If you’ve typed “my boxwood is turning yellow” into a search bar, you’re probably staring at a shrub that used to look perfect and now looks worried. It’s a common problem, but the good news is that most causes are fixable once you pin down the why.
The key is to treat boxwood yellowing like a detective case. As of 2026, the most reliable diagnostic method comes from university extension research, which shows that the pattern of yellowing, combined with the season, points to the culprit 90% of the time. Let’s walk through the steps together.
Image source: YouTube / TOPBUXUS (YouTube thumbnail (fair-use with source credit))
Why Your Boxwood Is Turning Yellow (The Short Answer)
Boxwood leaves turn yellow for five main reasons. Winter burn, overwatering, underwatering, nutrient deficiency, or boxwood blight. The pattern tells you which one.
Uniform yellowing usually means a root or water issue. Patchy yellowing points to winter damage or disease. Yellow new growth signals iron deficiency.
Yellow old growth signals nitrogen deficiency. Speckled leaves mean pests.
Step 1: Look at the Yellowing Pattern
Before you do anything else, get close and describe exactly how the yellow appears. This single observation eliminates half the possibilities.
Uniform Yellowing (Whole Plant, Even Color)
If the entire shrub looks washed out or pale, top to bottom, the problem is systemic. Likely suspects: poor drainage (roots sitting in water), compacted soil, or a pH that’s too high (above 7.5). Boxwoods prefer slightly acidic to neutral soil, 6.5 to 7.5.
A uniform yellow often means the roots can’t access iron or nitrogen, even if those nutrients are present in the soil.
Patchy Yellowing (Sections or Individual Branches)
If only one side or a few branches are yellow, think local damage. Winter wind exposure, salt spray from a sidewalk, or a dog’s repeated bathroom spot can cause patchy yellowing. Also check for broken branches or rodent damage at the base.
This pattern rarely means a whole-plant disease.
Yellowing Only on New Growth (Tips or Outer Leaves)
New leaves at the branch tips turning yellow while older leaves stay green is a classic sign of iron chlorosis. The plant can’t take up iron, often because the soil pH is too high. This is common in alkaline soils or after heavy lime application.
Yellowing Only on Old Growth (Inner / Lower Leaves)
When the inner, older leaves turn yellow first and drop, the plant is running low on nitrogen. Boxwoods are light feeders, but they still need a steady supply. This is often paired with slow growth and a generally thin appearance.
Speckled or Stippled Yellowing
Tiny yellow dots or a mottled look on the leaf surface means sucking pests. Boxwood leafminers and spider mites are the usual suspects. Flip a leaf over, if you see tiny insects or fine webbing, you’ve found the cause.
Step 2: Check the Season and Weather History
The timing of the yellowing is another huge clue. Ask yourself a few questions.
- Did it turn yellow right after a hard winter or a late spring freeze? That’s almost certainly winter burn or frost damage.
- Did the yellowing show up after a rainy week? Overwatering or root rot is likely, especially if the soil drains poorly.
- Did it appear during a dry spell? Your boxwood is thirsty.
- Is it early spring? Some boxwood varieties naturally bronze or turn yellow as they come out of dormancy. That’s normal and temporary.
According to University of Minnesota Extension, winter burn is the most common cause of yellowing boxwoods in colder climates. It happens when the ground freezes, roots can’t take up water, and the sun evaporates moisture from the leaves faster than the roots can replace it. You’ll see the damage on the south or west side of the shrub, where the sun hits directly.
Step 3: The Soil Test You Need to Do Right Now
You can guess at nutrient problems all day, but a soil test gives you a definitive answer. Don’t skip this step. It takes ten minutes and costs a few dollars.
You’ll need a soil pH test kit or a digital meter. Insert the probe 3 to 4 inches deep into the soil near the root zone. Do this in a few spots around the shrub.
Write down the readings.
Here’s what the numbers mean:
| pH Range | What It Tells You |
|---|---|
| Below 6.0 | Too acidic. Boxwoods struggle. |
| 6.5 – 7.5 | Ideal range. Likely not a pH issue. |
| Above 7.5 | Too alkaline. Iron and manganese become unavailable. |
| Above 8.0 | Severe alkalinity. Expect yellowing. |
If the pH is above 7.5, you’ve likely found the root cause. If it’s in the ideal range, move on to the next step.
Also test soil moisture. Dig down 3 to 4 inches. Squeeze a handful of soil.
If water drips out, the soil is too wet. If it crumbles and feels dry, it’s too dry. Boxwoods need consistently damp soil, not wet or bone-dry.
Step 4: Match Your Symptoms to the Likely Cause
Now that you know the pattern, the season, and the soil conditions, you can zero in on the real problem. The table below gives you a quick side-by-side summary.
| Cause | Yellowing Pattern | Season | Soil Condition | Other Signs |
|---|---|---|---|---|
| Winter burn | Patchy, south/west side | Late winter to early spring | Frozen or dry | Brown tips, leaf drop |
| Overwatering / root rot | Uniform, pale yellow | Any, after wet period | Waterlogged, smells sour | Mushy roots, black stems |
| Underwatering | Uniform, dull yellow | Dry season | Dry, cracked | Wilting, leaf curl |
| Nitrogen deficiency | Old leaves first | Any | Normal pH | Thin growth |
| Iron deficiency | New leaves only | Any | pH above 7.5 | Green veins remain |
| Boxwood blight | Spots, then yellowing | Warm, wet weather | Normal | Black stem lesions, leaf drop |
| Leafminer | Speckled, blisters | Late spring | Normal | Tiny flies, leaf mines |
| Transplant shock | Whole plant or one side | After planting | Any | Wilting, slow growth |
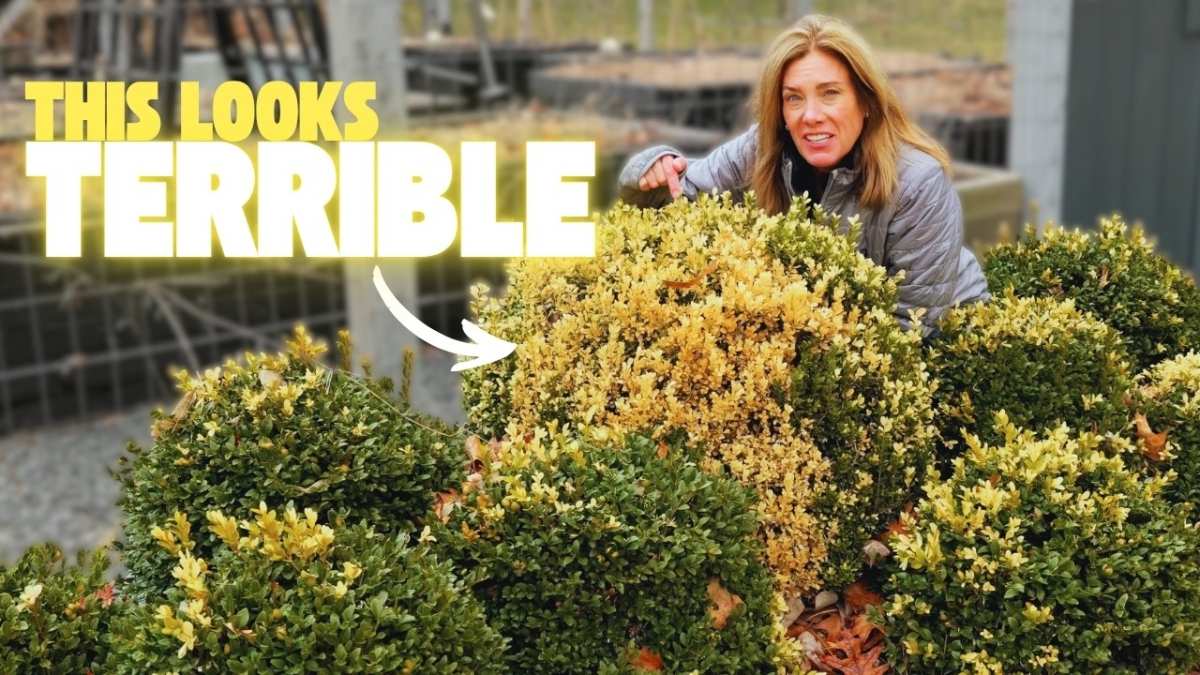
Image source: YouTube / The Impatient Gardener (YouTube thumbnail (fair-use with source credit))
Winter Burn (Bronzing)
If your boxwood looks orange-yellow or bronze in early spring, and the damage is worse on the sunny side, it’s winter burn. The leaves will eventually drop, but the plant usually recovers if the roots are healthy. No treatment needed beyond care.
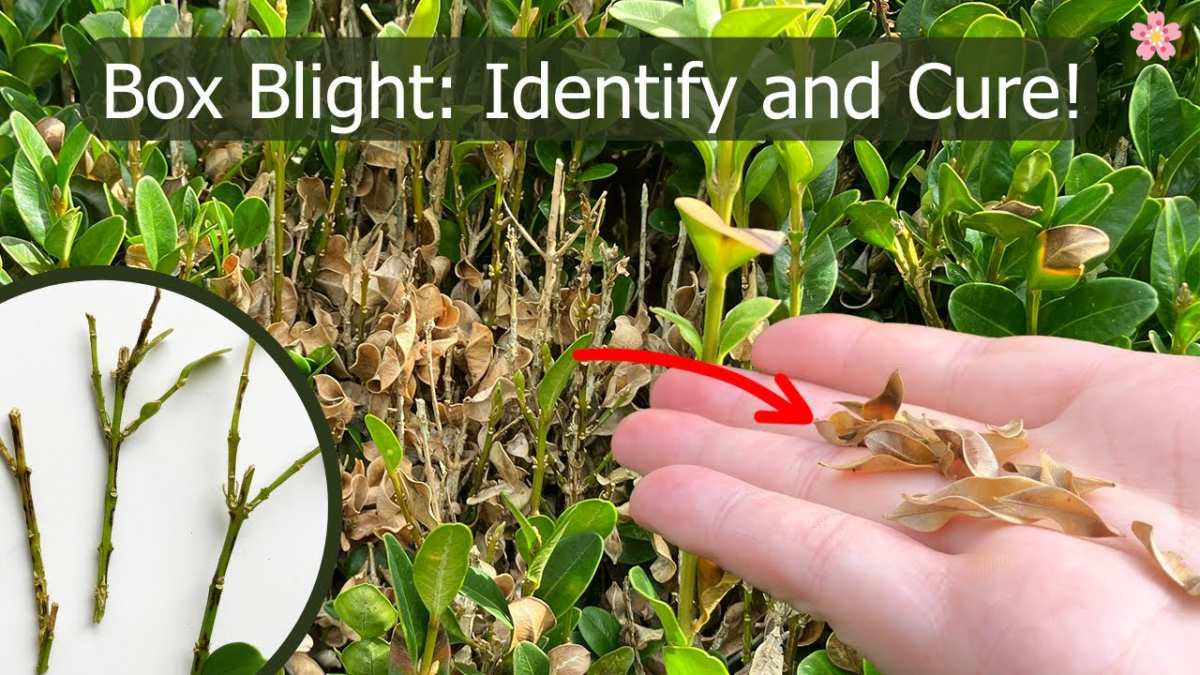
Image source: YouTube / Rebekah the UK Plant Doctor (YouTube thumbnail (fair-use with source credit))
Boxwood Blight
If you see circular tan spots with a dark border, and the leaves turn yellow before falling, suspect boxwood blight. It spreads fast, especially in wet weather. This is serious.
Infected branches develop black cankers. Remove and bag any affected parts immediately. Do not compost them.
This is a fungal disease that can kill the plant.
Image source: YouTube / HomeShowGardenPros (YouTube thumbnail (fair-use with source credit))
Overwatering / Root Rot
If the soil is soggy and the roots are brown and mushy, you have root rot. This is often fatal if caught late. The yellowing is uniform because the roots can’t take up anything.
Improve drainage or replant in a raised bed.
Leafminer and Other Pests
Speckled yellow leaves that feel papery usually mean leafminer larvae are tunneling inside. You’ll see tiny yellow blisters on the upper leaf surface. Prune off affected leaves and dispose of them.
Healthy plants can tolerate a mild infestation. For severe cases, a systemic insecticide applied in spring (before adult flies emerge) is the standard recommendation per manufacturer guidelines.
Transplant Shock
Newly planted boxwoods often turn yellow while their roots establish. This usually resolves within a few weeks with consistent watering and a layer of mulch. Avoid fertilizing until you see new growth.
Step 5: Your Treatment Plan Based on the Diagnosis
Once you know the cause, the fix is usually straightforward. Don’t throw random fertilizers or fungicides at the problem. That wastes time and can make things worse.
If It’s Winter Burn
No fertilizer. No pruning yet. Wait until new growth appears in mid to late spring.
Then trim off the dead branches back to where you see green wood inside the stem. The plant will push new leaves from those points. Keep the soil consistently moist through the recovery period.
Apply a 2-inch layer of mulch around the base (not touching the trunk) to insulate the roots next winter.
If It’s a Watering Issue
For overwatering, stop watering immediately. Let the soil dry out. If the shrub is in heavy clay that stays wet, consider replanting it in a raised bed or amending the soil with compost and sand.
For underwatering, give it a deep soak. Place a hose on a slow trickle at the base for 30 to 60 minutes. Then water deeply once a week during dry spells.
A moisture meter helps you avoid guessing.
If It’s a Nutrient Deficiency
For iron deficiency (yellow new leaves, green veins), lower the soil pH with elemental sulfur or apply chelated iron according to the label. For nitrogen deficiency (yellow old leaves), use a balanced slow-release fertilizer like a 10-6-4 formula. Apply it in early spring before new growth starts.
Always water after fertilizing. Overdoing it burns the roots.
If It’s Blight or a Pest
For boxwood blight, remove all infected leaves and branches. Bag them in plastic and throw them in the trash. Do not compost.
Apply a fungicide labeled for boxwood blight (look for chlorothalonil or mancozeb) following the label schedule. For leafminers, prune off affected leaves. For heavy infestations, apply a systemic insecticide in early spring before adult flies appear.
Pest pressure is usually worse on stressed plants, so correct watering and mulching first.
If It’s Transplant Shock
Be patient. Newly planted boxwoods often turn yellow for two to four weeks while roots establish. Water deeply every few days if there’s no rain.
Keep the soil damp, not wet. Do not fertilize until you see fresh green growth. A layer of mulch helps retain moisture and keeps soil temperature steady.
Common Mistakes That Keep Boxwoods Yellow
Even with the right diagnosis, people often make things worse. Here are the most common errors.
- Pruning too late in the season. That encourages tender new growth that gets killed by frost, leading to winter burn.
- Over-fertilizing. More fertilizer does not fix yellowing caused by poor drainage or high pH. It often burns the roots and makes the yellowing worse.
- Not testing the soil first. Guessing at nutrient deficiencies leads to the wrong treatment.
- Ignoring drainage. Boxwoods planted in clay soil without amendment will always struggle. Amend with compost or plant in a raised bed.
- Using weed-and-feed products near boxwoods. The herbicides in those products can damage shallow boxwood roots.
When Yellowing Is Actually Normal (And You Should Relax)
Not every yellow leaf means your boxwood is dying. Some varieties naturally bronze or turn yellow in late fall and winter. That’s called winter bronzing.
It’s a protective response. The leaves revert to green in spring. You don’t need to do anything.
Also, inner leaf drop is normal every few years. Boxwoods shed older leaves as they grow. If only a few inner leaves turn yellow and fall, and the rest of the shrub looks healthy, leave it alone.
How to Prevent Yellowing Next Season
Prevention is easier than cure. A little routine care keeps your boxwoods green and vigorous.
Image source: YouTube / Garden Goods Direct (YouTube thumbnail (fair-use with source credit))
Watering Schedule That Works
Boxwoods need about 1 inch of water per week from rain or irrigation. Water deeply once a week during dry spells. Shallow daily watering encourages surface roots that dry out fast.
Use soaker hoses or drip irrigation to keep water off the leaves. Wet foliage invites fungal diseases.
Mulching the Right Way
Apply a 2 to 3 inch layer of organic mulch (shredded bark or wood chips) around the base. Keep it 2 inches away from the trunk. Mulch moderates soil temperature, retains moisture, and reduces weed competition.
It also prevents soil compaction over time.
Fertilizer Timing and Type
Feed boxwoods once a year in early spring before new growth starts. Use a slow-release balanced fertilizer with an NPK ratio around 10-6-4. Do not fertilize after mid-summer.
Late fertilization pushes tender growth that won’t harden off before winter.
Pruning Best Practices
Prune boxwoods in early spring just before new growth emerges. Remove dead, diseased, or crossing branches. Thin the interior to improve air circulation.
Avoid shearing into a tight ball shape; that traps moisture and invites disease. Always use clean, sharp pruners.
Winter Protection
In cold climates, apply a 3-inch layer of mulch after the first freeze. You can also wrap smaller boxwoods with burlap or install a windbreak on the south and west sides. Anti-desiccant sprays help prevent winter moisture loss.
Apply them in late fall when temperatures are above 40°F.
Quick Reference: Yellow Boxwood Decision Guide
Use this flow to get your answer in under a minute.
| If you see… | Then most likely… | Do this… |
|---|---|---|
| Uniform yellow, soggy soil | Overwatering / root rot | Stop watering; improve drainage |
| Uniform yellow, dry soil | Underwatering | Deep soak weekly |
| Patchy yellow on sunny side, spring | Winter burn | Wait and prune dead in late spring |
| New growth yellow, green veins | Iron deficiency (high pH) | Lower pH or apply chelated iron |
| Old growth yellow | Nitrogen deficiency | Apply balanced slow-release fertilizer |
| Spots with dark borders, leaf drop | Boxwood blight | Remove infected parts; apply fungicide |
| Speckled leaves, tiny blisters | Leafminer / mites | Prune affected leaves; use insecticide if severe |
| Whole shrub yellow after planting | Transplant shock | Keep soil moist; be patient |