If you've landed here after a "Check Fuel Cap" message or a check engine light that showed up right after a fill-up, you're probably searching for how to clean a gas cap sensor. Here's the first thing nobody tells you: your car doesn't actually have a gas cap sensor. What it has is a sealed fuel system that notices when the cap's rubber seal stops doing its job.
Since 1996, federal OBD-II rules have required every US gasoline vehicle to monitor fuel tank pressure for vapor leaks. In our research across service manuals and owner forums, a dirty, glazed, or worn cap seal is one of the most common and cheapest EVAP code causes out there. Cleaning it takes about ten minutes and costs almost nothing.
Here's what's actually going on under that filler door.
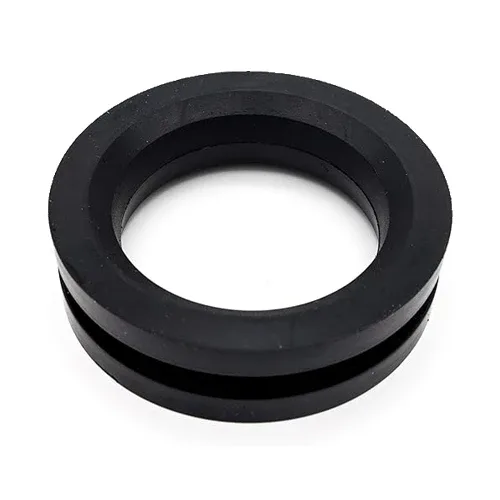
Quick Answer: There's No Gas Cap Sensor (Here's What You're Actually Fixing)
There is no gas cap sensor to clean. The fix starts with the rubber seal on the fuel cap itself. Remove the cap and wipe the O-ring with a damp microfiber cloth.
Use mild soapy water or 91% isopropyl alcohol, then dry it fully. Tighten the cap back on until it clicks.
Why Your Car Blames the Gas Cap: A 60-Second EVAP System Explainer
Your car's computer judges the seal indirectly. It watches fuel tank pressure, and any pressure escaping past the cap reads as a leak somewhere in the system. That's the whole trick behind the misleading dash message.
Your fuel system is deliberately airtight. Gasoline constantly gives off vapor, and instead of venting it into the air, the evaporative emission control system (EVAP) stores those fumes in a charcoal canister. The engine burns them off later through the purge valve.
To verify nothing is leaking, the computer runs a pressure test on the tank. It compares readings from the fuel tank pressure (FTP) sensor against factory calibration. If pressure falls too fast, the computer concludes there's a hole somewhere.
A loose, dirty, or hardened cap seal is the biggest hole that system can have. That's why the cap gets blamed first. The EPA has required this self-testing on all 1996-and-newer gasoline vehicles, so any modern car checks that seal on every drive.
The failure chain looks like this:
- Vapors escape past a dirty or hardened cap seal
- Tank pressure drops during the EVAP monitor's test
- The computer stores a leak code
- The dash shows "Check Fuel Cap" or a check engine light
One wrinkle worth knowing. As of 2026, plenty of new trucks and SUVs use capless fuel systems with no cap at all. If that's your vehicle, there's no seal to wipe, and your leak is hiding in a hose, a valve, or the filler door seal itself.
Start With the Codes: P0440, P0442, P0455, P0456, and P0457 Mean Different Things
Pull the codes before you touch anything. A basic OBD-II scanner costs $20 to $30. Many auto parts stores will scan your car for free.
Newer trucks can even show the code in the gauge cluster menu.
Each number describes a different leak size, so the specific code changes your odds.
| Code | Meaning | Is the Cap the Likely Fix? |
|---|---|---|
| P0457 | Fuel cap loose or off | Yes, almost always |
| P0455 | Gross leak (0.08 inch or larger) | Usually, or a popped-off hose |
| P0440 | General EVAP fault | Possibly, check the cap first |
| P0442 | Small leak (up to 0.040 inch) | Maybe, but often a hose or valve |
| P0456 | Very small leak (up to 0.020 inch) | Less likely, suspect purge and vent valves |
Read that table like a probability score. P0457 and P0455 point hard at the cap. P0442 and P0456 can come from a tired seal.
Just as often, they trace to a cracked EVAP hose or a purge valve stuck open.
Some brands, Ford and Toyota among them, flash a dedicated fuel cap message before ever storing a code. If you got the message but no light, you're dealing with a loose or dirty seal. That's the best-case scenario.
Inspecting the Gas Cap and O-Ring Seal Under Good Light
Cleaning a cracked seal is a waste of an evening. Two minutes with a flashlight tells you which path to take. Park in decent light, pull the cap, and work through this list:
- Press the seal with a fingernail. It should spring back, not stay dented.
- Look for cracks, flat spots, missing chunks, or a shiny glazed surface.
- Check for sticky brown fuel varnish and packed-in road grime.
- Inspect the threads on both the cap and the filler neck.
- Tug the tether. A stretched one can stop the cap from seating fully.
Now apply the branch logic. If the seal is pliable and intact, clean it and move on. If it's cracked, flattened, or missing pieces, stop there.
No cleaner reverses that, so you need a new cap. A perfect-looking seal with returning codes means the leak lives elsewhere in the EVAP system.
One buying note while we're here. An OEM cap from the dealer runs $20 to $60, and it's worth it. Bargain-bin aftermarket caps are a repeat offender in our research because their seals rarely match factory tolerances.
If you're the type who handles small maintenance jobs yourself, this two-minute inspection belongs in your regular rotation. It's the same preventive habit we recommend for every engine you own, including the ones in your yard.
Step-by-Step: Cleaning the Gas Cap Seal Properly
This is the ten-minute job the dash message was really asking for. Work through it in order, and don't skip the drying step.
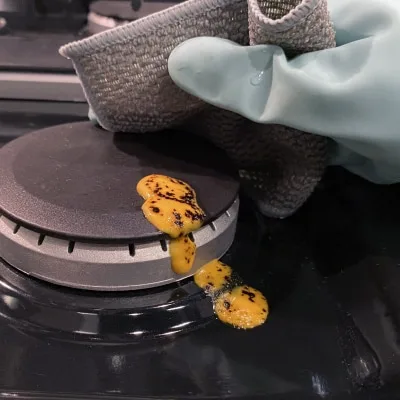
What to Use (and Which Cleaners Destroy Rubber Seals)
You need about $10 worth of supplies, most of which is already in a kitchen drawer.
| Item | Job |
|---|---|
| Microfiber cloth | Wipes the seal without leaving lint |
| Mild dish soap, warm water | Lifts dirt and road film |
| 91% isopropyl alcohol | Cuts sticky fuel varnish |
| Old toothbrush | Cleans grime out of the seal groove |
| Silicone grease (optional) | Conditions a dried-out but intact seal |
Never use brake cleaner, carburetor cleaner, WD-40, or gasoline itself on the seal. Petroleum solvents swell rubber, and a swollen seal leaks worse than a dirty one. Stick to soap, water, and alcohol.
Cleaning the Filler Neck, Threads, and Reinstalling to a Full Click
- Park outside or in a ventilated spot with the engine off and cool. Fuel vapor is flammable, so keep sparks and open flame well away.
- Remove the cap and set it seal-up on a clean rag.
- Wipe the O-ring with a cloth dampened in soapy water. Dig the grime out of the groove with the toothbrush.
- If the seal feels sticky or varnished, go over it again with a fresh cloth corner dampened in isopropyl alcohol.
- Dry the seal completely. Trapped moisture holds grit and can freeze the cap shut in winter.
- Wipe the filler neck rim and threads while you're in there. Debris on the neck mimics a bad seal.
- Optional: apply a fingertip-thin film of silicone grease. Skip it if the rubber is already soft and supple.
- Reinstall and tighten until it clicks. Many owner's manuals specify three clicks, so check yours, and don't muscle it past that.
That's the whole job. A healthy seal looks matte black and feels slightly tacky, not glossy and hard. Staring at a cracked ring at step 3?
Stop cleaning and order the correct cap for your VIN instead.
Once the cap is back on, fold this seal check into your seasonal maintenance routine so the next warning never surprises you.
The Decision Point: Clean It, Replace It, or Look Somewhere Else
Everything you've checked so far funnels into one of three paths. Pick yours honestly, because each one leads somewhere different.
- If the seal is grimy but pliable: clean it, reinstall, and drive. You're done in ten minutes.
- If the seal is cracked, flattened, or missing chunks: replace the cap. No cleaner reverses dry rot.
- If the seal looks nearly new but codes return: stop buying caps. Your leak lives elsewhere in the EVAP system.
When replacement is the call, match the cap to your VIN instead of grabbing a universal-fit unit. Tethered caps are shaped to each filler neck. A sloppy seat reads exactly like a leak.
Dealer OEM parts run $20 to $60. Correctly matched aftermarket caps from Stant, Motorad, or Gates typically cost $8 to $25 and seal fine.
Own a capless system? Skip this entire branch. Ford's Easy Fuel setup and similar designs have no cap or O-ring, so the leak hunt starts at the filler door flap and hoses instead.
After the Fix: Drive Cycles, EVAP Monitors, and When the Light Finally Clears
How Long Until the Light Turns Off?
Usually a few days to a week of normal driving, sometimes faster. The light won't flip off the moment you tighten the cap. The computer has to rerun its evaporative monitor first, and that test only fires when conditions line up.
Per manufacturer specs, the monitor wants fuel level between roughly 15% and 85%. It also wants a cold-to-warm temperature swing and steady cruising. Short errands may never trigger it.
Three things speed this along:
- Keep the tank between a quarter and three-quarters full during the test window.
- Log a few longer drives rather than endless two-mile hops.
- Give it up to 50 to 100 miles before judging the fix a failure.
One trap to avoid: clearing the code yourself resets every readiness monitor on the car, not just the EVAP one. That matters a lot if an inspection is coming, and we'll cover it below. Meanwhile, set a reminder on a simple maintenance calendar to recheck the dash after a week.
If the Code Comes Back: Purge Valves, Vent Valves, and Professional Smoke Tests
A returning code after 100 miles means escalation, not repetition. Cleaning harder won't help. Work down this list in order, ranked by failure rate.
- Purge valve stuck open. The most common next culprit. It bleeds vapor constantly and spoils the tank pressure test. Part cost runs $40 to $120.
- Vent valve stuck or clogged. Dirt and even spider webs clog the breather line. Same price range as the purge valve.
- Cracked EVAP hose, especially the short rubber sections near the charcoal canister.
- Fuel tank pressure sensor giving false readings. Rare, but it happens on high-mileage vehicles.
What Is an EVAP Smoke Test?
A shop seals the system and pumps low-pressure smoke with a UV tracer through it. Escaping smoke marks the exact leak point, no guessing. Most shops charge $40 to $150 and credit the fee toward the repair if you fix it there.
Before you pay for any diagnosis, know what the numbers mean. Fault definitions come from SAE International standards, so a "small leak" verdict means the same thing on every brand. That matters when a shop quotes a $600 charcoal canister for a problem a $15 hose would fix.
Mistakes That Turn a Five-Minute Fix Into a Repair Bill
Most botched gas-cap jobs share the same handful of errors. Avoid these and you'll stay out of the repair queue.
- Overtightening past the click. The ratchet stops for a reason. Forcing it strips threads or cracks the cap housing.
- Reaching for brake cleaner or carb cleaner. Those sprays swell the same rubber we just cleaned. Stick to soap, water, and alcohol.
- Replacing the cap blind. If a cracked hose was the true cause, the new cap changes nothing and the light returns by Friday.
- Clearing codes the night before an inspection. Resetting wipes every readiness monitor and earns a "not ready" rejection.
- Ignoring a stretched or frayed tether. A lazy tether keeps the cap from pulling fully seated.
Every one of these is a small check skipped. That's the same prevention-beats-repair logic behind any worthwhile care program. Ten honest minutes beats a hundred-dollar diagnostic every time.
What It Costs: DIY Cleaning vs. a New Cap vs. Shop Diagnosis
Here's the full cost ladder side by side.
| Route | Typical Cost | Time | Best For |
|---|---|---|---|
| DIY seal cleaning | $0 to $10 | 10 to 15 min | Dirty seal, intact rubber |
| Replacement cap, self-installed | $8 to $60 | Under 5 min | Cracked or hardened seal |
| Shop diagnostic hour | $100 to $150 | Varies | Codes that survive the cap fix |
| EVAP smoke test | $40 to $150 | 30 to 60 min | Hidden leaks in hoses or valves |
Start at the top of that ladder, always. Cleaning costs almost nothing and eliminates the single most common cause before anyone touches a credit card. If a shop quotes diagnostics, ask whether the fee rolls into the repair.
Many independents roll it in as goodwill, and that changes the math considerably.
Filler Neck Safety: Vapors, Solvents, and Ignition Sources
Gasoline vapor is the hazard here, not liquid fuel. Vapor weighs more than air, pools low, and ignites easily. Work outdoors or in an open garage with the engine off and completely cool.
A few hard rules before you start:
- No smoking, sparks, or open flame nearby, including water heater pilots.
- Keep isopropyl alcohol away from the open filler neck until vapors have cleared.
- Wear gloves if the seal is coated in old varnish, and wash up afterward.
Skip topping off the tank past the automatic shutoff click, too. Modern refueling systems depend on proper headroom in the tank. Overfilling pushes raw liquid into the vapor lines, floods the charcoal canister, and triggers the very codes you just fixed.
Emissions Inspection Timing: Why You Shouldn't Clear Codes the Night Before
Clearing a code erases every readiness monitor on the car. Most testing states then reject the vehicle as "not ready" instead of passing it. You'd fail the inspection by trying too hard to pass it.
Rebuilding those monitors takes real driving. Plan on several days minimum, sometimes up to a week depending on the manufacturer's drive cycle requirements. Disconnecting the battery does the same damage as clearing codes with a scanner.
Work backward from your inspection date. Clean or replace the cap now, drive normally for 50 to 100 miles, then confirm readiness with a cheap scanner before booking the test. California and other CARB states run this same monitor logic with tighter leak thresholds.
Gas Cap Cleaning FAQs
How often should you clean a gas cap seal?
Once a year is plenty for most drivers, ideally before emissions season. Wipe it again anytime the dash shows a fuel cap message after refueling. Seals older than seven years deserve a close look each time, since rubber hardens with age regardless of cleanliness.
Can you drive with a "Check Fuel Cap" message showing?
Yes, the car is drivable, but fix it soon. A leaking seal wastes fuel through vapor loss, lets fumes into the cabin, and keeps a code stored that fails inspections. Tighten the cap first, then clean the seal if the message returns.
Why won't my check engine light turn off after replacing the gas cap?
The computer hasn't rerun its EVAP monitor yet. Give it 50 to 100 miles of mixed driving with the tank between a quarter and three-quarters full. If the code still returns after that, the real leak sits in a purge valve, vent valve, or hose.
Is WD-40 safe on the gas cap O-ring?
No. It's petroleum based, and petroleum products swell and soften rubber seals over time. Use a fingertip-thin coat of silicone grease instead if the seal feels dry.
When the rubber is cracked or flattened, skip conditioning entirely and buy a new cap matched to your VIN.
Do capless fuel systems ever show these warnings?
They do, just less often. Ford Easy Fuel and similar designs replace the cap with spring-loaded flaps and a separate inner seal. Grime builds on that inner seal instead, and leaks hide in the filler door assembly.
Never pry the flaps open with anything rigid.
How do I know if my new aftermarket gas cap is sealing right?
Tighten it until it clicks three times, then watch the dash for a week. A properly matched cap clears the message within a few drive cycles. If P0457 comes straight back, the seal geometry doesn't match your filler neck, and an OEM unit is the safer bet.
Your Decision Path in 30 Seconds
Here's the whole topic compressed to four moves:
- Dash message or EVAP code appears → tighten the cap to three clicks first.
- Seal dirty but pliable → clean with soap, water, or alcohol, dry fully, reinstall.
- Seal cracked or hardened → replace with a VIN-matched cap, OEM preferred.
- Code returns anyway → smoke test, then chase the purge valve, vent valve, and hoses.
Start cheap, verify with driving miles, and escalate only when the evidence forces you to.