Figuring out how to take care of backyard lawn can feel like a never-ending puzzle. Between watering schedules, mowing heights, and mysterious brown patches, it's easy to throw your hands up or just hope for the best.
But here's the good news: a healthy lawn isn't rocket science. It's a simple system of cause and effect. Once you understand your grass type and what your soil needs, the whole routine clicks into place.
In our research, we've found that most lawn failures come down to guessing instead of testing, and reacting instead of planning. As of 2026, university extension programs recommend a soil test every 2 to 3 years. That one simple step can save you money and a ton of wasted effort.
So, let's break this down into a practical workflow that any homeowner can follow. Ready to get your hands dirty?
Quick Answer
Taking care of your backyard lawn starts with identifying your grass type. Cool-season grasses thrive in spring and fall. Warm-season grasses prefer summer heat.
Test your soil pH and nutrient levels before buying fertilizer. Mow high and often, water deeply but rarely, and aerate yearly. These basics prevent weeds and disease naturally.
Before You Do Anything: Identify Your Grass Type and Climate Zone
If you only take one thing from this guide, make it this: all grass is not created equal. Treating a Kentucky bluegrass lawn like a Bermuda lawn is a one-way ticket to a dead yard.
Grasses split into two major camps: cool-season and warm-season. Cool-season grasses, like tall fescue, Kentucky bluegrass, and perennial ryegrass, grow most actively when temperatures sit between 60°F and 75°F. They green up early in spring, slow down in summer heat, and surge again in fall.
Warm-season grasses like Bermudagrass, Zoysiagrass, and St. Augustinegrass do their best work in the 80°F to 95°F range. They go dormant and turn brown once frost hits.
Here's how to figure out which one you have.
Check Your Hardiness Zone
The USDA Plant Hardiness Zone Map is your starting point. If you live in the northern half of the U.S., you almost certainly have a cool-season lawn. The southern states, from Texas to Florida and up the Atlantic coast, are warm-season territory.
The transition zone, which includes places like Tennessee, Virginia, and parts of Missouri, is trickier. Homeowners there often have a blend or must pick based on sun exposure and watering budget.
Look at the Grass Blade
Warm-season grasses generally have coarse, thick blades that spread via runners. Cool-season grasses typically have finer, denser blades that grow in clumps or bunches. If you can pull a single blade and notice deep ridges running down its length, you're likely holding a cool-season grass like tall fescue.
If the blade feels smooth and waxy, it's probably Bermudagrass.
When in Doubt, Ask a Local
Your local cooperative extension office is a goldmine. They publish county-specific guides on what grass species perform best in your area. A quick search for "[your state] extension turfgrass" will give you free, research-backed recommendations.
The Soil Test: Why Guessing Your Lawn's Needs Wastes Money
Here's the uncomfortable truth: you have no idea what your lawn needs until you test the soil. Fertilizer is not a one-size-fits-all product. Dumping a high-nitrogen blend on already-rich soil won't help.
It will either run off into storm drains or burn the roots.
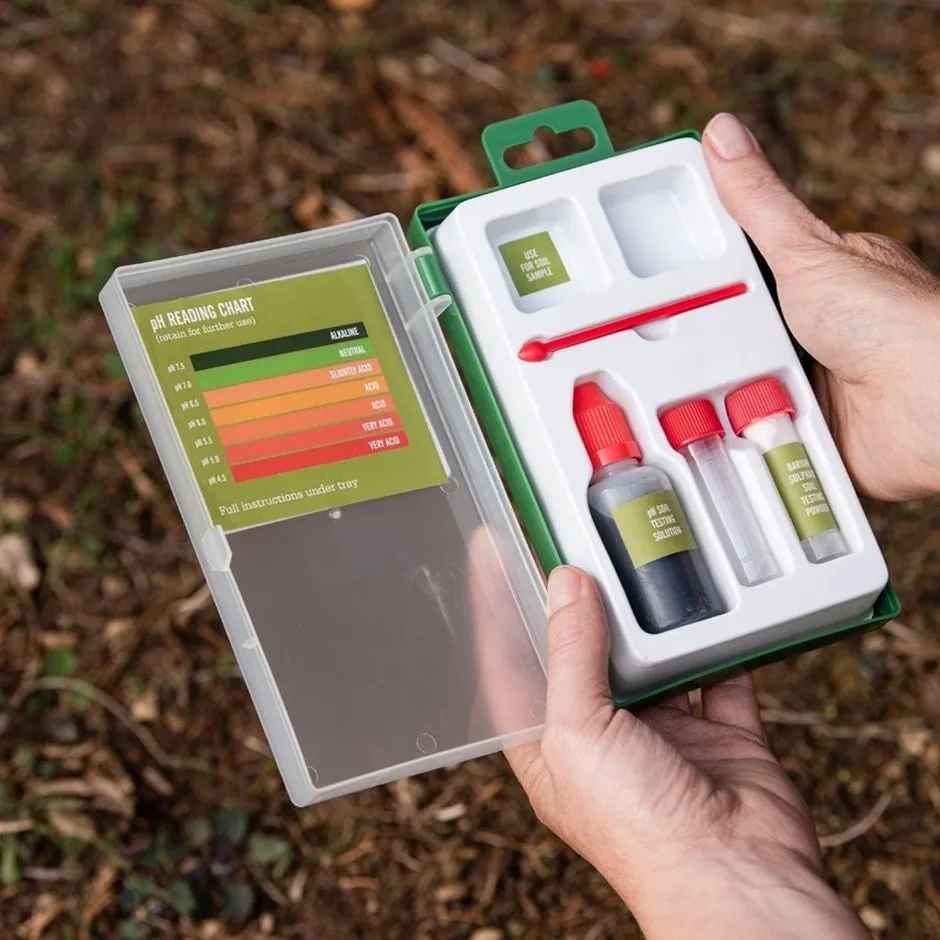
Image source: Web (Bing) / rhs.crocdn.co.uk (Web image (fair-use with source credit))
We recommend doing a soil test once every 2 to 3 years. It's cheap, usually $15 to $30 through a university lab, and it removes all the guesswork.
What a Soil Test Measures
A standard soil test reports three key numbers: pH, phosphorus (P), and potassium (K). Many labs also test for nitrogen, organic matter, and micronutrients like iron and zinc.
Most turfgrasses prefer a pH between 6.0 and 7.0. Below 6.0, you may need to add lime. Above 7.0, sulfur is often the fix.
Phosphorus supports root development. If your levels are high, skip the starter fertilizer entirely. Excess phosphorus causes algae blooms in nearby waterways, which is why some states now restrict its use.
Potassium helps grass handle drought and cold stress. Low levels show up as yellowing leaf tips and weak growth.
How to Take a Proper Sample
Grab a trowel and a clean bucket. Dig down 3 to 4 inches and take small cores from 8 to 10 different spots across your yard. Mix them together in a clean container, then send about a cup of the combined sample to the lab.
Avoid areas that recently had compost, fertilizer, or dog urine patches. Those spots skew the results.
Once your report comes back, follow the lab's recommendations. They'll tell you exactly how many pounds of nitrogen per 1,000 square feet to apply, whether you need lime, and in what season. That data beats any calendar schedule you'll find online.
Mowing Right: The Single Biggest Mistake Homeowners Make
Most people scalp their lawn without realizing it. They cut grass short to avoid mowing as often, but short grass is the fastest way to invite weeds, disease, and drought damage.
The One-Third Rule
Never remove more than one-third of the grass blade in a single mowing. That means if you're maintaining a 3-inch cut, you need to mow before the grass exceeds 4.5 inches. Scalping exposes the crown of the plant, stresses the roots, and gives weed seeds direct sunlight to germinate.
Set the Right Mower Height
Mower height varies by grass type. Cool-season grasses like tall fescue do best at 3.5 to 4 inches. They shade their own roots and hold moisture better.
Warm-season grasses like Bermuda prefer a tight 1.5 to 2.5 inches.
| Grass Type | Recommended Mowing Height |
|---|---|
| Tall fescue | 3.5 to 4 inches |
| Kentucky bluegrass | 2.5 to 3.5 inches |
| Bermudagrass | 1 to 2 inches |
| Zoysiagrass | 1 to 2.5 inches |
| St. Augustinegrass | 2.5 to 4 inches |
Start with the higher end of the range during summer heat. On Bermudagrass, avoid switching from a high cut to a scalped cut in one go. Drop the height gradually over a few mowings.
Keep the Blades Sharp
Dull mower blades rip grass instead of cutting it. Torn edges turn brown within hours, and the weakened plant becomes an open door for fungal infections. Manufacturer specifications recommend sharpening mower blades after every 8 to 10 hours of use, or at the beginning of each season.
Mulch or Bag?
Mulch the clippings whenever possible. Grass clippings are roughly 80% water and break down quickly, returning nitrogen to the soil. Clippings do not cause thatch buildup.
Thatch is made of stems and roots, not leaf blades. Bag only when the clippings are excessively long or if you're dealing with a fungal outbreak.
Watering Deep and Less Often: The 1-Inch Rule
Overwatering is more common than underwatering. It's also easier to screw up. Frequent, shallow watering trains grass roots to stay near the surface.
When the top inch of soil dries out, so does the grass. Deep, infrequent watering pushes roots down, building a drought-resistant lawn.
The Screwdriver Test
The simplest tool to check soil moisture is a flathead screwdriver. Push it into the soil. If it slides in easily to 6 inches, the ground is still moist.
If you hit resistance, it's time to water.
How Much and How Often
Most turfgrasses need about 1 to 1.5 inches of water per week, including rainfall. In most climates, that means one to two deep waterings per week is plenty. Clay-heavy soil holds water longer and may need a single weekly soak.
Sandy soil drains fast and might require three shorter sessions.
Water Early in the Morning
The best window is between 4 a.m. and 8 a.m. Watering in the evening leaves grass blades wet overnight, which encourages fungal diseases like brown patch and dollar spot. Morning watering lets the sun dry the blades quickly and put the moisture into the soil before the heat of the day evens out.
Adjust for Sprinkler Coverage
Irrigation systems rarely water evenly. Place a few empty tuna cans around your lawn, run a cycle, and measure the depth in each can. If one spot has a quarter inch and another has a full inch, you're dealing with a coverage gap.
Clean clogged heads, adjust angles, and fix broken risers before you stress your watering schedule.
If you're in the middle of a drought, check your local watering restrictions. Many municipalities enforce odd-even day schedules or ban irrigation during peak heat hours.
Feeding Your Lawn: Fertilizer Schedules, N-P-K Ratios, and Application Timing
Fertilizer is where most homeowners either overdo it or skip it entirely. Both extremes cause problems. Understanding the N-P-K ratio on the bag is the first step to feeding your lawn properly.
Reading the N-P-K Ratio
Every fertilizer bag shows three numbers, like 20-5-10. These represent the percentage of nitrogen (N), phosphorus (P), and potassium (K) by weight. Nitrogen drives leafy green growth.
Phosphorus supports root establishment. Potassium builds overall stress tolerance.
Choosing the Right Formula
Your soil test determines which ratio you need. A lawn with high phosphorus already should get a fertilizer with a middle number close to zero. Most established lawns do well with a high-nitrogen, low-phosphorus blend.
Starter fertilizers, which are higher in phosphorus, are only for new seed or sod.
| Fertilizer Type | N-P-K Ratio | Best For |
|---|---|---|
| Balanced lawn food | 20-10-10 | General maintenance |
| High-nitrogen | 30-0-4 | Established lawns, fall feeding |
| Starter | 10-20-10 | New seed or sod |
| Low-phosphorus | 20-0-10 | Areas with phosphorus restrictions |
When to Feed Cool-Season vs. Warm-Season Lawns
Timing matters more than brand. Cool-season grasses need their biggest meal in early fall. This is when they're storing energy for winter and building deep roots.
A second application in late spring, around May, covers the growth push. Avoid heavy summer feeding. It stresses the grass and encourages weeds.
Per USDA guidance, soil temperature drives nutrient uptake, so fall feeding before soil cools below 50°F is ideal.
Warm-season grasses work on a different calendar. They wake up hungry in late spring. Feed them once temperatures are consistently above 65°F.
A second application in midsummer keeps them green. Stop feeding about 6 weeks before the first expected frost, or you'll push tender growth that winter damage kills.
Slow-Release vs. Quick-Release
Slow-release fertilizers use coated granules that break down over 6 to 12 weeks. They're harder to mess up and require fewer applications. Quick-release fertilizers give an instant green-up within days, but they burn the grass easily if misapplied.
Aggregate reviews from university extension tests consistently show that slow-release formulas are safer for home lawns, especially in sandy soil where quick-release nitrogen leaches away fast.
Application Tips
Always water after applying granular fertilizer. This washes the granules off the leaf blades and into the soil where roots can reach them. Don't apply before a heavy rain forecast.
That just washes the product into storm drains. And never spread fertilizer on frozen or dormant grass, since runoff risk spikes.
Weed Control: Pre-Emergent vs. Post-Emergent (And When to Use Each)
Weeds are not a failure of character. They're a symptom of an underlying issue. Thin turf, compacted soil, or an improper mowing height creates open gaps where weed seeds land and take hold.
Kill the weeds and the bare patches remain, so the cycle repeats. The real fix combines smart herbicide timing with good cultural practices.
Pre-Emergent: Prevention First
Pre-emergent herbicides don't kill weeds that are already growing. They create a chemical barrier in the top layer of soil, stopping seeds from germinating. Crabgrass and other annual weeds are the primary targets.
Timing is everything. Apply pre-emergent before soil temperatures hit 55°F at a 2-inch depth for 3 to 5 consecutive days. That's about when forsythia bushes start blooming.
Apply the second round 6 to 8 weeks later for season-long coverage.
Apply pre-emergent before soil temperatures hit 55°F. That's around when forsythia bushes start blooming. A second application 6 to 8 weeks later extends coverage through the season.
What Pre-Emergent Won't Do
Pre-emergent won't touch perennial weeds like dandelions, clover, or ground ivy. Those have deep taproots that shrug off the soil barrier. For those, you need a different strategy.
Post-Emergent: Spot Treatment for Existing Weeds
Post-emergent herbicides target weeds that are already visible. They fall into two groups: selective and non-selective.
Selective herbicides kill broadleaf weeds like dandelions and clover without harming grass. They're sold as spot treatments or broad-spectrum weed-and-feed combinations. Non-selective products like glyphosate kill everything they touch.
Use them only for spot treatment of tough perennial weeds or to clear an area before overseeding.
Broadleaf vs. Grassy Weeds
Identification matters because the herbicide chemistry differs. Broadleaf weeds, such as dandelion, chickweed, and plantain, have obvious leaves with netted veins. Grassy weeds, like crabgrass and goosegrass, look like the lawn itself.
Most broadleaf-specific products won't control grassy weeds, and vice versa.
Visual ID helps: yarrow has feathery, fern-like leaves. Dandelions have jagged, tooth-like edges. Crabgrass grows in low, spreading clumps that form a circular pattern.
Application Safety and Timing
Check the product label for temperature restrictions. Most post-emergent herbicides fail below 60°F or above 85°F. The weeds must be actively growing for the chemical to translocate to the roots.
Don't apply before rain. Don't mow for 24 to 48 hours after treatment. And keep kids and pets off the treated area until the spray has completely dried, which usually takes 2 to 4 hours.
For mortar and brick pathways or cracking patios, a non-selective approach works well. Just shield nearby grass and desirable plants with cardboard or a plastic barrier before spraying.
The Cultural Fix: Thick Turf Crowds Out Weeds
The best weed control is no weed control needed at all. A dense lawn leaves no open soil for seeds to germinate. Proper mowing height, deep watering, and regular aeration all work together to build a canopy so thick that weed seeds never touch soil.
If you're fighting the same weed patches year after year, fix the underlying conditions instead of reaching for the spray bottle.
Aeration and Dethatching: Do You Actually Need Them?
Aeration and dethatching sound like fancy lawn treatments, but they solve specific problems. If your lawn doesn't have those problems, both are a waste of time and money.
What Core Aeration Actually Does
Core aeration pulls small plugs of soil out of the lawn and leaves them on the surface. This relieves compaction, opens up pores for air and water, and creates channels for roots to grow deeper. Most lawns benefit from aeration once a year.
Lawns on heavy clay soil with lots of foot traffic may need it twice.
How to Check for Compaction
Try the screwdriver test again, or stick a pencil into the soil. If you can't easily push it in 2 or 3 inches, the soil is compacted. Aeration is your fix.
When Aeration Matters
- Before overseeding, because seeds need soil contact to germinate.
- In fall for cool-season lawns, when grass is actively growing.
- In late spring for warm-season lawns, just before peak growth.
Don't aerate in summer heat when the grass is struggling. It adds stress without recovery time.
Dethatching: A Different Problem
Thatch is the spongey layer of dead stems, roots, and crowns that builds up between the soil and the green grass blades. A thin layer under half an inch is normal and beneficial. Once it exceeds 1 inch, water and fertilizer struggle to penetrate.
How to Check Thatch Depth
Cut a small wedge of lawn with a shovel and inspect the cross-section. If the brown, spongey layer is thicker than half an inch, your lawn needs dethatching.
Aerate or Dethatch? A Quick Decision Guide
| Condition | Best Treatment |
|---|---|
| Hard, compacted soil | Core aeration |
| Spongey lawn that bounces when you walk | Dethatching |
| Thin grass with bare spots | Both, plus overseeding |
| No visible problems | Do nothing. Hmm, actually, doing nothing is fine. |
After Aeration
Leave the soil plugs on the surface. They break down in a few weeks and return nutrients to the soil. This is also the best time to topdress with a quarter inch of compost.
The aeration holes act like little gutters, channeling the compost directly into the root zone.
Bare Patches and Overseeding: How to Repair Thin Lawns
Patchy, thinning grass is the most common complaint from homeowners. The good news is that it's also the most fixable problem, if you time it right.
Why Overseeding Fails Most of the Time
Most people scatter seed in spring, then wonder why nothing appears. Spring seeded cool-season grass has to compete with crabgrass and summer heat before its roots establish. The seed dies.
Fall is the correct window. For cool-season grass, aim for 6 to 8 weeks before the first hard frost. Soil temperatures around 60°F are ideal.
Warm-season lawns in southern climates should overseed in late spring to early summer, once the soil is consistently above 70°F.
Step-by-Step Overseeding Process
- Mow low. Drop the mower height 1 to 2 inches lower than usual. This opens up the canopy so seed reaches soil.
- Rake and clean. Remove dead grass, thatch, and debris. Bare soil is the goal.
- Loosen the top quarter inch. Use a rake or a power seeder to scratch up the surface.
- Spread the seed. Use a broadcast spreader for even coverage. Follow the seeding rate on the bag, typically 5 to 10 pounds per 1,000 square feet for cool-season grasses.
- Roll or press. A lawn roller helps press the seed into soil contact. Walking over it firmly works too.
- Keep it moist. Water lightly once or twice a day until germination. Don't let the top quarter inch dry out.
Patching Dead Spots
For small bare patches, skip the full overseeding routine. Loosen the soil, mix in a handful of compost, broadcast seed by hand, and keep it damp.
Dog Urine Repair
Dog urine burns grass because of the nitrogen concentration. The patch dies, but the soil pH and salt levels stay elevated for weeks. To repair, rake out the dead grass, soak the area with water to flush excess salts, add a thin layer of compost, then seed.
If the same spot keeps dying, train your dog to a specific bathroom area or water the spot immediately after they pee.
The Monthly Backyard Lawn Maintenance Calendar
You've got the individual skills. Now here's the complete yearly rhythm, designed by grass type.
Cool-Season Grasses (Northern Lawns)
| Month | Key Tasks |
|---|---|
| March | Rake debris, test soil, apply pre-emergent |
| April | Mow regularly, start watering as needed |
| May | Light nitrogen feeding, spot-treat weeds |
| June | Keep mower high, water deeply, only if dry |
| July | Minimal stress, raise mower height, manage fungus |
| August | Plan fall projects, order seed and soil tests |
| September | Core aerate, overseed, apply fall fertilizer |
| October | Keep mowing until growth stops, apply lime |
| November | Rake leaves, final mow, winterize sprinklers |
Warm-Season Grasses (Southern Lawns)
| Month | Key Tasks |
|---|---|
| March | Rake dormant grass, apply pre-emergent |
| April | First nitrogen feeding once soil hits 65°F |
| May | Mow lower, increase frequency |
| June | Second feeding, raise mow height slightly |
| July | Water deeply, watch for chinch bugs |
| August | Third feeding, continue consistent mowing |
| September | Prepare for dormancy, stop heavy feeding |
| October | Apply post-emergent for winter weeds |
| November | Lower mower height, reduce watering |
Common Lawn Care Mistakes to Avoid (The "I Killed My Lawn" List)
These are the exact mistakes we see repeated in aggregate reviews and extension office Q&As. Skip them and you're already ahead of most homeowners.
Mowing Wet Grass
Wet clippings clump and smother the lawn. They also clog the mower deck and create uneven cuts. Wait until the grass dries completely, preferably in the afternoon.
Watering at Night
Night watering keeps the leaf blades wet for 12 hours straight. That's prime real estate for fungus. Water in the early morning so the sun pulls the moisture off quickly.
Ignoring Mower Blade Sharpness
Dull blades tear the grass, leaving jagged edges that turn brown. That stress invites disease and insect damage. A sharp blade cuts clean and stays greener.
Applying Too Much Fertilizer
More isn't better. It's worse. Excess nitrogen burns the roots and pushes fast, weak growth.
If you see yellow streaks or burning patterns, you've over-applied.
Skipping the Soil Test
You don't know what the soil lacks until you measure it. You buy needless fertilizer. You add lime that's not needed.
A $20 soil test is the smartest money you'll spend.
Overseeding at the Wrong Time
Spring seeding on cool-season lawns is a wasted effort most years. The seed fights summer stress and crabgrass. Wait for fall.
Ignoring Thatch
A thick thatch layer acts like a sponge, holding water on top of the soil and starving roots of air. Check it yearly, and dethatch when the layer passes one inch.
FAQs: Quick Answers to Lawn Care Questions
Should I leave grass clippings on the lawn?
Yes. Grass clippings are roughly 80% water and break down quickly, returning nitrogen to the soil. Clippings do not cause thatch buildup.
Thatch is composed of stems and roots, not leaf blades. Leave them unless they're excessively long or you're dealing with a fungal outbreak.
How do I fix yellow patches from dog urine?
Dog urine kills grass because of concentrated nitrogen and salts. Rake out the dead growth, soak the area with water to flush the salts, then add a thin layer of compost and reseed. Water the spot immediately after your dog pees to prevent future burns, or train them to use a designated mulch area.
Is it better to water in the morning or evening?
Morning, ideally between 4 a.m. and 8 a.m. This gives grass blades time to dry during the day, which reduces fungal disease risk. Watering at night leaves the turf wet for 12 hours, inviting pathogens like brown patch and dollar spot.
Can I use household compost as fertilizer?
Yes, but not as a complete replacement. Compost adds organic matter and micronutrients, improving soil structure and microbial activity. It's low in quick-release nitrogen, so granular fertilizer still provides the primary feeding.
Use compost as a topdressing after aeration or when overseeding.
How long does it take to repair a dead lawn?
If you're seeding, expect to wait 7 to 14 days for germination depending on grass type and soil temperature. Full coverage takes 2 to 3 months of consistent watering and mowing. Sod gives immediate coverage but costs significantly more per square foot.
Final Recommendation: Your Decision Guide Based on Lawn Condition and Time Budget
By now, you know the core skills. The real question is how much time and effort you want to invest. There's no wrong answer, as long as you pick a lane that matches your reality.
Path 1: Minimal Maintenance
Mow high, water deeply during dry spells, and leave the clippings. Skip fertilizer entirely or apply a single fall feeding for cool-season grass. Expect a decent-looking lawn with some weeds and thin patches.
This works if you're busy and don't mind a bit of character.
Path 2: Balanced Care
Mow correctly, water on a schedule, test soil, and apply fertilizer twice a year. Aerate once a year and overseed after aeration. This takes a few hours per month, but it gives you a thick, green lawn that handles stress well.
It's the best effort-to-result ratio for most homeowners.
Path 3: Full Renovation
This is for lawns that are more than 40% weeds, bare dirt, or dead crabgrass remnants. Test soil, kill the existing vegetation if needed, till or dethatch, amend with compost, and either reseed or lay sod. It's a hard weekend of work and a month of careful watering, but you get a blank slate with a fully rebuilt root zone.
For deep tips on what's happening below the surface, check out our guide on what animal do grubs turn into. If you spot signs of grub damage, it's worth checking how to stop animals from digging for grubs to protect your repair work.
The Bottom Line
The best lawn care routine is the one you'll actually stick with. Start with a soil test and a correct mowing height. Those two steps will fix more problems than any product you can buy.
Everything else is refinement. Choose one path, follow it, and give your lawn 90 days to respond. You'll be happy with what comes back.