Let's be honest. Most DIY lawn care advice online is either recycled marketing copy or written by someone whose lawn lives in a completely different climate than yours. You follow their perfect schedule, buy the products they recommend, and somehow your yard still looks worse than when you started.
That's not a lack of effort. That's a lack of a system.
The best DIY lawn care program isn't a one-size-fits-all calendar. It's a decision-making framework that adapts to your soil, your grass type, and your specific conditions. In our research, the difference between a thriving lawn and a patchy disaster almost always comes down to timing and soil health, not product brands.
As of 2026, university extension programs across the US still agree on one thing: test your soil first, and everything else gets easier.
Quick Answer
Test your soil before buying anything. Identify your grass type and climate zone. Build your program around those two facts.
Adjust your mowing height, watering depth, and fertilizer timing to match your grass's natural growth cycle. Skip the expensive products. Focus on soil health, consistent watering, and proper mowing.
That's the entire secret.
Step 1: Test Your Soil Before You Spend a Dime
Your soil is the entire foundation of your lawn. If the pH is off, your grass literally cannot absorb the nutrients you're paying for. It's like trying to fill a gas tank with a hole in it.
You can dump all the fertilizer you want, and the grass will stay thin, pale, and weak.
The fix is simple. Test your soil before you do anything else.
Why pH Matters More Than Any Product
Soil pH measures how acidic or alkaline your soil is. The scale runs from 0 to 14, with 7 being neutral. Most turfgrasses prefer a pH between 6.0 and 7.0.
Outside that range, essential nutrients like nitrogen, phosphorus, and potassium become chemically locked in the soil. They're present, but the roots can't reach them.
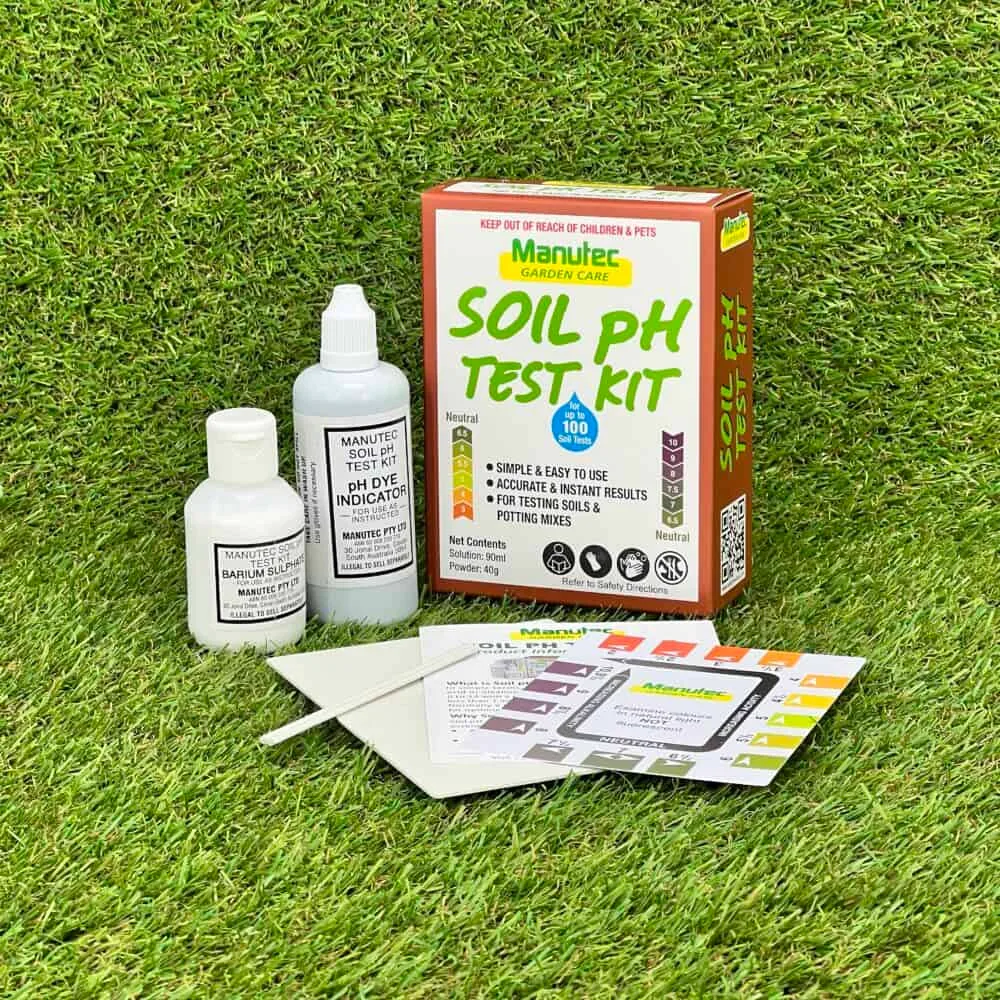
Image source: Web (Bing) / lawnaddicts.com.au (Web image (fair-use with source credit))
If your pH sits at 5.2, adding high-nitrogen fertilizer won't help. The grass still starves. You have to correct the pH first by adding lime to raise it or sulphur to lower it.
DIY Kits vs. University Lab Tests
You have two options for testing.
DIY soil test kits run between $10 and $20 at most garden centers. They give you a rough reading of pH and sometimes basic nitrogen, phosphorus, and potassium levels. They're fine for a quick check, but the margin of error is noticeable.
A reading can be off by half a point, which is enough to make the wrong call on amendments.
University extension lab tests are the gold standard. For about $15 to $30, you collect a small soil sample, mail it to your state's land-grant university, and they send back a detailed report. The report gives you your exact pH, nutrient deficiencies, organic matter percentage, and precisely how much lime or sulphur to add.
Most state programs also provide fertilizer recommendations based on your specific grass type.
Search for "[your state] university extension soil test" to find the right lab. This is a .edu resource, meaning the data is research-backed and specific to your region.
How to Collect a Good Soil Sample
- Use a clean trowel or shovel.
- Take 5 to 10 small cores from different spots in your yard.
- Go about 4 inches deep for an established lawn.
- Remove grass, roots, and stones.
- Mix the cores in a clean bucket.
- Let the sample air-dry before bagging it.
That's it. Ten minutes of work gets you a complete roadmap for the next 12 months. Skip this step, and you're just guessing with your wallet.
Step 2: Identify Your Grass Type and Climate Zone
This is the fork in the road. Your entire lawn care program changes depending on whether you have cool-season or warm-season grass. They have opposite growth cycles, opposite fertilizer schedules, and opposite watering needs.
Get this wrong, and you're actively fighting your own lawn.
Cool-Season Grasses
These grasses thrive in the northern half of the US, the Midwest, and the Pacific Northwest. Think Fescue, Kentucky Bluegrass, and Ryegrass. They grow actively in the cool months of spring and fall.
They go dormant or struggle through the heat of summer. Their main fertilizer feeding happens in autumn, when they're storing energy for winter.
Warm-Season Grasses
These grasses dominate the southern US. Think Bermuda, Zoysia, Centipede, and St. Augustine.
They grow actively in late spring and summer. They go brown and dormant in winter. Their main feeding happens during peak heat, and they don't want much nitrogen once the weather cools.
How to Tell What You Have
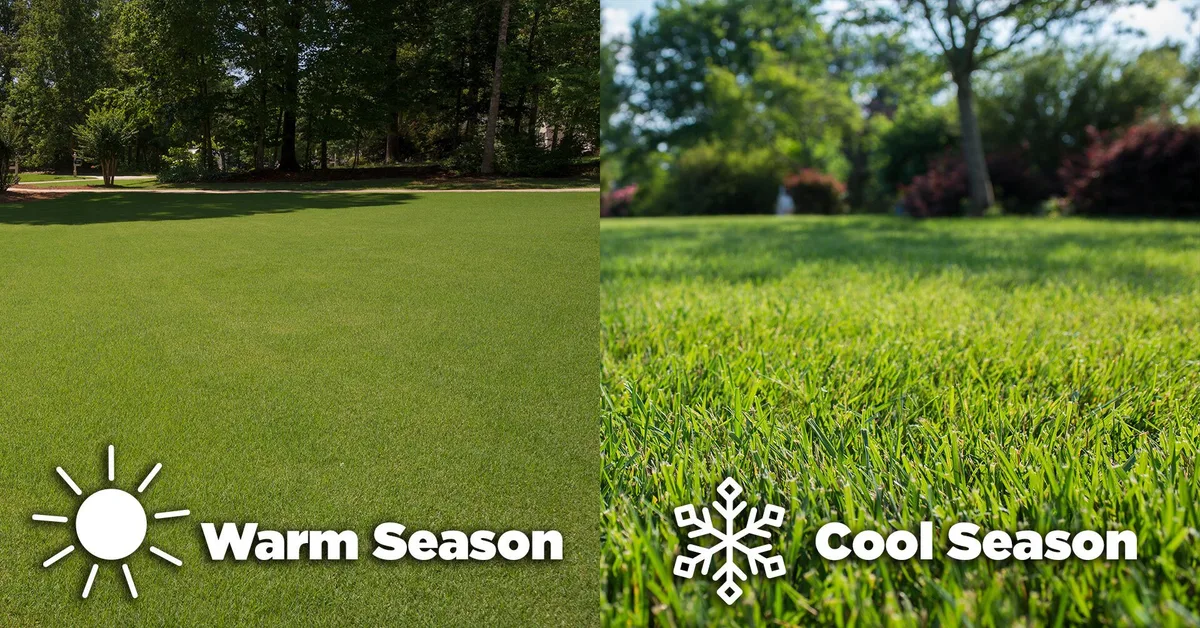
Image source: Web (Bing) / info.supersod.com (Web image (fair-use with source credit))
Here's a quick visual test. Look at your lawn in July, then again in January.
- Green in summer, brown in winter? You have warm-season grass.
- Green in spring and fall, struggling in summer? You have cool-season grass.
- Green all year, or patchy in extreme cold? You're in the transition zone.
The transition zone is the tricky middle band cutting through Tennessee, Virginia, North Carolina, and parts of Kansas and Missouri. Some homeowners there have a blend of both grass types. That's fine.
Pick the dominant type and follow its calendar.
Step 3: The Decision Tree for Your Specific Lawn
Once you know your soil and your grass, you move into the decision tree. Three questions determine the details of your program. Answer honestly, and the right choices become obvious.
Question 1: How Much Sun Does Your Lawn Get?
- Full sun (6+ hours daily): You have maximum flexibility. Your grass can grow thick, and you can use standard fertilizer rates.
- Partial shade (3 to 6 hours): You need a shade-tolerant mix like fine fescue for cool-season zones, or a shade-tolerant cultivar for warm-season zones. Cut fertilizer rates by about half.
- Deep shade (under 3 hours): Grass struggles to survive. Your best option is a shade-tolerant ground cover or professional tree thinning. No fertilizer program fixes a lawn that physically can't photosynthesize.
Question 2: What Kind of Soil Texture Do You Have?
Grab a handful of damp soil and squeeze it.
- Clay soil forms a tight ball that doesn't crumble. It holds nutrients well but drains poorly. Water deeply and less frequently. Consider core aeration once a year.
- Sandy soil falls apart immediately. It drains fast and washes nutrients away. Water more often but for shorter durations. Use smaller, more frequent fertilizer applications.
- Loamy soil holds a loose ball that crumbles when you poke it. This is the ideal. Use a standard schedule.
Question 3: How Much Weed Pressure Can You Tolerate?
- High tolerance: Focus on mowing, watering, and proper fertilization. A thick, healthy lawn naturally crowds out most weeds. Spot-treat as needed.
- Low tolerance: You need a pre-emergent herbicide schedule. Apply in early spring when soil temperatures hit 55°F, and again in fall for cool-season lawns. Timing matters more than the brand.
Step 4: The Seasonal Calendar That Actually Works
Here's where it all comes together. No 10-step programs. No monthly checklists that ignore your climate.
Just a simple rhythm that works with your grass's natural cycle.
For Cool-Season Lawns
| Season | Action |
|---|---|
| Spring (Mar-May) | Light fertilizer at half rate. Focus on weed prevention. |
| Summer (Jun-Aug) | Mow high (3.5-4 inches). No fertilizer. Water deeply once weekly. |
| Fall (Sep-Nov) | The big feeding window. Full dose of slow-release nitrogen in Sept and again in late Oct. |
| Winter (Dec-Feb) | Rake leaves. Stay off frozen grass. Nothing else. |
For Warm-Season Lawns
| Season | Action |
|---|---|
| Spring (Apr-May) | Wait until fully green. First balanced feeding. |
| Summer (Jun-Aug) | Feed every 4-6 weeks with nitrogen-heavy mix. Water deeply when blades fold. |
| Fall (Sep-Oct) | Taper off nitrogen. Lower mowing height gradually. |
| Winter (Nov-Mar) | Dormant. No fertilizer. No extra water. |
The key insight is timing. One properly timed fall feeding for cool-season grass does more than four scattered feedings all year. One deep weekly soak beats a daily sprinkle that keeps roots shallow and weak.
Here's how mowing fits into the bigger picture. If you need a reminder on seasonal maintenance, keep it simple: mow high in summer for cool-season lawns, mow low going into winter for warm-season lawns. The calendar above gives you the rhythm.
Mowing Rules That Make or Break the Lawn
Mowing is the most underrated tool in your arsenal. It's also where most DIYers make their biggest mistake. They scalp the lawn, or they let it get too tall and then cut off more than a third of the blade at once.
Both damage the grass and invite weeds.
The Rule of Thirds
Never remove more than one-third of the grass blade in a single mowing. If your grass has grown to 4 inches, don't set your mower below 2.7 inches. Cut high, wait two days, then cut again if needed.
This simple rule keeps grass roots healthy and reduces stress.
Keep Your Blades Sharp
A dull mower blade tears grass instead of cutting it. The torn edges turn brown and invite disease. Sharpen your blade every 4 to 6 uses during the growing season.
You'll notice the difference immediately. Clean cuts heal fast. Torn cuts stay stressed.
Leave the Clippings
Grass clippings are about 85% water and full of nitrogen. Leaving them on the lawn is free fertilizer. The only time you should bag them is when they clump so heavily that they're smothering the grass underneath.
Otherwise, let them lie. This is called grasscycling, and it saves you one full fertilizer application per year.
Watering Smarter, Not More
Watering is where most DIYers go wrong. They either drown the lawn with daily sprinkles or they barely water at all and wonder why the grass goes dormant. The goal is deep, infrequent watering that encourages roots to grow downward.
How to Read Your Lawn's Thirst Signals
Grass tells you when it needs water. Look for these signs:
- A bluish-gray tint across the lawn.
- Footprints that stay visible for more than 30 seconds after walking.
- Leaf blades that are folded or curled.
If you see any of these, it's time to water.
The 1-Inch-Per-Week Rule
Most lawns need about 1 to 1.5 inches of water per week, including rainfall. The easiest way to measure this is to place a tuna can or shallow container in the middle of the lawn while you water. When it's full, you've hit the mark.
Timing and Frequency Based on Soil Type
- Clay soil: Water once a week, deeply. Slow absorption means the water penetrates gradually.
- Sandy soil: Water twice a week for shorter durations. The soil drains fast and can't hold moisture.
- Loamy soil: Water once a week with a deep soak.
Always water in the early morning, between 4 AM and 8 AM. This reduces evaporation and gives the grass time to dry before nightfall, which prevents fungal disease.
Common DIY Lawn Care Mistakes (And How to Avoid Them)
Every lawn care expert sees the same mistakes repeated year after year. Here are the ones that cost the most time and money.
Scalping the Lawn
Cutting grass too short is the single most common error. It stresses the roots, exposes the soil to weeds, and turns the lawn brown. Keep your mower deck high and follow the Rule of Thirds.
Over-Fertilizing
More fertilizer is not better. Extra nitrogen burns the grass blades and creates a heavy thatch layer. Always follow the rates on the label, and back off if you've applied pre-emergent recently.
The Daily Sprinkle Habit
Watering a little bit every day keeps roots shallow and weak. The grass never needs to dig deep for moisture, so it doesn't. Switch to deep, infrequent watering and your lawn will develop a stronger root system.
Ignoring Soil pH
You can spend hundreds on fertilizer and still have a thin lawn if the pH is off. The soil test from Step 1 is non-negotiable. It's the cheapest thing you'll buy all year.
Applying Pre-Emergent Too Late
Pre-emergent herbicides only work before weed seeds germinate. If you apply them after the weeds have sprouted, you've wasted your money. Watch soil temperatures, not the calendar.
Costs and Products: What to Buy, What to Skip
You don't need a shed full of expensive equipment to run a solid DIY program. Here's a realistic starter budget.
| Item | Price Range | Priority |
|---|---|---|
| Soil test kit | $10-$20 | Must-have |
| University lab test | $15-$30 | Strongly recommended |
| Spreader (drop or broadcast) | $40-$80 | Must-have |
| Slow-release fertilizer | $20-$40 per bag | Must-have |
| Pre-emergent herbicide | $20-$40 | Depends on weed tolerance |
| Mower blade sharpening kit | $15-$30 | Must-have |
| Core aerator (rental) | $50-$75 per day | Annual, for clay soil |
What's Worth the Money
- A good spreader. Even coverage matters more than the fertilizer brand. Calibrate it before use.
- University lab testing. The detailed report pays for itself in fertilizer savings.
- Quality slow-release nitrogen. It feeds the lawn steadily instead of causing a growth spike.
What to Skip
- "Lawn in a bottle" miracle products. If it promises overnight results, it's snake oil.
- Weed-and-feed combos during heat. The herbicide can stress the grass.
- Colorant sprays. They hide symptoms without fixing the underlying problem.
Safety, Local Rules, and Pet Considerations
Lawn chemicals are tools, and tools need respect. Before you buy or apply anything, check local regulations and think about who uses your yard.
Watering Restrictions and Fertilizer Bans
Many states restrict watering during drought. Some regions, like Florida, ban nitrogen fertilizer during the summer rainy season to prevent runoff into waterways. Check your local extension office or city website for the rules in your area.
Keeping Kids and Pets Safe
- Keep pets and children off treated areas until the product has dried completely.
- Look for fertilizers with no added pesticides if you have dogs.
- Store all chemicals out of reach in a sealed container.
- Follow the label's re-entry interval, typically 24 hours after application.
Runoff Awareness
Never apply fertilizer or herbicide right before heavy rain. The chemicals wash into storm drains and eventually into local waterways. This is both an environmental concern and a waste of your money.
When DIY Isn't Working: The Honest Tipping Point
Sometimes the problem isn't your technique. It's the problem itself.
Signs You Need Professional Intervention
- Grubs: If you peel back a patch of sod and find white, C-shaped larvae, you have a grub infestation. A targeted insecticide is the fix, but timing matters.
- Disease: Fungal patches that spread despite proper watering and mowing need a professional diagnosis.
- Severe soil compaction: If water pools on the surface after minutes of rain, core aeration might not be enough.
- Extreme thatch: Over 1 inch of spongy buildup requires dethatching equipment that's best rented or hired out.
When It's a Pest Problem, Not a Nutrition Problem
A lawn that's mostly brown with patches of green is often signaling a pest issue, not a fertilizer issue. Animals digging in the yard usually means grubs are present. Skunks, raccoons, and birds tear up lawns specifically to eat them.
If this describes your yard, address the grub problem before anything else. Treating with extra nitrogen won't stop the digging.
Frequently Asked Questions
How long does it take to see results with a DIY lawn care program?
Expect visible improvement within 4 to 6 weeks of correcting soil pH and adjusting your watering schedule. Full lawn recovery depends on your grass type and how damaged the yard was at the start. Cool-season grasses bounce back fastest in fall.
Warm-season grasses need the summer heat to recover.
How often should I water my lawn?
Deeply water once per week during the growing season, reaching 1 to 1.5 inches of total moisture including rain. In sandy soil, split it into two sessions. In clay soil, stick with one deep soaking.
Adjust during drought restrictions or sustained rainfall.
What is the best fertilizer for a DIY lawn?
The best fertilizer is a slow-release, granular product with a balanced NPK ratio like 10-10-10 or 30-0-4, depending on your season. A soil test determines your exact needs. For most lawns, nitrogen is the most important element, but phosphorus and potassium matter for root and stress tolerance.
Can I overseed in the spring?
Spring overseeding works for cool-season grasses, but fall gives better results. The cooler temperatures and higher moisture help germination. For warm-season grass, overseeding in late spring or early summer is more reliable.
Always pair overseeding with consistent watering to keep the seeds from drying out.
Is weed-and-feed worth using?
Weed-and-feed is convenient but often poorly timed. Applying herbicide in the heat stresses the grass, and applying fertilizer in the fall when grass is dormant wastes nitrogen. Separate applications at the right times work better.
The Verdict: Build Your Program One Season at a Time
You don't need to fix your lawn in a single weekend. Start with the soil test. Identify your grass type.
Set your mower height correctly. Water deeply and less often. Feed at the right time of year.
That's the whole program.
The best DIY lawn care program is patient and scientifically grounded. It doesn't rely on gimmicks or expensive products. It works with your soil, your climate, and your grass type.
Give it one full season, and you'll see the difference in spring. Give it two, and your neighbors will start asking questions.