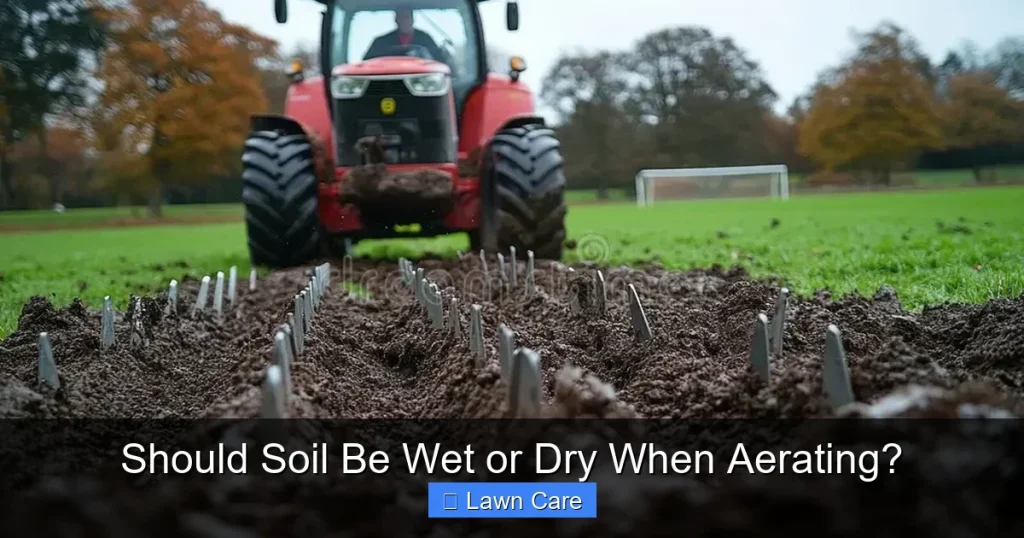
The ideal soil moisture for aerating is slightly damp, not soaking wet or bone dry. This “firm but yielding” state allows aeration tools to penetrate effectively without tearing or clogging. Properly aerated soil leads to better nutrient and water absorption, promoting a healthier, greener lawn.
When it comes to giving your lawn some love, aeration is a big deal. It’s like giving your grass roots room to breathe and stretch out. But a common question pops up: should soil be wet or dry when aerating? This might seem like a small detail, but getting it right can make a world of difference in how effective your aeration efforts are and, ultimately, how healthy your lawn looks.
Think about it – you’re going to be poking holes into your lawn, pulling up plugs of soil. You want those holes to be clean and effective, allowing good things to reach your grass’s roots. If the soil is too hard or too mushy, you’re not going to achieve the best results. So, let’s dive into the nitty-gritty of soil moisture for aeration and figure out that sweet spot.
## Understanding Soil Aeration and Its Goals
Before we get into the moisture debate, let’s quickly recap what aeration is all about. Aeration, specifically core aeration, is the process of mechanically removing small plugs of soil from your lawn. These plugs are then left on the surface to decompose. The primary goal of this process is to alleviate soil compaction.
Why Soil Compaction is Bad
Over time, foot traffic, heavy machinery, and even natural soil settling can cause your soil to become compacted. When soil is compacted, the tiny air pockets between soil particles are squeezed out. This has several negative consequences for your lawn:
* Reduced Water Penetration: Water struggles to seep into compacted soil, leading to surface runoff and uneven watering. Your grass might look thirsty even when you’re watering regularly.
* Limited Airflow: Roots need oxygen to survive and thrive. Compacted soil restricts the flow of air, essentially suffocating the root system.
* Nutrient Uptake Issues: Compacted soil makes it harder for roots to access essential nutrients and fertilizers. This can result in a weak, sickly-looking lawn.
* Poor Root Growth: Roots have a harder time growing through dense, compacted soil. This leads to shallow root systems, making your grass more susceptible to drought and disease.
The Benefits of Aeration
By creating those small holes, aeration addresses these issues head-on:
* Improved Water Infiltration: Water can now easily penetrate the soil, reaching the root zone more effectively.
* Enhanced Air Circulation: Oxygen can freely move through the soil, vital for healthy root respiration.
* Better Nutrient Access: Fertilizers and nutrients can reach the roots more readily.
* Encouraged Deeper Root Growth: With less resistance, roots can grow deeper, leading to a more resilient lawn.
* Reduced Thatch Buildup: Aeration helps break down thatch, that layer of dead grass and organic matter that can choke out your lawn.
* Better Seed Germination: If you’re planning to overseed, aeration provides ideal conditions for new seeds to establish. This is especially important when considering when you should seed Bermuda grass.
Knowing these benefits really highlights why we want to do aeration correctly. And that brings us back to the soil moisture.
Key Takeaways
- Slightly Damp is Best: Aim for soil that is moist but not saturated. Think of it like a squeezed-out sponge.
- Why Not Dry? Very dry soil is hard and resistant, making aeration difficult and less effective. It can also damage your tools.
- Why Not Wet? Excessively wet soil can become muddy and smear, clogging aeration equipment and hindering root growth.
- The “Firm but Yielding” Test: A good indicator is when you can easily dig into the soil with a trowel, but it doesn’t stick excessively to your shoe.
- Adjusting Moisture: If your soil is too dry, water it a day or two before aerating. If it’s too wet, wait for it to dry out slightly.
- Benefits of Proper Moisture: Correct moisture levels ensure aeration holes are clean and allow for better water, air, and nutrient penetration, promoting root development.
Quick Answers to Common Questions
What is the primary goal of aerating soil?
The primary goal of aerating soil is to alleviate soil compaction, which allows for better water, air, and nutrient penetration to the root zone.
Why is very dry soil bad for aeration?
Very dry soil is hard and resistant, making it difficult for aeration equipment to penetrate effectively, potentially causing strain or damage to the tools and resulting in ineffective aeration.
What happens if you aerate soil that is too wet?
Aerating overly wet soil can lead to smearing, clogging of equipment, damage to soil structure, and potential harm to the grass roots and turf.
How can I test if my soil is at the right moisture level for aeration?
You can test soil moisture by digging a small amount with a trowel; if it holds its shape when squeezed but crumbles easily, it’s likely at the right level. If it drips water or falls apart into dust, it’s not.
When is the best time to aerate my lawn in relation to seeding?
It’s generally best to aerate a day or two before overseeding. The aeration holes provide ideal conditions for new grass seeds to germinate and establish.
📑 Table of Contents
The “Sweet Spot”: Slightly Damp Soil
So, what’s the magic moisture level for aerating? The consensus among lawn care experts is that soil should be slightly damp. It’s not about being dry, and it’s certainly not about being waterlogged. Let’s break down what “slightly damp” means and why it’s so crucial.
What “Slightly Damp” Looks Like and Feels Like
Imagine a sponge that you’ve just taken out of the water and squeezed thoroughly. It’s moist, but no water drips out when you apply pressure. That’s the kind of moisture you’re aiming for in your soil.
* Visual Clues: The soil will have a darker, richer color than when it’s dry. It won’t look dusty or powdery.
* Tactile Clues: If you pick up a handful of soil, it should feel moist and pliable. When you squeeze it, it should hold its shape without crumbling apart, but it also shouldn’t feel excessively sticky or form a mudball.
* The Trowel Test: A great way to check is to try digging into the soil with a trowel. If the trowel sinks in relatively easily with some gentle pressure, your soil is likely at the right moisture level. If you have to really struggle to push the trowel in, it’s probably too dry. If the soil oozes out and sticks to the trowel like mud, it’s too wet.
This “firm but yielding” state is ideal because it offers just enough resistance for the aeration tines or spikes to cut cleanly through the soil. This creates those nice, open holes we’re after.
Why Dry Soil Isn’t Ideal for Aeration
Visual guide about Should Soil Be Wet or Dry When Aerating?
Image source: c8.alamy.com
Let’s talk about the opposite end of the spectrum: dry soil. What happens if you try to aerate a bone-dry lawn?
Challenges with Dry Soil
* Resistance and Tool Strain: Dry, compacted soil is incredibly hard. Aeration machines, whether manual or powered, will struggle to penetrate it. This puts a lot of strain on the equipment, potentially leading to damage or breakage.
* Ineffective Penetration: Instead of pulling out clean cores, the tines might just skim over the surface or bounce off. You won’t get the deep penetration needed to relieve compaction effectively.
* Dust and Debris: Dry soil tends to crumble into fine dust and small, hard clods. This creates a messy situation and doesn’t leave the open channels that are the goal of aeration.
* Poor Core Ejection: If the machine does manage to pull up a plug, it might be dry and brittle, not the nice, moist core that will easily break down.
For best results, you want to avoid aerating when the soil is extremely dry. It’s frustrating, ineffective, and can be tough on your tools.
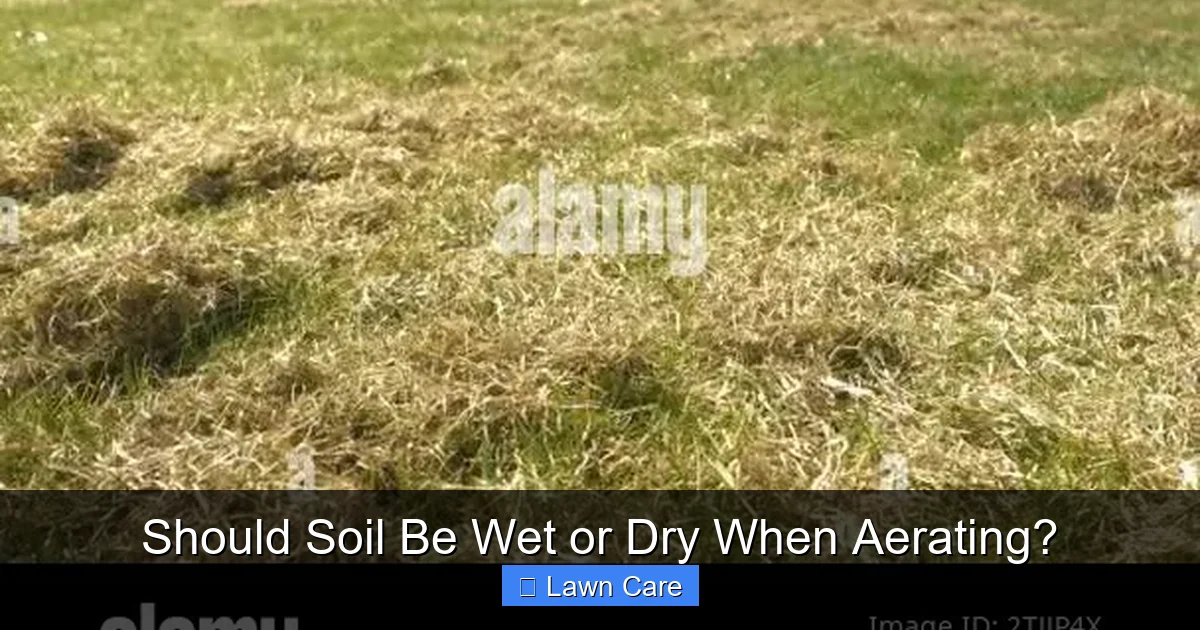
Why Wet Soil Isn’t Ideal for Aeration

Visual guide about Should Soil Be Wet or Dry When Aerating?
Image source: piedmontmastergardeners.org
Now, let’s consider the other extreme: soil that’s too wet, almost soggy. This can be just as problematic as dry soil.
Problems with Wet Soil
* Mud and Smearing: When soil is saturated, the aeration tines tend to smear the soil rather than creating clean holes. This creates a sticky, muddy mess.
* Clogging Equipment: The wet, sticky soil can easily clog up the tines and mechanisms of your aeration machine. This requires frequent stops for cleaning, slowing down the process considerably.
* Damage to Soil Structure: Working with overly wet soil can actually damage its structure. The soil particles can be easily displaced, leading to a different kind of compaction or instability.
* Root Damage: When you pull cores from very wet soil, they can tear and distort the root structure rather than leaving clean openings. This can hinder root development instead of promoting it.
* Turf Damage: Walking on excessively wet soil can cause significant damage to the turf. You might sink in, tear up grass blades, and create muddy patches. This is similar to how you need to be careful about how dry a lawn needs to be to mow.
So, while a little moisture is good, a lot of moisture is bad. We’re looking for that middle ground.
How to Achieve the Right Soil Moisture for Aeration
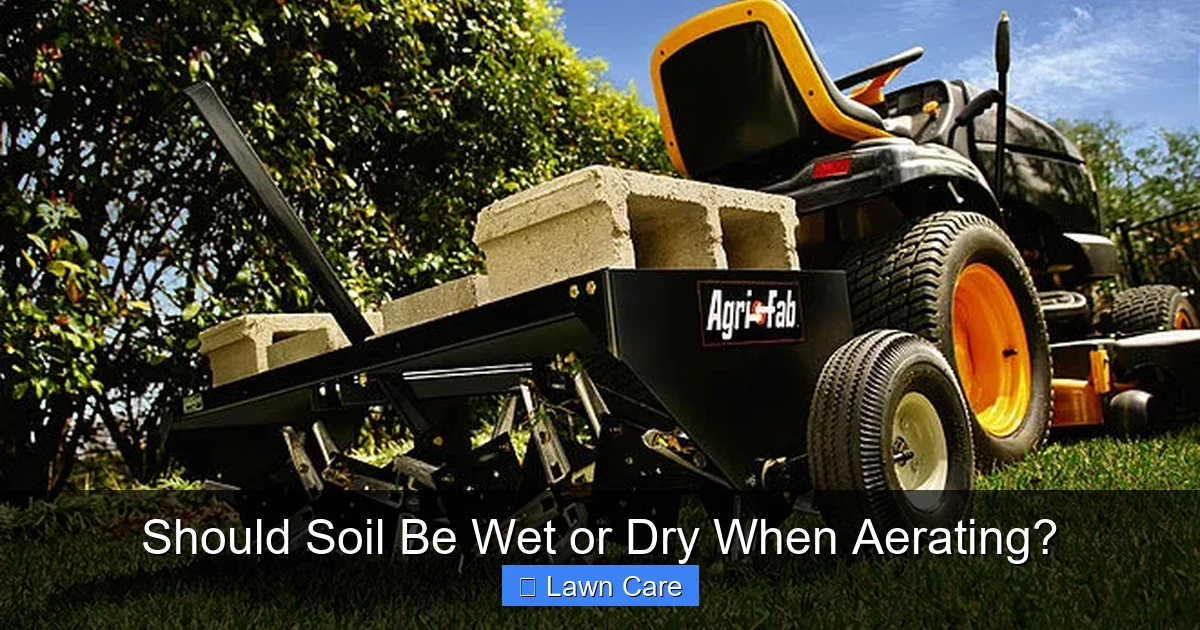
Visual guide about Should Soil Be Wet or Dry When Aerating?
Image source: lawnstarter.com
Knowing the ideal moisture is one thing, but achieving it can sometimes be a challenge, especially if your lawn’s watering habits are a bit erratic or if you’ve had unusual weather. Here’s how you can get your soil to that perfect “slightly damp” state.
1. The Watering Strategy
The most direct way to adjust soil moisture is through watering.
* If Too Dry: Water in Advance. If your soil feels hard and dry, you’ll need to water it. The best approach is to water the lawn thoroughly about 24 to 48 hours before you plan to aerate. This allows the water to penetrate deep into the soil profile. You don’t want the surface to be a muddy mess, but you want that moisture to have soaked down. A good deep watering session will help.
* If Too Wet: Wait It Out. If your lawn is currently waterlogged, the best course of action is patience. Give the soil time to dry out naturally. You can speed this up slightly by avoiding walking on the lawn and ensuring good airflow if possible. If there’s a very light rain expected, it might actually help moisten dry soil to the right level.
2. Observing Weather Patterns
Pay attention to recent rainfall and upcoming forecasts. If you’ve had a good rain a day or two ago, your soil might be perfect. If it’s been unusually dry, you’ll likely need to water. If a heavy rain is expected right before your planned aeration, you might need to reschedule.
3. The Sponge Test (Practical Application)
This is the simplest and most reliable method. Take a small shovel or trowel and dig down a few inches. Grab a bit of that soil.
* Squeeze it: Does it hold together but crumble easily? Good.
* Does it drip water? Too wet.
* Does it fall apart into dust? Too dry.
You might need to do this in a few different spots on your lawn to get a general idea of the moisture levels across the entire area.
When to Aerate in Relation to Other Lawn Care Tasks
Knowing the right soil moisture is just one piece of the puzzle. It’s also important to consider when aeration fits into your overall lawn care schedule. For instance, if you’re planning to overseed, aerating before seeding is beneficial. This is where understanding the timing for different grass types becomes critical. For example, knowing when to seed Bermuda grass or when to plant Bahia grass seed will help you coordinate your aeration efforts.
Aeration and Seeding
Aerating right before overseeding is a fantastic combination. The holes created by aeration provide a perfect environment for new grass seeds to germinate and establish. The seeds can fall into these openings, getting good soil contact, and the loosened soil allows for better root development. You typically want to aerate a day or two before seeding, ensuring the soil is at that ideal moisture level for both processes.
Aeration and Fertilizing
It’s generally a good idea to aerate before fertilizing, especially if your soil is compacted. Aeration opens up the soil, allowing fertilizers to penetrate more effectively to the root zone. You don’t want to aerate when the soil is too wet, as you might compact it further. It’s also useful to consider whether you should water before or after fertilizing, as this also impacts nutrient delivery.
Aeration and Dethatching
Dethatching and aerating are both soil-loosening processes. It’s often recommended to aerate *after* dethatching if you have a severe thatch problem. However, if you’re just doing a light dethatch or focusing on aeration’s soil-loosening benefits, aerating first can help break up any thatch that’s present. Always ensure the soil moisture is appropriate for aeration.
Timing with Weed Control
You generally want to avoid applying certain herbicides immediately before or after aeration, as it can reduce their effectiveness or spread the chemicals unevenly. For example, knowing when to apply crabgrass preventer is key, and it’s usually best to apply it well before or after aeration. Always check product labels for specific instructions.
Common Mistakes to Avoid
When undertaking lawn aeration, it’s easy to make a few common mistakes that can reduce its effectiveness.
Mistake 1: Aerating at the Wrong Time of Year
While not directly related to soil moisture, the timing of aeration is crucial. It’s generally best to aerate when your grass is actively growing, allowing it to recover quickly. For cool-season grasses (like fescues and bluegrasses), this is typically fall. For warm-season grasses (like Bermuda and Zoysia), spring or early summer is ideal. For example, understanding when to aerate St. Augustine grass is important for its specific growth cycle.
Mistake 2: Not Watering Sufficiently Before Aeration
As we’ve discussed, dry soil is a major hurdle. Many people underestimate how much water is needed to penetrate compacted soil. Remember that deep watering 24-48 hours beforehand is usually necessary.
Mistake 3: Aerating in Extremely Wet Conditions
On the flip side, many homeowners might think “it’s rained, great, let’s aerate” without realizing the soil is waterlogged. This leads to smearing, equipment clogs, and potential damage.
Mistake 4: Not Following Up Appropriately
Aeration is not a one-time fix. It’s a practice that benefits from being done regularly. Also, consider what you do *after* aerating. Leaving the cores on the lawn to break down is usually beneficial, allowing them to reintroduce nutrients and organic matter.
Conclusion
So, to circle back to our initial question: should soil be wet or dry when aerating? The answer is neither. The ideal state for your soil when aerating is slightly damp. This provides the perfect balance – firm enough for your tools to work effectively without excessive strain, yet moist enough to allow for clean core extraction and optimal soil structure.
Achieving this “sweet spot” ensures that your aeration efforts are truly beneficial, helping to alleviate compaction, improve water and air penetration, and ultimately leading to a healthier, more vibrant lawn. By paying attention to soil moisture and following these tips, you’ll be well on your way to a truly outstanding lawn. Happy aerating!
Frequently Asked Questions
Should I water my lawn before aerating?
Yes, if your soil is dry, watering your lawn thoroughly about 24 to 48 hours before aerating can help achieve the ideal slightly damp moisture level needed for effective aeration.
What does “slightly damp” soil feel like?
Slightly damp soil feels moist and pliable. When squeezed, it holds its shape but doesn’t feel overly sticky or drip water, and it should crumble easily when broken apart.
Can aeration damage my lawn?
Aeration can cause temporary disruption, but when done correctly with the right soil moisture, it actually promotes healthier growth. Aerating overly wet or dry soil carries a higher risk of unintended damage.
How often should I aerate my lawn?
The frequency of aeration depends on your soil type and lawn use. Heavily used lawns or those with clay soil may benefit from annual aeration, while others might only need it every 2-3 years.
What kind of equipment is used for aeration?
Aeration is typically done with a core aerator (which pulls out plugs of soil) or a spike aerator (which punches holes). Core aerators are generally more effective for relieving compaction.
What should I do after aerating my lawn?
You can leave the soil cores on the lawn to break down naturally, which helps return nutrients and organic matter to the soil. It’s also a good time to overseed or apply topdressing if needed.