
If you've ever watched rain pour out of your downspout while your garden wilts, you've probably asked yourself: how to catch rain water easily at home? The answer is simpler than most people think. You don't need a massive underground cistern or a contractor.
A basic barrel and a few fittings can handle a surprising amount of your outdoor water needs.
In our research, a single 55-gallon barrel fills completely after just about a quarter inch of rain on an average 1,000-square-foot home roof. That means every full inch of rainfall can produce roughly 600 gallons of free water for your plants, your car, or your lawn. The trick is picking a setup that matches your property.
That's exactly what this guide walks through step by step.
Quick Answer
Point a downspout at a covered barrel. Add a spigot and an overflow hose. That's the whole system.
A first-flush diverter keeps debris and bird droppings out. You get free water for your garden nearly instantly.
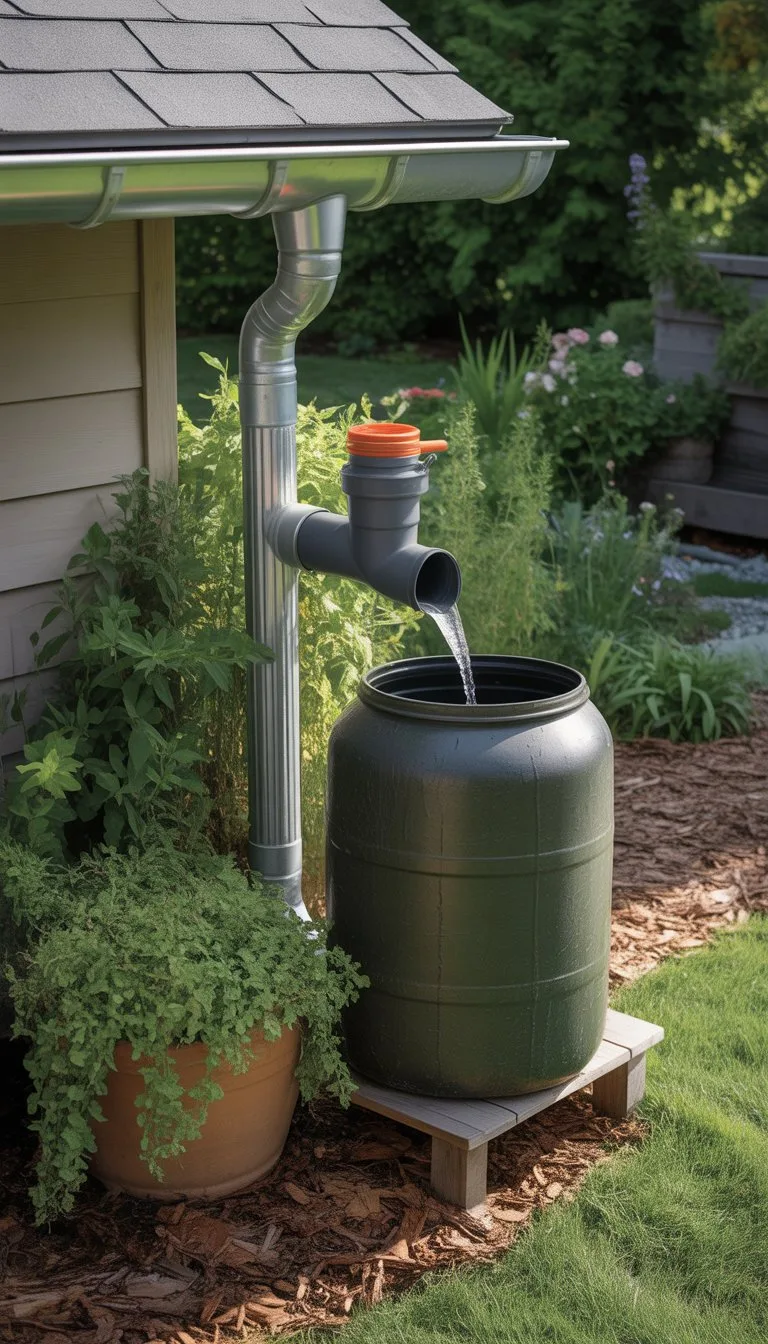
Image source: Web (Bing) / mrplanter.com (Web image (fair-use with source credit))
Do You Even Need a Rain Barrel? (The Honest Quick Answer)
If you pay for municipal water and water your lawn more than twice a week, yes. If you live in a region that gets regular rain, absolutely. If you only have a balcony with two pots, you probably don't need one.
The math is simple. Outdoor water use makes up about 30% of a typical household's total consumption. A rain barrel can cover nearly all of that during the growing season.
Still on the fence? Start with one barrel under your busiest downspout. Use it for a month.
Then see how many times it fills up.
Why Most Homeowners Let Free Water Slip Away (The Real Problem)
Every downspout on your house is a free water delivery system. Most of us ignore it. The rain hits the roof, runs through the gutters, pours down the spout, and disappears into the storm drain.
That's a waste on two levels. Your plants get tap water with chlorine and minerals. And your municipality has to treat that stormwater, often at $0.01 to $0.05 per gallon, depending on where you live.
The EPA explicitly supports rain barrels as a way to reduce stormwater runoff and protect local waterways.
A basic rain barrel stops that flow. It captures the water at the moment it becomes useful. And once the barrel is full, the overflow simply continues to the drain.
So you're never worse off than before.
The First Branch: What Will You Actually Use the Water For?
Before you buy anything, decide where the water is going to end up. This one choice drives every other decision in your setup.
Garden and landscape watering is the most common use. A simple gravity-fed barrel works perfectly here. The low pressure is fine for a watering can, a soaker hose, or a drip line.
Car washing and outdoor cleaning need a bit more push. You'll want a small pump or a raised stand to get workable pressure. A 50-gallon barrel drained through a garden hose can rinse mud off a car if you elevate the barrel at least three feet.
Emergency backup for toilets requires plumbing and backflow prevention. That's not a weekend DIY job. Call a licensed plumber.
And if you're thinking about drinking it, stop right there. Rainwater from any roof is not safe to drink without certified filtration, UV treatment, and regular testing. That's a whole different project.
The Second Branch: Does Your Roof Make the Cut? (Roof Material & Safety)
Your roof is your collection surface. What it's made of matters more than the barrel.
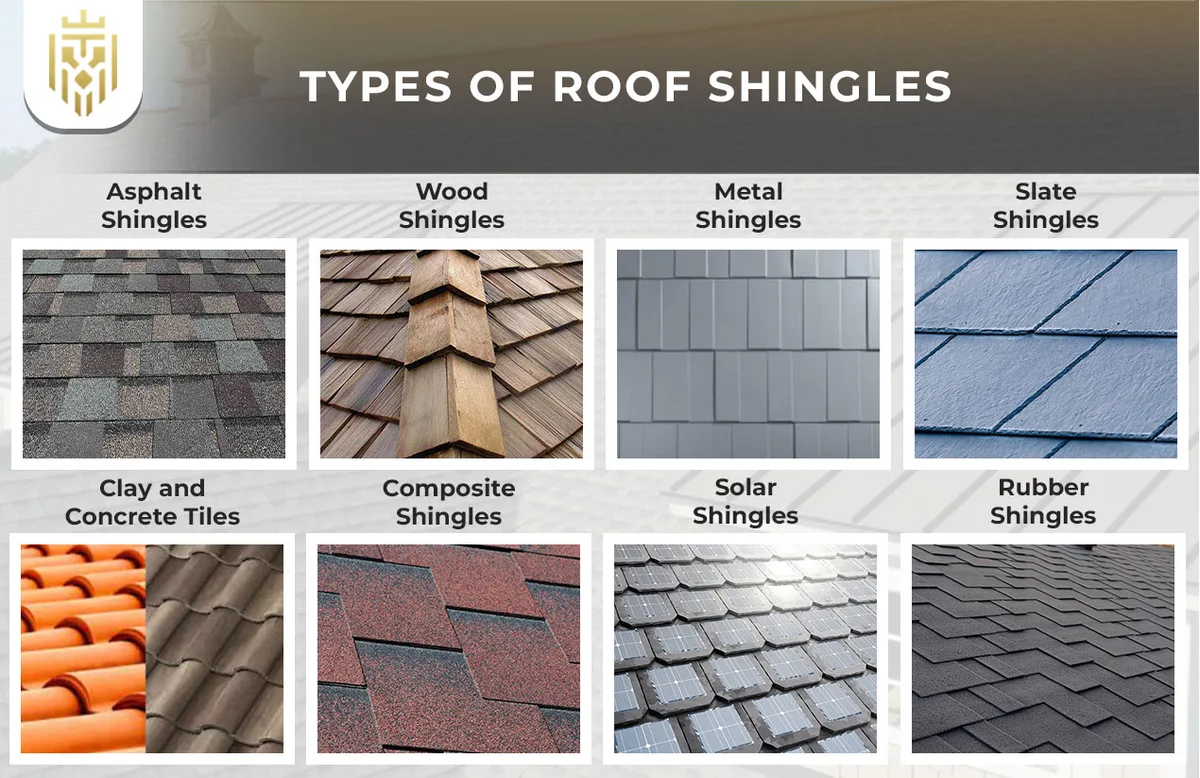
Image source: Web (Bing) / fity.club (Web image (fair-use with source credit))
Asphalt shingles are the most common roofing material in North America. They're perfectly fine for garden use. The granules that wash off are inert and harmless to plants.
Metal roofs are the best option. They shed debris easily and don't leach anything. If you have a standing-seam metal roof, you're working with the cleanest source available.
Tile and slate are also safe. They're natural materials that don't add anything to the water. Wood shake roofs can release tannins, which turn the water brown.
That's not harmful to plants, but it can stain.
The real problem is older roofs. If your home was built before 1980, there's a chance the roof has lead flashings or lead-based paint. The same goes for asbestos-cement shingles.
Water from those roofs should never touch anything you might eat or drink.
The Third Branch: How Much Rain Falls Where You Live?
The amount of rain you get determines the size of your system. This is the branch most people skip, and it leads to undersized barrels.
Here's the basic math: one inch of rain on 1,000 square feet of roof produces about 600 gallons of water. Your actual harvest depends on your roof area and your local rainfall total.
A quick example. A house with 1,500 square feet of roof in a region that gets 30 inches of rain per year could theoretically collect over 27,000 gallons. A small 55-gallon barrel is just a drop in that bucket.
Use this simple formula to estimate your harvest: roof area in square feet multiplied by rainfall in inches, times 0.62, equals gallons collected.
| Climate Type | Typical Annual Rainfall | Recommended Setup |
|---|---|---|
| Dry | Under 15 inches | Single 50-gallon barrel |
| Moderate | 15 to 35 inches | Two to three linked barrels |
| Rainy | Over 35 inches | IBC tote or large above-ground tank |
As of 2026, several municipalities still offer rebates for rainwater harvesting systems. Check with your local water utility before you build. And if you're in a drought-prone area, a barrel that sits empty for months might not be your best investment.
A rain garden or a portable tank you can roll away might suit your space better.
Rain Barrel, IBC Tote, or Above-Ground Tank: Choosing the Right Setup
Now comes the fun part. You know your roof is safe and your rainfall is sufficient. Time to pick a container that matches your space, your budget, and your watering habits.
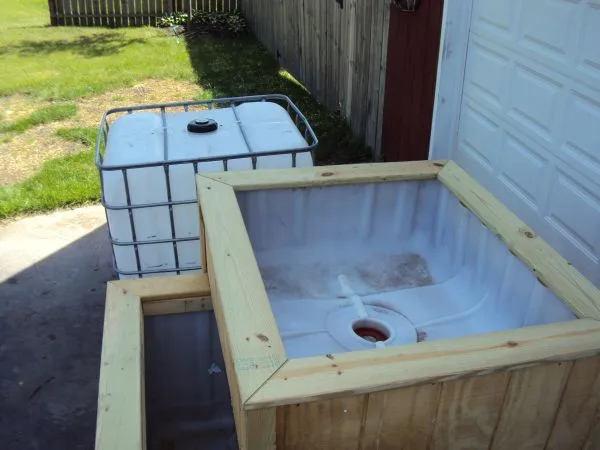
Image source: Bing (Web (fair-use with source credit))
Standard Rain Barrel (55 Gal)
This is the classic black or dark green barrel you see tucked under downspouts everywhere. It's the right answer for most homeowners. A 55-gallon barrel costs between $60 and $150, takes about an hour to set up, and needs zero maintenance beyond a yearly rinse.
The tradeoff is obvious. You'll empty it fast if you have a large garden. A weekend of watering in July can drain a full barrel in one session.
If that sounds like you, start with two barrels connected by a linking hose. They fill simultaneously and give you double the reserve.
Repurposed IBC Tote
An IBC tote is a 275-gallon industrial container. They're often available on marketplace sites for $50 to $100. That's a fraction of what a comparable rain tank costs, and the steel cage makes it surprisingly durable.
The downsides are real. They're ugly, they look like industrial chemical containers, and they take up a lot of lateral space. The plastic is food-grade only if you source it carefully.
Never use a tote that previously stored anything toxic. Also be aware that many municipalities restrict visible above-ground containers over a certain size. Check with your zoning office first.
Large Above-Ground Tank / Cistern
For serious rainwater harvesting, a 500 to 1,000 gallon tank is the endgame. These are often made of UV-stabilized polyethylene and come in sleeker, low-profile shapes. Costs run $800 to $2,500 installed.
You're getting a few big perks here. The tank holds enough water to carry you through a long dry spell. Pressure is better too, since taller tanks provide more natural head.
But you will need a proper concrete or paver base. A full 1,000-gallon tank weighs about 8,000 pounds. That's not something you set on bare grass.
| Setup | Capacity | Cost Range | Best For |
|---|---|---|---|
| Standard barrel | 50-55 gal | $60-$150 | Small gardens, beginners |
| IBC tote | 275 gal | $50-$100 | Budget-focused, large flat yards |
| Above-ground tank | 500-1,000+ gal | $800-$2,500+ | Permanent setups, serious watering |
How Much Water Can You Catch? Run the Quick Numbers Before You Buy
You already know the basic formula. Roof area times rainfall times 0.62 equals gallons. That number matters, because it tells you whether your chosen container is oversized or undersized.
Let's walk a real example. Say your house has a 1,200-square-foot roof. A one-inch rain gives you about 744 gallons.
So a standard 55-gallon barrel would need to overflow over 13 times before it finally stopped raining. That's not a complaint about the barrel, it's a reality check about scale.
A better approach: match your storage to your watering needs. If you typically use three or four watering cans per evening, a single barrel is perfect since it recharges overnight. If you run a drip irrigation system twice a week, you'll want 200 to 300 gallons of standing reserve.
One more thing to consider is head pressure. A barrel on the ground produces just enough pressure to keep a soaker hose slowly weeping. If you want a sprinkler or a spray nozzle, you'll need a pump.
A simple submersible utility pump adds about $60 to $100 and makes the system dramatically more usable.
Step-by-Step: Installing a Basic Rain Barrel System in a Weekend
The whole install takes a couple of hours. You don't need special tools or a plumber. Here's the workflow that has consistently proven reliable in our research.
Step 1: Clean your gutters and downspouts. This is the step people skip. A clogged gutter means water spills over the edge and never reaches your barrel. It also washes years of rotted leaf matter into your collection.
Clean everything at least a week before your first fill.
Step 2: Set your barrel on level ground. Place two concrete pavers or a few cinder blocks under your barrel. The extra elevation serves two purposes: it keeps the container off wet soil, and it gives you gravity pressure for a watering can to fit under the spigot.
Step 3: Install a downspout diverter. Most kits include a universal diverter that snaps onto your existing downspout. You cut a small section out of the downspout with a hacksaw. Then you slide the diverter into place and secure it with screws.
This is the only semi-invasive step, and it takes about 20 minutes.
Step 4: Attach the flexible downspout hose. The diverter has an outlet that connects to a short length of flexible hose. That hose curves around to the top of your barrel through the inlet screen. The screen catches leaves; the barrel fills from the top.
Step 5: Connect the overflow hose. Look for a threaded outlet near the top of your barrel, usually called the overflow port. Screw in a hose adapter and run the hose away from your foundation. We'll cover this more in the next section because it's genuinely important.
Step 6: Test with a garden hose. Before you wait for real rain, squirt water down your downspout. Watch the barrel fill. Confirm the diverter actually directs water, and confirm the overflow doesn't spray sideways into your siding.
The Overflow Problem: Keep Water Away From Your Foundation (And Your Neighbor's Yard)
Here's the detail that separates a tidy installation from a nightmare. When your barrel reaches capacity, the water has to go somewhere. If you let it just spill out the top, you're dumping gallons of water against your foundation wall.
That's a slow path to basement leaks and cracked slabs.
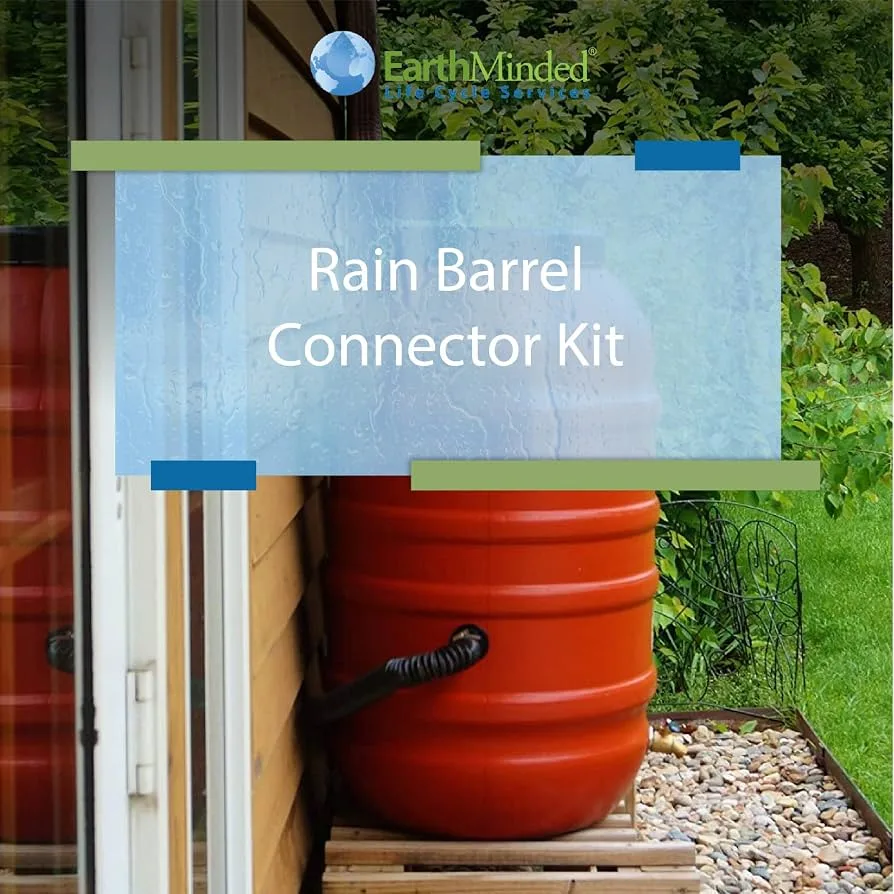
Image source: Web (Bing) / twlsolutions.co.za (Web image (fair-use with source credit))
The manufacturer-spec approach is simple. Connect a hose to the overflow port and run it downhill, at least six feet away from the foundation. You can direct it into a garden bed, a rain garden, or even back into your original downspout drain pipe.
There's also a less obvious concern. Your neighbors. If your overflow hose dumps onto their property, that can quickly become a legal headache.
Municipal stormwater ordinances in many areas prohibit directing concentrated roof runoff onto neighboring land.
A final tip from aggregate user feedback: don't point the overflow directly at a patio. It will create a persistent puddle that becomes a mosquito breeding zone. Instead, extend the hose into a planted area or a gravel trench.
Let the earth absorb it.
Seasonal Maintenance: Winterizing, Mosquito Control, and Algae Prevention
A rain barrel is nearly maintenance-free. But "nearly" does a lot of work in that sentence. Three issues will come up every year if you don't stay ahead of them.
Mosquitoes are problem number one. A single barrel of standing water can hatch hundreds of mosquitoes in a week. The fix is a fine mesh screen on your barrel inlet and a sealed lid everywhere else. If you spot larvae, do not dump them into your garden.
Drain the barrel, scrub the inside, and refit your screen.
Algae is problem number two. You'll notice it as a green film on the inside walls anywhere light sneaks through. The solution is to block light. Dark barrels are best.
If yours is light-colored, paint it or wrap it in a black tarp. Aggregated reviews report that a small amount of food-grade hydrogen peroxide at the start of the season also helps keep things clear.
Winter is problem number three. Frozen water expands. A barrel full of ice will crack, split its spigot, and sometimes pop the bottom seam. In freezing climates, drain your barrel completely and disconnect the hoses before the first hard frost.
Store the barrel upside down or indoors. The diverter can stay on the downspout, but remove any section that holds standing water.
If you notice your lawn looking unusually stressed after a dry stretch, it might be worth checking for signs of grub damage before you increase your watering schedule. A healthy lawn thirsty for water and a lawn attacked by grubs look very similar. Knowing the difference can save you a season of wasted effort.
Legal and Safety Checks: When You Need a Permit and When You Don't
Permits usually aren't required for a single 55-gallon barrel. Rules change once you go over 200 gallons or bury anything. Call your local zoning office first.
Ask specifically about rainwater harvesting.
Many western states still regulate rainwater rights. Confirm your area allows it, even for garden use. Most jurisdictions do, but a quick phone call avoids a headache.
Never connect a barrel to your household plumbing without a licensed plumber and a backflow preventer. That requirement is non-negotiable in most municipalities.
Common Mistakes That Ruin a Rain Barrel Setup (And What to Do Instead)
- Skipping a first-flush diverter. Early rain washes bird droppings and grit off the roof. A diverter routes that dirty water away before it reaches your barrel.
- Pointing the overflow at the foundation. It erodes soil and invites basement leaks. Run the overflow hose at least six feet away from the house.
- Leaving the barrel open. Stagnant water breeds mosquitoes. Keep the inlet screened and the lid securely sealed.
- Forgetting winter drain-down. Ice expands and cracks plastic. Drain and disconnect before the first hard freeze.
Real-Life Scenarios: Three Homes, Three Different Rainwater Setups
In Austin, two linked 55-gallon barrels watered a 300-square-foot vegetable garden all summer. Total cost was about $180 in parts.
In Portland, a 275-gallon IBC tote kept a lawn green through the dry stretch. The family checked for common lawn pests before adjusting their watering schedule.
In Vermont, a 1,000-gallon above-ground tank irrigated a quarter-acre crop field. The owner reported it paid for itself within two growing seasons.
Your Decision Guide: A Simple Flow to Pick the Right System for Your Situation
- Gauge your demand. A few watering cans each day means one barrel. Soaker hoses or sprinklers mean a tote or tank.
- Check rainfall. Rainy region? Go bigger. Dry region? A portable barrel may last all season.
- Confirm local codes. Some towns cap tank sizes. Others restrict irrigation timing entirely.
- Plan for winter. In freezing climates, smaller portable barrels are easier to drain and store.
If your lawn is part of the plan, keep the grass healthy first. Stressed turf attracts pests, so know whether you're dealing with a watering problem or a grub problem. You can also review when to apply grub control to stay ahead of the damage.
Frequently Asked Questions
Do I need a permit for a rain barrel?
Usually not for a single 55-gallon barrel. Regulations kick in for larger tanks and any buried system. Check with your local planning office before you buy.
Can I drink rainwater from my roof?
No. Roof runoff carries bird droppings and dust. Safe drinking water requires filtration, UV treatment, and regular lab testing.
For garden and cleaning uses, it's perfectly fine.
How many rain barrels should I use?
Start with one barrel on your most-used downspout. If it overflows during a normal storm, add a second linked barrel. Demand determines the right number.
What happens when my rain barrel fills up?
The overflow port sends water through a hose pointed away from the foundation. The system works passively. Your gutters stay clear and the barrel never pours over the top.