
You've looked out at your lawn and seen it, the dreaded yellowing, the stubborn brown patches, or maybe just a general lack of vibrant green. It stinks, right? Getting your grass back to its lush, healthy state can feel like a huge puzzle. But don't worry, figuring out "how can I get my grass back to green?" is totally doable when you know where to look.
The key is understanding what’s going on under the surface. Grass health depends on a few core things: good soil, the right amount of water, proper mowing, and protection from pests and diseases. Our research indicates that addressing the root cause, rather than just the symptom, is what leads to lasting results. Manufacturers' maintenance specifications often suggest a soil pH between 6.0 and 7.0 for most common turfgrass types, which is a good starting point for investigation.
Why Is My Grass Yellow or Brown? Diagnosing Lawn Troubles
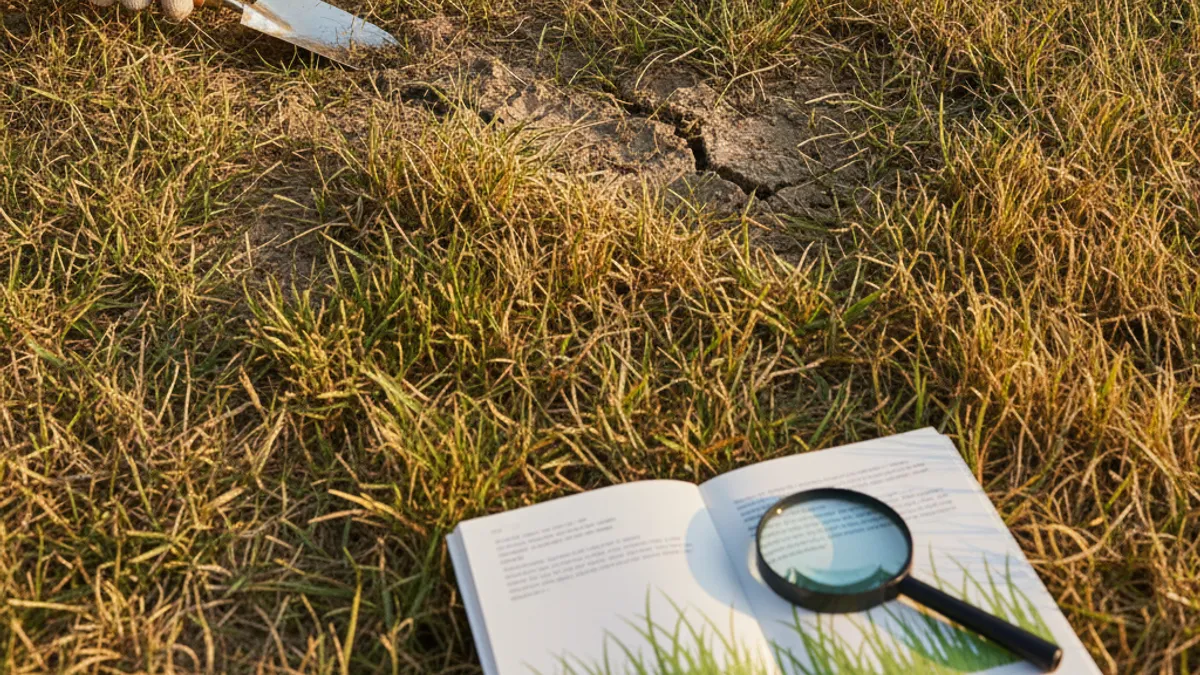
Is your lawn looking less like a putting green and more like a sun-baked desert? That yellowing or browning usually isn't just one thing; it's a sign that your grass is stressed. Thinking of it like a doctor's visit for your lawn, we first need to figure out why it's sick before we can prescribe the cure. A quick glance is rarely enough.
We need to dig a little deeper, both literally and figuratively, to find the real culprit.
This diagnostic phase is crucial. Without it, you might use the wrong fertilizer, water too much or too little, or try to fight a made-up pest. That’s not only a waste of time and money but can actually make your lawn’s condition worse. So, let’s break down the common reasons your grass might be suffering.
Understanding Soil Problems: pH and Nutrients
Your soil is the foundation for everything your grass needs to thrive. If that foundation is shaky, your lawn will show it. One of the biggest soil issues is an imbalanced soil pH. This is essentially how acidic or alkaline your soil is, measured on a scale from 0 to 14, with 7 being neutral.
Most popular turfgrasses, like Kentucky Bluegrass or Fescue, do best in soils with a slightly acidic to neutral pH, generally between 6.0 and 7.0. When your soil pH is too high (alkaline) or too low (acidic), it locks up essential nutrients, making them unavailable to your grass even if they're present. This nutrient lockout is a primary reason for yellowing, often called chlorosis.
Beyond pH, your soil needs a balanced supply of macronutrients, mainly nitrogen (N), phosphorus (P), and potassium (K), and various micronutrients. If you haven't tested your soil, you might be missing key elements or have too much of something, which can also cause problems.
Identifying Watering Issues: Too Much or Too Little?
Watering is a tricky balancing act, and it’s one of the most common places homeowners go wrong. Both overwatering and underwatering can lead to yellowing and browning.
- Underwatered Grass: When grass doesn't get enough water, it starts to conserve what little it has. Blades will often turn a dull or grayish-green before becoming completely brown and wilting. You might also see footprints remain visible on the lawn long after you've walked on it, a sign the grass blades lack the moisture to spring back. Extended drought conditions will cause widespread browning.
- Overwatered Grass: This sounds counterintuitive, but too much water can be just as damaging. Constantly soggy soil deprives grass roots of oxygen, essentially drowning them. This stress can lead to yellowing, thinning, and an increased susceptibility to fungal diseases. Overwatering can also leach essential nutrients from the soil.
The right amount of water depends on your grass type, soil type, and local climate. As a general guideline, most lawns need about 1 to 1.5 inches of water per week, applied in one or two deep watering sessions rather than short, frequent sprinkles.
Recognizing Mowing Mistakes
How you mow your lawn has a surprisingly big impact on its health and appearance. Incorrect mowing practices are frequent contributors to a lawn that’s struggling to stay green.
- Mowing Too Short: Cutting your grass too short, especially during hot weather, shocks the plant and scalps the lawn. This removes too much of the green blade, exposing the soil to the sun and increasing stress. Shorter grass also develops shallower root systems, making it less drought-tolerant and more prone to weeds. For most cool-season grasses, a mowing height of 2.5 to 3.5 inches is recommended, while warm-season grasses can often be cut a bit shorter.
- Dull Mower Blades: A dull mower blade doesn't cut grass cleanly; it tears it. This tearing action creates jagged edges on the grass blades, which heal slowly, turn brown, and leave your lawn looking ragged and sick. Dull blades also make the grass more vulnerable to disease and pests.
- Mowing Wet Grass: Blades of grass are more prone to disease when cut while wet. It can also lead to clumping, which smothers the grass underneath.
Regularly check your mower blades for sharpness. You should aim to cut no more than one-third of the grass blade’s length at a time to avoid stressing the plant.
Spotting Pests and Diseases
Even with perfect soil, watering, and mowing, your lawn can be attacked by unwelcome guests. Pests and diseases are a major cause of unhealthy lawns, manifesting as brown patches, rings, or thinning areas.
- Common Pests: Grubs are one of the most destructive lawn pests. These C-shaped larvae feed on grass roots, causing large, irregular dead patches that can be easily lifted like a carpet. Chinch bugs are another nuisance, sucking the sap from grass blades and causing irregular patches of yellowing or browning, especially in sunny areas. Armyworms and sod webworms can also chew through grass blades.
- Common Diseases: Fungal diseases are prevalent, especially in humid conditions. Dollar spot causes small, straw-colored spots about the size of a silver dollar. Brown patch is a more serious fungal disease that creates circular, brown patches that can grow larger, sometimes with a dark border. Powdery mildew often appears as a white, powdery coating on grass blades, mainly in shady, humid areas.
Identifying the specific pest or disease is critical because treatments vary widely. A close inspection of the affected areas, looking for the organisms themselves or characteristic damage patterns, is the first step in diagnosis.
Quick Wins: Immediate Fixes for a Greener Lawn
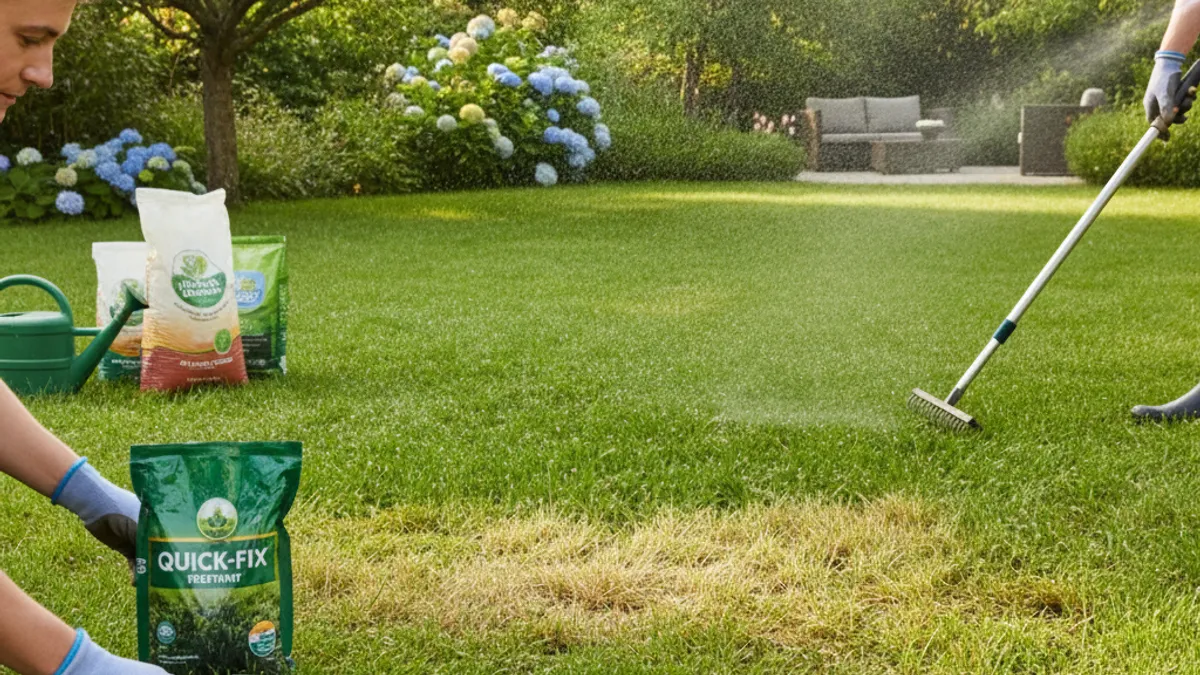
Sometimes, you just want to see some green again, fast. While a truly healthy lawn takes time and consistent care, there are a few things you can do to give your grass a visual boost and start the recovery process. These methods can help improve the aesthetic of your lawn quickly, but it's important to remember they often treat the symptoms, not always the underlying causes that we'll dive into next.
Think of these as your lawn's emergency first aid. They can help you get through a tough spot or look presentable for an event, but true long-term greenness comes from addressing the deeper issues.
Here are a few immediate steps to consider:
- Watering Boost: If you suspect underwatering is the main issue and the weather allows, a good, deep watering session can revive wilting grass within hours. Aim for about 1 to 1.5 inches of water, ensuring it soaks deep into the soil to reach the grass roots.
- Quick-Release Nitrogen Fertilizer: For a rapid green-up, a fertilizer with a high percentage of quick-release nitrogen (the first number in the N-P-K ratio) can provide a noticeable color change in a few days. Products with urea are common examples. However, be cautious: applying too much, especially without knowing your soil's needs, can burn the grass or promote excessive top growth at the expense of root health. Always follow label instructions precisely.
- Light Raking: In areas with minor thatch buildup or dead grass blades, a gentle raking can help remove the surface debris, allowing more light and air to reach the living grass. This is more of an aesthetic fix, but it can make a difference in how green the lawn appears overall.
- Manual Weed Removal: For scattered weeds, pulling them by hand can provide an instant visual improvement by removing the brown or yellow offenders. This is most effective when the soil is moist, making it easier to pull the entire root system.
These methods offer a temporary fix. For sustainable, long-term green grass, you'll need to implement a more comprehensive care plan that addresses the root causes of your lawn's decline. That's exactly what we'll cover in the upcoming sections.
Step 1: Assess Your Lawn's Specific Issues
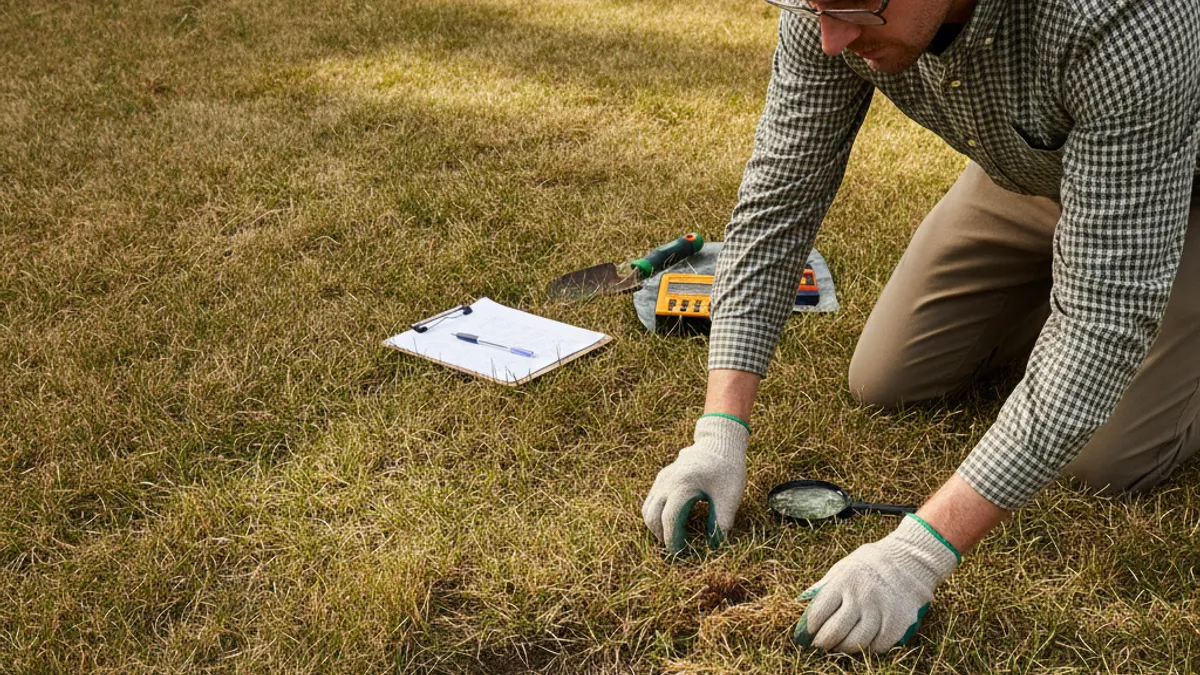
Before you reach for a bag of fertilizer or a hose, stopping to understand why your grass is struggling is the most critical step. This is where we move beyond the quick fixes and get to the heart of the problem. A healthy lawn is a complex ecosystem, and what works for one might not work for another. So, think of this as your lawn's check-up and diagnosis station.
This phase involves observation and, ideally, testing. You need to gather clues about your soil, your watering habits, your mowing routine, and any visible signs of pests or diseases. It’s like being a detective for your turf.
Understanding Soil Problems: pH and Nutrients
Soil is the literal bedrock of a thriving lawn. If your soil isn't happy, your grass won't be either. The two main culprits in soil health are its pH level and nutrient availability.
Soil pH is a measurement of how acidic or alkaline your soil is, on a scale of 0 to 14. A neutral pH is 7. Most common lawn grasses, like Kentucky Bluegrass, Fescues, and Perennial Ryegrass, prefer a slightly acidic to neutral range, typically between 6.0 and 7.0. If your soil pH is too high (alkaline, above 7) or too low (acidic, below 6), it directly impacts your grass's ability to absorb nutrients from the soil, even if those nutrients are present.
This is often why grass turns yellow, a condition known as chlorosis, even when fertilized.
Beyond pH, your soil needs a balanced diet of essential nutrients. The big three are Nitrogen (N) for green leafy growth, Phosphorus (P) for root development, and Potassium (K) for overall plant health and stress tolerance. Deficiencies or excesses in these, as well as micronutrients like iron, can all lead to discolored or unhealthy grass.
The best way to understand your soil's needs is to get a soil test. You can get kits from your local garden center or, for more comprehensive results, through your county's cooperative extension office. These tests typically reveal your soil’s pH, N-P-K levels, and other important indicators.
Identifying Watering Issues: Too Much or Too Little?
Water is life for grass, but it's a classic case of "too much of a good thing can be bad." Both underwatering and overwatering can devastate your lawn and lead to the sad, discolored patches you're seeing.
- Underwatered Grass: When grass doesn't get enough water, it starts to shut down to conserve moisture. Blades will turn a dull, grayish-green before progressing to straw-like brown. Another tell-tale sign is footprints: if your steps remain visible on the lawn long after you walk across it, the grass blades lack the turgor pressure (moisture) to spring back. Prolonged drought will cause widespread browning and dormancy.
- Overwatered Grass: This is a more insidious problem because it seems counterintuitive. Constantly waterlogged soil suffocates grass roots by displacing oxygen. Root rot diseases thrive in these conditions, and the stressed grass can turn yellow. Overwatering also washes away vital nutrients and can make the lawn more susceptible to fungal diseases and weed invasion.
The amount of water a lawn needs varies greatly depending on the type of grass, soil composition, and your local climate. Generally, most lawns benefit from about 1 to 1.5 inches of water per week. The key is how you apply it: deep and infrequent watering is far better than light, frequent sprinklings. Deep watering encourages roots to grow deeper into the soil, making the grass more resilient to drought.
Shallow watering promotes shallow roots, which are more easily stressed.
Recognizing Mowing Mistakes
Your lawn mower isn't just a tool; it's a surgical instrument for your grass. How you use it directly impacts grass health, and common mistakes can actively contribute to a less-than-green appearance.
- Cutting Too Short: Scalping your lawn, or cutting it significantly shorter than recommended for its type, is a major stressor. It removes too much of the green leaf blade, which is essential for photosynthesis (the grass's food-making process). This exposes the soil to harsh sun, increasing evaporation and heat stress. It also hinders root development, making the grass weaker and more vulnerable.
- Dull Mower Blades: This is a silent lawn killer. Dull blades don't cut grass cleanly; they tear it. This ragged tearing leaves the grass blades exposed and damaged, which then turns brown and creates an unsightly, unhealthy look. These torn edges also provide entry points for fungi and diseases.
- Mowing When Wet: Cutting wet grass can clog your mower, create uneven patches, and, most importantly, spread fungal diseases throughout your lawn. The wet blades are more susceptible to infection, and disease spores can easily be transferred from one area to another.
The National Turfgrass Evaluation Program (NTEP) provides recommended mowing heights for various grass varieties, often suggesting heights between 2.5 and 3.5 inches for cool-season grasses. Always ensure your mower blades are sharpened regularly, typically at least once per growing season, or more often if you notice tearing.
Spotting Pests and Diseases
Even if you've got the watering and mowing down pat, your lawn can fall victim to microscopic invaders and unwelcome critters. Pests and diseases are a major cause of brown patches, thinning turf, and overall poor lawn health. Identifying the specific culprit is half the battle in treating the problem.
- Pests: Think of pests as the biting, chewing, or root-sucking enemies of your grass. Common culprits include grubs, which are the larval stage of scarab beetles. They tunnel through the soil and chew grass roots, causing large, irregular dead patches that often appear in late summer or fall. You can test for them by cutting a 1-square-foot section of turf and trying to lift it; if it comes up easily and you see C-shaped white grubs, you likely have a grub problem. Chinch bugs are another common pest, especially in warmer climates. They feed on grass sap, causing irregular yellowing or browning that can spread rapidly, especially in sun-loving grasses.
- Diseases: Fungal diseases are the most common type of lawn disease, often exacerbated by excess moisture, humidity, and improper air circulation. Dollar Spot creates small, distinct patches of yellow or straw-colored grass that look like the size of a silver dollar. Brown Patch is more serious, forming circular or irregular brown areas that can merge into larger dead zones, often with a distinct dark purplish-brown border. Powdery Mildew appears as a white, powdery coating on grass blades, usually in shady, damp areas with poor air movement.
Diagnosing these issues often requires careful observation. Look for specific patterns of damage: are the dead spots circular, irregular, or scattered? Are there visible insects on the grass blades or in the soil? Are there any unusual textures or colors on the grass itself?
Sometimes, a magnifying glass can help identify small insects or fungal spores.
Step 2: Tailoring Your Treatment Plan

Once you've got a clearer picture of what's ailing your lawn, whether it's nutrient deficiencies, watering woes, pest infestations, or fungal diseases, it's time to build your personalized treatment strategy. This step is all about applying the right solutions for the specific problems you've identified. There's no one-size-fits-all approach because every lawn is unique.
This is where you translate your diagnosis into action. The goal isn't just to make the grass green again, but to restore its fundamental health so it can stay that way. We'll look at the most common treatments and how to use them effectively.
Choosing the Right Fertilizers for Your Grass Type
Fertilizing is key to providing your lawn with the nutrients it needs to grow strong and green, but the type and timing of fertilizer are critical. Applying the wrong fertilizer, or applying it at the wrong time, can do more harm than good. The first step is knowing your grass type because different grasses have different nutritional needs and thrive in different conditions.
- Understanding N-P-K: Fertilizer bags always list three numbers, like 10-10-10. These represent the percentage by weight of Nitrogen (N), Phosphorus (P), and Potassium (K).
- Nitrogen (N): This is the primary nutrient for green, leafy growth. If your grass is pale or yellowing and you've ruled out other issues, it likely needs more nitrogen.
- Phosphorus (P): Essential for root development, seed germination, and establishment. Most established lawns have sufficient phosphorus in the soil, and many regions regulate its use to prevent water pollution. It's often omitted or in low amounts in fertilizers for established lawns.
- Potassium (K): Supports overall plant health, stress tolerance (drought, heat, cold), and disease resistance. A lawn deficient in potassium might struggle during extreme weather.
- Timing is Everything: Different grass types have different growing seasons. Cool-season grasses (like Fescue, Ryegrass, Bluegrass) are most actively growing in spring and fall, so that's when they benefit most from fertilization. Warm-season grasses (like Bermuda, Zoysia, St. Augustine) thrive in summer heat, so they are best fertilized then. Applying fertilizer too late in the fall to cool-season grasses can encourage disease.
- Slow-Release vs. Quick-Release:
- Quick-Release Nitrogen: Provides an immediate green-up because it's readily available to the grass. However, its effects are short-lived, and it can be easily leached out of the soil, potentially causing pollution. Over-application can also burn the grass.
- Slow-Release Nitrogen: Feeds the lawn over a longer period (e.g., 6-8 weeks or more), providing a more consistent supply of nutrients and reducing the risk of burning or leaching. It's generally considered superior for sustained lawn health. Many modern lawn fertilizers incorporate a mix of both.
- Organic vs. Synthetic:
- Synthetic Fertilizers: These are chemically manufactured and provide nutrients in a readily available form. They offer precise nutrient ratios and fast results.
- Organic Fertilizers: Derived from natural sources like compost, manure, or bone meal. They release nutrients slowly as they decompose, improving soil structure over time and reducing the risk of burning. They typically have lower N-P-K ratios but contribute to a healthier soil ecosystem.
For a general feeding of an established lawn, a fertilizer with a balanced N-P-K ratio or one slightly higher in nitrogen (for greening) is often recommended. Always perform a soil test to determine your specific needs. As of 2026, many lawn care professionals recommend fertilizers with at least 50% slow-release nitrogen.
Tackling Weeds: Methods and Timing
Weeds are the unwelcome guests that steal water, nutrients, and sunlight from your desirable grass. Getting rid of them is essential for a dense, green lawn. The approach you take will depend on the type of weeds, their stage of growth, and your preferred method.
- Identify Your Weeds: The first step is knowing what you're up against. Are they broadleaf weeds (like dandelions or clover) with wide leaves, or grassy weeds (like crabgrass or nimblewill) that look similar to turfgrass? Knowing this helps you choose the most effective herbicide or method.
- Pre-Emergent Herbicides: These are applied before weed seeds germinate. They create a barrier in the soil that prevents weed seedlings from growing. Pre-emergent herbicides are most effective for preventing annual grassy weeds like crabgrass. They need to be applied at the right time, typically in early spring before soil temperatures consistently reach 50-55°F, and again in the fall for certain weeds.
- Post-Emergent Herbicides: These are applied after weeds have already sprouted. They are designed to kill existing weeds. Post-emergent herbicides can be selective (targeting specific types of weeds, like broadleaf weeds, without harming grass) or non-selective (killing all vegetation, like glyphosate formulas). For broadleaf weeds, herbicides containing 2,4-D, MCPP, or dicamba are common.
- Timing for Effectiveness: Herbicides work best when weeds are actively growing and are young. Applying them during extreme heat or drought can be less effective and may stress your lawn. Always read and follow the product label carefully regarding application rates, timing, and safety precautions.
- Manual Removal: For scattered weeds, pulling them by hand is an effective, chemical-free method. It's best done when the soil is moist, as this makes it easier to pull out the entire root system. This is particularly important for weeds with deep taproots, like dandelions.
- Cultural Controls: A healthy, dense lawn is the best defense against weeds. Proper mowing, watering, and fertilizing help your grass outcompete weeds for resources. Dethatching and aeration also improve turf health, making it harder for weeds to establish.
It's important to note that relying solely on herbicides can disrupt the natural soil ecosystem. A combination of cultural practices and targeted herbicide use is often the most sustainable and effective approach.
Treating Pests and Diseases Effectively
Once you've identified the specific pest or disease plaguing your lawn, you need to choose the right treatment. Using the wrong product or method won't be effective and could even harm your grass or beneficial organisms. Product labeling is your best friend here, providing crucial details on application.
Pest Treatments:
- Grubs: For grub infestations, look for insecticides that target these root feeders. Products containing active ingredients like imidacloprid, chlorantraniliprole, or trichlorfon are common. Application timing is critical; they are most effective when grubs are actively feeding near the soil surface, typically in late summer or early fall, or as a curative treatment when damage is first noticed. Some products also offer preventative benefits if applied in early summer.
- Chinch Bugs: These tiny insects are tough to spot but can cause widespread damage. Insecticides with pyrethroid-based active ingredients (like bifenthrin or lambda-cyhalothrin) are often effective. Proper application involves watering the area hours before treatment to encourage chinch bugs to move up from the thatch layer, making them more accessible to the insecticide.
- General Insecticides: Always check the product label to ensure it's labeled for lawns and specifically for the pest you're targeting. Some broad-spectrum insecticides can harm beneficial insects like pollinators or earthworms, so use them judiciously.
Disease Treatments:
- Fungal Diseases: Fungicides are used to treat lawn diseases. They come in various types: preventative (applied before disease appears, like those with chlorothalonil) and curative (applied after symptoms showing, like those with propiconazole or myclobutanil). Often, a combination of cultural practices and fungicides is most successful.
- Application Tips: Most fungicides work best when applied preventatively, especially during periods of high humidity or when conditions favor disease development. For curative treatments, ensure thorough coverage of affected areas. Watering the lawn after application can help the fungicide penetrate the grass blades and soil.
Remember that integrated pest management (IPM) is the most sustainable approach. This means using chemical treatments only when necessary and in combination with cultural practices that make your lawn less hospitable to pests and diseases in the first place.
Step 3: Watering and Mowing for a Greener Future
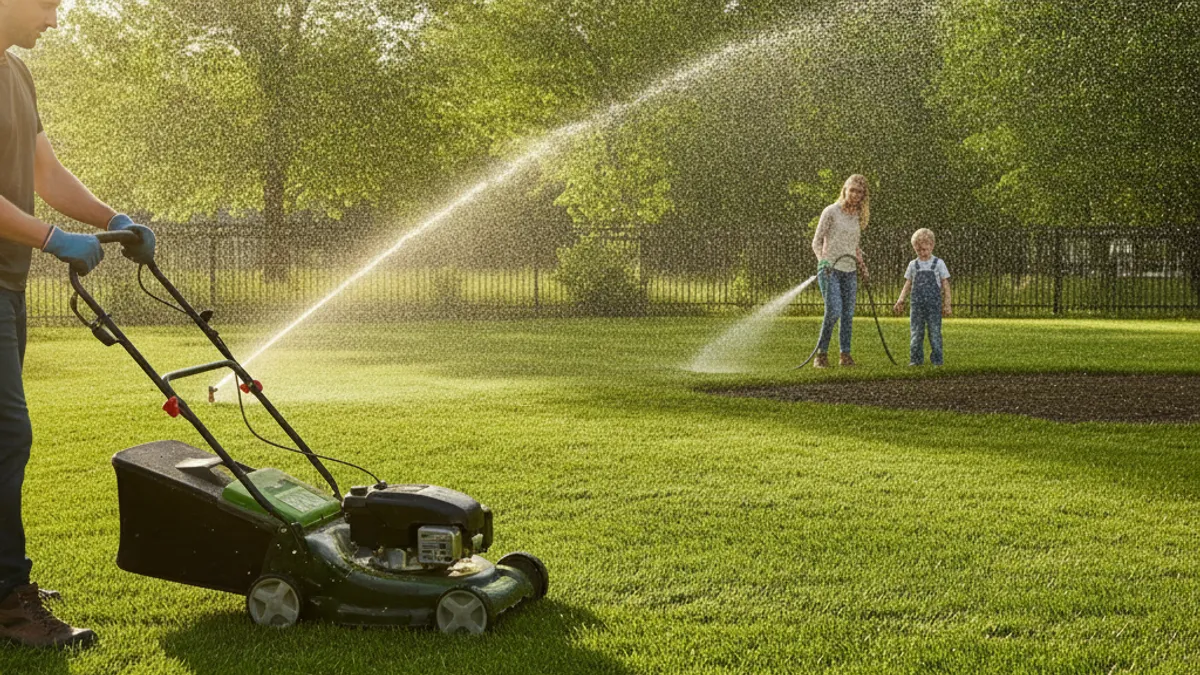
With your soil addressed, weeds managed, and any immediate pest or disease issues under control, it's time to focus on the ongoing, daily care that keeps your lawn healthy and green. Watering and mowing are the cornerstone practices for maintaining turf health. Doing them correctly means the difference between a struggling lawn and one that truly thrives.
Think of these as the daily vitamins and exercise for your grass. They don't provide the "cure" for a sick lawn, but they are absolutely essential for keeping a healthy lawn vibrant and preventing future problems. Consistent, proper technique here is your best defense.
Watering Wisely: Frequency, Duration, and Time
Getting your watering right is crucial for encouraging deep root growth and overall lawn resilience. As we touched on earlier, the goal is usually about 1 to 1.5 inches of water per week, but how you deliver that water makes all the difference.
- Deep and Infrequent: The most important principle is watering deeply but less often. This encourages grass roots to grow down into the soil in search of moisture, creating a more drought-tolerant lawn. Shallow, frequent watering promotes shallow root systems that are easily stressed by dry spells.
- How to Measure: Place a few empty tuna cans or rain gauges around your lawn while watering. Time how long it takes for the cans to collect about 1 inch of water. This tells you how long to run your sprinklers in each zone to deliver the correct amount.
- Best Time to Water: The ideal time to water your lawn is in the early morning, between 4 AM and 10 AM. This allows the grass to absorb the water before the heat of the day causes excessive evaporation. Watering in the morning also gives the grass blades time to dry off before nightfall.
- Why Avoid Evening Watering: Watering late in the evening or overnight can keep the grass blades wet for extended periods, creating an ideal environment for fungal diseases to thrive. It's best to allow the grass to dry out completely during the day.
- Adjusting for Conditions: Your watering needs will change based on weather, temperature, and rainfall. On hot, dry days, you might need to water more frequently or for longer durations. After significant rainfall, you can skip watering that week entirely. Look for signs of stress, like wilting or the footprints test mentioned earlier, to gauge if your lawn needs water.
- Sprinkler System Check: If you use an automated sprinkler system, regularly check that all heads are working correctly, covering the entire lawn evenly, and aren't watering sidewalks or driveways.
By following these watering principles, you're building a more robust and drought-tolerant lawn from the roots up.
Mowing Height and Blade Sharpness Matter
We’ve touched on mowing mistakes, but proper mowing isn't just about avoiding problems; it's actively contributing to a greener, healthier lawn. The height at which you cut and the sharpness of your blades are the two primary factors.
- Optimal Mowing Height: The correct height varies by grass type, but generally, you want to mow higher rather than lower.
- Cool-Season Grasses (Fescue, Ryegrass, Bluegrass): Typically thrive when cut at 2.5 to 3.5 inches. Taller grass shades out weed seeds, develops deeper roots, and tolerates stress better.
- Warm-Season Grasses (Bermuda, Zoysia): Can often be mowed shorter, sometimes as low as 0.5 to 1.5 inches, depending on the specific variety. However, even with these, avoiding cutting too short is important.
- The One-Third Rule: Never remove more than one-third of the grass blade’s total height in a single mowing. This prevents shocking the plant. If your grass grows too tall between mows (e.g., you go on vacation), you'll need to gradually lower the height over subsequent mowings rather than cutting it all at once.
- Blade Sharpness: This is non-negotiable. Sharp blades make clean cuts that heal quickly. Dull blades tear the grass, leaving ragged edges that turn brown, weaken the plant, and invite disease.
- How Often to Sharpen: A good rule of thumb is to sharpen your mower blades every 8-10 hours of mowing time, or at least twice per growing season. If your grass looks frayed or has brown tips after mowing, it’s time to sharpen.
- Clippings: Leaving grass clippings on the lawn (grasscycling) is beneficial. They decompose and return valuable nutrients to the soil, acting as a natural fertilizer. They can also help retain soil moisture. Just be sure not to leave clumps, which can smother the grass.
Implementing these meticulous mowing habits on a regular basis will pay dividends in the vibrancy and resilience of your lawn.
Step 4: Overseeding for Denser, Greener Growth
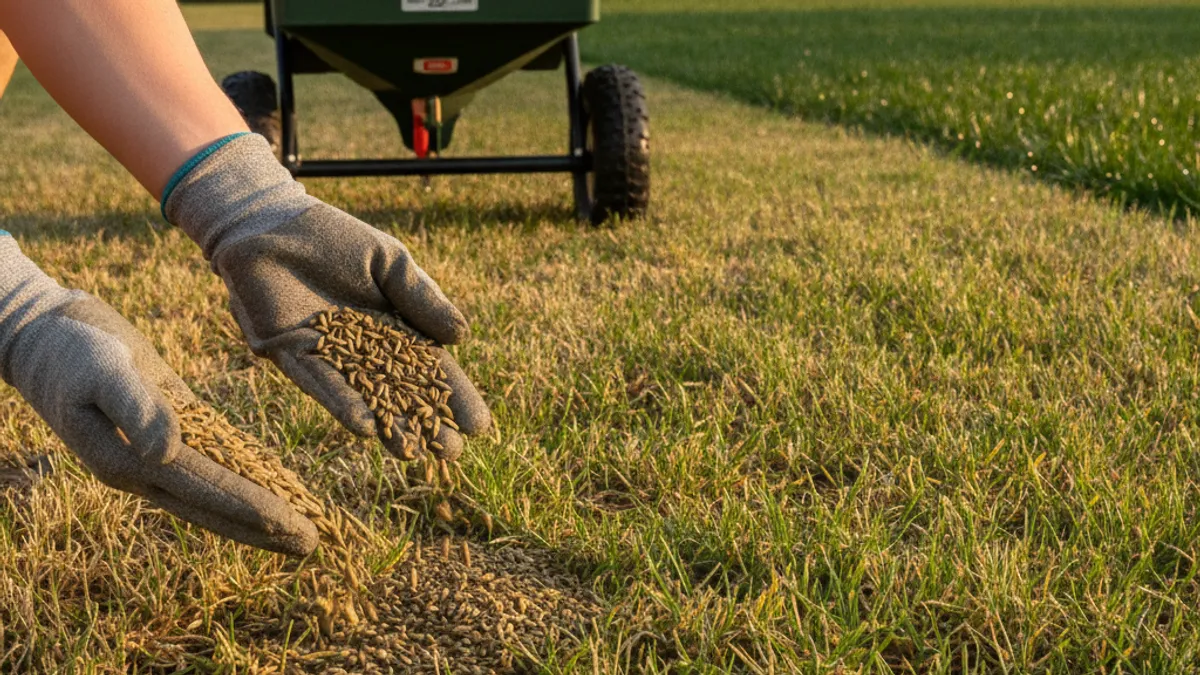
Once your lawn is on the road to recovery and you've established good watering and mowing practices, overseeding is an excellent way to fill in thin spots and create a denser, more uniform green carpet. This process involves sowing new grass seed directly into an existing lawn, without tearing up the turf. It’s a fantastic method for improving an established lawn’s appearance and health.
Overseeding is typically done in the fall for cool-season grasses and in late spring for warm-season grasses, coinciding with their optimal germination and growth periods. The goal is to introduce new, healthy grass plants that will fill out thinning areas, improve wear tolerance, and outcompete weeds.
Here’s a simplified workflow for effective overseeding:
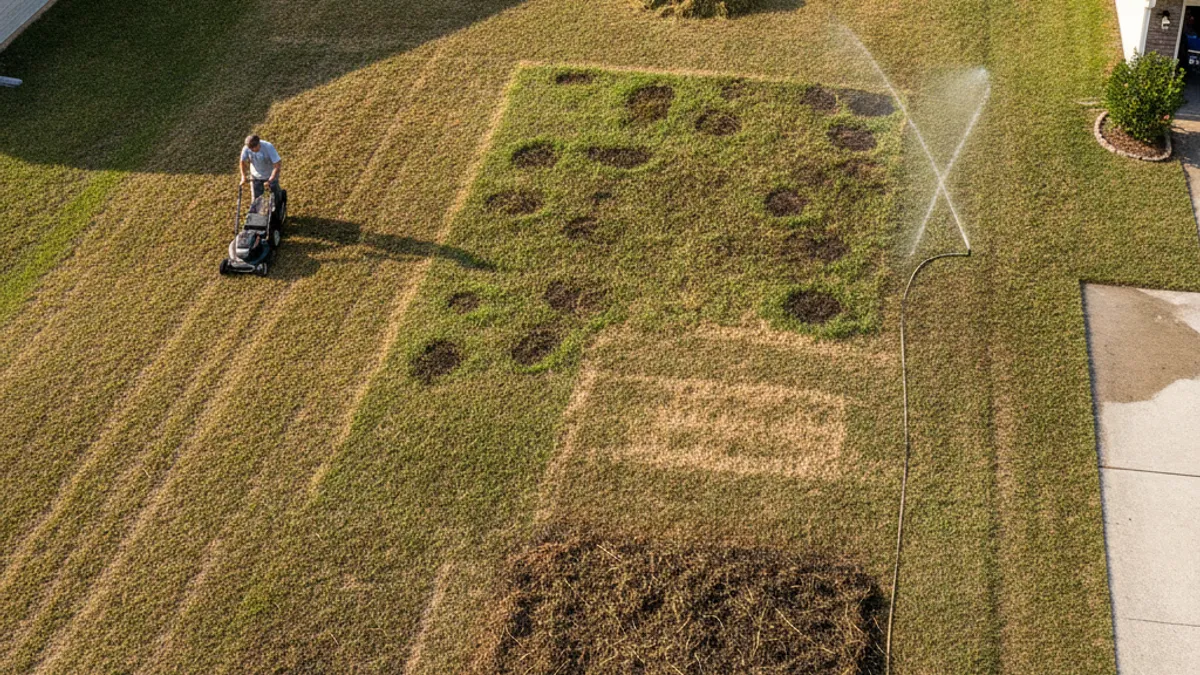
Prepare the Area:
- Mow Low: Mow your existing lawn to a lower height than usual. This helps the new seed reach the soil surface.
- Dethatch (if needed): If you have more than 1/2 inch of thatch (the layer of dead organic matter between the grass blades and the soil), dethatch or rake the lawn thoroughly. This is crucial for allowing the seed to make good contact with the soil.
- Aerate: Core aeration is highly recommended. It creates small holes in the soil that allow the new seeds to fall into, improving germination rates and helping the seeds access moisture and nutrients.
- Clean Up: Rake up any debris or excess thatch to ensure good seed-to-soil contact.
Select the Right Seed:
- Choose a high-quality grass seed blend that is suitable for your climate, light conditions (sun/shade), and intended use of the lawn. Often, overseeding with a mix of the same or a superior grass type is best. For example, if you have Fescue, choose a top-rated Fescue blend.
Apply the Seed:
- Use a spreader (broadcast or drop spreader) for even application. Follow the recommended seeding rate for your chosen grass type, typically between 4 to 8 pounds per 1,000 square feet.
- You can lightly rake the seed into the soil (about 1/4 inch deep) to further enhance seed-to-soil contact, but avoid burying it too deeply.
Maintain Moisture and Protection:
- Water Consistently: Keep the seeded area consistently moist until the new seedlings are established. This often means light, frequent watering (several times a day) for the first 1-2 weeks. Avoid letting the seed dry out.
- Limit Traffic: Keep foot traffic, pets, and mowing off the newly seeded areas until the grass reaches about 3 inches tall.
- Fertilize: Apply a starter fertilizer specifically designed to promote seed germination and root development shortly after seeding. These fertilizers are typically lower in nitrogen and higher in phosphorus.
Overseeding is a proactive way to thicken your lawn, improve its color, and reduce the space available for weeds to establish themselves.
Common Lawn Care Mistakes to Sidestep
Even with the best intentions, many homeowners fall into common traps that undermine their lawn care efforts. Avoiding these frequent missteps is just as important as implementing correct practices. Understanding where others often go wrong can save you time, money, and frustration.
These aren't just minor errors; some of these mistakes can actively harm your grass, reverse progress, or create ongoing problems that are difficult to fix later. Being aware of them puts you ahead of the game.
Here are some of the most common lawn care blunders:
- Mowing Too Short (Scalping): As mentioned before, this is a huge stressor. It weakens roots and exposes soil. Aim for the higher end of the recommended mowing height for your grass type.
- Overwatering: This leads to shallow roots, fungal diseases, and nutrient leaching. Most lawns get too much water, not too little. Check soil moisture a few inches down before you water.
- Fertilizing at the Wrong Time: Applying nitrogen-heavy fertilizers in late fall or summer to cool-season grasses can promote disease or growth when the grass should be slowing down or is heat-stressed. Always fertilize during the grass's active growing season.
- Using Dull Mower Blades: This tears grass, causing browning and disease, rather than clean cuts. Keep those blades sharp!
- Applying Herbicides Improperly: Not reading the label, applying during the wrong conditions (heat, drought), or using too much can kill your grass or fail to control the weeds. Selective herbicides are crucial for broadleaf weeds in lawns.
- Failing to Test Soil: Guessing about pH and nutrient levels means you might be applying the wrong amendments or fertilizers, leading to wasted effort and potentially worsening soil conditions.
- Not Aerating or Dethatching When Needed: Compacted soil and excessive thatch prevent water, air, and nutrients from reaching the roots, suffocating the grass. These practices are vital maintenance steps.
- Ignoring Early Signs of Pests/Diseases: Waiting until damage is widespread makes treatment much harder and more expensive. Early detection and intervention are key.
- Watering in the Evening: This creates a prime environment for fungal diseases by leaving grass blades wet overnight. Early morning watering is best.
- Compacting Soil with Heavy Foot Traffic: Especially when the ground is wet, constant heavy traffic can crush grass blades and compact the soil, hindering root growth.
By being mindful of these common pitfalls, you're much more likely to achieve and maintain the lush, green lawn you're aiming for.