Noticing yellow leaves on your tomatillo plants can be alarming, especially when you've been tending them carefully. If you're wondering why are my tomatillo leaves turning yellow, you're not alone. It's one of the most common issues tomatillo growers run into, and the good news is that most causes are fixable once you know what to look for.
The yellowing can mean several different things depending on which leaves are affected, how the discoloration spreads, and what your growing conditions look like. A soil pH outside the ideal 6.0 to 7.0 range, for example, can lock out nutrients even when they're present in the soil. Let's walk through the most likely causes so you can figure out exactly what's going on and get your plants back on track.
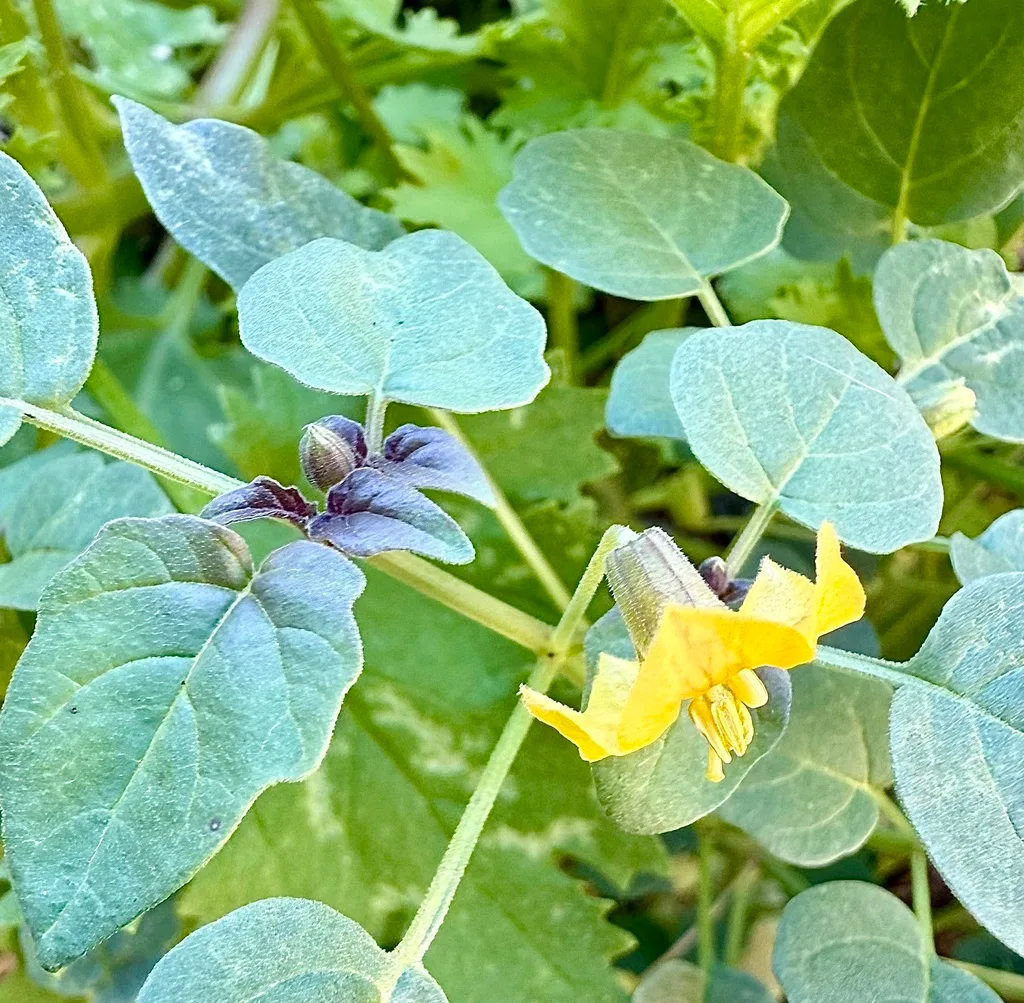
Image source: iNaturalist / Irene
Quick Answer
Tomatillo leaves turn yellow most often from nitrogen deficiency, overwatering, or iron chlorosis caused by high soil pH. Check which leaves yellow first. Older lower leaves point to nitrogen or phosphorus deficiency, while newer growth yellowing suggests iron or sulfur issues.
Test your soil moisture and pH to narrow it down fast. Most cases resolve with targeted fertilization or adjusted watering within one to two weeks.
The Most Common Causes of Yellow Tomatillo Leaves
Yellowing on tomatillo plants isn't a single problem. It's a symptom with multiple possible causes, and the fix depends entirely on what's driving it. Here are the six most common culprits we see in home gardens.
Nitrogen Deficiency: The Most Likely Cause
Nitrogen deficiency is far and away the most frequent reason tomatillo leaves turn yellow. Nitrogen is a mobile nutrient, meaning the plant pulls it from older leaves to feed new growth when supplies run low. That's why you'll see the bottom leaves yellowing first while the top of the plant still looks green.
Tomatillos are moderate feeders, and they're especially hungry during fruiting. Per University of California ANR guidance, nightshade-family crops like tomatillos benefit from nitrogen supplementation at planting and again when fruit begins to set.
Signs to watch for:
- Uniform yellowing starting on the oldest leaves
- Yellowing progresses upward through the plant
- Stunted growth and smaller fruit
- Leaves may eventually turn brown and drop
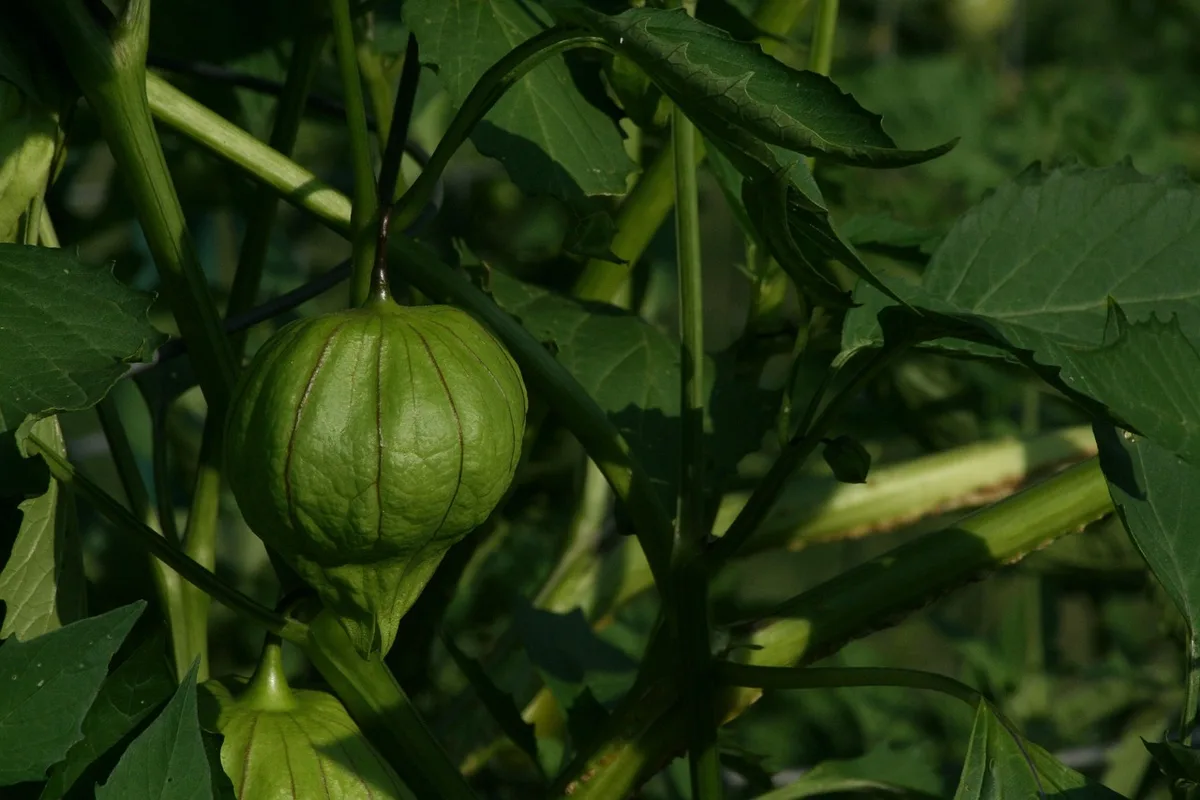
Image source: Pixabay / jhayse (Pixabay Content License)
Overwatering and Root Rot
Overwatering is the second most common cause, and it's easy to do, especially in heavy clay soils or containers without adequate drainage. When the soil stays waterlogged, the roots can't take up oxygen. They start to suffocate, rot sets in, and the plant can't absorb nutrients properly.
Phytophthora and Pythium are two soil-borne pathogens that thrive in waterlogged conditions. According to Cornell University's plant pathology resources, prevention through proper drainage is far more effective than treating root rot after the fact.
Signs to watch for:
- Yellowing across the entire plant
- Wilting even when the soil is wet
- Soft, mushy, brown roots instead of firm white ones
- A sour smell from the root zone
- Plant pulls easily from the ground
Image source: Pixabay / congerdesign (Pixabay Content License)
Iron Chlorosis and High Soil pH
Iron chlorosis happens when your soil pH is too high for the plant to absorb iron, even when iron is present in the soil. Tomatillos prefer a pH between 6.0 and 7.0. Once you creep above 7.5, iron availability drops sharply.
This is especially common in the alkaline soils found across the Southwest US and parts of the Midwest.
Unlike nitrogen deficiency, iron chlorosis shows up on the newest growth first because iron is an immobile nutrient. The telltale sign is bright yellow leaves with green veins, called interveinal chlorosis.
Signs to watch for:
- Yellowing on new, upper leaves first
- Distinct green veins against yellow tissue
- Stunted new growth
- Soil pH above 7.0 on a basic test kit
Underwatering and Heat Stress
Too little water causes yellowing just as often as too much. During hot spells above 90°F, tomatillos lose water through transpiration faster than their roots can replace it. The plant starts shutting down older leaves to conserve moisture.
Container-grown tomatillos are particularly vulnerable because pots dry out much faster. If you're growing in a 5-gallon container during a heat wave, you might need to water twice a day.
Signs to watch for:
- Yellowing and crispy leaf edges
- Soil pulling away from the sides of the pot
- Wilting during the hottest part of the day
- Leaves feel dry and papery
Pest Damage: Aphids and Sap-Suckers
Aphids are the most common pest on tomatillos. These tiny insects cluster on the undersides of leaves and suck out sap, causing yellowing, curling, and sticky honeydew deposits. A heavy infestation can weaken a plant significantly in just a few days.
Spider mites and whiteflies cause similar damage. They're harder to spot because they're smaller, but you'll often see fine webbing with mites or tiny white insects flying up when you disturb the plant with whiteflies.
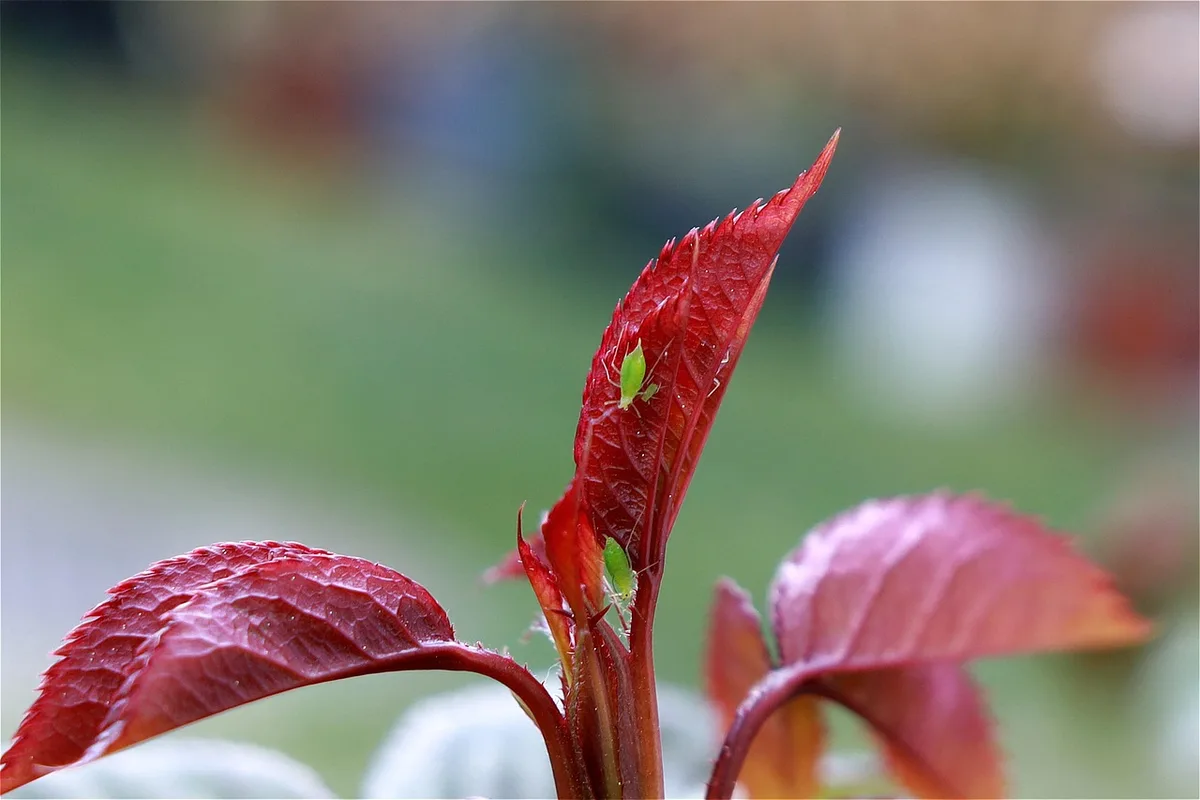
Image source: Pixabay / WFranz (Pixabay Content License)
Signs to watch for:
- Clusters of small insects on leaf undersides
- Sticky residue on leaves (honeydew)
- Curled or distorted new growth
- Fine webbing between leaves and stems
Disease: Mosaic Virus and Bacterial Wilt
Tomatillo mosaic virus causes mottled, yellow-green patterns on leaves. It spreads through infected seed, aphids, and mechanical contact. Bacterial wilt, caused by Ralstonia solanacearum, blocks the plant's vascular system, causing sudden wilting and yellowing, usually starting on one side of the plant.
Both diseases have no cure. Remove and destroy affected plants immediately. Do not compost them.
Signs to watch for:
- Mottled, mosaic-patterned yellowing (virus)
- Sudden wilting on one side of the plant (bacterial wilt)
- Brown streaks inside the stem when cut
- No improvement with watering or fertilization
How to Figure Out What's Wrong
Now that you know the main causes, let's walk through a simple diagnostic process. Each step narrows down the possibilities until you land on the right answer.
Step 1: Check Which Leaves Are Yellowing First
This is your single most useful clue. Note where the yellowing started.
- Older, lower leaves first. Likely nitrogen or phosphorus deficiency, or overwatering.
- Newer, upper leaves first. Likely iron chlorosis or sulfur deficiency.
- Random, scattered yellowing. Could be pest damage, disease, or environmental stress.
Step 2: Feel Your Soil
Stick your finger about 2 inches into the soil at the base of the plant.
- Soggy or muddy. You're overwatering. Check drainage and cut back immediately.
- Bone dry. Underwatering. Increase frequency and volume.
- Moist but not wet. Watering is probably fine. Look at nutrients or pests next.
Step 3: Look at the Yellowing Pattern
| Yellowing Pattern | Most Likely Cause |
|---|---|
| Uniform yellow, older leaves | Nitrogen deficiency |
| Yellow with green veins, new leaves | Iron chlorosis |
| Yellow edges, crispy texture | Underwatering or potassium deficiency |
| Yellow with brown spots | Fungal disease or calcium issue |
| Mottled, patchy yellow-green | Mosaic virus |
| Yellowing and wilting, wet soil | Root rot |
Step 4: Inspect the Undersides of Leaves
Flip over a few affected leaves and look closely. Use a magnifying glass if you have one.
- Tiny insects clustered along veins. Aphids, whiteflies, or spider mites.
- Sticky residue. Honeydew from sap-sucking insects.
- Fine webbing. Spider mites.
- Clean undersides. Problem is likely nutrient or water-related.
Step 5: Test Your Soil pH
A basic soil pH test kit costs a few dollars and saves a lot of guesswork. You can find them at any garden center or through your local cooperative extension office.
- pH below 5.5. Too acidic. Lime can help raise it.
- pH 6.0 to 7.0. Ideal range for tomatillos.
- pH above 7.5. Too alkaline. Elemental sulfur or iron sulfate can lower it.
For a more complete picture, many university extension services offer affordable soil nutrient testing. New Mexico State University's Cooperative Extension, for example, provides soil analysis covering pH, nitrogen, phosphorus, potassium, and micronutrients.
What to Do Based on Your Diagnosis
Once you've narrowed down the cause, the fix is usually straightforward.
Fixing Nitrogen Deficiency
Apply a balanced liquid fertilizer with a higher first number on the NPK ratio, like a 10-5-5 or fish emulsion. Water it in well around the base of the plant. For longer-term improvement, work 2 to 3 inches of compost into the top layer of soil.
You should see new green growth within 7 to 10 days if the roots are healthy.
Organic options like blood meal or alfalfa meal also work well. Apply about 1 to 2 tablespoons per plant, scratched into the soil surface and watered in. Avoid over-applying, as too much nitrogen gives you a lush green plant with very little fruit.
Correcting Overwatering and Drainage Issues
Stop watering immediately if the soil is soggy. Let it dry out for several days. If the plant is in a container, drill additional drainage holes or repot into a mix that includes perlite or coarse sand.
For in-ground plants, amend heavy clay soil with compost. Raised beds are a great solution for slow-draining areas.
If root rot has already set in, remove the plant entirely to prevent pathogens from spreading. Dispose of it in the trash, not the compost pile.
Treating Iron Chlorosis
Apply elemental sulfur according to package directions, usually about 1 pound per 100 square feet for moderately alkaline soil. It takes several weeks to months for sulfur to fully adjust pH. For a faster short-term fix, use a foliar spray of chelated iron.
The leaves absorb it directly, and you should see greening within a week.
Long-term, mulching with pine needles or oak leaves helps maintain a slightly acidic soil environment. If your tap water is very hard, consider using rainwater for your tomatillos.
Adjusting Watering Habits
Tomatillos need about 1 to 2 inches of water per week. In hot, dry climates, that might mean watering every day or two. In cooler areas, twice a week is usually enough.
The best approach is deep, infrequent watering rather than light daily sprinkles. Deep watering encourages roots to grow downward, making the plant more drought-resistant.
Mulching with 3 to 4 inches of straw, wood chips, or shredded leaves helps retain soil moisture and keeps roots cooler during heat waves.
Dealing with Pests
For aphids, start with a strong spray of water from the hose to knock them off. Do this in the morning so the foliage dries before evening. If the infestation persists, apply insecticidal soap or neem oil, coating the undersides of leaves where aphids hide.
Spider mites thrive in hot, dry conditions. Increase humidity by misting the foliage in the early morning. Neem oil and horticultural oils are effective, but reapply every 5 to 7 days to catch newly hatched eggs.
Whiteflies respond well to yellow sticky traps hung near the plants.
When Disease Is the Cause
Mosaic virus and bacterial wilt have no cure. Remove affected plants immediately and dispose of them in the trash. Don't compost infected material.
The pathogens can survive and spread to other plants. Clean your tools with a 10% bleach solution after working around diseased plants.
For future prevention, practice crop rotation. Don't plant tomatillos or other nightshade crops in the same spot for at least three years.
Mistakes That Make Yellow Leaves Worse
Even with good intentions, it's easy to make the problem worse. Here are the most common mistakes we see.
- Adding more fertilizer when roots are damaged. If root rot is the problem, extra fertilizer increases salt buildup and stresses the plant further.
- Watering on a fixed schedule instead of checking soil moisture. Weather changes. Your soil doesn't care what day of the week it is.
- Ignoring soil pH. You can add all the iron or nitrogen you want, but if the pH is wrong, the plant can't absorb it.
- Over-treating for pests with harsh chemicals. Broad-spectrum insecticides kill beneficial insects too, including the ones that naturally control aphids and mites.
- Composting diseased plant material. Fungal and bacterial pathogens can survive the composting process and infect your garden next season.
How to Prevent Yellowing in Future Seasons
Prevention is always easier than treatment. A few simple practices keep tomatillo plants green and productive year after year.
Start with good soil. Amend your planting area with 3 to 4 inches of compost before you put plants in the ground. This improves drainage, adds nutrients, and supports beneficial soil organisms.
Test your soil pH annually. A basic test kit costs under $10 and takes five minutes. Adjust pH before planting rather than trying to fix it mid-season.
Mulch consistently. A thick layer of organic mulch regulates soil temperature, retains moisture, and slowly feeds the soil as it breaks down.
Rotate your crops. Don't plant tomatillos in the same spot more than once every three years. This prevents soil-borne diseases from building up.
Feed at the right times. Apply a balanced fertilizer at transplanting and again when the first flowers appear. Avoid heavy nitrogen applications during fruiting, which pushes leaf growth at the expense of fruit.
Water deeply and consistently. Erratic watering stresses plants and makes them more vulnerable to disease and pest problems.
Frequently Asked Questions
Can yellow tomatillo leaves turn green again?
Leaves that are fully yellow won't recover. But if you correct the underlying issue, new growth will come in green and healthy. The plant can still produce a good harvest.
Should I remove yellow leaves from my tomatillo plant?
Yes. Once a leaf is more than 50% yellow, it's not contributing to the plant. Removing it helps the plant redirect energy to healthy growth and fruit production.
Is Epsom salt good for yellow tomatillo leaves?
Epsom salt provides magnesium, which can help if magnesium deficiency is the cause. But magnesium deficiency is less common than nitrogen or iron issues. Test your soil first before adding anything.
How often should I fertilize tomatillos?
Feed at transplanting and again when flowering begins. In poor soil, a light side-dressing of compost or balanced fertilizer every 4 to 6 weeks during the growing season works well.
Can too much sun cause yellowing?
Tomatillos need full sun, but in extreme heat above 100°F, leaves can scorch and yellow. Provide afternoon shade in the hottest climates, or use shade cloth during heat waves.
Are yellow leaves a sign my tomatillos are ready to harvest?
No. Yellowing leaves are a stress signal, not a ripeness indicator. Fruit is ready when the husk splits and the fruit fills out the papery shell.
Final Checklist: Your Action Plan
Here's a quick summary to follow when you spot yellowing on your tomatillo plants.
- Identify which leaves are yellowing first (old vs. new).
- Check soil moisture (wet, dry, or just right).
- Inspect leaf undersides for pests.
- Test soil pH if you haven't recently.
- Apply the targeted fix based on your diagnosis.
- Monitor for 7 to 14 days for improvement.
- Remove fully yellow leaves to help the plant focus energy.
Most yellowing issues resolve within two weeks of the correct treatment. If nothing improves after that, dig up a small root section and check for rot, or contact your local cooperative extension office for a professional soil test. With the right diagnosis and a few adjustments, your tomatillo plants should be back to producing those delicious green fruits in no time.