To fix a self-propelled Honda lawn mower, start by checking the drive belt and transmission components for wear or damage, then clean and replace parts as needed. Ensure the drive cable is properly adjusted and lubricated. If the mower still doesn’t propel properly, inspect the drive gears or transmission system and repair or replace any faulty parts.
A self-propelled Honda lawn mower can age or face issues that make it stop moving forward as easily as before. The good news is that most problems are straightforward to diagnose and fix with basic tools. Whether it’s a loose drive belt, a worn cable, or a transmission issue, identifying the root cause and replacing or adjusting the faulty part can get your mower back to working perfectly. Keep in mind that regular maintenance and inspection will help prevent these problems from occurring in the first place, making your mowing experience smooth and hassle-free.

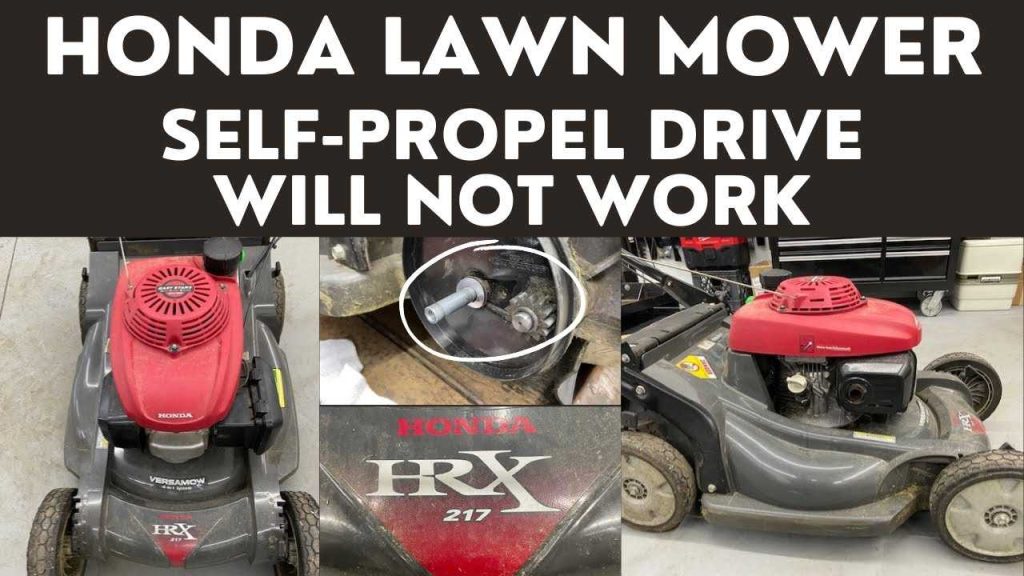
How to Fix a Self Propelled Honda Lawn Mower
Understanding the Common Problems
When your Honda self propelled lawn mower isn’t working properly, it can be frustrating. The first step is to identify the specific issue affecting the mower’s performance. Common problems include the mower not moving forward, strange noises, or the engine not starting.
To troubleshoot these problems effectively, check the basic components like the drive system, engine, and blades. Recognizing the symptom helps narrow down the possible causes and guides your repair steps.
Inspecting the Drive System
The self-propelled feature relies on a drive cable or belt that connects the engine to the wheels. If your mower isn’t moving, the drive system might be broken or disconnected.
Start by turning off the mower and removing the safety key. Examine the drive cable for signs of wear, fraying, or disconnection. If the cable appears damaged, replacing it is necessary.
Check the drive belt if your mower uses a belt-driven system. Look for cracks, tears, or slipping. Replacing a worn belt restores proper movement and ensures safe operation.
Checking the Drive Clutch and Blade Engagement
The drive clutch is the component that engages the self-propelled feature when you squeeze the handle. If it’s faulty, the mower may not move forward even when the handle is pressed.
Inspect the clutch for damage or excessive wear. If it doesn’t engage or disengages suddenly, consider replacing it. Also, make sure the drive cable is properly attached to the clutch.
In addition, verify the blade engagement system. If the blades won’t turn when you activate the blade control, it may indicate a problem with the safety switch, blade clutch, or belt.
Assessing the Engine Power and Performance
Engine problems are common causes of mower malfunction. If your mower starts but doesn’t move, check whether the engine runs smoothly.
Look for issues like poor starting, stalling, or loss of power. These can result from fouled spark plugs, dirty air filters, or old fuel.
Clean or replace the spark plug regularly, ensuring a good spark to ignite the fuel. Also, change the air filter if it’s clogged to improve airflow and engine efficiency.
Troubleshooting the Fuel System
A clogged or contaminated fuel system can cause poor engine performance. Drain old fuel and refill with fresh gasoline, especially if the fuel has been sitting for more than a month.
Inspect the fuel lines for cracks or blockages. Clean or replace the fuel filter if it’s dirty or clogged. Ensuring the fuel system is clean helps the engine run smoothly and maintains consistent power.
Examining the Spark Plug and Ignition System
The spark plug ignites the fuel-air mixture in the engine. A faulty spark plug can prevent the engine from starting or cause rough operation.
Remove the spark plug and check its condition. If it’s dirty, worn, or damaged, replace it. Ensure the spark plug gap is set correctly according to the manufacturer’s specifications.
Test the ignition system by grounding the spark plug while cranking the engine. If no spark is visible, there may be an electrical issue needing professional inspection or replacement.
Inspecting the Air Filter and Carburetor
A dirty air filter can reduce airflow, causing poor engine performance. Remove and inspect the filter regularly and replace it if it’s dirty.
The carburetor mixes fuel and air for combustion. If it’s clogged or damaged, the engine may stall or not start. Clean the carburetor carefully using carburetor cleaner or seek professional help for thorough cleaning and adjustment.
Maintaining Proper Oil Levels
Low or dirty oil can hinder the engine’s performance. Check the oil level with the dipstick and refill if needed. Use the recommended oil type specified in the mower’s manual.
Change the oil regularly to keep the engine running smoothly and prevent damage. Proper oil maintenance extends the life of your mower and keeps it functioning effectively.
Replacing Worn or Damaged Parts
Over time, parts like blades, belts, and drive cables wear out. Regular inspection helps spot these issues early.
Replace worn blades to ensure effective cutting and prevent damage to the engine. Keep belts tight and replace any that are frayed or cracked.
Use high-quality replacement parts compatible with your Honda mower model to ensure proper fit and function.
Performing Routine Maintenance
Regular maintenance improves the lifespan of your mower and reduces the risk of breakdowns. Clean the mower deck and remove grass clippings after each use.
Sharpen blades periodically for a clean cut. Check and tighten all nuts and bolts to keep parts secure.
Lubricate moving parts according to the manufacturer’s recommendations. Proper maintenance not only fixes current issues but also prevents future problems.
Seeking Professional Repairs
Sometimes, issues are complex and require professional attention. If troubleshooting doesn’t resolve the problem or you’re uncomfortable performing repairs, consult a certified Honda service technician.
Professional repair ensures safety and proper functioning of your mower. Also, they can diagnose electrical or internal engine issues that are difficult to fix on your own.
Final Tips for Fixing Your Honda Self Propelled Lawn Mower
Always follow safety precautions when working on your mower. Disconnect the spark plug wire before starting repairs.
Use genuine Honda parts for replacements to guarantee compatibility and durability. Keep a repair manual specific to your mower model handy for reference.
Regularly maintaining your mower and addressing issues promptly can extend its lifespan and keep your lawn looking neat and healthy.
By understanding these components and steps, you can effectively diagnose and fix most problems with your self propelled Honda lawn mower. Proper care and timely repairs help ensure it runs smoothly season after season.
Fixing The Self Propel On A Honda Mower
Frequently Asked Questions
What should I check if my Honda lawn mower’s self-propulsion stops working unexpectedly?
Inspect the drive belt for signs of wear or breakage, as a damaged belt prevents the self-propulsion from functioning. Also, examine the drive gear and transmission components to ensure they are engaging properly. Make sure the control lever or bar is functioning correctly and engaging the drive system when pressed. Cleaning any debris around the drive mechanisms can also help improve operation.
How can I troubleshoot if my Honda mower’s drive system is not engaging smoothly?
Check the drive cable for fraying or damage, and adjust it if needed to ensure proper tension. Lubricate moving parts like the drive cable and pulley to reduce friction. Verify that the clutch mechanism is engaging properly when you press the control bar. If the drive gear appears worn or damaged, replacing it can restore smooth engagement.
What steps should I take if my self-propel system is making unusual noises?
Listen for grinding or squealing sounds that may indicate loose or worn-out parts. Inspect the drive belt and pulleys for debris, cracks, or signs of wear. Tighten or replace any loose or damaged components. Lubricate moving parts to reduce friction, and ensure that the transmission housing is free of debris that could cause noise.
How do I maintain the drive system to prevent future problems in my Honda lawn mower?
Regularly clean and inspect the drive belt, pulleys, and transmission components to catch issues early. Keep the drive cable well-lubricated and replace it if it shows signs of fraying. Adjust the tension of the drive cable periodically to ensure proper engagement. Following the manufacturer’s maintenance schedule helps keep the self-propulsion system in good condition.
What should I do if the self-propulsion mechanism on my Honda mower still does not work after troubleshooting?
If troubleshooting does not resolve the issue, consider replacing the drive belt or worn gears. Check for any disconnected or broken control cables and reconnect or replace them as needed. If the problem persists, seek professional repair services to diagnose and fix internal transmission or drive system issues that may require specialized tools or parts.
Final Thoughts
To fix a self propelled Honda lawn mower, start by inspecting the drive belt for wear or damage and replace it if necessary. Check the drive cable for proper tension and any signs of misalignment. Ensure the wheels and drive system are clean and free of debris for smooth operation. Regular maintenance and cautious troubleshooting can resolve most issues quickly.
In conclusion, how to fix a self propelled Honda lawn mower involves inspecting belts, cables, and general cleanliness. Properly addressing these areas ensures the mower runs efficiently and reliably.