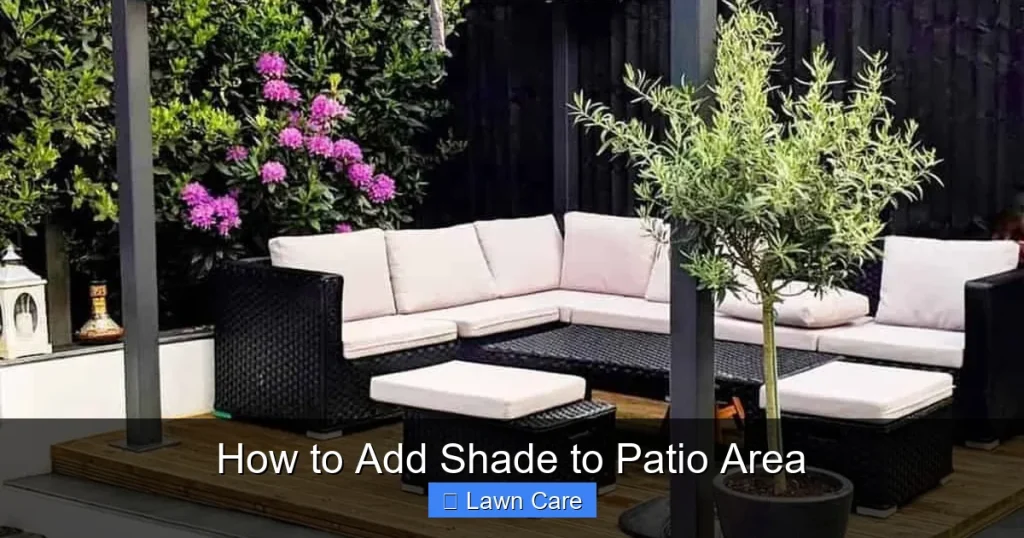
Transform your hot patio into a cool oasis with our comprehensive guide on adding shade. We cover everything from planning and choosing the right shade solution to installation and maintenance. Discover practical tips and step-by-step instructions to make your patio comfortable and enjoyable, no matter the weather.
Spending time on your patio should be a pleasure, not a struggle against the sun’s harsh rays. If your patio feels like a furnace during the warmer months, it’s time to add some much-needed shade! This guide will walk you through everything you need to know to create a cool, comfortable, and inviting outdoor living space. We’ll explore different shade solutions, discuss their pros and cons, and provide you with practical steps to implement them. Get ready to reclaim your patio and enjoy it to the fullest!
- Assess your needs: Determine the amount of shade, your budget, and your patio’s style before choosing a shade solution.
- Explore various options: Consider pergolas, awnings, shade sails, umbrellas, and natural shade from trees as potential solutions.
- Understand installation requirements: Each shade solution has different installation needs, from simple setup to more complex construction.
- Prioritize durability and maintenance: Choose materials that can withstand your local climate and are easy to clean and maintain.
- Factor in aesthetics: Select a shade solution that complements your home’s architecture and your personal style.
- Consider DIY vs. professional installation: Some options are DIY-friendly, while others may require professional help for safety and best results.
Why Add Shade to Your Patio?
A shaded patio offers numerous benefits beyond just comfort. It can:
- Protect you from harmful UV rays: Reduce your risk of sunburn and long-term skin damage.
- Lower the ambient temperature: Make your patio usable even on the hottest days.
- Extend the life of your patio furniture: Prevent fading and degradation of materials.
- Create a more inviting atmosphere: Encourage outdoor dining, relaxation, and entertaining.
- Reduce energy costs: By blocking sun from entering your home, it can lower your air conditioning needs.
Step 1: Assess Your Needs and Budget
Before you dive into shopping for shade solutions, take some time to plan. This will save you time, money, and potential frustration down the line.
Determine Your Shade Requirements
Think about how much shade you need and at what times of day. Do you want complete shade all day, or just afternoon relief? Consider the sun’s path across your yard throughout the day and year.
Visual guide about How to Add Shade to Patio Area
Image source: simplifiedbuilding.com
Example: If your patio gets intense afternoon sun, you’ll want a solution that can effectively block the western sun. If you enjoy morning coffee on the patio, ensure you still get some morning light if desired.
Set Your Budget
Shade solutions range from very affordable to quite expensive. Having a clear budget in mind will help you narrow down your options. Consider not just the cost of the shade structure itself but also installation costs, if any.
Tip: Look for sales or consider DIY options if your budget is tight.
Consider Your Patio’s Style and Architecture
The shade solution you choose should complement your home’s existing style. A modern pergola might look out of place on a traditional cottage, and vice-versa.
Evaluate Your DIY Skills and Time Commitment
Are you comfortable with basic construction, or would you prefer something that requires minimal assembly? Some solutions are simple to install, while others might be best left to the professionals. This will impact your budget and the complexity of your project.
Step 2: Explore Your Shade Solution Options
There are many ways to add shade to your patio. Here are some of the most popular and effective options:
Pergolas
Pergolas are structures with a slatted roof, typically supported by posts. They offer partial shade and can be a beautiful architectural addition to your yard.
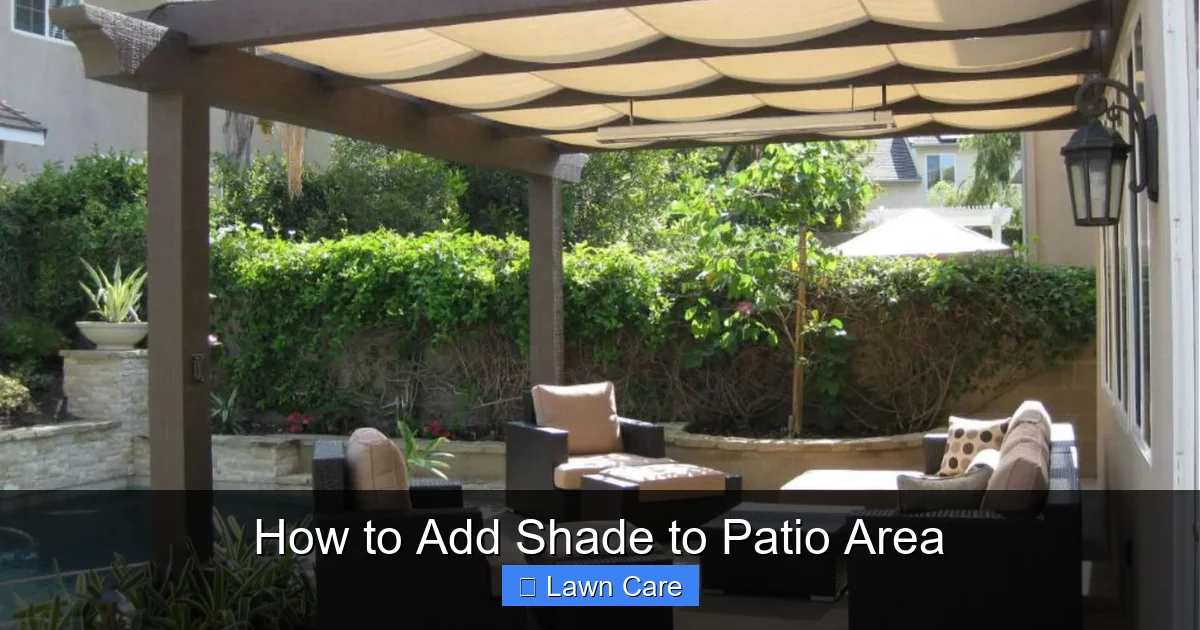
Visual guide about How to Add Shade to Patio Area
Image source: thespruce.com
Pros:
- Aesthetically pleasing and can increase home value.
- Can be customized with climbing plants for extra shade and beauty.
- Offers dappled shade, which many people prefer.
- Provides structure for hanging lights or fans.
Cons:
- Can be expensive, especially for larger or custom-built pergolas.
- Requires a more involved installation process, often needing concrete footings.
- Does not provide complete shade on its own; may require adding a canopy or fabric cover.
Installation of a Pergola
This is often a larger project. You’ll need to decide on the size, material (wood, vinyl, metal), and location.
Pergola Installation Steps:
- Site Preparation: Clear the area and mark the locations for your posts.
- Install Footings: Dig holes for concrete footings according to local building codes and the pergola’s design. Pour concrete and set post anchors.
- Assemble Posts: Attach the main support posts to the anchors.
- Add Beams and Rafters: Install the horizontal beams and then the rafters, which form the slatted roof.
- Add Cross-Supports and Trim: Secure any additional supports and add decorative trim pieces.
- Finishing Touches: Stain or paint the pergola if it’s made of wood.
Note: For more complex pergolas, especially those requiring permits, professional installation is highly recommended.
Retractable Awnings
These are fabric or vinyl coverings that can be extended or retracted, usually manually or with a motor. They are attached to the exterior wall of your house.
Pros:
- Provides shade on demand.
- Can be retracted to allow full sun when desired.
- Relatively easy to install compared to a pergola.
- Offers significant shade coverage.
Cons:
- Can be expensive, especially motorized versions.
- Requires a sturdy wall for mounting.
- Fabric can be susceptible to damage from strong winds or heavy rain if not retracted.
- May require periodic fabric replacement.
Installation of a Retractable Awning
This can be a DIY project if you are comfortable with heights and basic mounting hardware.
Retractable Awning Installation Steps:
- Locate Studs: Determine the best mounting location and identify wall studs for secure attachment.
- Mount Brackets: Securely attach the mounting brackets to the wall studs.
- Attach Awning: Lift the awning onto the brackets and secure it according to the manufacturer’s instructions.
- Test Operation: Manually or motorize the awning and test its extension and retraction.
Important: Always follow the manufacturer’s specific installation guide. If you have concerns about your wall’s integrity, consult a professional.
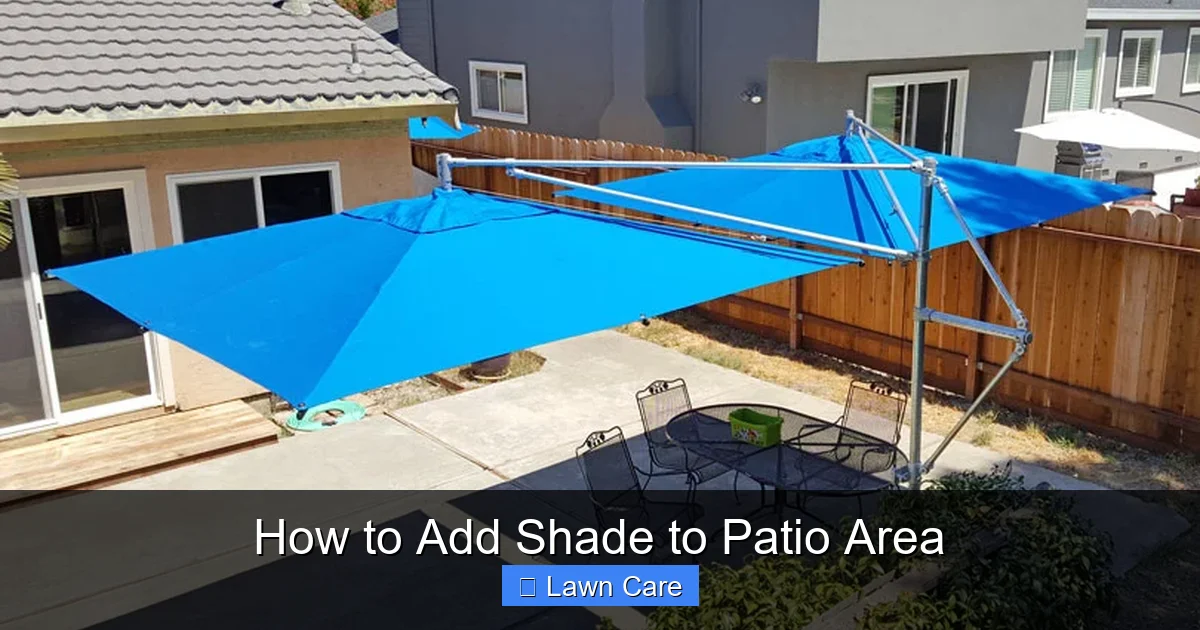
Shade Sails
These are durable fabric panels that are tensioned and anchored to posts or existing structures. They offer a modern and versatile shade solution.
Pros:
- Very versatile in terms of placement and shape.
- Modern and stylish appearance.
- Relatively affordable compared to pergolas.
- Easy to install, often a DIY project.
- Can be removed for winter or severe weather.
Cons:
- Provide partial shade, similar to pergolas.
- Requires sturdy anchor points.
- Tension needs to be maintained for optimal performance.
- Fabric may degrade over time with prolonged sun exposure.
Installation of a Shade Sail
This is a popular DIY option. You’ll need anchor points like sturdy posts, trees, or your house.
Shade Sail Installation Steps:
- Plan Placement: Determine the desired shade coverage and mark anchor points for the corners of the sail.
- Install Anchor Points: If using posts, dig holes and set them in concrete. If using existing structures, ensure they are strong enough. Install eye bolts or specialized hardware.
- Attach Sail: Connect the shade sail to the anchor points using turnbuckles and carabiners for easy tensioning.
- Tension the Sail: Adjust the turnbuckles to create a taut surface, ensuring water can run off.
Tip: Consider angling the sail slightly to allow for water runoff.
Umbrellas
Patio umbrellas are a classic and portable shade solution.
Pros:
- Most affordable and easiest to set up.
- Portable, can be moved as needed.
- Available in many sizes, colors, and styles.
- Offer immediate shade.
Cons:
- Limited coverage area compared to other options.
- Can be unstable in windy conditions.
- Require a sturdy base or table to hold them.
- May need to be stored when not in use to protect them from the elements.
Installation of a Patio Umbrella
This is typically very simple.
Patio Umbrella Setup:
- Choose a Base: Select a heavy and stable umbrella base appropriate for the umbrella size.
- Insert Pole: Place the umbrella pole into the base and secure it.
- Open Umbrella: Use the crank or mechanism to open the umbrella canopy.
Tip: For very large umbrellas or windy areas, consider a weighted base or bolting it down.
Natural Shade (Trees and Vines)
Planting trees or using climbing vines on trellises can provide beautiful, natural shade over time.
Pros:
- Aesthetically pleasing and can improve your landscape.
- Environmentally friendly.
- Can significantly cool surrounding areas.
- Low long-term cost once established.
Cons:
- Takes time to grow and provide significant shade.
- Requires ongoing care and maintenance (watering, pruning).
- Falling leaves, flowers, or fruit can create a mess.
- Roots can sometimes cause structural damage if planted too close to foundations.
Planting for Shade
Choose native trees or fast-growing vines suitable for your climate.
Planting for Shade Steps:
- Select Plants: Research trees or vines that will grow to the desired height and spread, considering your climate and soil type. For instance, some varieties of Bermuda grass thrive in specific conditions, and understanding your surrounding plants is key.
- Choose Location: Ensure the plants are located at an appropriate distance from your home and patio to avoid root damage.
- Planting: Dig a hole twice the width of the root ball and deep enough for the plant to sit at the same level it was in its nursery pot. Water thoroughly after planting.
- Establishment: Water regularly and provide appropriate care as the plant grows.
Consideration: For faster shade, consider planting a fast-growing tree that will mature within a few years.
Step 3: Installation and Maintenance
Once you’ve chosen your shade solution, it’s time for installation. Proper installation is crucial for safety and longevity.
DIY Installation Tips
- Read Instructions Carefully: Always follow the manufacturer’s assembly and installation guides.
- Gather Tools: Ensure you have all the necessary tools before you start.
- Get Help: For larger items like pergolas or awnings, enlist a friend or family member to help.
- Check Local Regulations: Some structures may require building permits.
- Safety First: Wear appropriate safety gear, especially when working at heights.
Professional Installation
If you’re not comfortable with DIY projects or if your chosen shade solution is complex, consider hiring a professional. This is especially true for structures that require digging deep footings or attaching to your home’s structure.
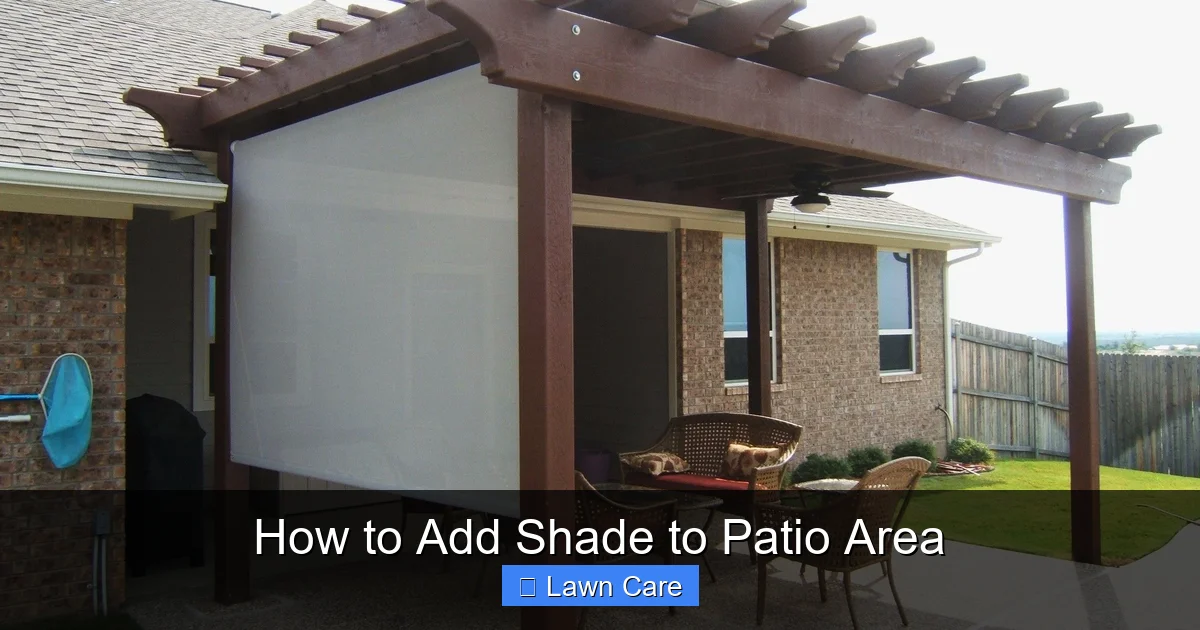
Visual guide about How to Add Shade to Patio Area
Image source: i.pinimg.com
Maintenance
All shade solutions require some level of maintenance to keep them looking good and functioning properly.
- Clean Regularly: Wipe down surfaces, clean fabric with mild soap and water, and remove debris.
- Inspect for Damage: Periodically check for loose bolts, tears in fabric, or signs of wear and tear.
- Winterize (if necessary): Some solutions, like retractable awnings and umbrellas, may need to be stored or protected during harsh winter months.
- Tensioning: Shade sails may need their tension adjusted periodically.
Troubleshooting Common Issues
* My patio is still too hot:
You might need more shade coverage. Consider adding a secondary shade solution or a more robust option. Also, check if your current solution is positioned optimally to block the hottest sun rays.
* My shade structure is wobbly or unstable:
This usually indicates an issue with the foundation or anchoring. For DIY installations, re-check that all bolts are tightened and that posts are securely set in concrete. For professional installations, contact the installer.
* Fabric is fading or tearing:
Choose high-quality, UV-resistant fabrics. If damage occurs, consider replacing just the fabric panel rather than the entire structure. For umbrellas, always close them during high winds.
* Water pools on my shade sail:
This means the sail is not tensioned properly or is not sloped correctly. Adjust the turnbuckles or the anchor points to create a downward slope for water runoff.
Conclusion
Adding shade to your patio is an investment that pays off in comfort, enjoyment, and even home value. By carefully assessing your needs, exploring the various options available, and following proper installation and maintenance practices, you can transform your patio into a delightful outdoor retreat. Whether you opt for a grand pergola, a practical retractable awning, a stylish shade sail, or the simple charm of a patio umbrella, the key is to find a solution that fits your lifestyle and budget. Enjoy your newly shaded oasis!