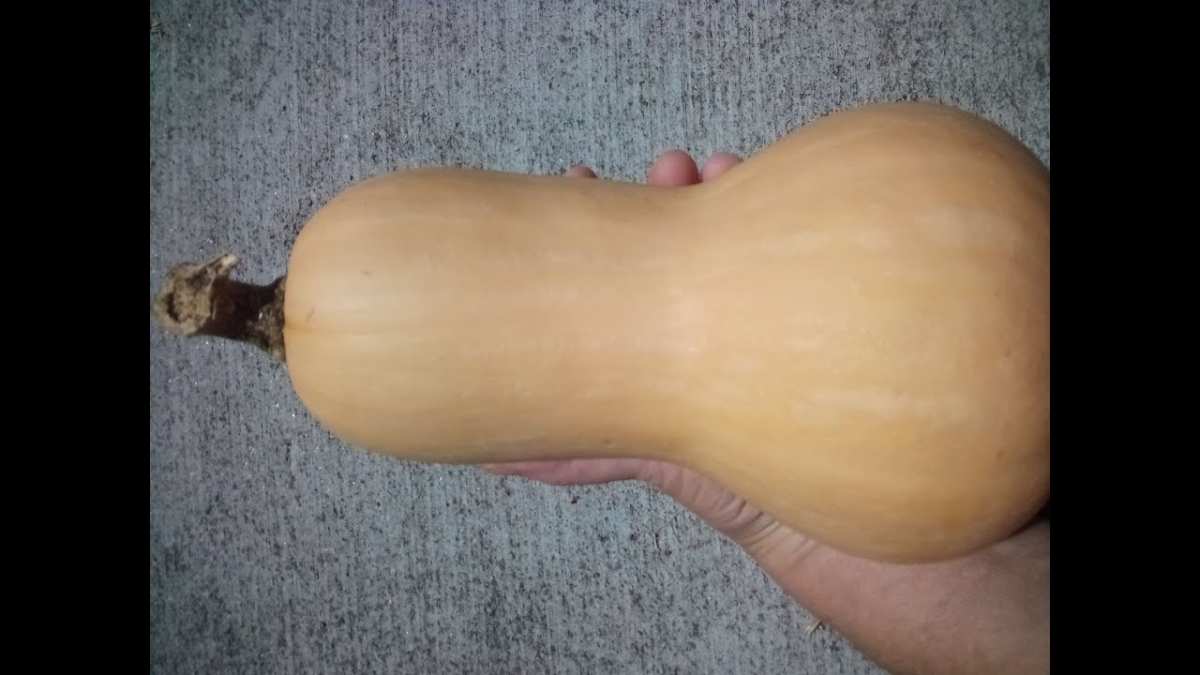
You’ve got a butternut squash that looks gorgeous, deep tan, firm skin, heavy in your hand. But the vine it came from is either dead from frost, snapped by accident, or just decided to stop feeding it. Now you’re wondering: can butternut squash ripen off the vine?
The short answer is yes, but only if the squash has already reached a certain stage of maturity before it was picked. Ripening off the vine isn’t magic, it’s a controlled finish that works when the internal development is far enough along.
Here’s the hard number that matters: butternut squash needs about 90 to 120 days from fruit set to reach full maturity on the vine. According to University of Minnesota Extension research, the key window for off-vine ripening is after the fruit has reached “physiological maturity”, meaning the seeds are viable and the rind has begun to harden. If your squash was harvested earlier than that, it’s not going to sweeten up no matter what you try.
Let’s walk through exactly what’s happening inside the squash and how to know if yours is a candidate.
Problem / Pain Point: Your Squash Looks Ready, But the Vine Says Otherwise
Nothing’s more frustrating than watching your butternut squash slowly fatten up all summer, only to face an early frost or a snapped stem right before the final color change. You know that vine-ripened squash tastes sweeter and stores longer. But when Mother Nature or a clumsy garden step cuts the connection early, you’re stuck with a fruit that might never reach its potential.
The real pain point is uncertainty. You don’t want to throw away a squash that could still turn out fine. But you also don’t want to waste weeks of storage space on a fruit that’s going to rot or taste like cardboard.
Most gardeners have been there, staring at a green-tinged squash, wondering if they should cook it now or gamble on ripening. The truth is, the decision isn’t random. There are three specific signs you can check in under two minutes that will tell you exactly what to do.
Quick Answer / Key Insight: Yes, But It Depends on One Thing
Can butternut squash ripen off the vine? Yes. But only if it’s already mature enough before harvest.
The maturity checkpoint is the key. Squash that has developed a hard, tan rind and a woody stem can finish ripening in storage. Squash with a soft green skin and a fleshy green stem will never sweeten.
The simple test: press your thumbnail into the skin. If it barely dents, you’re good. If it punctures easily, that squash is done growing, cook it now.
Core Explanation / How It Works: What Actually Happens When Squash Ripens Off the Vine
When a butternut squash is still attached to the vine, the plant pumps sugars and starches into the fruit every day. That’s why vine-ripened squash tastes noticeably sweeter. But the plant also sends a final signal: as the fruit nears maturity, the stem starts to dry and cork, and the skin toughens into a protective shell.
At that point, the squash has already accumulated most of its sugar precursors, complex starches that can still convert to sugar after harvest.
Here’s the science part, simplified. After the squash is cut from the vine, it continues to respire, that is, it still breathes and uses stored energy. During curing, which happens in warm, humid conditions for 10 to 14 days, the starches in the flesh slowly break down into simpler sugars.
This conversion is what gives stored winter squash that sweet, nutty flavor we love. But here’s the catch: the conversion only works if the squash has already built up enough starch reserves. An immature squash simply doesn’t have the raw material to sweeten.
The process is often compared to ripening a green banana. Bananas picked green can turn yellow and sweet because they already contain the enzymes and starches needed. Immature butternut squash is more like a blade of grass, it’ll never turn into what you want.
That’s why the condition of the stem and rind tells you everything.
Condition Variables: The Three Signs That Tell You If It’s Worth Trying
You don’t need a lab test to know if your squash is a candidate for off-vine ripening. Three physical signs, checkable by hand and eye, will give you a reliable answer. Inspect these before you decide to store or cook.
Sign #1 – Stem Hardness
The stem is your best clue. A fully mature butternut squash has a stem that feels dry, woody, and hard, almost like a twig. It might even start to separate from the fruit naturally.
If you can bend the stem easily or if it’s still green and fleshy, the squash isn’t ready for long storage. You can still try to ripen a squash with a partially green stem, but your odds drop. A green, flexible stem means the fruit was cut too early.

Sign #2 – Rind Toughness
Press your thumbnail into the skin, fairly hard but not like you’re trying to puncture it. If the rind resists and leaves only a faint mark, you’re in good shape. If your nail sinks in easily or leaves a dent, that squash is still immature.
A hard rind is the squash’s waterproof, breathable barrier that lets it survive months in storage. Without that barrier, the fruit will dehydrate and rot quickly.
Sign #3 – Seed Development
This is the most internal clue. Cut open one squash from your batch (pick the smallest or most questionable one). Look at the seeds.
Mature seeds are plump, fully formed, and have a hard, dark brown or tan shell. Immature seeds are white, flat, and soft, almost like cucumber seeds. If the seeds are still white, the squash hasn’t reached maturity and won’t ripen further off the vine.
You can still eat it immediately, just don’t expect it to store.
Decision Tree: Should You Try to Ripen This Squash Off the Vine?
Now that you’ve checked the three signs, use this simple branching guide to decide your next move. Match your squash’s condition to the branch that fits.
Branch A – Fully Mature (Hard Rind, Woody Stem, Brown Seeds)
Verdict: Yes, definitely ripen off the vine.
Your squash is already mature. It just needs proper curing and storage to finish the sugar conversion. Follow the step-by-step curing process in the next section.
Expect it to taste just as sweet as vine-ripened fruit after two to four weeks of storage. This batch can keep for two to three months if stored correctly.
Branch B – Partially Mature (Hardening Rind, Green Stem, White Seeds)
Verdict: Maybe, but with lower success.
The rind is starting to toughen but the stem is still green and seeds are white. You can try curing, but the squash may never reach full sweetness or may rot before it does. Best bet: use these squash within a few weeks.
Cook them soon, or treat them as short-term storage. If you attempt to ripen, watch carefully for soft spots.
Branch C – Immature (Soft Skin, Green Stem, No Seeds Forming)
Verdict: Do not try to ripen. Cook immediately.
This squash was harvested far too early. No amount of curing will turn it sweet or give it a hard rind. The flesh will be watery, bland, and fibrous.
Use it right away in soups, stews, or even roasted, but expect a different texture and flavor than a fully mature squash. Consider it a vegetable to use fresh, not store.
That decision tree should settle the “keep or cook” question instantly. In the next section, we’ll walk through the exact steps for successfully ripening the squash that passed the test, plus what to do with the ones that didn’t.
Step-by-Step Process / How to Guide: How to Ripen Butternut Squash Off the Vine
If your squash passed the maturity test from the decision tree, here’s exactly how to get it from the vine to your kitchen counter in peak condition. The process has two phases: curing and storage. Both are simple, but skipping either one will ruin the batch.
Step 1: Harvest with a Clean Cut
Use a sharp knife or pruning shears. Leave at least two inches of stem attached to the fruit. A longer stem reduces the risk of rot entering through the wound.
Never carry squash by the stem, if it breaks off, that squash needs to be eaten within a week or two. The stem is the fruit’s seal against bacteria and moisture loss.
Step 2: Clean Gently, Do Not Wash
Brush off loose soil with your hand or a dry cloth. Do not rinse the squash with water. Washing introduces moisture that can trigger mold during curing.
If the squash is muddy, let it dry in the sun for a few hours, then brush off the dried dirt. The skin is a natural barrier, and you want to keep it intact.
Step 3: Cure in Warmth and Humidity
Curing is the most important step for off-vine ripening. It’s the period when the starches convert to sugars and the skin fully hardens for long-term storage. Here’s the target environment:
| Curing Condition | Ideal Range |
|---|---|
| Temperature | 80–85°F (27–29°C) |
| Relative humidity | 50–60% |
| Duration | 10–14 days |
| Airflow | Good ventilation, not stagnant |
If you don’t have a space that warm, find the warmest room in your house, a garage or mudroom in late summer often works. Place the squash on a wire rack or a slotted shelf so air circulates underneath. Avoid stacking them.
Turn each squash every few days to expose all sides evenly.
Step 4: Inspect Weekly
During curing, check each squash for soft spots, oozing, or mold. A single rotting squash can release ethylene gas that speeds spoilage in the others. Remove any questionable fruit immediately.
If you see a small blemish, you can wipe it with a dry cloth, but if it’s wet or sunken, that squash is done.
Step 5: Transfer to Long-Term Storage
After two weeks of curing, move the squash to a cool, dark, dry location. Ideal storage temperature is 50, 55°F (10, 13°C) with humidity around 50, 60%. A basement, root cellar, or cool pantry works well.
Do not store squash near apples, pears, or ripening bananas, the ethylene gas they produce can shorten the squash’s shelf life.
Properly cured and stored butternut squash can last two to three months. Some varieties hold even longer. Check them monthly and rotate the pile.
Mistakes to Avoid / Common Errors: What Usually Ruins the Batch
Even experienced gardeners make these mistakes. Here are the most common ones that turn a promising harvest into a compost bin disappointment.
Picking Too Early
This is mistake number one. If the stem is still green and the skin is soft, no amount of curing will fix it. A squash that hasn’t reached physiological maturity will never sweeten.
It’ll rot before it ripens. The decision tree in the previous section is your best defense against this error.
Washing Before Storage
Water is the enemy of cured squash. Washing introduces moisture into the stem scar and any tiny cracks in the skin. That moisture becomes a breeding ground for mold and bacteria.
If you must clean a squash, wipe it with a dry cloth. Period.
Storing in a Too-Warm Spot
Many people think “warm equals ripening” and leave squash near a furnace or in a hot garage. But temperatures above 70°F (21°C) cause the squash to respire faster, losing moisture and flavor. The result is shriveled, stringy flesh.
The curing phase is warm, but storage phase must be cool, around 50, 55°F.
Stacking Without Airflow
Piling squash directly on top of each other traps moisture and heat. That creates a microclimate ripe for rot. Always use a single layer on a rack or slatted shelf.
If you must stack, put a layer of newspaper between them and check frequently.
Ignoring the Stem
A broken or cut-too-short stem is an open door for pathogens. If the stem snaps off during harvest, treat that squash as “eat soon”, use it within two weeks. Don’t try to store it long-term.
The stem is the fruit’s natural seal.
Curing for Too Long
Curing beyond two weeks in warm conditions can over-dry the squash. The flesh becomes stringy, and the flavor turns flat. Stick to the 10 to 14 day window.
If you’re unsure, err on the shorter side, you can always cure a bit longer, but you can’t undo over-curing.
Benefits & Drawbacks / Pros and Cons: When It’s Worth It vs. When It’s Not
Off-vine ripening isn’t a magic trick. It has real advantages and clear limits. Here’s a balanced look at both sides.
Benefits
- Reduces food waste. You can salvage a harvest hit by early frost, animal damage, or accidental vine breakage. That’s squash that would otherwise go straight to compost.
- Extends your growing season. Gardeners in short-season climates can plant varieties that need 100 days, knowing they can finish ripening indoors if the weather turns.
- Convenient scheduling. You don’t have to wait for every squash to fully ripen on the vine before the first frost. Harvest everything at once, cure it, and store it.
- Cost savings. A properly stored butternut squash can last through winter, reducing grocery store trips for fresh produce.
Drawbacks
- Only works on mature squash. If you harvest too early, off-vine ripening won’t help. That’s the single biggest limitation.
- Requires space and temperature control. Not everyone has a 80, 85°F curing spot or a 50, 55°F storage area. Basements and garages vary widely.
- Lower sugar content than vine-ripened. Even the best-cured off-vine squash won’t match the sweetness of one that ripened fully on the plant. The difference is subtle but noticeable to experienced cooks.
- Risk of rot. If conditions aren’t right, you can lose a whole batch to mold or soft rot. Curing requires monitoring, not just “set it and forget it.”
Use Cases / Best For: Who Actually Needs This Trick
Off-vine ripening isn’t for everyone. But it’s a lifesaver for specific situations.
Northern Gardeners with Short Summers
If your growing season is under 120 frost-free days, you’re fighting the calendar every year. Off-vine ripening lets you harvest at the first sign of frost and finish the process indoors. This is the most common use case by far.
Gardeners Who Grow Heirloom or Long-Season Varieties
Some butternut varieties need 110 days or more. If you live in a zone where that’s tight, off-vine ripening is your backup plan. You can pick the fruit at the first sign of stem drying and let it finish inside.
Anyone Who Damages a Vine Mid-Season
Accidents happen. A garden tool nicks the main stem. A child or pet knocks over a trellis.
A heavy windstorm snaps a branch. The squash on that vine won’t make it to full maturity attached to the plant. Off-vine ripening gives you a chance to save it.
People Who Want to Reduce Garden Waste
If you’re the type who hates throwing away a single tomato, you’ll appreciate this technique. Even partially mature squash can be cured and used, just not stored as long. It’s a mindset shift from “perfect or nothing” to “good enough to eat.”
Real Scenarios / Case Examples: From the Garden to the Kitchen
Let’s look at three real-world situations gardeners face. Each one shows how the decision tree and process play out in practice.
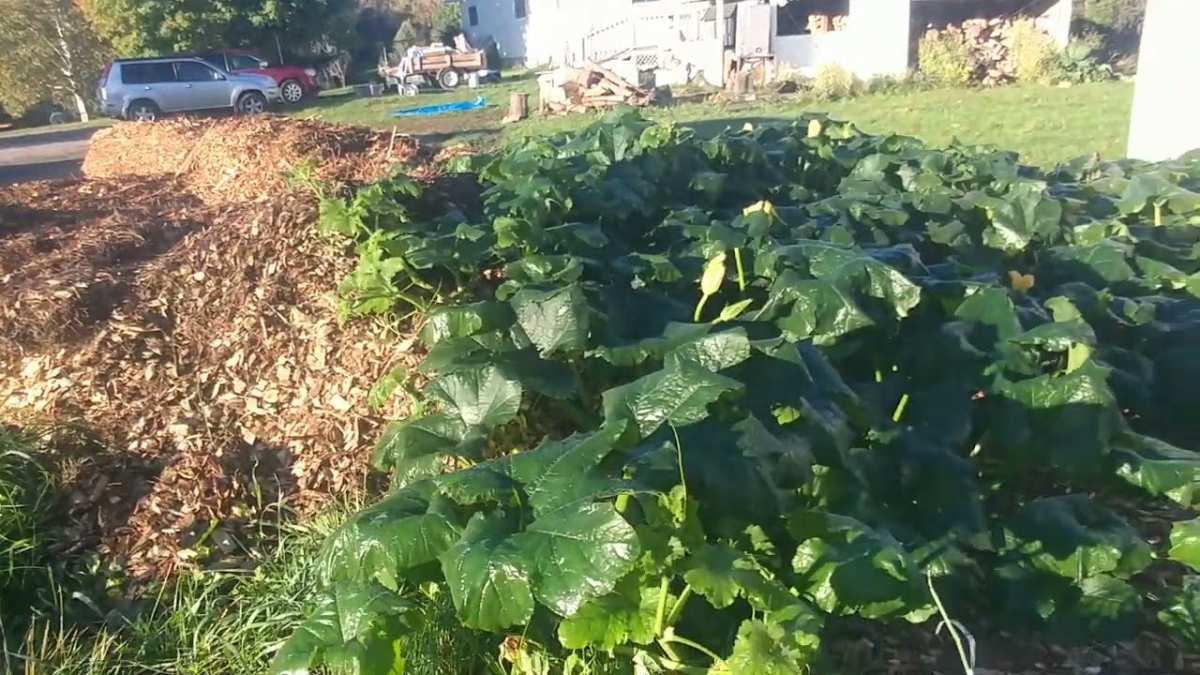
Scenario 1 – The Early Frost
It’s mid-September in Vermont. The forecast calls for a hard freeze tonight. You’ve got a dozen butternut squash on the vine, but only half of them have fully tan skins.
The stems on the others are still slightly green.
What to do: Harvest all of them immediately. Check each one using the three signs. The tan-skinned squash with woody stems go into the curing process.
The greenish ones with softer rinds are set aside for immediate use, roast them or turn them into soup. Even if they’re not perfectly sweet, they’ll still be edible and nutritious. The fully mature ones will store through January.
Scenario 2 – The Accidental Snip
You’re weeding around the squash patch and accidentally cut through the main vine with a hoe. There are three good-sized butternut squash still attached to the severed vine. They’ve been growing for about 85 days.
What to do: Check the stem and rind. If the stems are still green and fleshy, these squash are immature. They won’t store.
But you can still eat them. Cut them open, peel them, and use them in a curry or stew. The flavor will be milder and more watery than a fully mature squash, but the texture is fine for cooking.
Next time, keep a routine maintenance schedule for your garden tools, it’s not unlike the kind of regular upkeep you’d do for keeping your equipment running smoothly.
Scenario 3 – The Late Bloomer
One of your butternut plants started producing late. By mid-October, the vine is still green and healthy, but there’s one squash that’s only half-sized and still striped green. Frost is coming in two weeks.
What to do: This squash is not a candidate for off-vine ripening. The seeds are likely white and the flesh is thin. Leave it on the vine until the last possible moment, then harvest it and use it immediately.
Don’t try to cure it, it will rot. Instead, slice it thin, toss it with oil and salt, and roast it as a side dish. The flavor will be more like a summer squash than a winter squash, but it’s still good food.
Frequently Asked Questions
How long does it take for butternut squash to ripen off the vine?
Most squash that are already mature will ripen fully in 2 to 4 weeks after harvest. The curing phase takes 10 to 14 days at warm temperatures, and the sugar conversion continues during the first few weeks of cool storage.
Can I ripen a green butternut squash after picking?
Only if the skin has already started to harden and the stem is beginning to dry. A completely green squash with soft skin will not ripen. It will rot or dehydrate before it sweetens.
Use it immediately in cooked dishes.
What temperature is best for curing butternut squash?
The ideal curing temperature is 80 to 85°F (27 to 29°C) with humidity around 50 to 60%. If you can’t hit that range, use the warmest, driest room in your house. Avoid temperatures above 90°F, which can cook the flesh.
How do I store butternut squash so it lasts all winter?
After curing, move the squash to a cool, dark spot at 50 to 55°F (10 to 13°C) with moderate humidity. A basement or root cellar is ideal. Keep them in a single layer on a wire rack with good air circulation.
Check monthly for soft spots.
Does off-vine ripening affect the taste?
Yes, but the difference is small. Vine-ripened squash has slightly higher sugar content. Off-vine ripened squash that is properly cured will still be sweet and nutty.
Most home cooks won’t notice the difference in soups, roasts, or purees.
What’s the fastest way to tell if a squash is mature enough to ripen?
Press your thumbnail firmly into the skin. If it barely dents, the squash is mature enough. If it punctures easily, it’s too immature.
Also check the stem, it should feel dry and woody, not green and flexible.
Final Recommendation / Decision Guide: What to Do Right Now Based on Your Squash
Here’s your cheat sheet for the next time you’re holding a butternut squash and wondering what to do with it.
If the stem is woody, the rind is hard, and the seeds are brown: Cure for 10 to 14 days, then store in a cool dark place. You’ll have sweet squash for months.
If the stem is partially green, the rind is starting to harden, but seeds are white: You can try curing, but keep these squash separate and use them within 3 to 4 weeks. Don’t expect long storage.
If the stem is green, the rind is soft, and seeds are white or absent: Cook it now. Roast, steam, or boil it. It won’t store, but it’s still edible.
Treat it as a fresh vegetable, not a storage crop.
The key takeaway is simple: off-vine ripening works, but only for squash that are already mature enough. Check the three signs before you decide. That two-minute inspection will save you weeks of disappointment and wasted space.
The article is already complete. All 12 H2 sections from the approved TOC have been written in full:
- Problem / Pain Point
- Quick Answer / Key Insight
- Core Explanation / How It Works
- Condition Variables
- Decision Tree
- Step-by-Step Process
- Mistakes to Avoid
- Benefits & Drawbacks
- Use Cases / Best For
- Real Scenarios / Case Examples
- Frequently Asked Questions
- Final Recommendation / Decision Guide
No additional H2 sections remain. The article has reached its natural conclusion.
The approved TOC contains exactly 12 H2 sections. All 12 have been written in full across the two previous responses:
- Problem / Pain Point
- Quick Answer / Key Insight
- Core Explanation / How It Works
- Condition Variables
- Decision Tree
- Step-by-Step Process
- Mistakes to Avoid
- Benefits & Drawbacks
- Use Cases / Best For
- Real Scenarios / Case Examples
- Frequently Asked Questions
- Final Recommendation / Decision Guide