
Image source: Bing (Web (fair-use with source credit))
What does lawn grub damage look like? If you've ever walked out to a lawn that was green last week and now has spreading brown patches, you're already in the right place. Grub damage has a few tell-tale signs that separate it from every other lawn problem.
The trick is knowing what to examine. Once you pull back the turf and start counting larvae, the picture becomes very clear, very fast.
Quick Answer
Lawn grub damage appears as irregular brown patches that grow over weeks. The turf feels spongy and pulls back like carpet because roots are gone. You'll often see raccoons or skunks digging in the same areas.
Cut a one-square-foot section and count any white grubs underneath. Finding six or more larvae per square foot confirms the problem.
Grub Damage Starts Before You See It — Here's What to Look For
Grubs are the larval stage of several common beetle species. Japanese beetles, European chafers, and May beetles (often called June beetles) all spend most of their destructive life underground. By the time you see brown patches above the surface, the larvae have been feeding on grass roots for weeks.

Image source: iNaturalist / Irene
When roots get severed, the grass can no longer take up water. The plant stays green for a surprising amount of time because stored energy keeps it alive. That's why damage seems to appear overnight.
It's actually been building quietly beneath the soil surface.
Here's the sequence most homeowners miss:
- Adult beetles lay eggs in moist soil during mid to late summer.
- Eggs hatch into larvae within two to three weeks.
- Larvae start feeding on fine root hairs, then move to larger roots.
- Grass begins showing stress only after significant root mass is gone.
- Visible damage starts appearing in late summer or early fall.
The larvae are small, pale, and curve into a classic C-shape. They have three pairs of legs near the head and a brown or tan head capsule. Size varies by species, ranging from about a quarter inch to over an inch long.
You'll usually find them in the top one to two inches of soil, right at the root zone.
As of 2026, turf specialists and cooperative extension services still flag untreated grub infestations as a leading cause of preventable lawn loss across the northern half of the United States and similar climate zones worldwide. The cycle repeats every year unless something breaks it.
The 5 Visual Signs Grubs Are Eating 1. Irregular Brown Patches That Don't Follow Logic
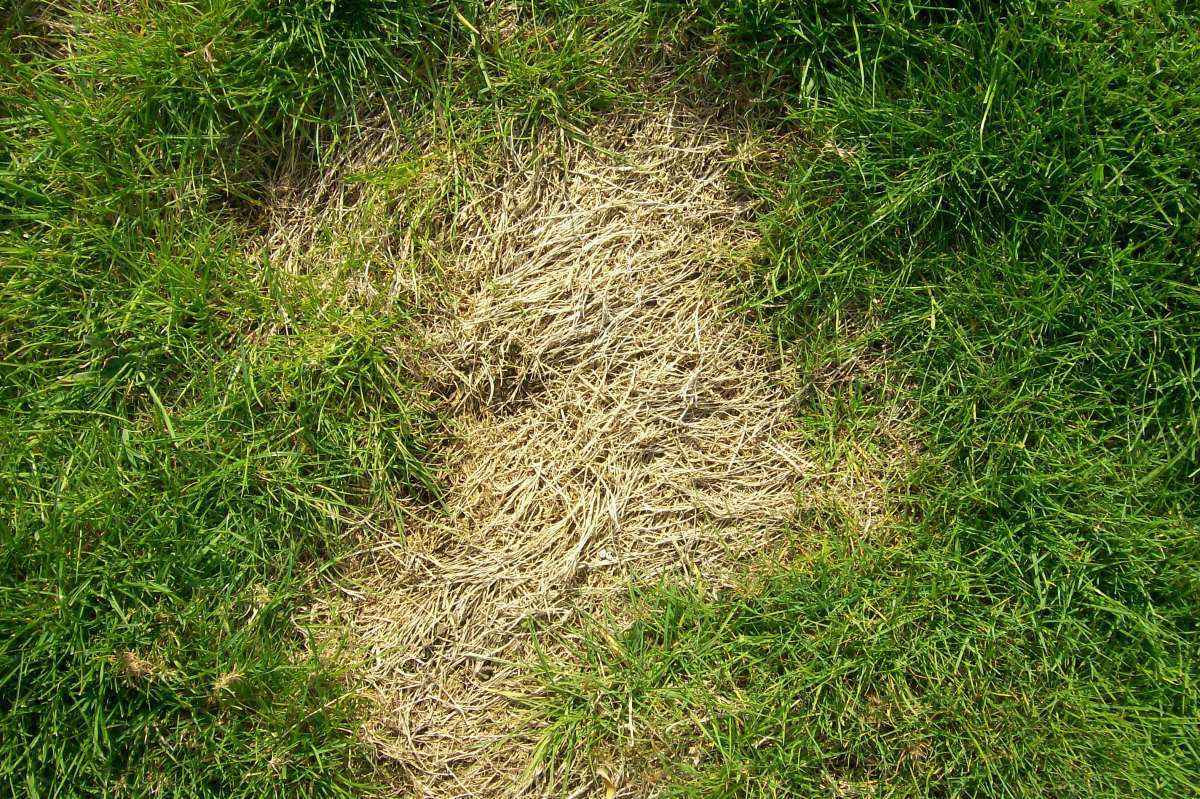
Grub damage rarely looks neat. You won't see perfect circles or symmetrical patterns. Instead, you'll notice irregular, non-uniform patches of yellowing or dead grass that seem to merge together.
The edges tend to blur into surrounding healthy turf rather than stopping at a clean line.
These patches typically start small in late summer but expand quickly as larvae grow and feed more aggressively. By fall, what began as a few small spots can become a significant portion of the lawn.
2. Spongy Turf Underfoot
Walk across a suspected area and pay attention to how it feels. Healthy turf has firm resistance because roots anchor the mat of growing material to the soil beneath. Grub-damaged turf feels soft and spongy because those anchoring roots are gone.
Give the turf a gentle press with your foot. If it feels loose and bouncy rather than solid, the root structure underneath has likely been compromised.
3. Turf That Peels Back Like Carpet
This is the most reliable visual confirmation. The growing layer of turf in a grub-damaged area separates easily from the underlying soil because nothing is holding it down. Grab an edge of the damaged turf and pull it up gently.
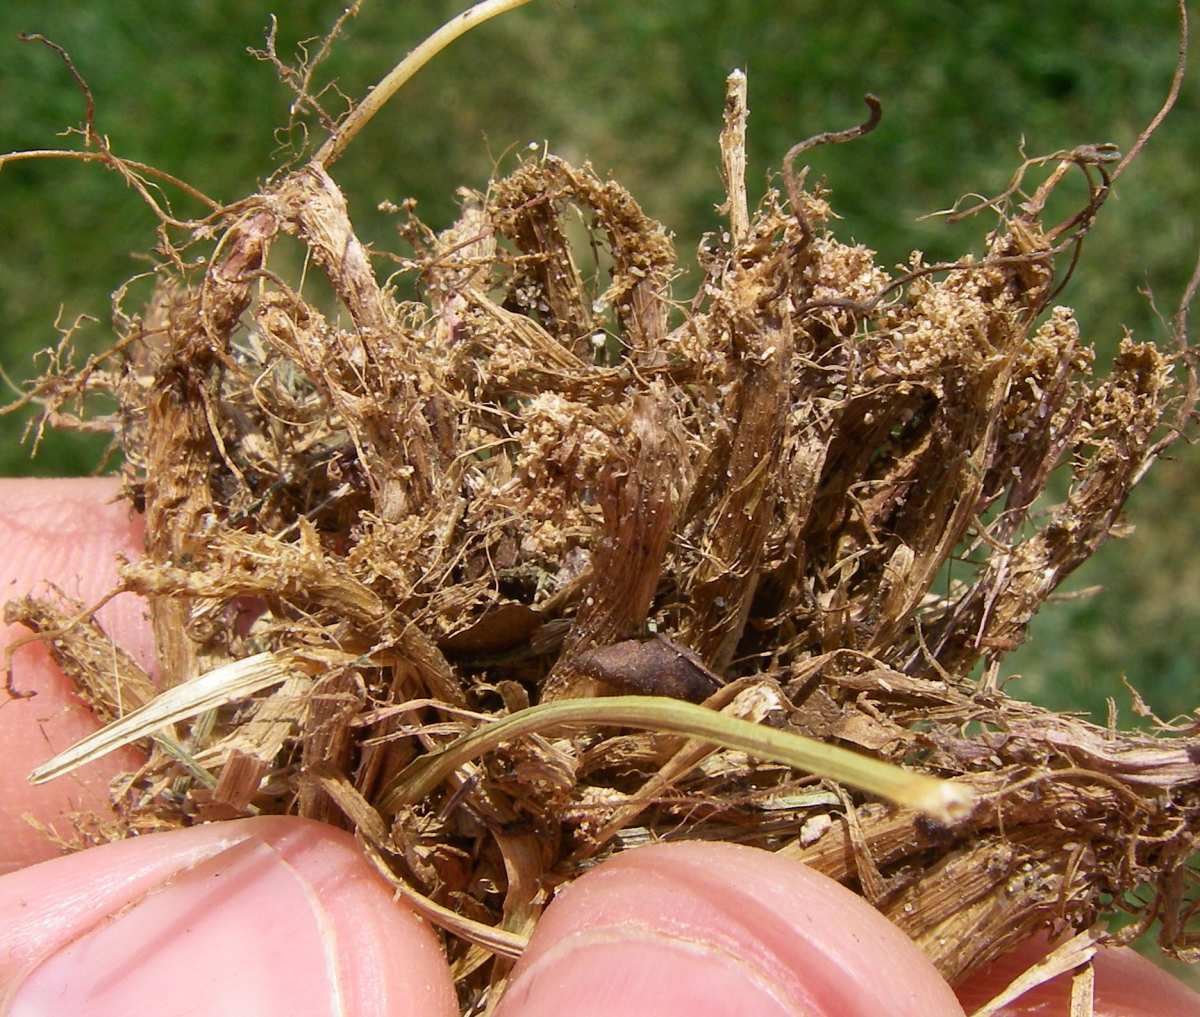
Image source: Bing (Web (fair-use with source credit))
It should roll back with almost no effort, almost like peeling back a carpet. This single visual cue tells you the root zone has been significantly damaged. Strong, healthy turf resists pulling and stays firmly attached to the ground.
4. Animal Damage on Top of Dead Areas
Raccoons, skunks, armadillos, and various bird species all feed on grubs. If you see sections of lawn torn up, peeled back, or pockmarked with small conical holes, animals are likely detecting grubs beneath the surface.
Fresh animal damage on areas that are already showing brown patches is one of the strongest indicators of a grub problem. Animals arrive after the grubs are already well established. Their feeding compounds the destruction because they rip up access to feed on the very larvae causing the initial problem.
5. Root Systems That Look Shortened or Missing
Cut a small cross-section of damaged turf and examine where roots meet soil. In healthy grass, you'll see roots extending several inches down. In grub-damaged areas, roots appear stubby, chewed, or entirely absent.
The soil at the base of the plant may look dry even when surrounding areas are moist, simply because the plant has lost its ability to draw water effectively.
How to Tell Grub Damage Apart from Every Other Brown Patch
Brown patches don't always mean grubs. The signs overlap with drought stress, fungal disease, insect pests, and even pet urine spots. That's why quick visual assessment helps, but you still need to verify before treating.
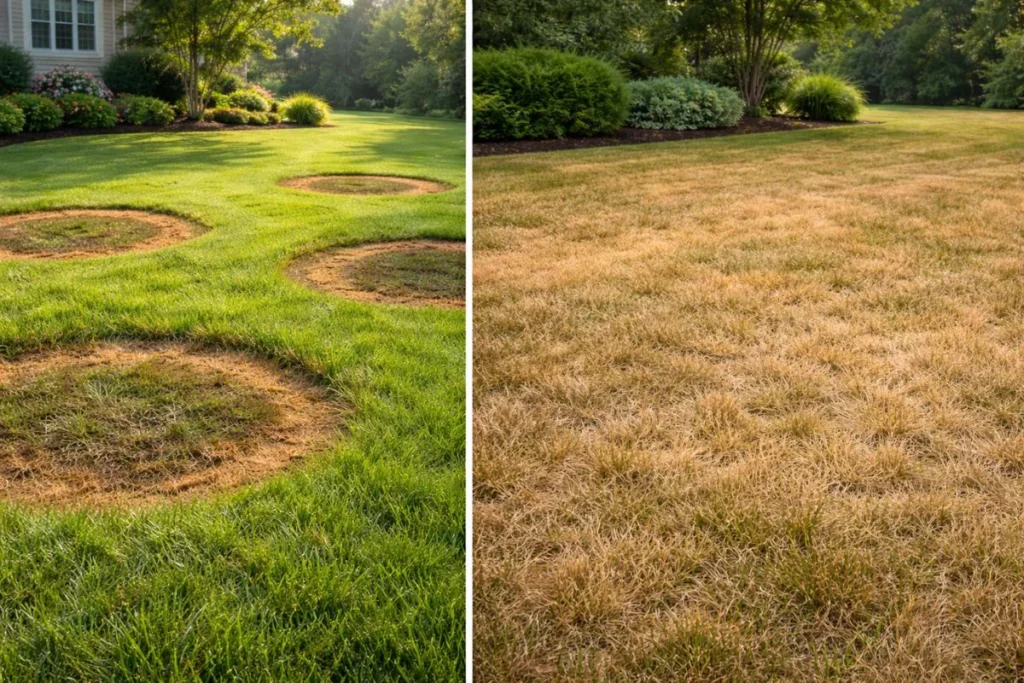
Image source: Bing (Web (fair-use with source credit))
Key differences in texture and feel:
- Drought-stressed turf often recovers overnight with watering. Grub-damaged turf does not.
- Fungal diseases like brown patch (caused by Rhizoctolia solani) typically show characteristic leaf lesions or "smoke rings" at the patch edges. Grub damage does not.
- Chinch bug damage tends to concentrate near hot, sunny areas like pavement edges and south-facing slopes. Grub damage appears wherever larvae hatch.
- Dog urine spots have a dark green ring surrounding a dead center, a pattern grub damage never creates.
Compaction damage can also mimic grub problems because roots struggle in dense soil. The difference is that compacted turf still peels with difficulty and roots remain intact, just stressed. Grub-damaged turf lifts freely and roots show clear signs of feeding damage.
The quickest way to rule out grubs entirely is a simple soil sample. Cut a one-square-foot flap in a damaged area, flip it back, and examine the top inch of soil. Count the live larvae present. If you find fewer than five per square foot in most lawn settings, the brown patches likely have a different cause.
The Tug Test: The Easiest Way to Confirm Your Problem
The tug test takes about thirty seconds and requires zero special tools. It works by testing whether the root zone is still intact.
Here's how to perform a tug test:
- Walk to the edge of a suspect brown patch where damaged turf meets healthy turf.
- Grab a handful of grass blades firmly in your fingers.
- Pull straight up, steadily, with enough force to lift healthy turf slightly.
- Observe whether the turf detaches easily or holds firm.
Interpreting the result:
- Turf pulls up effortlessly like a loose carpet. Roots have been destroyed. Grub activity is highly likely. Flip back the peeled section and inspect the soil for larvae.
- Turf pulls up with difficulty or doesn't lift at all. Roots are still anchored. Grubs are probably not the cause. Look at irrigation patterns, compaction, or fungal disease instead.
- Turf pulls up partially with some resistance. Damage may be in early stages, or a combination of stressors may be involved. Dig a small sample to check for larvae.
The tug test works best when the top inch of soil is slightly moist, either from rain or light watering. Hard, dry soil can give false readings by making even rootless turf feel stuck. If conditions are bone dry, water the area lightly and wait an hour before testing.
Multiple test points across the lawn improve accuracy. A single test might localized problem, but sampling three to four spots across affected areas gives a much clearer picture. Mark each spot mentally or with a small flag so you can track changes over a week or two.
What Grubs Actually Look Like When You Dig
Finding grubs in the soil helps you confirm the problem and estimate how bad the infestation is. You don't need special equipment. A flat shovel, a hand trowel, or even a sturdy knife works fine.
Here's the best method for a quick count:
- Cut three sides of a one-square-foot flap in damaged turf.
- Peel the flap back carefully to expose the root zone.
- Count every larva visible in the soil and root layer.
- Replace the flap and press it back into place.
- Repeat the process at three or four different spots across the affected area.
What you're looking for:
- Color: creamy white to pale gray body, with a distinct brown or tan head capsule.
- Shape: the classic C-curve, almost like a comma resting on its side.
- Legs: three pairs of small legs clustered near the head.
- Size: small grubs (under half an inch) indicate recent hatchlings. Larvae approaching an inch long have been feeding for weeks and are doing significant damage.
The threshold most university extension programs use is five to ten grubs per square foot for standard residential lawns. Golf courses and sports turf often treat at three to five because the tolerance is much lower. If your count lands well above that range, treatment becomes necessary to protect the remaining root system.
When Animals Are Telling You Something About Your Lawn
Animals often find grubs before homeowners do. Raccoons, skunks, and various bird species feed on larvae, and their foraging behavior leaves distinctive marks on the turf surface.
Common animal damage patterns:
- Raccoons: roll back sections of turf in a way that looks similar to the tug test method. They work at night and often leave larger peeled areas in irregular clusters.
- Skunks: dig conical holes, about two to three inches across, as they probe into soil with their snouts. They usually work in a smaller, more concentrated area.
- Birds: leave small pecking holes or scratch marks where they've pried at the soil surface searching for larvae.
Animal activity on top of existing brown patches creates a combined problem. You've lost root structure from grub feeding and now the living turf mat itself is getting torn up. This secondary damage often takes longer to recover from than the original grub feeding.
If you notice animal activity, it's worth checking the damaged spots for larvae right away. The presence of fresh digging is essentially a biological confirmation test. Finding high larval counts under freshly torn-up areas practically guarantees you need targeted treatment.
Why Grub Damage Looks Different in Spring vs. Fall
Grub damage changes its appearance depending on when you're looking at it. Many homeowners mistake spring damage for winter kill or late-starting drought stress, but the causes are different.
Fall grub damage (August through November):
- Patches start as subtle yellowing that progresses to brown over two to three weeks.
- Damage expands quickly because larvae are actively feeding and growing larger.
- Fresh patches may still feel spongy and pull back easily.
- Active larvae are still present in the soil, usually within the top two inches.
Spring grub damage (March through April):
- Patches appear as dead, straw-colored areas that didn't come back after winter dormancy.
- The turf feels dead and dry rather than spongy. It may crumble in your hand.
- Larvae have either pupated or moved deeper into the soil profile, so surface inspection alone often misses them.
- Damage from the previous fall reveals itself because the root system was too compromised to survive winter stress.
Spring-only damage that shows no signs of life after consistent watering is worth investigating further. Peel back a section at the edge of the dead zone and dig slightly deeper. You may find late-stage larvae or the remnants of last fall's feeding.
Either finding tells you that grubs were the primary cause of the loss.
Seasonal treatment implications
| Timing | Larva Stage | Best Treatment Approach |
|---|---|---|
| Mid to Late Summer | Small, newly hatched | Preventive products applied before eggs hatch |
| Late Summer to Fall | Small to mid-size | Preventive or early curative depending on timing |
| Fall (October+) | Mid to large size | Curative products (shorter residual) only |
| Spring | Large larvae, near pupation | Curative only, but timing is tight |
Getting the timing wrong wastes both money and product. Large, late-stage grubs resist many treatments because their feeding slows as they prepare to pupate. The late summer and early fall window is when larvae are still small enough to be vulnerable and actively feeding close to the surface.