Nothing's more frustrating than walking out to your garden and finding your okra looking rough. If you've noticed your okra plant leaves turning yellow, you're not alone, and it doesn't necessarily mean your whole crop is in trouble. The cause could be something as simple as a nutrient gap or as fixable as adjusting your watering schedule.
The key is figuring out which of several common issues is actually behind the yellowing. Okra (Abelmoschus esculentus) thrives in warm conditions and well-drained soil with a pH between 6.0 and 6.8, according to university extension guidelines. When something in that balance shifts, the leaves are usually the first place it shows.
Let's walk through what to look for and how to respond.
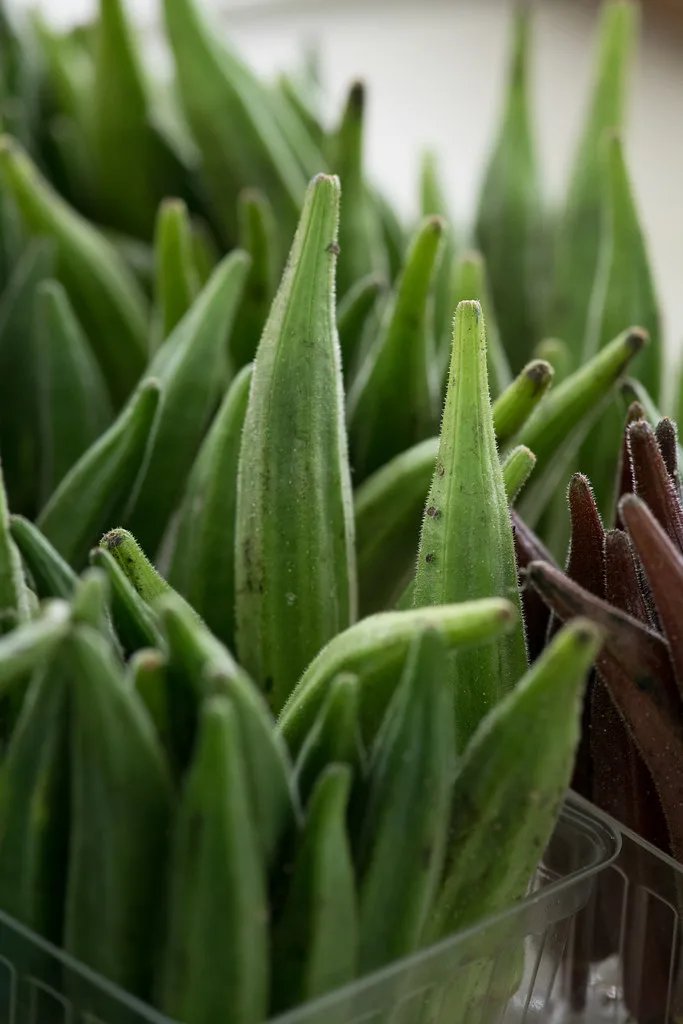
Image source: Openverse / USDAgov (PDM 1.0)
Quick Answer
Okra leaves turn yellow most often from overwatering, nitrogen deficiency, iron deficiency, pests, or fungal root rot. Check which leaves are affected first, test your soil moisture and pH, and inspect for pests on the undersides of leaves. Fix the specific cause rather than applying a generic treatment.
Most yellowing is reversible if caught early.
Why Are My Okra Leaves Turning Yellow? Here's What's Actually Going On
Yellow leaves on okra are a symptom, not a disease themselves. Think of it like a check-engine light. Something underneath is off, and the plant is telling you about it through its foliage.
The most common culprits fall into five categories: too much water, not enough nitrogen, not enough iron, pest damage, or fungal root rot. Each one produces a slightly different pattern of yellowing, and learning to read those patterns is what separates a quick fix from weeks of guessing.
Overwatering is probably the number one mistake home gardeners make with okra. The plant likes consistent moisture, but it absolutely hates sitting in soggy soil. When roots can't breathe, they start to suffocate, and the leaves yellow as a result.
If your soil feels wet an inch below the surface more than a day or two after watering, that's a red flag.
Nutrient deficiencies are the next most likely cause. Okra is a heavy feeder, especially when it comes to nitrogen. If you haven't fertilized since planting, or if your soil is naturally lean, the plant will start pulling nitrogen from its older leaves to support new growth.
That's why nitrogen deficiency shows up on the bottom of the plant first.
Pests like aphids, spider mites, and whiteflies suck sap from the leaves, draining them of chlorophyll and causing yellow stippling or mottling. These are easy to miss because they tend to hide on the undersides of leaves. A quick inspection with a hand lens or even your phone's camera zoom can confirm whether bugs are the problem.
Fungal root rot, caused by pathogens like Pythium or Fusarium, is the most serious cause. It usually follows prolonged overwatering and can kill a plant fast if the roots are badly damaged. The yellowing from root rot tends to be more uniform across the whole plant and is often accompanied by wilting, even when the soil is moist.
The 5 Most Common Causes of Yellow Okra Leaves
Here's a breakdown of each major cause, what it looks like, and how to confirm it.
| Cause | Where Yellowing Appears | Key Clues | How to Confirm |
|---|---|---|---|
| Nitrogen deficiency | Older, lower leaves first | Uniform yellowing, stunted growth | Soil test or recent fertilizing history |
| Iron deficiency | Newer, upper leaves first | Yellow between veins, veins stay green (interveinal chlorosis) | Soil pH test (high pH locks out iron) |
| Overwatering | Lower leaves, often uniform | Soil stays wet, may see wilting despite moisture | Finger test: soil wet 1+ inch down 24+ hours after watering |
| Pest damage (aphids, mites, whiteflies) | Anywhere, often patchy | Stippling, webbing, visible insects on leaf undersides | Visual inspection of leaf undersides |
| Root rot (Pythium, Fusarium) | Whole plant, rapid spread | Wilting with wet soil, brown or mushy roots | Gently dig near base and inspect root color and texture |
Each of these requires a different response, so taking a minute to narrow down the cause saves you time and keeps you from making things worse.
How to Figure Out Which Cause Is Affecting Your Plant
This is where a little detective work pays off. Rather than guessing, work through these checks in order. Each one eliminates possibilities and points you toward the right fix.
Check the Pattern: Which Leaves Are Yellow First?
The location of the yellowing tells you a lot. Pull this image up as a reference while you inspect your plant.

Image source: Pixabay / analogicus (Pixabay Content License)
Older, lower leaves turning yellow first usually points to nitrogen deficiency. The plant is mobile with nitrogen, meaning it can move it from old tissue to new tissue when supplies run low. If the yellowing is fairly uniform across those older leaves and the plant looks a bit smaller than expected, nitrogen is your likely culprit.
Newer, upper leaves turning yellow first, especially with the veins staying green while the tissue between them goes yellow, is classic interveinal chlorosis. That's a sign of iron deficiency, which is often caused by soil pH being too high (above 7.0). Iron becomes less available to plants in alkaline conditions, even if there's plenty of it in the soil.
Yellowing all over the plant at once, especially if it's paired with wilting, suggests a root problem. That could be overwatering, root rot, or both. This pattern needs faster action because root damage can become irreversible.
Check the Soil: Moisture, Drainage, and pH
Stick your finger about an inch into the soil near the base of the plant. If it feels wet or muddy, you're probably overwatering. Okra likes soil that's moist but not saturated.
In most climates, watering deeply once or twice a week is enough, and the top inch of soil should dry out between waterings.
If you're growing in containers, make sure there are drainage holes and that water flows freely when you water. Saucers that hold standing water are a common cause of root problems in potted okra.
Soil pH matters more than most gardeners realize. Okra performs best between 6.0 and 6.8. Above that range, iron and other micronutrients become chemically locked out.
A simple home test kit from a garden center can tell you where you stand. As of 2026, most university extension offices still offer soil testing for a small fee, and that's the most accurate option if you want a full nutrient profile.
Check for Pests: What to Look for on the Stems and Undersides of Leaves
Flip a few leaves over and take a close look. This is where most pests set up shop, and it's the check most people skip.
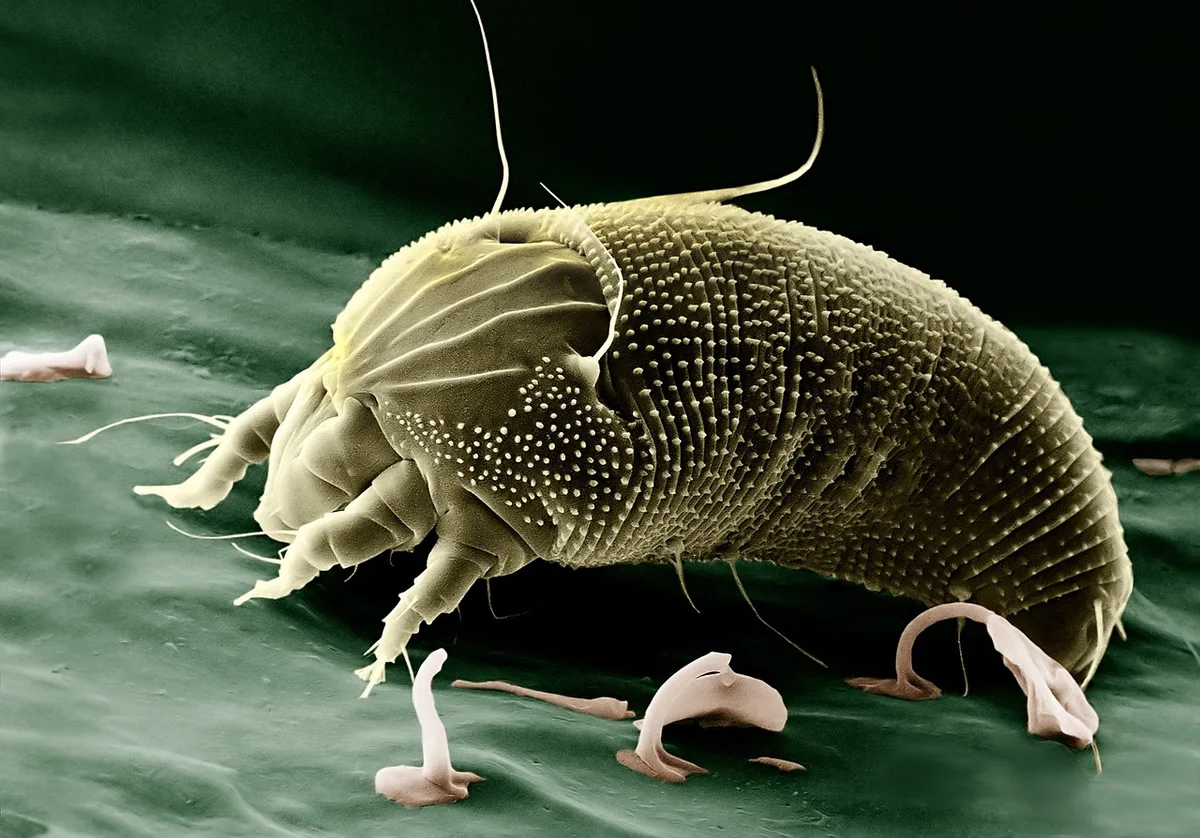
Image source: Pixabay / WikiImages (Pixabay Content License)
Aphids are small, soft-bodied insects that cluster on new growth and leaf undersides. They can be green, black, or brown. You'll often see sticky residue (honeydew) on the leaves below them.
Spider mites are tiny, almost invisible without magnification. Look for fine webbing on the undersides of leaves and a stippled or bronzed appearance on the leaf surface. They thrive in hot, dry conditions, so they're more common in midsummer.
Whiteflies are small, white, moth-like insects that fly up in a cloud when you disturb the plant. Like aphids, they leave honeydew behind.
If you find any of these, the good news is they're treatable. Neem oil and insecticidal soap are both effective and safe for edible crops when used according to label directions.
Check Your Fertilizing Habits: Are You Feeding Enough, or Too Much?
Okra is a heavy feeder, especially during the flowering and pod-production stages. If you planted in good soil but haven't added anything since, the plant may have used up the available nitrogen.
On the other hand, over-fertilizing with phosphorus-heavy blends can actually make iron deficiency worse by further locking out micronutrients. A balanced fertilizer or one slightly higher in nitrogen (like a 10-5-5 or similar ratio) is a better choice for okra than a high-phosphorus formula.
If you've been fertilizing regularly and still see yellowing, the issue is more likely pH-related or due to overwatering preventing nutrient uptake. Roots that are waterlogged or damaged can't absorb nutrients efficiently, no matter how much you add to the soil.
What to Do Once You've Found the Cause
Now that you've narrowed things down, here's how to respond to each specific issue. The right fix depends entirely on the diagnosis, so don't skip ahead.
Fixing Nitrogen Deficiency in Okra
If the older leaves are yellowing and the plant looks underfed, apply a nitrogen-rich fertilizer. Blood meal, fish emulsion, or a balanced granular fertilizer with a higher first number (nitrogen) will do the job.
Work it into the top inch of soil and water it in well. You should see improvement within a week to ten days as the plant pushes out new green growth. For container-grown okra, a liquid fertilizer every two to three weeks during the growing season keeps nitrogen levels steady.
Don't go overboard. Too much nitrogen gives you a big, leafy plant with few pods. Follow the product's application rates and resist the urge to double up.
Fixing Iron Deficiency and pH Lockout
If the newer leaves show interveinal chlorosis, start with a soil pH test. If the pH is above 7.0, that's likely why the iron isn't available.
To lower pH gradually, work elemental sulfur into the soil according to package directions. For a faster short-term fix, apply chelated iron directly to the soil or as a foliar spray. Chelated iron is available at most garden centers and is absorbed quickly by the plant.
If you're growing in containers, switching to a potting mix formulated for vegetables (which typically has a balanced pH) can prevent this issue from recurring.
Correcting Overwatering and Drainage Problems
If the soil is staying too wet, cut back on watering immediately. Let the top inch dry out before you water again. In most climates, okra needs about an inch of water per week, including rainfall.
For in-ground plants in heavy clay soil, consider amending with compost to improve drainage. For container plants, make sure the pot has adequate drainage holes and isn't sitting in a saucer of water.
If the overwatering has been going on for a while, gently check the roots for signs of rot. Healthy roots are white or light tan. Brown, mushy, or foul-smelling roots mean the problem has progressed to root rot, which needs a different approach.
Treating Root Rot Before It Kills the Plant
Root rot is the most urgent situation. If you catch it early, you may be able to save the plant.
First, stop watering and let the soil dry out. If the plant is in a container, consider repotting into fresh, well-drained potting mix after trimming away any brown or mushy roots with clean scissors. Disinfect your tools between cuts to avoid spreading the fungus.
For in-ground plants, improve drainage around the base by gently working compost into the surrounding soil. Fungicides containing Trichoderma species can help suppress fungal pathogens in the soil, though they work best as a preventive measure.
If more than half the root system is damaged, the plant may not recover. In that case, remove it to prevent the fungus from spreading to neighboring plants and replant in a different spot or in fresh soil.
Getting Rid of Aphids, Spider Mites, and Whiteflies
For all three of these common pests, start with the least invasive option. A strong spray of water from the hose can knock aphids and spider mites off the leaves. Do this in the morning so the foliage dries before evening.
If the infestation is heavier, apply neem oil or insecticidal soap to the undersides of the leaves. Both are effective against all three pests and are approved for use on edible crops. Reapply every five to seven days until the population is under control.
Avoid broad-spectrum insecticides. They kill beneficial insects like ladybugs and lacewings that naturally keep pest populations in check. Targeted treatments are better for your garden's long-term health.
Mistakes That Make Yellow Leaves Worse
The most common mistake is watering more when you see yellow leaves. It feels intuitive, but if the problem is overwatering or root rot, adding more water accelerates the damage fast.
Another frequent error is applying a high-phosphorus fertilizer to fix yellowing. Many "bloom booster" formulas are heavy on phosphorus and light on nitrogen. If nitrogen deficiency is the actual problem, you're feeding the plant the wrong nutrient and potentially locking out iron at the same time.
Spraying pesticides without confirming pests are present is another one. You'll kill beneficial insects that were already keeping pest populations down, and you still won't have addressed the real cause.
Here's a quick checklist of what not to do:
- Don't water on a fixed schedule without checking soil moisture first
- Don't apply fertilizer without knowing which nutrient is lacking
- Don't spray broad-spectrum insecticides as a preventive measure
- Don't ignore soil pH, it affects everything else
- Don't remove all yellow leaves at once, the plant can still recover some of that tissue
When Yellow Leaves Are Actually Normal
Not every yellow leaf is a crisis. It's completely normal for the oldest, lowest leaves on an okra plant to yellow and drop off as the plant matures. This is especially true once the plant starts putting energy into flowering and pod production.
If only one or two bottom leaves are yellow and the rest of the plant looks vigorous, you're fine. The plant is just reallocating resources. Pull those leaves off if you want to keep things tidy, but don't panic.
Seasonal yellowing at the end of the growing season is also expected. Okra is a warm-season annual. As temperatures drop in fall, the whole plant will yellow and decline.
That's the natural end of its life cycle, not a disease.
How to Prevent Yellow Leaves in Future Okra Plantings
Prevention starts before you even put a seed in the ground. Get a soil test done through your local extension office. Knowing your baseline pH and nutrient levels lets you amend the soil properly from the start.
Choose a planting site with good drainage. Okra hates wet feet. Raised beds are ideal because they drain faster than in-ground rows, especially in clay-heavy soils.
If you're using containers, go with at least a five-gallon pot per plant and make sure there are drainage holes.
Image source: Pixabay / fietzfotos (Pixabay Content License)
Mulch around the base of the plant to regulate soil moisture and temperature. Two to three inches of straw or shredded leaves works well. Mulch also reduces the splash-up of soil-borne fungal spores onto lower leaves.
Start a fertilizing routine early. Side-dress with a balanced fertilizer or compost when the plant is about a foot tall, then again when it begins flowering. Consistent feeding prevents the nutrient gaps that lead to yellowing.
Inspect your plants weekly. Flip a few leaves over, check the soil moisture, and look for early signs of pests. Catching problems in the first few days makes them much easier to fix than dealing with a full-blown infestation or advanced root rot.
Real-World Example: Diagnosing Yellow Leaves in a Raised Bed
A gardener in central Texas noticed the lower leaves on their okra turning yellow in late June. The plants were in a raised bed filled with a mix of garden soil and compost. They'd been watering every other day.
The first clue was the pattern. Only the oldest leaves were affected, and the yellowing was uniform, not blotchy. The newer growth at the top looked green and healthy.
That pointed to nitrogen deficiency rather than pests or disease.
The second clue was the soil. The raised bed had been heavily amended with compost, but compost alone doesn't always provide enough fast-release nitrogen for a heavy feeder like okra. The gardener hadn't added any supplemental fertilizer since planting six weeks earlier.
They applied a liquid fish emulsion fertilizer at the recommended rate and cut back watering to every three days, letting the top inch of soil dry between sessions. Within eight days, the yellowing had stopped progressing. New growth came in deep green, and the plant produced pods normally for the rest of the season.
The takeaway: the problem wasn't disease or pests. It was simply a hungry plant in a well-drained bed that needed more nitrogen than the compost alone could provide.
Frequently Asked Questions
Should I remove yellow leaves from my okra plant?
If a leaf is more than half yellow, go ahead and pull it off. The plant won't recover that tissue, and removing it improves air circulation. If the leaf is only slightly yellow, leave it.
The plant is still pulling useful nutrients from it.
Can yellow okra leaves turn green again?
Leaves that are fully yellow won't turn green again. But if you fix the underlying cause, new growth will come in healthy and green. The plant recovers even if the damaged leaves don't.
Is Epsom salt good for yellow okra leaves?
Epsom salt provides magnesium, not nitrogen or iron. It only helps if magnesium deficiency is the specific cause, which is less common than nitrogen or iron issues. A soil test will tell you whether magnesium is actually low before you add anything.
How often should I water okra to prevent yellowing?
Water when the top inch of soil is dry. In most climates, that works out to once or twice a week. Container-grown okra may need more frequent watering in hot weather.
The key is letting the soil dry slightly between waterings rather than keeping it constantly wet.
Can too much sun cause okra leaves to yellow?
Okra loves full sun and needs at least six to eight hours per day. Sunscald is rare in okra. If leaves are yellowing and the plant is in full sun, the cause is almost certainly water, nutrients, or pests rather than too much light.
Quick-Reference Decision Guide: Yellow Okra Leaves
Use this guide to match your symptoms to the right action.
Yellowing on older, lower leaves first:
Likely cause is nitrogen deficiency. Apply a nitrogen-rich fertilizer and monitor for improvement over 7 to 10 days.
Yellowing on newer, upper leaves with green veins:
Likely cause is iron deficiency or high soil pH. Test soil pH. Apply chelated iron and amend pH if needed.
Yellowing all over with wilting despite wet soil:
Likely cause is overwatering or root rot. Stop watering, let soil dry, and inspect roots. Repot or improve drainage if root damage is found.
Patchy yellowing with visible insects or webbing:
Likely cause is pests. Identify the pest, then treat with neem oil or insecticidal soap. Reapply weekly until controlled.
One or two bottom leaves yellowing on an otherwise healthy plant:
This is normal aging. No action needed unless the yellowing spreads rapidly to newer growth.