To clean a Briggs and Stratton lawn mower carburetor effectively, start by removing the carburetor from the mower, disassembling it carefully, and soaking the parts in a carburetor cleaner. Use a wire brush or compressed air to clear out any clogs, then reassemble and reinstall it. This quick process can restore your mower’s performance and ensure it runs smoothly.
If your Briggs and Stratton lawn mower isn’t starting or stalls frequently, a clogged carburetor might be the culprit. Cleaning it involves taking it apart, cleaning all passages thoroughly, and replacing any damaged parts. In no time, your mower will be back to cutting grass efficiently, saving you time and money on repairs.
When your lawn mower isn’t performing as it should, a dirty or blocked carburetor is often to blame. Over time, debris, old fuel, and dirt can clog the tiny passages responsible for delivering fuel to the engine. Cleaning the carburetor might sound daunting, but with the right tools and a bit of patience, you can easily do it yourself. In this guide, we’ll walk you through the straightforward steps to keep your Briggs and Stratton mower running at peak performance. Whether you’re a seasoned DIYer or a beginner, maintaining a clean carburetor ensures your mower stays reliable and ready to tackle your yard work.

How to Clean a Briggs and Stratton Lawn Mower Carburetor
Cleaning the carburetor is a key step to keeping your Briggs and Stratton lawn mower running smoothly. Dirt, debris, and old fuel can clog the carburetor, causing starting problems or poor engine performance. In this guide, you’ll learn how to clean the carburetor effectively and safely, restoring your mower’s power and efficiency.
Understanding the Carburetor and Its Role
The carburetor mixes air and fuel before it enters the engine. It ensures the right amount of fuel is supplied for combustion. When the carburetor gets clogged or dirty, it can lead to issues like the engine stalling or struggling to start. Regular cleaning helps prevent these problems and keeps your mower working properly.
Tools and Materials Needed
Before beginning, gather these essential tools:
- Screwdrivers (flathead and Phillips)
- Socket wrench set
- Carburetor cleaner spray
- Wire brush or small brush
- Needle-nose pliers
- Clean cloth or rag
- New gaskets or seals (if necessary)
- Small container or bowl for soaking
- Gloves and safety glasses for protection
Having these ready will make the cleaning process easier and safer.
Preparation Before Cleaning
Start by disconnecting the spark plug wire to prevent accidental starting. Remove the mower’s air filter to access the carburetor easily. Use a clean cloth to wipe off any dust or debris around the carburetor area. Always work in a well-ventilated space and wear protective gear.
Locating and Removing the Carburetor
Locate the carburetor, which is typically mounted on the side of the engine, connected via fuel lines and linkages. Use the appropriate screwdriver or socket wrench to carefully detach the carburetor. Take note of how components are assembled, or take photos for reference during reassembly.
Disassembling the Carburetor
Carefully remove the carburetor cover and float bowl. Be cautious not to damage small parts like the needle valve or gaskets. Use needle-nose pliers if needed. Keep all parts organized to simplify reassembly.
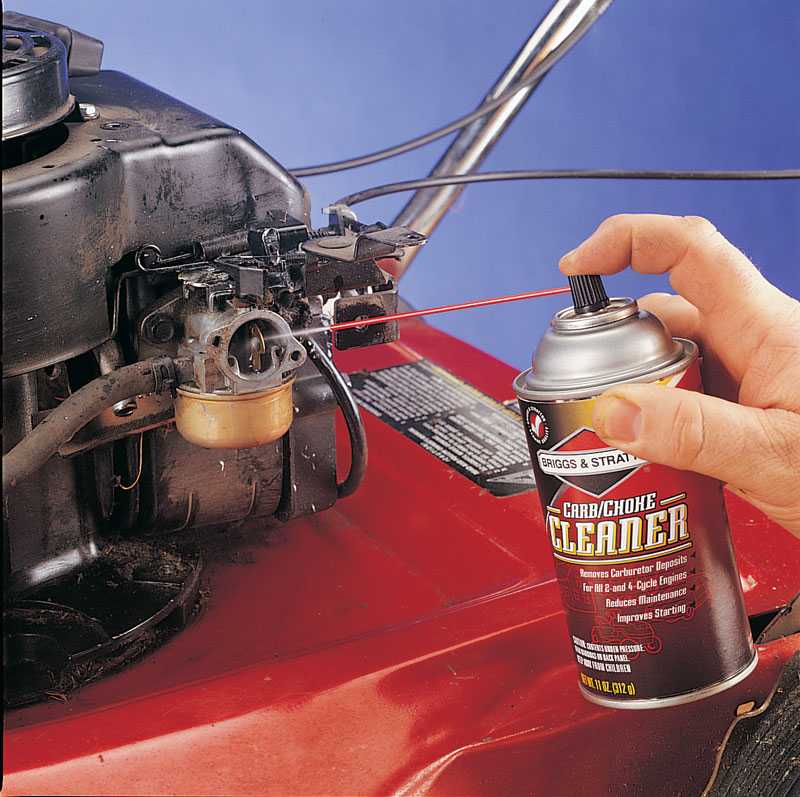
Cleaning the Carburetor Components
Spray carburetor cleaner into all openings, jets, and passages. Use a small brush or wire to gently scrub away grime and deposits. Soaking carburetor parts in a container of cleaner for about 30 minutes can help loosen stubborn dirt. Rinse parts with clean water and dry thoroughly with a cloth.
Cleaning the Jets and Passages
Pay special attention to the main jet and pilot jet, as these are common clog points. Use a fine wire or needle to clear any blockages carefully. Avoid enlarging or damaging the jets, as this can affect engine performance.
Replacing Worn or Damaged Parts
Inspect gaskets, seals, and the needle valve. Replace any parts that show signs of wear or damage. Use new gaskets to ensure an airtight seal upon reassembly. Properly fitting parts prevent leaks and fuel flow issues.
Reassembling the Carburetor
Once all parts are clean and dry, reassemble the carburetor in reverse order. Make sure all screws and nuts are tightened securely but avoid overtightening, which can crack plastic parts. Reattach the carburetor to the lawn mower, reconnect fuel lines, linkages, and air filter.
Testing the Mower
Reconnect the spark plug wire and start the mower. Observe its performance carefully. If it starts easily and runs smoothly, the cleaning was successful. If problems persist, check for missed steps, leaks, or blocked passages and repeat the cleaning if necessary.
Tips for Maintaining a Clean Carburetor
Regularly replacing or cleaning the air filter prevents dirt from entering the carburetor. Use fresh fuel and avoid leaving fuel in the tank for extended periods. Periodic inspection and cleaning of the carburetor every season can extend your mower’s lifespan.
Safety Precautions
Always work in a well-ventilated area and wear gloves. Handle chemicals like carburetor cleaner carefully, following label instructions. Disconnect the spark plug to prevent accidental starting during maintenance.
Summary of Cleaning Steps
- Disconnect spark plug and air filter.
- Remove the carburetor from the mower.
- Disassemble the carburetor carefully.
- Clean all parts with carburetor cleaner and brushes.
- Soak stubborn parts if needed, rinse, and dry completely.
- Inspect and replace any worn parts or gaskets.
- Reassemble the carburetor and reinstall on mower.
- Reconnect fuel lines, linkages, and test the mower.
Common Issues and Troubleshooting
If your mower still doesn’t run correctly after cleaning, check for:
| Issue | Possible Cause | Solution |
|---|---|---|
| Engine stalls or sputters | Fuel flow restriction | Verify fuel lines and replace clogged jets |
| Difficulty starting | Old or contaminated fuel | Drain old fuel and replace with fresh fuel |
| Uneven engine performance | Incorrect float level or gasket leak | Adjust float or replace gasket seals |
Maintaining your Briggs and Stratton mower’s carburetor through regular cleaning helps prevent these issues and extends the life of your equipment.
The process of cleaning the carburetor may seem detailed, but taking your time and following these steps will ensure a thorough job. Regular maintenance keeps your lawn mower running efficiently and saves you money on repairs.
HOW TO CLEAN A CARBURETOR ON A BRIGGS & STRATTON 550EX ENGINE FOR BEGINNERS (Yard Machines Mowers)
Frequently Asked Questions
What tools and materials are necessary to clean a Briggs and Stratton lawn mower carburetor?
To clean a Briggs and Stratton lawn mower carburetor, gather basic tools such as screwdrivers, pliers, and wrenches. You will also need carburetor cleaner spray, a small brush or toothbrush, a container of clean fuel, and safety gloves. Having a clean workspace helps prevent dirt and debris from entering the carburetor during cleaning.
How can I safely remove the carburetor from my lawn mower for cleaning?
Start by turning off the mower and disconnecting the spark plug wire to prevent accidental starting. Use the appropriate tools to loosen and remove the screws or bolts securing the carburetor. Carefully detach the carburetor from the fuel lines and linkage, noting the placement of each component. Place the carburetor on a clean surface to prepare for cleaning.
What is the proper procedure for cleaning the internal parts of the carburetor?
Disassemble the carburetor by removing the bowl and needle valve. Spray the internal parts thoroughly with carburetor cleaner, focusing on jets and small passages. Use a small brush or compressed air to remove stubborn dirt and deposits. Avoid damaging delicate components. Reassemble the carburetor once all parts are clean and dry.
Final Thoughts
To clean a Briggs and Stratton lawn mower carburetor effectively, begin by removing the carburetor from the mower. Use a carburetor cleaner spray to dissolve dirt and varnish buildup. Scrub gently with a brush, then reassemble and reinstall the unit.
Regular cleaning prevents engine issues and keeps your mower running smoothly. Always follow manufacturer instructions for your specific model.
In summary, knowing how to clean a Briggs and Stratton lawn mower carburetor ensures optimal performance and longevity. Proper maintenance makes lawn care easier and more efficient.