Quick Answer: To test a lawn mower solenoid with a multimeter, you will need to perform a few simple steps. First, ensure that the mower is turned off and disconnected from power. Then, disconnect the solenoid from the electrical system and remove it from the mower. Set your multimeter to the resistance or ohms setting. Connect the multimeter’s probes to the solenoid terminals and check for a reading between 20 and 500 ohms. If the reading falls within this range, the solenoid is functioning properly. If there is no reading or the reading is outside the recommended range, it indicates a faulty solenoid that needs replacement.
Introduction:
Is your lawn mower not starting or experiencing electrical issues? The culprit could be a faulty solenoid, a vital component responsible for starting the engine. Fortunately, testing the lawn mower solenoid with a multimeter is a simple task that can help you determine its functionality quickly. In this guide, we will walk you through the step-by-step process of testing your lawn mower solenoid using a multimeter. By following these instructions, you can diagnose if the solenoid is the cause of the problem and take appropriate action to resolve it. So, let’s dive in and troubleshoot the issue with our trusty multimeter!

How to Test Lawn Mower Solenoid with a Multimeter
When it comes to maintaining your lawn mower, one crucial component to check is the solenoid. The solenoid is responsible for connecting and disconnecting the battery to the starter motor, allowing your mower to start easily. If you suspect that the solenoid is faulty, it’s important to test it to ensure it is functioning correctly. In this guide, we will walk you through the process of testing a lawn mower solenoid using a multimeter. By following these steps, you can diagnose any issues with your solenoid and take the necessary steps to fix them.
What You Will Need
Before you begin testing the solenoid, gather the following tools and materials:
- Multimeter
- Safety gloves
- Safety goggles
- Wrench or pliers
- Wire brush or sandpaper
Step 1: Safety Precautions
Before you start working on your lawn mower, it’s important to take safety precautions to protect yourself from any potential harm. Follow these steps:
- Disconnect the spark plug wire to prevent accidental starting.
- Wear safety goggles and gloves to protect your eyes and hands.
- Make sure the mower is on a level surface and the engine is cool.
Step 2: Locate the Solenoid
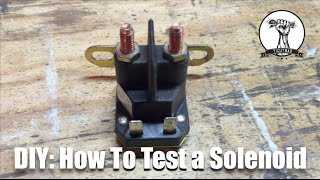
The solenoid is typically located near the battery or starter motor. Refer to your lawn mower’s manual to find the exact location. Once you’ve located the solenoid, visually inspect it for any signs of damage or corrosion. If you notice any issues, you may need to replace the solenoid.
Step 3: Test the Solenoid with a Multimeter
Now it’s time to test the solenoid using a multimeter. Follow these steps:
- Set your multimeter to the continuity or resistance mode.
- Attach the black probe to the solenoid’s ground terminal or any metal part of the mower’s engine.
- Attach the red probe to the small terminal on the solenoid. This terminal is usually labeled “S” or “Solenoid”.
- Observe the multimeter’s reading. A reading of zero or close to zero indicates good continuity, which means the solenoid is functioning properly. If the reading is significantly higher or infinite, it means the solenoid is faulty and needs to be replaced.
Step 4: Clean or Replace the Solenoid
If the multimeter reading indicates that the solenoid is faulty, you have two options: clean or replace it.
To clean the solenoid:
- Disconnect the battery cables from the solenoid.
- Use a wire brush or sandpaper to clean any corrosion or dirt from the solenoid’s terminals.
- Reconnect the battery cables and retest the solenoid with the multimeter. If the reading is now within the acceptable range, the cleaning process was successful. If not, proceed to the next step.
If cleaning the solenoid doesn’t resolve the issue, you’ll need to replace it. Refer to your lawn mower’s manual for instructions on how to remove and install a new solenoid. Make sure to disconnect the battery before replacing the solenoid.
Step 5: Reassemble and Test
After cleaning or replacing the solenoid, reassemble all the components following the reverse order of removal. Once everything is back in place, reconnect the spark plug wire and start the mower to test if the solenoid issue has been resolved.
Remember, if you are unsure or uncomfortable with testing or replacing the solenoid yourself, it’s always a good idea to seek professional assistance to ensure the job is done correctly and safely.
Testing a lawn mower solenoid with a multimeter is a relatively simple process that can help you determine if the solenoid is faulty. By following the steps outlined in this guide, you can confidently diagnose solenoid issues and take the appropriate steps to fix them. Regularly checking and maintaining your lawn mower’s solenoid will ensure smooth operation and extend the overall lifespan of your equipment. Happy mowing!
Note: Always refer to your lawn mower’s manual for specific instructions and safety guidelines.
How to Test lawn Mower Solenoids
Frequently Asked Questions
How do I test a lawn mower solenoid with a multimeter?
To test a lawn mower solenoid using a multimeter, follow these steps:
What equipment do I need to test a lawn mower solenoid with a multimeter?
To test a lawn mower solenoid with a multimeter, you will need the following equipment:
How can I check if the solenoid is receiving power?
To check if the solenoid is receiving power, you can perform the following steps:
What should I do if the solenoid is not receiving power?
If the solenoid is not receiving power, there are a few troubleshooting steps you can take:
How can I test the solenoid coil using a multimeter?
To test the solenoid coil with a multimeter, follow these steps:
What should I do if the solenoid coil is faulty?
If the solenoid coil is found to be faulty during testing, you may need to replace it. Here’s what you can do:
Final Thoughts
Testing a lawn mower solenoid with a multimeter is a simple and effective way to determine if it is functioning correctly. By following a few steps, you can diagnose any issues and ensure that your lawnmower works efficiently. First, gather the necessary tools and safety equipment. Then, disconnect the battery and locate the solenoid. Using the multimeter, test the solenoid’s resistance and voltage. By carefully analyzing the readings, you can assess if the solenoid is faulty or not. Remember, testing a lawn mower solenoid with a multimeter is a crucial skill for any lawn care enthusiast.