To quickly clean your lawn mower’s carburetor without removing it, start by using a carburetor cleaner spray while the engine is running and the choke is engaged. This flushes out grime and blockages effectively. For a deeper clean, you can also remove the air filter and spray cleaner directly into the carburetor throat, then let it sit before running the mower briefly to circulate the cleaner.
If your mower is stalling or struggling to start, cleaning the carburetor without taking it out can often solve the problem. Simply access the area, spray the cleaner into the carburetor, and let it work its magic. This method saves time and effort, letting you get back to your yard work faster.
Over time, dirt and old fuel can clog your lawn mower’s carburetor, causing performance issues. Removing and cleaning it can be a hassle, but with the right approach, you can restore proper function without full removal. In this guide, we’ll walk you through simple, effective steps to clean your carburetor in place, saving you both time and effort while keeping your mower running smoothly.

How to Clean a Lawn Mower Carburetor Without Removing It
Cleaning your lawn mower’s carburetor without taking it out might sound challenging, but it’s entirely doable with the right steps. Proper cleaning helps your mower run smoothly, improves fuel efficiency, and prevents stalling. Below, we’ll explore each part of the process in detail, ensuring you get the best results with minimal hassle.
Understanding the Importance of Carburetor Maintenance
Before diving into the cleaning process, it’s helpful to understand why the carburetor needs attention. Over time, dirt, debris, and stale fuel can clog the tiny passages inside, leading to poor engine performance. Regular cleaning can prevent engine misfires, rough idling, and difficulty starting your mower.
Identifying Common Signs of a Dirty Carburetor
Knowing when your carburetor needs cleaning can save you time and effort. Look for these signs:
- The mower stalls shortly after starting.
- Difficulty starting the engine or requiring multiple pulls.
- Engine runs unevenly or idles roughly.
- Decreased power during mowing.
- Black smoke or fuel leakage from the carburetor area.
If you notice these issues, it’s time to clean the carburetor effectively, even without removing it.
Tools and Supplies Needed for Cleaning
Gather the following items before starting:
- Carburetor cleaner spray (preferably carb-specific)
- Screwdrivers (flat-head and Phillips)
- Needle or small wire brush
- Compressed air canister or air compressor
- Clean cloths or rags
- Fuel stabilizer (optional but recommended)
Having these tools ready will make the process easier and faster.
Preparing the Lawn Mower for Cleaning
Start by shutting off your mower and disconnecting the spark plug wire to prevent accidental starting. Next, clean around the carburetor area to remove dirt and grass that might fall into the carburetor during cleaning. Also, drain or stabilize the fuel to prevent leaks or fires.
Accessing the Carburetor Without Removing It
Most lawn mower models allow access to the carburetor via the air filter or exterior panels. Remove the air filter cover and filter to expose the carburetor. Sometimes, a small cover or panel needs to be unscrewed for complete access. Use your screwdriver to carefully remove these parts without detaching the carburetor entirely.
Inspecting the Carburetor
Once accessible, examine the carburetor for visible dirt, varnish, or buildup. Pay close attention to the small fuel and air passages, as these tend to clog first. Using a flashlight can help reveal blockages that are not immediately obvious.
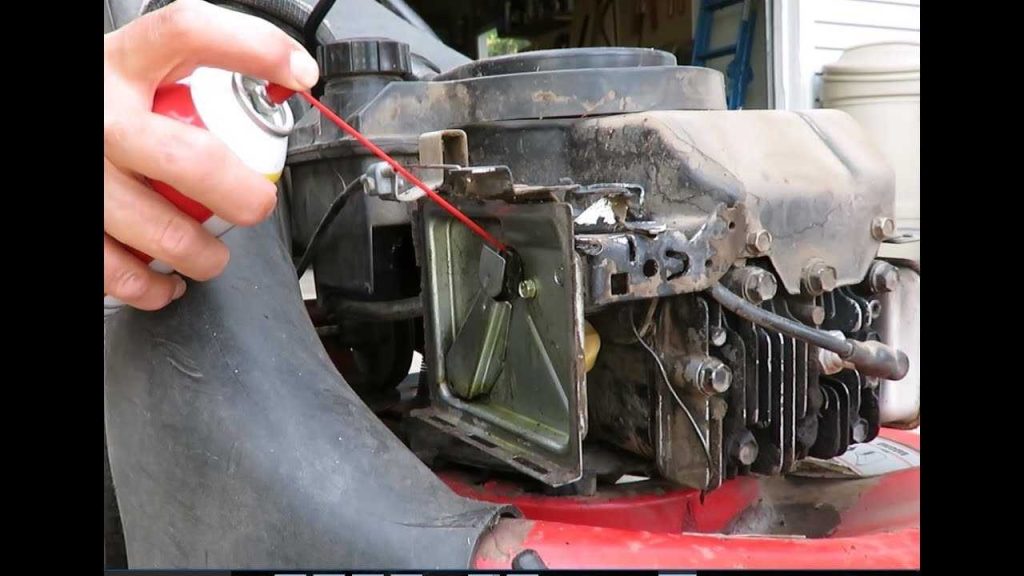
Performing a Basic Cleaning Using Carburetor Cleaner Spray
Spray the carburetor cleaner into the accessible openings and passages. Focus on the throat of the carburetor and all visible jets or ports. Allow the cleaner to sit for a few minutes to loosen grime. Use a small wire or needle to gently dislodge stubborn deposits.
Cleaning the Air Passages
Use compressed air to blow out all tiny holes and passages after applying the cleaner. Hold the air nozzle close to the openings and blow air through each passage. Be careful not to damage delicate parts, and wear safety glasses to protect your eyes from debris.
Cleaning the Carburetor Bowl and External Parts
If your mower’s carburetor has a visible bowl, clean its exterior with a cloth dampened with carb cleaner. If possible, gently loosen the bowl’s screw to access the inside and remove any residual dirt. Be cautious not to fully detach the bowl unless necessary, as some models require special tools.
Checking and Replacing Gaskets and Seals
While cleaning, inspect gaskets and seals for cracks or wear. Damaged gaskets can cause leaks and poor performance. Replace any worn or cracked gaskets promptly to ensure a proper seal and optimal engine operation.
Reassembling and Testing Your Mower
After cleaning, reattach any covers or filters removed initially. Reconnect the spark plug wire and add fresh fuel or stabilizer if needed. Start the mower and observe whether the engine runs smoother and more evenly. Make adjustments if necessary, such as tuning the idle screw.
Preventative Maintenance Tips
Regularly inspecting and cleaning your carburetor can extend its lifespan and keep your mower running optimally. Use fresh fuel, avoid letting gas sit for long periods, and clean the air filter regularly. Always store fuel in proper containers to prevent contamination.
Additional Tips for Effective Carburetor Cleaning
- Use high-quality carburetor cleaner for best results.
- Take your time to thoroughly spray and blow out all passages.
- Be gentle when cleaning delicate parts to prevent damage.
- Consult your mower’s manual for specific access points and procedures.
When to Seek Professional Help
If cleaning without removal doesn’t solve the issue, or if you notice severe damage or corrosion, it’s wise to consult a small engine professional. Sometimes, a full removal and rebuild of the carburetor are necessary for proper functioning.
Understanding how to clean a lawn mower carburetor without removing it saves time and effort, keeps your mower running efficiently, and reduces repair costs. With the right approach and tools, you can maintain your equipment in top shape without the need for complicated disassembly.
How to clean lawn mower carburetor in under 5 minutes!
Frequently Asked Questions
Can I clean the carburetor using a carburetor cleaner without removing it from the mower?
Yes, you can clean the carburetor in place by using a specialized carburetor cleaner spray. Spray the cleaner into the carburetor’s throat and openings, following the product instructions. Let it sit for a few minutes to loosen deposits, then start the mower and let it run for a few minutes to help the cleaner circulate. This process can help remove dirt and gummed-up fuel residues without the need to detach the carburetor.
What steps should I take to prevent fuel blockages during in-place cleaning?
To avoid fuel blockages, turn off the mower and disconnect the spark plug before starting cleaning. Drain some fuel from the tank if possible, or pin the fuel line to prevent fuel flow. Use a clean, compressed air source to blow through the carburetor’s jets and passages, dislodging any debris. Applying a carburetor cleaner spray into the openings also helps dissolve stubborn deposits and improves fuel flow.
How can I access the carburetor’s internal parts for cleaning without removing it?
Many mower models allow you to reach the carburetor internally by removing the air filter and the intake cover. Once these parts are off, you can access the carburetor’s exterior and sometimes the jets or throttle plate. Use compressed air or a carburetor cleaner spray to clear out deposits from these accessible points. Be cautious not to dislodge any internal components; if deeper cleaning is needed, removal might be necessary.
Is it effective to use ultrasonic cleaning for a lawn mower carburetor without removal?
Ultrasonic cleaning generally requires removing the carburetor and immersing it in a cleaning tank. Without removal, this method isn’t practical. Instead, using spray cleaners and compressed air provides a more straightforward approach for cleaning the carburetor in its place. For deep cleaning, removing the carburetor ensures thorough trouble-free maintenance.
What are the common signs indicating I need to clean my carburetor without removing it?
If your lawn mower is experiencing difficulty starting, irregular idling, reduced power, or inconsistent acceleration, these signs may point to a clogged carburetor. In-place cleaning with spray cleaners and air often resolves these issues without removing the component. However, persistent problems may require a more thorough cleaning or carburetor removal for complete inspection and servicing.
Final Thoughts
To clean a lawn mower carburetor without removing it, start by disconnecting the spark plug for safety. Remove the air filter to access the carburetor. Use carburetor cleaner spray to loosen grime and deposits inside.
Spray the cleaner directly into the carburetor throat and adjust the choke to help the cleaner reach deeper. Let the cleaner sit for several minutes to break down stubborn dirt.
Finally, reassemble everything and run the mower briefly to ensure smooth operation. How to clean a lawn mower carburetor without removing it involves careful cleaning and proper reassembly for optimal performance.