Soil testing is the foundational step to a thriving lawn. It reveals crucial information about your soil’s pH, nutrient levels, and texture. Understanding these elements allows you to tailor your lawn care routine, choose the right amendments, and ultimately achieve the lush, green lawn you desire. Don’t guess; test!
Let’s talk dirt. No, seriously! Your lawn’s health, that lush green carpet you dream of, doesn’t just appear out of nowhere. It starts from the ground up. And the secret to truly understanding what your ground needs? It’s soil testing. Think of it as a health check-up for your lawn, but instead of a doctor, your soil is the patient, and the test reveals its inner workings. Without this vital information, you’re essentially flying blind, throwing money and effort at your lawn hoping something sticks.
You might be wondering, “Why go through all this trouble? Can’t I just water and mow?” Well, you can, but you won’t get the best results. Your lawn could be struggling with nutrient deficiencies, imbalances in acidity or alkalinity, or poor structure, and you wouldn’t even know it. Soil testing is the key that unlocks the mystery, revealing exactly what your soil is made of and what it requires to thrive. It’s the smart way to garden, ensuring you’re giving your lawn exactly what it needs to flourish.
So, what exactly is soil testing, and why should it be a cornerstone of your lawn care strategy? Let’s dig in!
- Soil testing is the essential first step to understanding your lawn’s needs. It provides vital data about pH, nutrient levels, and texture that guesswork can’t provide.
- Key elements tested include pH, macronutrients (N, P, K), micronutrients, and organic matter. Each plays a critical role in plant health and growth.
- Proper sampling is crucial for accurate results. Collect samples from various areas of your lawn at the correct depth, avoiding unusual spots.
- DIY kits offer quick insights, while lab tests provide more comprehensive and precise analysis. Choose based on your needs and desired accuracy.
- Interpreting results allows you to make informed decisions about amendments and fertilizers. This prevents over- or under-application, saving time and money.
- Consistent soil testing (every 1-3 years) helps track improvements and identify emerging issues. It’s a continuous process for optimal lawn health.
[FEATURED_IMAGE_PLACEHOLDER]
Quick Answers to Common Questions
What is the most important nutrient for a healthy lawn?
While all essential nutrients are important, Nitrogen (N) is often considered the most critical for a healthy, green lawn because it’s vital for leafy green growth and is frequently depleted from the soil.
How deep should I take a soil sample for my lawn?
For established lawns, you should collect soil samples from a depth of 4 to 6 inches, as this is where the majority of grass roots are located and where nutrient uptake occurs.
Can I test my soil without sending it to a lab?
Yes, you can use DIY soil test kits available at garden centers. However, these kits are generally less accurate and provide less detailed information than professional lab tests.
How often should I test my soil?
It’s recommended to test your soil every 1 to 3 years to track its condition, identify any changes, and adjust your lawn care plan accordingly.
What does a soil pH of 5.5 mean for my lawn?
A pH of 5.5 is quite acidic. Most lawn grasses prefer a pH between 6.0 and 7.0, so a pH of 5.5 indicates that nutrients might not be readily available to your grass, and you would likely need to add lime to raise the pH.
📑 Table of Contents
What Is Soil Testing and Why Is It Important?
At its core, soil testing is a scientific process used to determine the physical and chemical properties of your soil. For your lawn, this means understanding its composition, nutrient levels, and acidity or alkalinity (pH). It’s like getting a detailed report card for your soil, showing its strengths and weaknesses.
The importance of soil testing for lawn care cannot be overstated. Here’s why:
Understanding Your Soil’s Foundation
Your soil is a living ecosystem. It’s made up of minerals, organic matter, water, air, and countless microorganisms. These components work together to support plant life. A soil test helps you understand the balance of these elements, especially the mineral nutrients that plants need to grow strong and healthy.
Identifying Nutrient Deficiencies and Excesses
Plants, just like us, need a balanced diet. They require macronutrients (like nitrogen, phosphorus, and potassium) and micronutrients (like iron, zinc, and manganese) to grow. A soil test will tell you if any of these essential nutrients are lacking or if there’s an excess, which can be just as detrimental. For instance, too much phosphorus can tie up other important nutrients.
Determining Soil pH
pH is a measure of how acidic or alkaline your soil is, on a scale of 0 to 14. A pH of 7 is neutral. Most lawn grasses prefer a slightly acidic to neutral pH, typically between 6.0 and 7.0. Why does pH matter? It directly impacts how well your grass can absorb the nutrients present in the soil. If the pH is too high or too low, nutrients can become unavailable to the plant, even if they are present in the soil. This is a common reason why lawns struggle to grow, even with regular fertilization. If your lawn is too acidic, you might need to look into what to do if your lawn soil is too acidic.
Assessing Soil Texture and Structure
While not always included in basic tests, some analyses can also provide insights into your soil’s texture (the proportion of sand, silt, and clay) and structure (how these particles are arranged). This information is vital for understanding drainage, aeration, and how well roots can penetrate the soil. For example, clay soils can become compacted, hindering growth, while sandy soils may drain too quickly. Dealing with compacted soil is a common challenge that can be addressed with proper soil management.
Preventing Waste and Environmental Impact
By knowing what your soil actually needs, you avoid applying unnecessary fertilizers and amendments. This saves you money, time, and effort. More importantly, it prevents over-application of nutrients, which can lead to runoff into waterways, causing pollution and environmental damage.
What Does a Soil Test Measure?
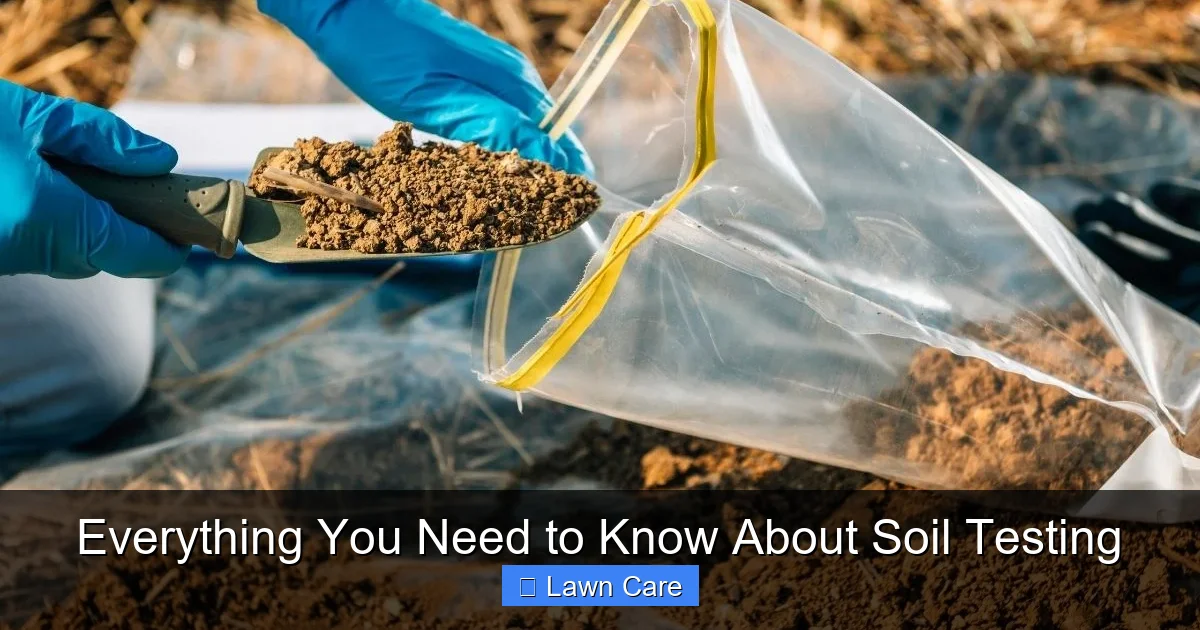
Visual guide about Everything You Need to Know About Soil Testing
Image source: cuttingtechnologies.com
A typical soil test for lawn care will focus on several key components. Understanding what each element tells you is crucial for interpreting the results and taking appropriate action.
Nutrient Levels
* Macronutrients: These are the big three:
* Nitrogen (N): Essential for leafy green growth. It’s the nutrient most often needed but also the one that leaches out of the soil quickly, requiring regular replenishment. Soil tests might indicate the “potential” or “available” nitrogen, but it’s often best managed through a regular fertilization schedule based on grass type and climate.
* Phosphorus (P): Crucial for root development, flowering, and seed production. Low phosphorus can stunt growth.
* Potassium (K): Important for overall plant health, disease resistance, drought tolerance, and stress management. It helps grass withstand wear and tear, making it particularly important for high-traffic areas.
* Secondary Nutrients: Calcium, magnesium, and sulfur are also vital, though usually needed in smaller quantities than the primary macronutrients.
* Micronutrients: These include iron, manganese, zinc, copper, boron, and molybdenum. While needed in tiny amounts, a deficiency can cause serious problems like yellowing (chlorosis) if iron is lacking.
Soil pH
As mentioned, this measures acidity or alkalinity. The ideal range for most lawns is 6.0 to 7.0. If your pH is too low (acidic), it can make essential nutrients like phosphorus and potassium unavailable. If it’s too high (alkaline), it can lock up micronutrients like iron. Testing soil pH is a fundamental part of soil analysis.
Organic Matter Content
Organic matter is the decomposed remains of plants and animals. It’s a powerhouse for soil health, improving structure, water retention, aeration, and nutrient availability. A healthy lawn typically has 3-5% organic matter. Low levels mean your soil is likely lacking in structure and fertility. Increasing organic matter is a long-term strategy for soil improvement.
Cation Exchange Capacity (CEC)
This is a measure of the soil’s ability to hold onto positively charged nutrient ions (cations) like potassium, calcium, and magnesium. Soils with higher CEC (often clay or loam soils) can hold more nutrients and are less prone to leaching. Sandy soils generally have lower CEC.
How to Take a Soil Sample for Testing
The accuracy of your soil test hinges entirely on how you collect your sample. A well-collected sample represents the average conditions of your lawn, not just one isolated spot.
When to Sample
* **Anytime is good:** You can test your soil at any time of the year. However, avoid testing immediately after applying fertilizers or lime, as this can skew the results. A good time is a few weeks before you plan to amend your soil.
Where to Sample
* **Collect from multiple locations:** Divide your lawn into sections (e.g., front yard, backyard, shady areas, sunny areas, high-traffic spots). Don’t just sample near trees or gardens, as their nutrient needs differ.
* **Avoid unusual spots:** Steer clear of areas where fertilizer or lime has recently been applied, or where you have spills of oil or chemicals. Also, avoid areas right next to driveways or sidewalks, as the soil there can be different.
* **Sample at the correct depth:** For established lawns, take samples from 4 to 6 inches deep. This is where the majority of grass roots are located and where nutrient uptake occurs. Use a soil probe or a clean trowel and shovel.
How to Sample
1. **Prepare your tools:** You’ll need a clean trowel, shovel, or soil probe, and a clean bucket or plastic bag.
2. **Remove the top layer:** If using a trowel, dig a small hole to the required depth and push the soil to one side.
3. **Collect a core sample:** Scrape about a tablespoon of soil from the side of the hole at the target depth.
4. **Repeat this process:** Go to at least 5-10 different spots within the designated area of your lawn, collecting about a tablespoon of soil from each spot at the same depth.
5. **Combine samples:** Place all the collected soil into your clean bucket or plastic bag. Mix them thoroughly to create a composite sample. This blended sample represents the average soil condition for that area.
6. **Prepare for submission:** Remove any plant debris, stones, or roots from the mixed soil. You’ll typically need about 1 to 2 cups of soil for a lab test.
Choosing a Soil Testing Method: DIY vs. Lab
You have two primary options when it comes to soil testing: DIY kits and professional lab testing. Each has its pros and cons.
DIY Soil Test Kits
* **Pros:** These kits are readily available at garden centers and online. They are generally inexpensive and provide relatively quick results, often within minutes. They can give you a general idea of your soil’s pH and sometimes basic nutrient levels.
* **Cons:** DIY kits are typically less accurate and provide less detailed information than lab tests. They might give you a broad range (e.g., “slightly acidic”) rather than a precise number. Nutrient analysis in DIY kits is often very basic or non-existent.
* **Best for:** Quick checks, identifying major pH imbalances, or when budget is a primary concern.
Professional Laboratory Soil Testing
* **Pros:** This is the gold standard for accuracy and detail. University extension offices, private labs, and some lawn care companies offer comprehensive soil testing services. They provide precise measurements of pH, all essential nutrients (macro and micro), organic matter, and sometimes CEC. The reports are usually accompanied by detailed recommendations for amendments and fertilization tailored to your specific needs and turf type.
* **Cons:** Lab tests take longer to get results (often 1-3 weeks) and are more expensive than DIY kits. You’ll need to mail your sample or drop it off.
* **Best for:** Comprehensive understanding, accurate nutrient management, identifying complex issues, and ensuring optimal lawn health. Many homeowners find that the cost is well worth the precise guidance it provides for achieving their dream lawn.
Interpreting Your Soil Test Results and Taking Action
Once you receive your soil test results, the real work begins: understanding them and acting on the recommendations. Don’t let the charts and numbers intimidate you!
Understanding the Report
Your report will likely include:
* **pH Value:** A number indicating acidity or alkalinity.
* **Nutrient Levels:** These are usually reported as “low,” “medium,” or “high,” or sometimes with specific parts per million (ppm) values.
* **Organic Matter Percentage:** A key indicator of soil health.
* **Recommendations:** This is the most valuable part – specific suggestions for fertilizers, lime, or other amendments, often quantified by the amount to apply and the best time to do it.
Making Informed Decisions
* **Adjusting pH:** If your pH is off, the report will tell you whether to add lime (to raise pH, making it less acidic) or sulfur (to lower pH, making it less alkaline). It will specify the type and amount to apply per 1,000 square feet.
* **Fertilizing:** Based on nutrient levels, the report will recommend specific fertilizer ratios (e.g., 10-10-10, or a blend high in nitrogen for growth). It will tell you how much to apply. This is where understanding the N-P-K numbers becomes important, and knowing the right time to fertilize is crucial for mowing schedules and nutrient uptake.
* **Improving Organic Matter:** If your organic matter is low, you’ll be advised to add compost or other organic amendments. This is a gradual process that significantly improves soil structure and fertility over time. You might also consider how to use compost to improve lawn soil.
* **Addressing Specific Issues:** If the test reveals a deficiency in a specific micronutrient, like iron, the report might suggest a chelated iron fertilizer.
Regular Testing for Long-Term Health
Soil testing isn’t a one-and-done task. For best results, re-test your soil every 1-3 years. This allows you to:
* **Track progress:** See how your amendments have affected your soil.
* **Identify new issues:** Soil conditions can change over time due to weather, traffic, and plant uptake.
* **Refine your strategy:** Adjust your fertilization and amendment plan based on current needs.
Maintaining soil health is an ongoing journey, and regular soil testing is your roadmap. It empowers you to make data-driven decisions, leading to a healthier, more resilient, and visually stunning lawn. By understanding what your soil needs, you can create the perfect environment for your grass to thrive, reducing the likelihood of common problems like bare spots caused by poor soil conditions or the appearance of unwanted plants like tumbleweed.
Frequently Asked Questions
Is soil testing really necessary for a healthy lawn?
Yes, soil testing is highly recommended for a healthy lawn. It provides crucial insights into your soil’s nutrient levels, pH, and other factors that directly impact grass growth and vitality. Without testing, you might be applying unnecessary products or missing key deficiencies.
What are the main nutrients tested in soil?
The main nutrients tested are macronutrients: Nitrogen (N), Phosphorus (P), and Potassium (K). Secondary nutrients like Calcium, Magnesium, and Sulfur are also often included, along with essential micronutrients like Iron and Manganese.
How do I interpret the results of my soil test?
Your soil test report will typically provide a breakdown of your soil’s condition, often with recommendations for fertilizers, lime, or sulfur applications. Look for specific advice on adjusting pH and nutrient levels to match your lawn’s needs.
What is the ideal pH range for most lawns?
The ideal pH range for most lawn grasses is slightly acidic to neutral, typically between 6.0 and 7.0. This range allows grass to efficiently absorb the nutrients available in the soil.
Can soil testing help me fix bare spots in my lawn?
Absolutely. Bare spots can often be a symptom of underlying soil problems like nutrient deficiencies, incorrect pH, or poor soil structure. A soil test can identify these issues, allowing you to make targeted improvements to help grass grow back effectively, especially if the problem is related to poor soil conditions.
What is organic matter and why is it important for my soil?
Organic matter is decomposed plant and animal material that acts as a natural fertilizer and soil conditioner. It improves soil structure, water retention, aeration, and nutrient availability, making it essential for a healthy and resilient lawn.