Wondering if your lawn needs a soil analysis? Sending soil samples to a lab is a powerful way to understand your soil’s unique needs. This guide will help you determine if it’s the right step for your lawn, covering the signs your soil might be unbalanced and how a lab test can provide actionable insights for healthier, greener grass. Learn when to test and what to expect.
## Do I Need to Send Soil Samples to a Lab?
Your lawn is more than just grass; it’s a living ecosystem. Like any living thing, it needs the right conditions to thrive. Sometimes, even with regular watering and mowing, your lawn might not look its best. Yellow patches, slow growth, or an inability to establish new grass can be frustrating. While it’s tempting to guess at the problem and apply generic solutions, the real answer might be hidden beneath the surface: in your soil.
This guide will help you understand when and why sending soil samples to a lab is a crucial step in achieving the lawn of your dreams. We’ll explore the signs that indicate a soil problem, the benefits of professional soil testing, and how to interpret the results to create a truly customized lawn care plan.
## Why Soil Health Matters for Your Lawn
Before diving into lab testing, it’s essential to grasp why soil health is the foundation of a beautiful lawn. Healthy soil provides:
* Nutrients: Plants need a balanced supply of macronutrients (like nitrogen, phosphorus, and potassium) and micronutrients (like iron, zinc, and manganese) to grow strong and green.
* Water Retention: Good soil structure allows water to penetrate and be held effectively, preventing drought stress.
* Aeration: Roots need oxygen to survive and grow. Healthy soil has pore spaces that allow air to circulate.
* pH Balance: Soil pH affects how well plants can access the nutrients available to them.
* Beneficial Microorganisms: A living soil is teeming with beneficial microbes that help break down organic matter and make nutrients available to plants.
When any of these elements are out of balance, your lawn will show it.
## Signs Your Lawn Might Need a Soil Test
Are you experiencing any of these common lawn problems? If so, a soil test could be the answer.
### Persistent Poor Growth and Thinning Turf
You water regularly, you fertilize, and you’re even careful about how often you mow, but your grass remains thin, weak, and doesn’t grow vigorously. This could indicate a deficiency in essential nutrients or a pH level that’s making nutrients unavailable.
### Unusual Discoloration
While some yellowing can be due to over or under-watering, persistent or widespread discoloration – such as yellowing, purpling, or browning of grass blades that isn’t related to seasonal changes – often points to nutrient imbalances or pH issues. For instance, iron deficiency can cause yellowing between the veins of grass blades.
### Lack of Root Development
Healthy grass has a strong, deep root system. If your grass pulls up easily or you notice shallow roots, it can be a sign of compacted soil or a lack of phosphorus, which is vital for root growth.
### Difficulty Establishing New Grass Seed
If you’ve tried to seed bare patches multiple times and the seeds just won’t germinate or grow into healthy seedlings, the problem is likely with your soil. Poor seed-to-soil contact, lack of nutrients, or incorrect pH can all prevent successful germination and establishment. You might also want to check how much grass seed you need, but the soil quality is often the limiting factor.
### Moss or Weed Infestations
While weeds can pop up for many reasons, a persistent and overwhelming presence of certain weeds or moss can indicate underlying soil conditions. For example, moss often thrives in acidic, compacted soil, and some weeds indicate low fertility.
### Drainage Problems
If your lawn stays waterlogged for extended periods after rain, it could be a sign of poor soil structure or compaction. While improving drainage is crucial, understanding why the soil isn’t absorbing water properly often starts with a soil test.
## What Can a Soil Test Reveal?
A professional soil test from a reputable laboratory provides comprehensive data that simple home kits can’t match. Here’s what you can expect to learn:
### Nutrient Levels
This is perhaps the most critical aspect of a soil test. It will tell you the exact amounts of major nutrients (Nitrogen, Phosphorus, Potassium – NPK) and essential micronutrients present in your soil. Knowing these levels allows you to apply fertilizers precisely, avoiding over-application (which can harm your lawn and the environment) or under-application (which leads to deficiencies).
### Soil pH
Soil pH is a measure of acidity or alkalinity. Most turfgrasses thrive in a slightly acidic to neutral pH range (typically 6.0 to 7.0).
* Low pH (Acidic Soil): Can lead to the unavailability of essential nutrients like phosphorus and calcium. It can also increase the solubility of toxic elements like aluminum.
* High pH (Alkaline Soil): Can make micronutrients like iron and manganese unavailable, leading to chlorosis (yellowing).
A soil test will tell you your exact pH and recommend amendments (like lime to raise pH or sulfur to lower it) to bring it into the optimal range. For example, if your soil is too acidic, you might need to explore what to do if your lawn soil is too acidic.
### Organic Matter Content
Organic matter is the lifeblood of healthy soil. It improves soil structure, water retention, aeration, and provides a slow release of nutrients. A soil test will indicate your organic matter percentage. Low organic matter can be improved with the addition of compost or other organic amendments. This is key to how to improve soil quality for a healthier lawn.
### Cation Exchange Capacity (CEC)
CEC measures the soil’s ability to hold and supply essential positively charged nutrients like calcium, magnesium, and potassium. Soils with higher CEC can hold onto nutrients better and are generally more fertile.
### Soluble Salts
High levels of soluble salts can damage grass by interfering with water uptake. This can be caused by over-fertilization, road salt, or certain irrigation water sources.
## When Should You Send Soil Samples to a Lab?
The frequency and timing of soil testing depend on your specific situation.
### Initial Lawn Setup
If you are establishing a new lawn, whether from seed or sod, testing your soil beforehand is highly recommended. This allows you to amend the soil to create the best possible environment for your new grass. It’s a crucial first step for how do I take care of a new lawn.
### Annual or Biennial Testing
For most established lawns, testing every 1-3 years is sufficient. This allows you to monitor nutrient levels and pH and make adjustments as needed.
### When Problems Arise
If you notice persistent issues with your lawn that you can’t otherwise explain (as outlined in the “Signs Your Lawn Might Need a Soil Test” section), it’s time to get a soil test, regardless of when you last tested.
### Before Major Lawn Renovations
If you plan to undertake significant lawn work, such as a major pH correction, extensive overseeding, or adding new garden beds, a soil test will provide valuable baseline information.
### Optimal Timing
The best time to collect soil samples is typically during the spring or fall.
* Spring: After the ground has thawed but before active growth begins in earnest.
* Fall: After the growing season has ended but before the ground freezes.
These times generally provide the most stable and representative readings, as they are not influenced by the rapid nutrient uptake of peak summer growth or the dormant period of winter.
## How to Collect Soil Samples for Lab Testing
Collecting samples correctly is vital for accurate results. A poorly collected sample can lead to misleading information and ineffective treatments.
### Step 1: Gather Your Supplies
You will need:
* A clean bucket
* A clean trowel, spade, or a soil probe
* Plastic bags or containers provided by the testing lab
* Gloves (optional)
* A pen or marker
### Step 2: Determine Your Sampling Area
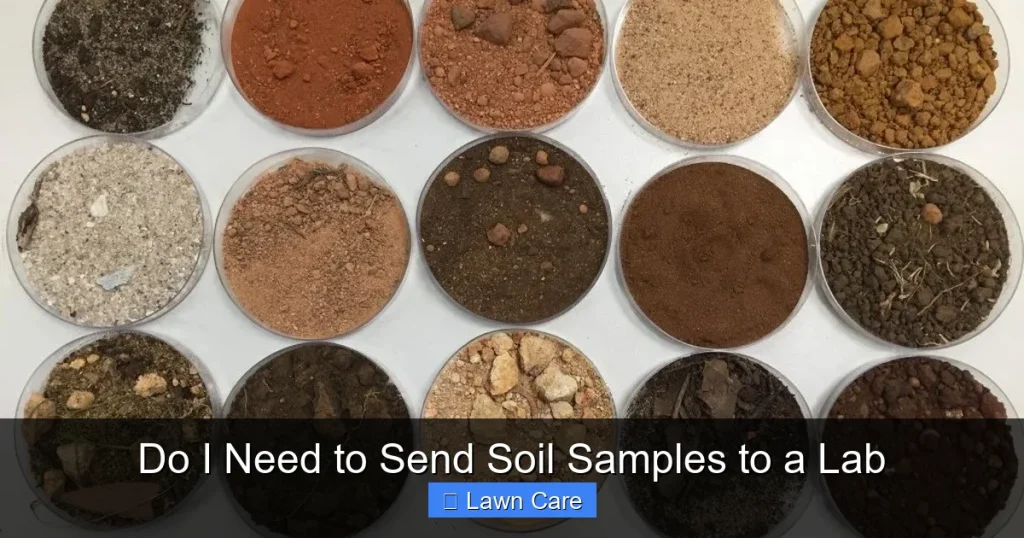
* Divide Your Lawn: If you have different types of grass, varying soil conditions (e.g., sandy areas vs. clay areas), or distinct problem zones, it’s best to take separate samples for each area. A typical lawn might require just one or two composite samples.
* Avoid Contamination: Do not take samples near driveways, sidewalks, compost piles, or areas where fertilizers or pesticides have recently been applied.
### Step 3: Collect Multiple Sub-Samples
This is the most critical part of ensuring a representative sample.
* Depth: For lawns, you generally want to sample the top 4-6 inches of soil, which is where most grass roots grow. If using a soil probe, ensure it collects soil to this depth. If using a trowel or spade, dig a small hole and take a slice of soil from the side of the hole, about 1 inch thick, from top to bottom.
* Number of Locations: In each designated area, collect at least 5-10 sub-samples. These should be spread randomly across the area.
* Mixing: Place all sub-samples from one area into your clean bucket.
### Step 4: Prepare the Composite Sample
* Mix Thoroughly: Break up any large clumps of soil in the bucket and mix the sub-samples thoroughly. You want to create a uniform blend of the soil from the entire area.
* Remove Debris: Discard any large rocks, twigs, or grass clippings from the mixture.
### Step 5: Fill the Sample Bag/Container
* Fill the bag or container provided by the lab with about 1-2 cups of your mixed soil. The lab will specify the amount needed.
* Label the bag clearly with your name, the date, and the area the sample represents (e.g., “Front Lawn,” “Shady Spot”).
### Step 6: Fill Out the Submission Form
* Most labs provide a form to complete. This form will ask for details about your lawn, such as the type of grass, its condition, past treatments, and what you hope to achieve. The more information you provide, the more tailored the recommendations will be.
### Step 7: Mail or Deliver Your Samples
* Follow the lab’s instructions for submitting your samples. This might involve mailing them or dropping them off at a local extension office.
## Choosing a Soil Testing Lab
There are several options for soil testing:
### University Extension Offices
Your local university’s agricultural extension office is often an excellent resource. They typically offer affordable and reliable soil testing services tailored to your region. They also provide expert advice based on the results.
### Private Soil Testing Laboratories
Numerous private labs specialize in soil analysis for turf, agriculture, and horticulture. They may offer more advanced testing options, but can sometimes be more expensive.
### DIY Soil Test Kits (for pH only)
You can buy simple DIY soil test kits at garden centers. These are useful for a quick pH check but do not provide the comprehensive nutrient analysis of a lab test. While they can offer a general idea, they are not a substitute for professional analysis when you need precise recommendations. Understanding how to test soil pH without a kit is useful, but limited.
## Understanding Your Soil Test Report
Once you receive your report, it might seem like a foreign language. Here’s a breakdown of what to look for:
### Key Parameters and Recommendations
* Nutrient Levels (e.g., P, K, Mg, Ca): These will be reported as low, medium, high, or in numerical values. The report will usually recommend specific amounts of fertilizer or amendments needed to reach the optimal level.
* pH: Your current pH will be listed, along with a recommended target range and the type and amount of amendment (e.g., lime or sulfur) needed to adjust it.
* Organic Matter: A percentage will be given, often with a recommendation to increase it if it’s below a certain threshold.
* Nitrogen (N): Nitrogen is highly mobile in the soil and can fluctuate rapidly. Most labs don’t report a precise N level but will recommend a nitrogen application rate based on your grass type and goals.
### Interpreting the Results
* Compare to Recommendations: Pay close attention to the specific recommendations for amendments and fertilizers. These are customized for your soil and your lawn type.
* Prioritize: If you have multiple nutrient deficiencies or a significant pH imbalance, address the most critical issues first (often pH, then major nutrients).
* Don’t Overreact: A single test result doesn’t mean your lawn is doomed. It’s a snapshot that helps you make informed decisions over time.
## When You Might NOT Need to Send Samples to a Lab
While soil testing is highly beneficial, there are times when it might be less critical:
### You’re Just Starting and Have No Prior Issues
If you’ve just moved into a new home with a healthy-looking lawn and no apparent problems, you might not need an immediate soil test. Continue with good general lawn care practices. However, it’s still a good idea to test after a year or two to establish a baseline.
### You’re Seeing Obvious, Easily Correctable Problems
If your lawn is uniformly pale green and you haven’t fertilized in a long time, a simple nitrogen application might be all that’s needed. A test would confirm this, but the action is often straightforward.
### Budget Constraints for a Basic Lawn
If your primary goal is just to keep a lawn alive and you’re on a very tight budget, you might opt for basic, general-purpose lawn fertilizers and accept a less-than-perfect appearance. However, even a single test can save money in the long run by preventing the purchase of unnecessary or incorrect products.
### You’re Ripping Up and Starting Over Completely
If you plan to remove all existing turf, till the soil deeply, and incorporate a large amount of compost and new topsoil, a pre-test might be less crucial than if you’re trying to amend existing soil. However, even then, a test after initial amendments can be valuable.
## Conclusion: Invest in Your Lawn’s Foundation
Understanding your soil is like understanding your lawn’s DNA. While visual cues can offer hints, a professional soil test provides the detailed, scientific information needed to truly optimize your lawn’s health. If you’re struggling with a problematic lawn, or if you simply want to elevate your lawn care to the next level, sending soil samples to a lab is an invaluable step. It’s an investment that pays off in vibrant green turf, reduced guesswork, and a healthier, more resilient lawn for years to come. Don’t guess what your soil needs – find out for sure!
Key Takeaways
- You likely need to send soil samples to a lab if your lawn is consistently unhealthy despite your best efforts. Persistent issues like poor growth, discoloration, or weak turf are strong indicators.
- Lab tests reveal crucial nutrient levels, pH, and organic matter content. These are the building blocks for healthy plant life that visual inspection or home kits can’t fully assess.
- Timing is important. Sending samples in the spring or fall is generally recommended for the most accurate results, avoiding extreme weather conditions.
- Home soil testing kits can offer a general idea, but lab tests provide precise, actionable data. For targeted solutions, especially for complex problems, a lab is superior.
- The cost of a soil test is a worthwhile investment for long-term lawn health. It prevents wasted money on incorrect fertilizers or treatments and leads to more effective lawn care strategies.
- Understanding your soil report allows for customized lawn care. This includes precise fertilizer applications, pH adjustments, and soil amendment choices, leading to a vibrant lawn.