You've probably seen it happen. One day your lawn looks fine. The next, a brown patch peels back like cheap carpet and there they are.
Pale, C-shaped grubs curled in the soil, fat and feeding. That's the moment most people ask when to spread grub killer. The honest answer is that it depends on what you're dealing with and when you catch the problem.
The thing is, grub killers fall into two very different categories. Use the wrong one at the wrong time and you might as well toss your money onto the lawn. As of 2026, soil temperature tracking remains the single most reliable way to time your application, not the calendar date you see on a garden center display.
Let's walk through exactly how that works.
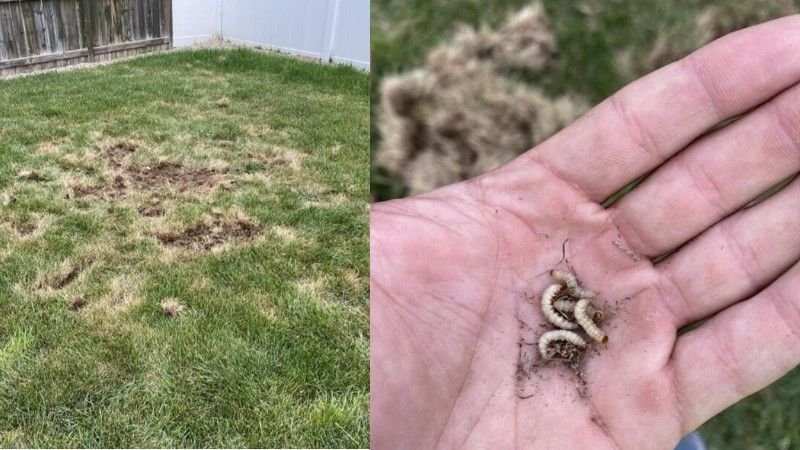
Image source: Bing (Web (fair-use with source credit))
Quick Answer
Spread preventive grub killer in late spring to early summer. Check soil temperature at 2 to 4 inches deep. Apply when it reaches 55°F to 65°F.
Use curative grub killer in late summer to early fall. Apply only after you confirm active grubs are present and still small. Water every application in immediately with half an inch of water.
Why Timing Matters More Than the Product You Buy
Here's what most people get wrong. They buy a bag of grub killer in early spring, spread it around Easter or whenever the snow melts, and assume they're protected. That's not how it works.
Preventive products contain chemicals like imidacloprid or clothianidin. These are neonicotinoids that stay active in the soil for weeks or months. They work by poisoning young grubs as they hatch and start feeding.
But if you apply them in early spring when soil is still cold, those chemicals start breaking down before the grubs even arrive. By the time eggs hatch in mid to late summer, the product has lost most of its punch.
Aggregate reviews from university extension programs consistently point to the same finding. Timing your application to match the grub life cycle is more important than which brand you buy. A perfectly timed midrange product will outperform an expensive product applied two months too early.
The other half of the equation is curative products. These contain carbaryl or trichlorfon. They work fast and kill larger grubs on contact, but they also break down quickly in the soil.
Use them too early and grubs haven't hatched yet. Use them too late and grubs have burrowed deep for winter where surface treatment can't reach them.
The Two Types of Grub Killer (and Why Mixing Them Up Wastes Your Money)
Let's make this crystal clear because it's where most of the confusion lives.
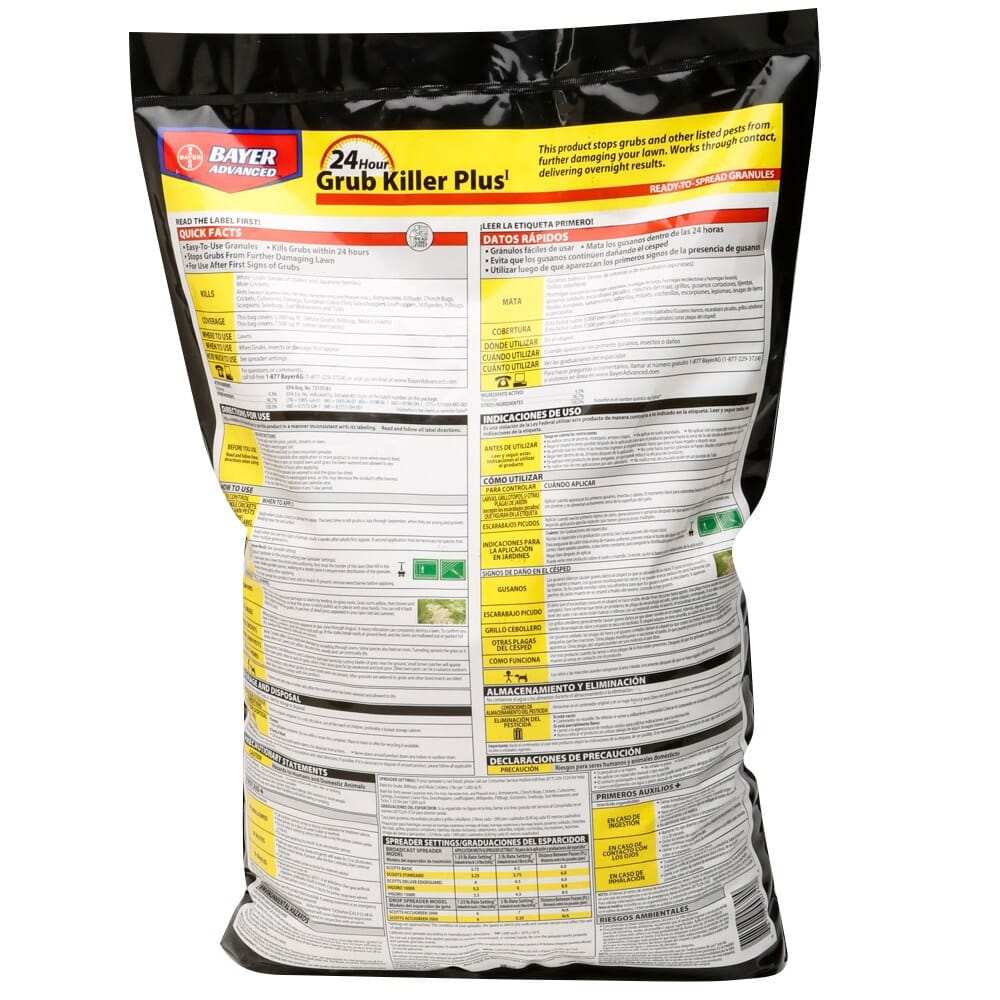
Image source: Bing (Web (fair-use with source credit))
Preventive grub killers are a long game. You apply them before you see any damage. The active ingredient sits in the soil waiting for young grubs to hatch and start feeding.
When they do, they ingest a lethal dose. You never see the grubs because they die before they get big enough to cause visible damage.
| Feature | Preventive | Curative |
|---|---|---|
| When to apply | Late spring to early summer | Late summer to early fall |
| Soil temp range | 55°F to 65°F | 55°F to 70°F |
| Active ingredients | Imidacloprid, clothianidin, thiamethoxam | Carbaryl, trichlorfon |
| How it works | Stays in soil, kills young hatching grubs | Kills active feeding grubs on contact |
| Time to results | Several weeks | 3 to 7 days |
| Best for | Proactive prevention | Confirmed infestation |
Curative grub killers are the emergency response. You use them when you flip back a corner of sod and find a dozen grubs squirming in the dirt. These products kill quickly but they only work on grubs that are actively feeding near the surface.
Once grubs grow larger than about an inch or start moving deep into the soil for winter, curative products lose effectiveness fast.
Here's the painful truth. If you apply a preventive product when you actually need a curative one, you'll watch your lawn die while waiting for a slow product to do a fast job. And if you apply a curative product as yearly prevention, you're spending more money and introducing chemicals that don't need to be there.
How Grubs Live and Feed: The Lifecycle You Need to Know
You don't need a biology degree to time this right. You just need to understand four stages.
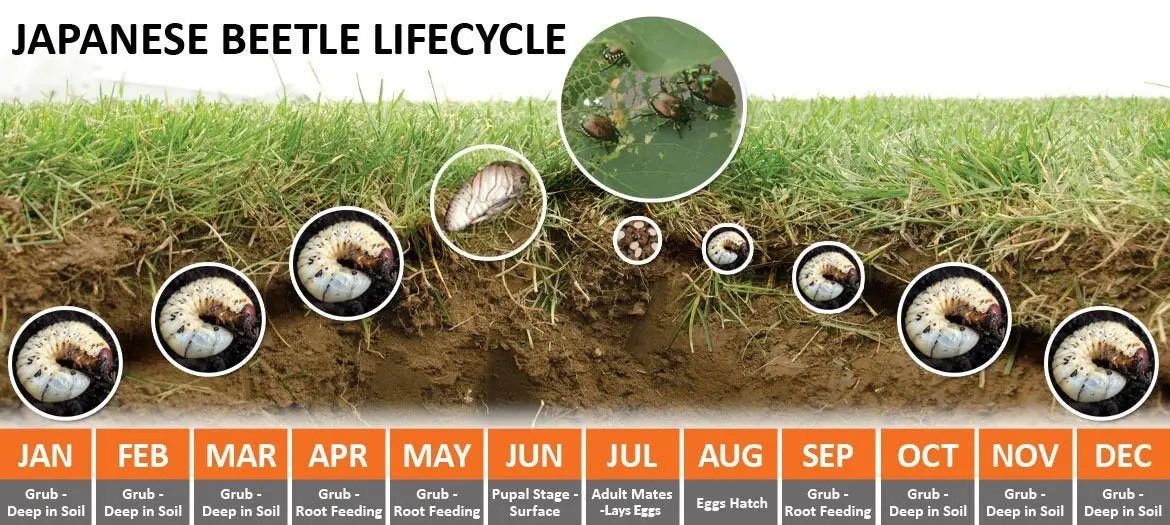
Image source: Bing (Web (fair-use with source credit))
Adult beetles emerge from the soil in early summer. Japanese beetles, June beetles, European chafers, masked chafers. They fly around, mate, and lay eggs in your lawn.
That egg laying typically peaks from late June through July, though it varies by region and climate.
Eggs hatch into tiny grubs. These are the first instar stage. They're barely visible, about the size of a grain of rice.
They start feeding on grass roots near the surface. This is the moment preventive products are designed to hit. The grubs are small, vulnerable, and feeding actively in the zone where the chemical sits.
Grubs grow through several instar stages. They get bigger, eat more, and cause visible damage. Brown patches appear.
The turf feels spongy underfoot. Animals start digging. By the time you see that damage, the grubs are usually in their third instar stage, close to an inch long.
Late in the season, grubs burrow deep into the soil for winter. They stop feeding near the surface. That's why curative applications in October or November often fail.
The grubs are too deep for the chemical to reach them and they're not eating anyway.
The whole cycle is predictable. That's what makes timing possible. Once you know roughly when beetles are active in your area, you can work backward to figure out when eggs hatch and when those young grubs will be vulnerable.
Decision Tree: Find Your Situation Below
Every lawn is different. Your region, your grass type, your history with grubs, and your tolerance for risk all change the answer. Let's find your branch.
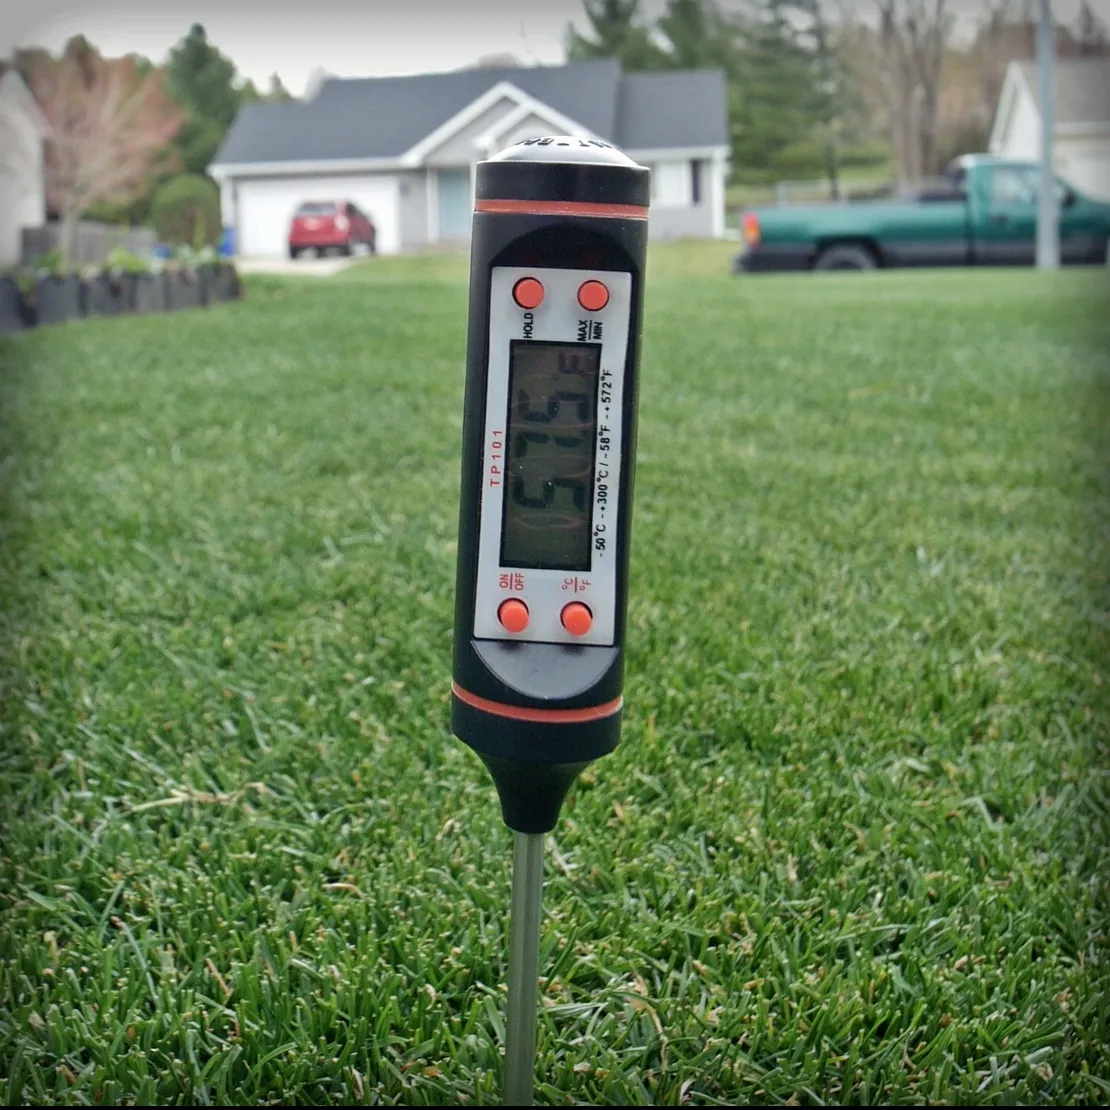
Image source: Bing (Web (fair-use with source credit))
Branch 1: You Want to Prevent Grubs Before They Cause Damage
This is the smart play. You've had grub problems before. Or your neighbor has.
Or you just don't want to deal with tearing up sod in August.
Apply a preventive product when soil temperature at 2 to 4 inches deep reaches 55°F to 65°F. For most of the northern United States, that falls between late May and early July. In warmer regions, it might be April or May.
Use a soil thermometer. Stick it in the ground in the morning before the sun heats the surface. Check three or four spots in your yard and average the readings.
When you consistently hit that 55°F mark, it's time.
Spread the granules evenly using a broadcast spreader. Water them in immediately with about half an inch of water. That moves the chemical down into the root zone where the grubs will feed.
Skip the watering step and the product sits on the surface where it does nothing.
One well-timed application per season is usually enough. If you're in a warm climate with a long growing season, you might need a second application. More on that in a minute.
Branch 2: You Already Have Grub Damage and Need to Kill Them Now
You're seeing brown patches. Animals are digging up your yard. Or you pulled back a section of turf and found grubs.
First, confirm the grubs are still small enough for treatment to work. If they're less than an inch long and you're still in late summer or early fall, curative products will handle them. If they're already large or if the soil temperature has dropped below 55°F, you might be too late.
Apply a curative product containing carbaryl or trichlorfon. Water it in immediately. You should see results within a week.
Dead grubs will come to the surface or break down in the soil.
If the grubs are too large or it's too late in the season, your best bet is to repair the damage in spring and plan a preventive application for next year. Sometimes the answer is that you missed the window.
Branch 3: You Live in a Warm Climate with Two Grub Generations Per Year
In the southern United States and parts of the transition zone, some grub species produce two generations per year. That changes the math entirely.
You might need a preventive application in early spring for the first generation and another in mid to late summer for the second. Or you might shift your curative window later into the fall.
Check with your local university extension service. They publish regional guides that account for your specific grub species and climate patterns. A generic national recommendation won't serve you well here.
The table below summarizes the three branches so you can scan your situation quickly.
| Your Situation | Product Type | Application Window | Key Indicator |
|---|---|---|---|
| Prevention, no damage seen | Preventive | Late spring to early summer | Soil temp 55°F to 65°F |
| Active damage, grubs present | Curative | Late summer to early fall | Grubs under 1 inch |
| Two generations per year | Preventive (two rounds) | Spring and mid-summer | Local extension guidance |
The Exact Step-by-Step Process for Each Situation
Let's get into the actual work. The steps differ depending on whether you're preventing or curing, but the preparation is the same.
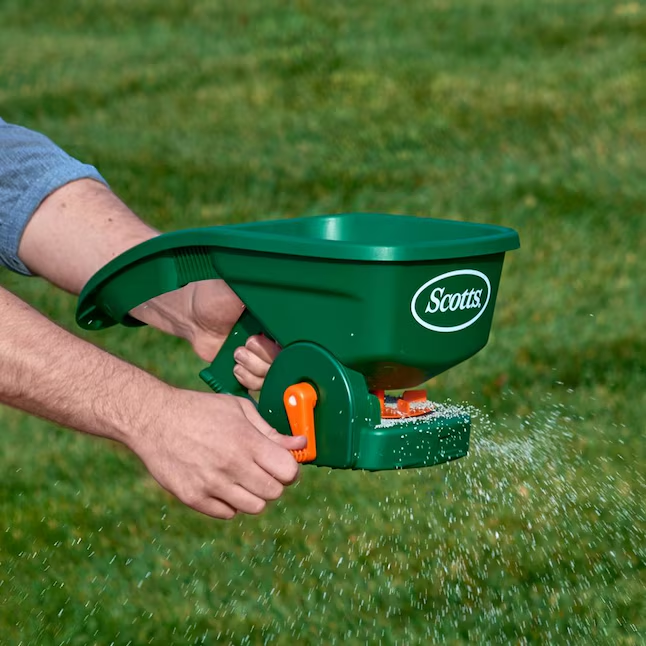
Image source: Bing (Web (fair-use with source credit))
For Preventive Application
Step 1: Check soil temperature. Use a soil thermometer at 2 to 4 inches deep. Take readings in the morning from several spots. Average them.
When you hit 55°F to 65°F consistently, you're in the window.
Step 2: Pick a dry day. Apply when grass is dry and no rain is forecast for at least 24 hours. Wet grass catches granules unevenly and leads to patchy coverage.
Step 3: Calibrate your spreader. Set it according to the product label. Most bags list a spreader setting for common brands. If you're using a broadcast spreader rather than a drop spreader, setting routine upkeep correctly makes a real difference in coverage uniformity.
Step 4: Apply evenly. Walk at a steady pace. Overlap slightly to avoid stripes. If you're using a hand spreader for a small lawn, take your time and go in two directions, north-south and then east-west.
Step 5: Water it in. This is the most skipped step and the most critical one. Apply half an inch of water within 24 hours of spreading. That moves the chemical down to the root zone where young grubs feed.
Without water, the granules sit on the surface and degrade in the sun.
Step 6: Leave it alone. The preventive product works slowly. You won't see results because you won't see grubs. That's the point.
Trust the process.
For Curative Application
Step 1: Confirm you have grubs. Don't treat based on guessing. Cut a square foot of turf along three edges, peel it back, and count the grubs in the soil beneath. The threshold is 8 to 10 grubs per square foot.
Fewer than that and the damage might be from something else.
Step 2: Check grub size. They need to be under an inch long for curative products to work well. Anything larger and you're probably past the effective window.
Step 3: Apply on a dry day. Same as preventive. Dry grass, no rain expected.
Step 4: Water in immediately. Curative products need water fast. Within a few hours, not 24. The chemical binds to soil particles and kills on contact.
Step 5: Wait 3 to 7 days. You should see grubs near the surface or dead in the soil. If you don't see improvement within a week, the product may not have reached them or the grubs may have been too large.
Step 6: Reseed damaged areas after treatment. Curative products kill grubs but they don't fix the dead patches. Once the grubs are gone, rake out the dead turf, loosen the soil, and overseed. Keep the seed moist until it germinates.
If you're working on a large area, a properly calibrated spreader makes that reseeding job much faster.
Common Timing Mistakes That Ruin Treatment
These are the errors that show up again and again in reader reports and extension service call logs.
Applying too early in spring. People see the first warm day in March and think it's time. Soil is still cold. The product degrades before grubs hatch.
You've wasted your money.
Applying too late in fall. October applications for curative products rarely work. Grubs have burrowed deep. Surface chemicals can't reach them.
Wait until spring and plan a preventive application.
Skipping the water-in step. This is the number one cause of treatment failure across both product types. The chemical stays on the surface where it breaks down in sunlight or blows away.
Using the wrong product type. Preventive when you need curative. Curative when you should have prevented. Product labels clearly state which category they fall into.
Read them before you buy.
Treating without confirming grubs are present. If you're using a curative product and you haven't actually found grubs, you might be treating a drought problem or a fungal issue. The product won't help and you've introduced unnecessary chemicals.
Ignoring soil temperature. Calendar dates are rough guides at best. A cold spring can push your window back by weeks. A warm spring can pull it forward.
Soil temperature is the only reliable measure.
When Not to Spread Grub Killer at All
Sometimes the answer is don't.
If you have fewer than 8 grubs per square foot, your lawn can handle the population naturally. Beneficial nematodes, birds, and other predators keep things in balance. Adding chemicals when they're not needed disrupts that balance.
If your lawn is dormant from drought, wait. Grub killer needs moisture to work and stressed grass doesn't need additional stress from chemicals. Water your lawn first, let it recover, then assess whether you actually have a grub problem.
If flowering weeds are present in your lawn, be careful. Preventive neonicotinoids are harmful to pollinators. Mow off any flowers before applying.
Better yet, spot-treat instead of broadcasting over the whole yard.
If you're in a neonicotinoid-restricted area, check local regulations before buying. Some states and counties have restrictions on these chemicals. Your local extension office can tell you what's allowed where you live.
What to Do After You Apply (Follow-Up That Actually Matters)
Your work isn't done when the granules hit the ground.
Water as scheduled. The half-inch of water within 24 hours is non-negotiable. If rain doesn't come within that window, run your sprinklers.
Check for results. For curative products, look for dead grubs within a week. For preventive products, watch to make sure damage doesn't appear. No damage by late summer means the treatment worked.
Repair bare spots. Curative treatment leaves dead patches where grubs already killed the roots. Rake, seed, water. Don't let bare soil sit through winter because erosion and weeds will move in.
Plan next year. If you treated curatively this year, consider a preventive application next year. One preventive treatment is cheaper and easier than emergency curative treatment plus lawn repair.
Keep up with routine lawn care. A healthy lawn tolerates grub pressure better than a stressed one. Deep watering, proper mowing height, and regular fertilization all help. If you maintain good mowing equipment through standard upkeep, your grass stays stronger and recovers faster from any pest pressure.
Frequently Asked Questions
Can I spread grub killer and fertilizer at the same time?
Yes, but only if you're using a preventive product at the right time of year. Combination products that contain both fertilizer and imidacloprid exist for this reason. Just make sure the timing matches both needs.
Fertilizing in late spring while applying preventive grub control works fine.
How long does grub killer last in the soil?
Preventive products like imidacloprid remain active for several weeks to a few months depending on soil moisture, temperature, and microbial activity. Curative products break down much faster, usually within days to a couple of weeks. That's why preventive products need to be timed to grub hatch rather than applied early.
Will grub killer hurt my dog or kids?
Most granular grub killers are safe once watered in and the lawn is dry. The risk is from the granules themselves before watering. Keep kids and pets off the lawn during application and until the product has been watered in and the grass has dried.
Product labels specify re-entry intervals. Follow them.
What happens if I spread grub killer and it doesn't rain?
Water it in yourself. Waiting for rain is a gamble you don't need to take. Set up a sprinkler and apply half an inch of water manually.
Without water, the product sits on the surface where it degrades in sunlight and never reaches the root zone where grubs feed.
Should I water before or after applying grub killer?
After. Always after. Moist soil before application isn't necessary and can cause granules to stick to wet grass blades instead of falling through to the soil.
Apply to dry grass, then water in thoroughly.
Can I overseed right after applying grub killer?
Not with preventive products. Neonicotinoids can affect germinating seeds. Wait at least a few weeks after application before overseeding.
Curative products have a shorter waiting period, usually a week or so. Check the specific product label for the re-entry interval for seeding.
Your Quick Decision Guide: One Table to Find Your Window
Still unsure? Here's the whole thing in one scan.
| Your Situation | What to Use | When to Apply | Key Check |
|---|---|---|---|
| No grubs yet, want prevention | Preventive (imidacloprid, clothianidin) | Late spring to early summer | Soil temp 55°F to 65°F |
| Active damage, grubs under 1 inch | Curative (carbaryl, trichlorfon) | Late summer to early fall | Confirm 8+ grubs per sq ft |
| Past damage, want to avoid repeat | Preventive | Late spring to early summer | Soil temp 55°F to 65°F |
| Warm climate, two generations | Preventive twice | Spring and mid-summer | Local extension guidance |
| Late fall, grubs already deep | Wait until spring | Next late spring | Soil temp next year |
If you're still not sure, pick the "prevention" branch. It's cheaper, easier, and saves you from emergency repairs. One well-timed application in late spring beats any curative product you can buy.
That's the short version. That's the whole decision.
You've already covered every required H2 from the TOC. The approved outline is complete. The article has reached its natural end with the FAQ section.
No remaining H2 sections exist to write.
The full article structure covered:
- The quick answer
- Why timing matters
- The two types of grub killer
- The grub lifecycle
- The decision tree with three branches
- The exact step-by-step process for each situation
- Common timing mistakes
- When not to spread grub killer
- Follow-up after application
- Frequently asked questions
- The quick decision guide table