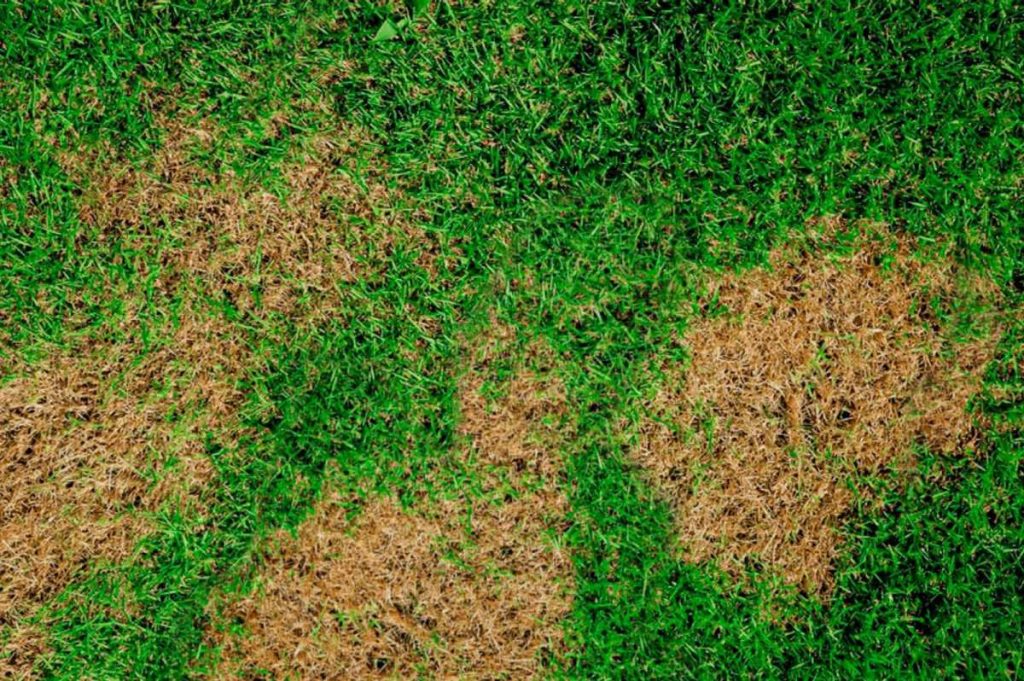
If you've noticed brown patches spreading across your lawn and you're wondering what does lawn with grubs look like, you're not alone. It's one of the most common lawn problems homeowners face, and it's also one of the most misidentified. The damage happens underground, so by the time you see it on the surface, the grubs have already been feeding for weeks.
The tricky part is that grub damage looks a lot like drought stress, disease, or even dog urine spots. But there are specific visual clues that set it apart. Once you know what to look for, you can confirm the problem fast and take action before it gets worse.
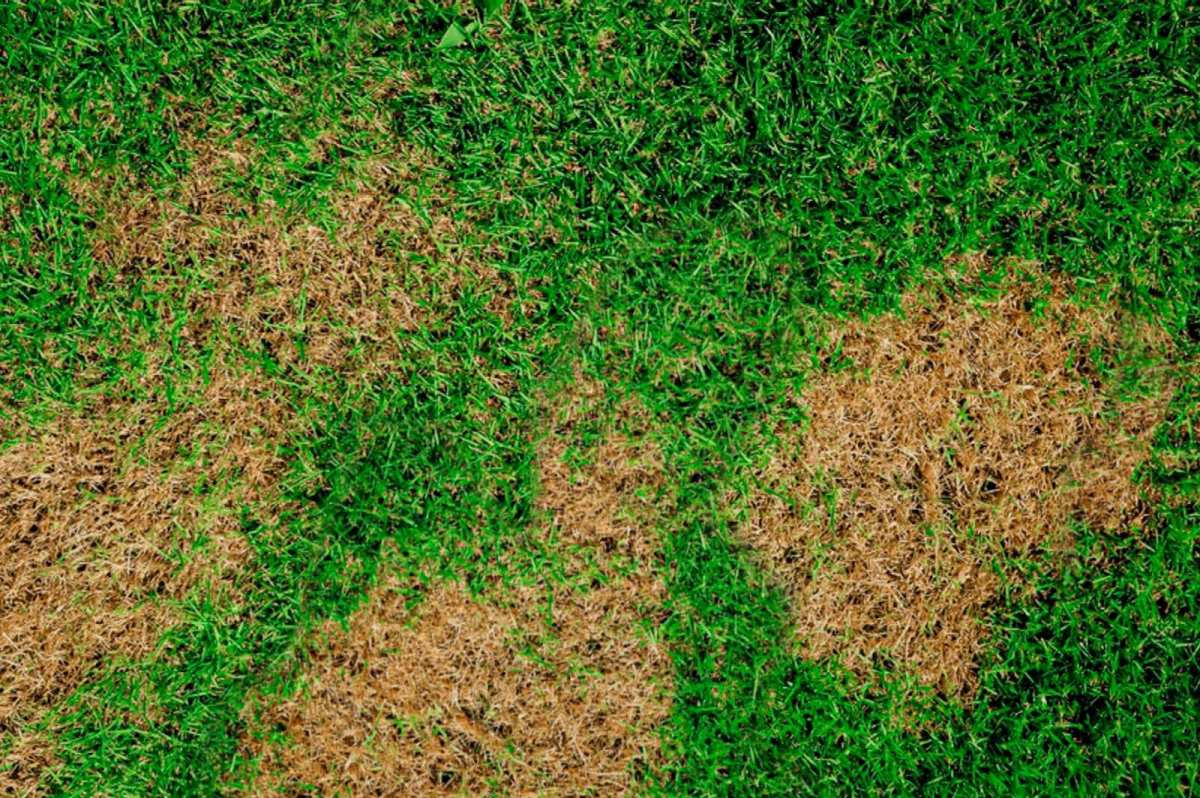
Image source: Bing (Web (fair-use with source credit))
Quick Answer
Grub damage shows up as irregular brown patches of dead or dying grass. The turf feels spongy underfoot and pulls up easily because the roots have been eaten. You'll often find C-shaped white grubs in the soil just below the surface.
Animals like skunks and raccoons may also dig up the lawn searching for them.
Why Grub Damage Is So Easy to Misidentify
Here's the thing about grub damage: it doesn't announce itself. The larvae feed on grass roots below the soil line, so the first visible sign is usually a patch of grass that starts yellowing and then turns brown. At that point, most people assume it's a dry spell or a watering issue.
But there's a key difference. Drought-stressed grass will recover when you water it. Grub-damaged grass won't, because the roots are gone.
The grass is essentially detached from the soil, sitting there with nothing anchoring it down.
Another reason it gets misdiagnosed is timing. Grub damage typically shows up in late summer and early fall, which is also when many lawns struggle with heat and drought. If you're not looking closely, it's easy to lump all brown patches into the same bucket.
The species of grub matters too. Japanese beetle grubs, European chafer grubs, and May/June beetle grubs all feed slightly differently, but the end result on your lawn looks broadly similar. What changes is the timing and severity depending on where you live and which species is active in your region.
What Grub Damage Actually Looks Like on Your Lawn
Grub damage follows a pretty consistent pattern once you know what to watch for. Here's what you'll typically see:
- Irregular brown patches that start small and expand outward. Unlike fertilizer burn, which creates sharp, defined edges, grub damage tends to have a more scattered, uneven shape.
- Spongy turf underfoot. Walk across the damaged area and it will feel soft and bouncy, almost like walking on a mattress.
- Grass that pulls up easily. This is the dead giveaway. If you can grab a handful of brown grass and lift it like a piece of carpet, the roots have been chewed through.
- Dry, brittle sod underneath. Once you peel it back, the soil below looks rootless. There's nothing holding the turf to the ground.
- Damage that doesn't respond to watering. You can soak the area for a week and it won't green up, because the grass can't take up moisture without roots.
The damage often starts in sunnier, drier parts of the lawn first. South-facing slopes and areas near pavement tend to show symptoms earlier because the soil warms up faster there, which speeds up grub activity.
One thing that surprises people is how quickly it can spread. A lawn that looks mostly fine in July can have significant dead patches by September if grub numbers are high enough. That's why catching it early makes such a difference.
The Tug Test: The Fastest Way to Confirm Grubs
If you suspect grubs, don't just guess. There's a simple test you can do in about 30 seconds that will tell you exactly what's going on.
Here's how the tug test works:
- Grab a handful of brown grass at the edge of a damaged patch. Don't pull from the center where the grass is already dead. Go to the transition zone where green meets brown.
- Pull upward firmly. If the grass lifts easily like a loose rug, that's a strong sign of grub damage. Healthy grass with intact roots will resist and stay anchored.
- Check the soil underneath. Peel back the turf and look at the top 1 to 2 inches of soil. You're looking for C-shaped larvae, creamy white to grayish-white in color, with a brown head capsule and six small legs near the head.
- Count what you find. Flip over a 1-foot by 1-foot section of sod and count the grubs you see. If you find 10 or more in that single square foot, you've got a problem that needs treatment.
The tug test works because grubs sever the root system. When roots are intact, grass holds firm. When they've been eaten away, the turf just rolls right up.
It's the single most reliable field test you can do without any special equipment.
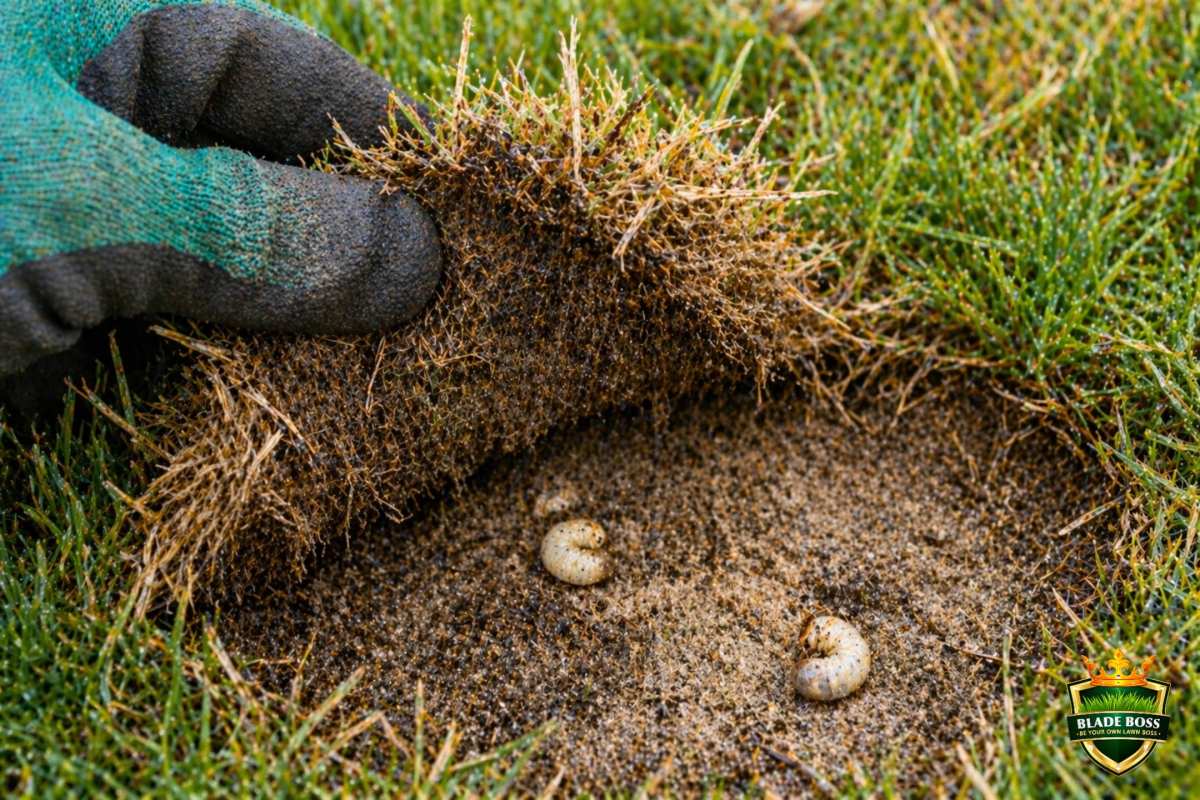
Image source: Bing (Web (fair-use with source credit))
If the tug test is positive, you don't need to dig up your whole lawn. Check a few spots across the damaged area to get a sense of how widespread the infestation is. Grubs often cluster, so you might find heavy concentrations in one part of the yard and almost none in another.
What the Grubs Themselves Look Like Up Close
Knowing what the actual grubs look like helps you confirm the diagnosis and rule out other issues. White grubs are the larval stage of several beetle species, and they all share a similar appearance.
Here's what to look for:
- C-shaped body. When you dig one up, it will almost always curl into a C shape. This is the classic grub posture and the easiest way to identify them.
- Creamy white to grayish-white body. The color can vary slightly depending on species and how recently they've fed.
- Brown or tan head capsule. The head is darker than the body and fairly easy to spot.
- Six legs near the head. They're small, but visible if you look closely.
- Size ranges from about ½ inch to over 1 inch depending on the species and age of the larva.
The most common species you'll encounter are Japanese beetle grubs, European chafer grubs, and masked chafer grubs. Telling them apart requires looking at the raster pattern (the arrangement of hairs and spines on the underside of the abdomen near the tail), which is something entomologists use for precise identification. For most homeowners, confirming that you have grubs at all is enough to move forward with treatment.
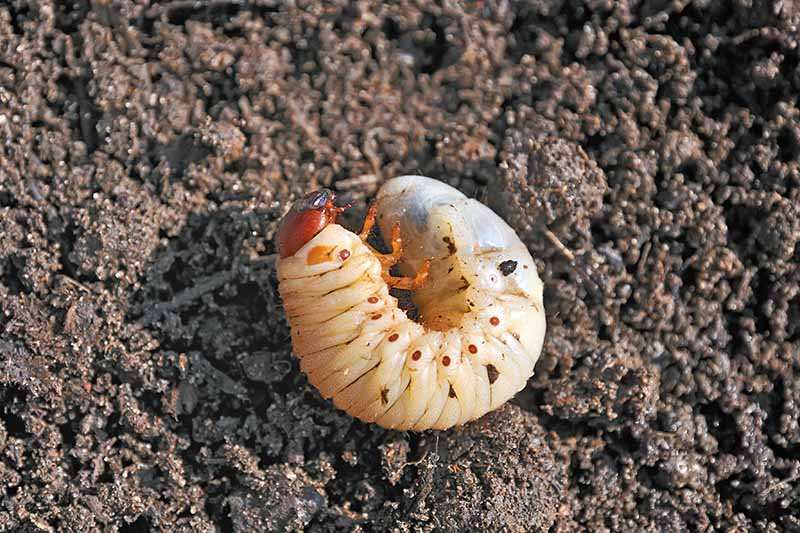
Image source: Bing (Web (fair-use with source credit))
If you're finding grubs but the lawn still looks mostly healthy, don't panic. A low population, fewer than 5 per square foot, usually won't cause visible damage. It's when numbers climb above the treatment threshold that you start seeing those brown patches spread.
Grub Damage vs. Drought Stress: How to Tell the Difference
This is the mix-up that happens most often. Both grub damage and drought stress produce brown grass, and both tend to show up during the same hot, dry stretch of late summer. But there are clear ways to tell them apart.
| Feature | Grub Damage | Drought Stress |
|---|---|---|
| Turf texture | Spongy, soft underfoot | Firm, dry, but anchored |
| Tug test | Grass pulls up easily | Grass stays rooted |
| Response to watering | No improvement | Greens up within days |
| Pattern | Irregular, scattered patches | More uniform across dry areas |
| Soil underneath | Rootless, grubs present | Roots intact, no grubs |
| Animal activity | Skunks or raccoons digging | None |
The watering test is probably the most practical way to separate the two. Give the brown areas a deep, thorough soaking and wait about a week. Drought-stressed grass will start to recover.
Grub-damaged grass won't budge because there's nothing left to absorb the water.
Another clue is the pattern. Drought stress tends to show up in the same areas every time: the spots that get the most sun, the highest points in the yard, the strips near driveways and sidewalks. Grub damage is more random.
You might find a dead patch in the middle of an otherwise healthy lawn with no obvious environmental reason.
If you're still not sure, do the tug test. It takes 10 seconds and gives you a definitive answer.
Grub Damage vs. Lawn Disease: How to Tell the Difference
Lawn diseases like brown patch, dollar spot, and take-all root rot can also produce circular or irregular brown patches. But the underlying cause is completely different, and so is the treatment.
Here's how to separate grub damage from fungal disease:
- Check the roots. Grub damage means the roots are physically gone. With lawn disease, the roots are usually still there, but the plant tissue above ground is damaged. Peel back the turf and look. No roots means grubs.
- Look for patterns in the blades. Fungal diseases often leave visible signs on the grass blades themselves: spots, lesions, or a slimy appearance in the early morning. Grub-damaged grass blades look normal. The plant just dies from the roots up.
- Timing matters. Brown patch disease tends to flare up during warm, humid nights in mid to late summer. Grub damage shows up a bit later, typically August through October, and doesn't depend on humidity.
- Spread pattern. Disease patches often have a visible "smoke ring" of darker grass at the edge where the fungus is actively spreading. Grub patches don't have this border. The edge is just dead grass meeting live grass with no transition zone.
If you treat a fungal disease with grub control product, you're wasting money and leaving the real problem unchecked. The same goes the other way. That's why confirming the cause before you treat is worth the extra few minutes.
Why Animals Are Digging Up Your Lawn
If you're finding torn-up patches of sod, scattered holes, or sections of turf flipped over like a flap, animals are probably after the grubs. Skunks, raccoons, and birds are the most common culprits, and they're all excellent at detecting larvae just below the surface.
Skunks are the worst offenders. They'll peel back sections of turf with their front claws to get at the grubs underneath, leaving behind cone-shaped holes or rolled-back patches of sod. Raccoons do similar damage but tend to tear larger sections.
Birds like crows and starlings will peck small holes as they probe for larvae.
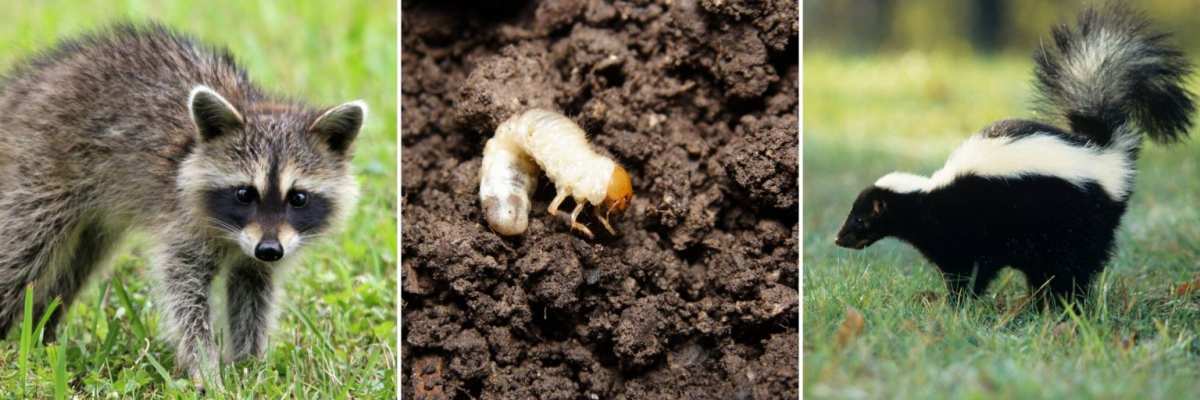
Image source: Bing (Web (fair-use with source credit))
Animal damage is actually a useful diagnostic clue. If you're seeing digging but the lawn still looks mostly green, you might have a moderate grub population that hasn't caused visible turf death yet. The animals are finding them before the damage becomes obvious.
The problem is that animal digging can destroy a lawn almost as fast as the grubs themselves. A single skunk can tear up a surprising amount of turf in one night. If you're dealing with both grubs and animals, you need to address the grub problem first.
Once the food source is gone, the animals will move on.
How Many Grubs Is Too Many? The Treatment Threshold
Not every grub in your lawn requires action. A small population is normal and won't cause visible damage. The question is when the numbers cross the line into problem territory.
The general treatment threshold used by most university extension programs is 5 to 10 grubs per square foot, depending on turf type and overall lawn health. Here's a rough guide:
| Grubs per Square Foot | What It Means |
|---|---|
| 0 to 4 | Low population. No treatment needed. Monitor next season. |
| 5 to 9 | Moderate. Consider treatment, especially if the lawn is stressed or thin. |
| 10 or above | High. Treatment recommended. Visible damage is likely or already occurring. |
A healthy, well-maintained lawn with deep roots can tolerate a few more grubs than a thin, drought-stressed one. If your lawn is already struggling from compacted soil, poor nutrition, or lack of water, even a moderate grub population can push it over the edge.
The square-foot sampling method is straightforward. Cut a 1-by-1-foot section of turf in a few different spots across the damaged area, peel it back, and count the grubs in the top 2 inches of soil. Average your counts and compare against the threshold.
If you're consistently finding 10 or more per square foot across multiple samples, it's time to treat. Waiting longer just gives the grubs more time to feed and the damage more time to spread.
When to Inspect and When to Treat
Timing is everything with grub management. Treat too early and the product breaks down before the grubs are active. Treat too late and the damage is already done.
Here's the seasonal breakdown:
- Late July through September is the prime window for inspection. This is when newly hatched grubs are small, actively feeding, and close to the surface. They're also vulnerable to curative treatments during this period.
- August through October is when visible damage typically appears. If you're seeing brown patches during this window, inspect right away.
- May through mid-July is the preventive treatment window. Products containing imidacloprid or chlorantraniliprole are applied before eggs hatch, creating a barrier in the soil. This approach works well if you've had grub problems in previous years.
- Late July through September is the curative window. Products containing trichlorfon or carbaryl can knock down an active infestation, but they work best when grubs are small and feeding near the surface.
If you're finding grubs in the fall and the lawn is already damaged, a curative application can stop further feeding. But the dead patches won't recover on their own. You'll need to reseed or sod those areas the following spring.
One common mistake is applying preventive grub control in September or October. By that point, the grubs are already large and feeding aggressively. Preventive products won't touch them.
You need a curative product instead, or you wait until the following spring when grubs move back toward the surface to feed again.
Common Mistakes People Make When Diagnosing Grub Damage
Even experienced homeowners get tripped up by grub identification. Here are the most frequent errors:
- Assuming all brown patches are grubs. Drought, disease, compaction, and fertilizer burn all produce similar-looking symptoms. Always confirm with the tug test before treating.
- Waiting too long to inspect. By the time damage is widespread, the grubs have been feeding for weeks. Early detection in July or August gives you more treatment options and better results.
- Confusing adult beetles with the problem. Seeing Japanese beetles on your roses doesn't mean your lawn has grubs. The adults and larvae occupy completely different spaces. Check the soil, not the flowers.
- Over-treating a low population. Finding one or two grubs doesn't justify a full lawn application. Use the threshold guide and treat only when numbers warrant it.
- Applying the wrong product at the wrong time. Preventive and curative products work differently and have different application windows. Read the label carefully and match the product to your situation.
- Ignoring the lawn after treatment. Killing the grubs is only half the job. Dead patches need to be reseeded and the underlying lawn health issues need to be addressed, or you'll be dealing with the same problem next year.
The biggest mistake of all is doing nothing because the damage "doesn't look that bad." Grub populations can build over multiple seasons. A moderate problem one year can become a severe infestation the next if left unchecked.
What to Do Once You've Confirmed Grubs
You've done the tug test, counted the larvae, and confirmed the population is above the treatment threshold. Now it's time to act.
Here's the step-by-step approach:
Choose the right product for your timing. If you're inspecting in late summer or early fall, go with a curative insecticide. Products containing trichlorfon work fast on active grubs. If you're planning ahead for next season, a preventive product applied in late spring creates a soil barrier before eggs hatch.
Apply evenly across the entire affected area. Grubs don't stay in one spot, so treat a buffer zone beyond the visible damage. Calibrate your spreader according to the label to avoid over or under-application.
Water in the product. Most granular grub controls need about ¼ to ½ inch of water after application to move the active ingredient into the root zone where grubs are feeding. Check the specific product label for watering requirements.
Monitor animal activity. If skunks or racons have been digging, they may continue for a few days after treatment while grubs are dying off. Install temporary motion-activated deterrents if needed to protect the turf while it recovers.
Reseed damaged areas in fall or spring. Dead patches won't fill back in on their own. Loosen the soil, add a thin layer of compost, seed with a matching grass variety, and keep it consistently moist until germination.
Improve long-term lawn health. Grubs exploit weak turf. Aerate compacted areas, maintain proper mowing height, and fertilize based on a soil test. A thick, healthy lawn tolerates low grub populations without showing damage.
Frequently Asked Questions
Can a lawn recover from grub damage?
Yes, but only if the roots are still partially intact or if you reseed the dead areas. Grass with completely severed roots won't come back. Reseeding in early fall or spring gives you the best chance of filling in the gaps before weeds take over.
How long does grub damage take to show?
Grubs typically feed from July through October, but visible damage often doesn't appear until August or September. By then, the larvae may have been feeding for six to eight weeks. That's why proactive inspection in late July catches problems earlier.
Are grub control products safe for pets?
Most granular grub controls are safe once watered in and the lawn has dried. Always check the specific product label for pet re-entry intervals. Keep dogs and cats off the treated area until the granules have been watered in completely.
Do I need to treat my entire lawn or just the damaged spots?
Treat the full area of active damage plus a buffer zone of several feet. Grubs often spread beyond where visible symptoms appear. Spot-treating only the brown patches can leave untreated populations nearby that cause damage the following year.
What's the best time of year to prevent grubs?
Late spring through mid-July is the ideal preventive window. Applying a long-lasting preventive product during this period protects the lawn when adult beetles are laying eggs and before the new hatchlings begin feeding in late summer.