There's nothing quite like walking out to your garden, coffee in hand, and noticing the tomatillo leaves turning yellow overnight. It's alarming, and it's one of the most common questions growers raise about Physalis philadelphica. The good news is that yellowing leaves are a symptom, not a death sentence, and they usually tell you exactly what the plant needs if you know how to read them.
Tomatillos are hardy, warm-season members of the nightshade family, but they're also more sensitive to waterlogged soil and nutrient imbalances than many gardeners expect. As of 2026, university extension services continue to stress that diagnosis is everything. The fix for nitrogen deficiency looks nothing like the fix for root rot.
That's why we've built this guide around a decision-tree approach: identify the pattern, confirm the cause, apply the right remedy.
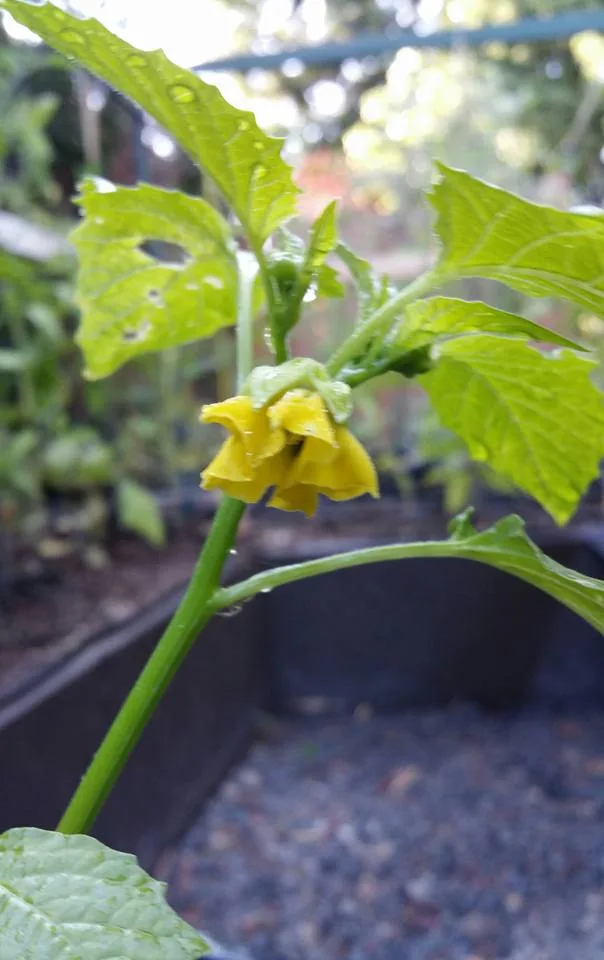
Image source: Wikimedia Commons / terri_bateman
The Quick Answer
Tomatillo leaves turning yellow is usually caused by overwatering, nitrogen deficiency, or poor soil drainage. Start by checking if the soil stays soggy for more than a day after watering. If the lowest leaves yellow first, suspect nitrogen.
If the newest growth yellows, look at iron availability or root damage. Viral infections and nematodes are less common but need early identification. Match the yellowing pattern to the cause before applying any treatment.
How to Read the Yellowing Pattern on Your Tomatillo Leaves
This is where most people go wrong. They see yellow and reach for fertilizer. But not all yellowing means the same thing.
The location, pattern, and speed of discoloration point to specific underlying problems. Think of it like a doctor reading symptoms. Here's what to look for.
Yellow starting on the lowest, oldest leaves
If the bottom leaves are turning yellow while the upper canopy still looks green, the plant is likely mobile-nutrient deficient. Nitrogen is the classic culprit here. The plant pulls nitrogen from older tissue and redirects it to new growth.
Other possibilities include gradual overwatering stress that hits the oldest tissue first, or natural leaf aging during fruiting. If yellowing is slow and limited to a few bottom leaves during mid to late summer, it's often normal. If it's climbing fast and affecting multiple layers, intervene.
Yellowing on the newest growth at the top
When the youngest leaves at the stem tips go yellow first, think immobile nutrients. Iron deficiency is the most common cause, and it shows up as bright yellow new leaves with green veins.
This pattern also appears when roots are damaged and can't take up nutrients, when soil pH is above 7.0, or when the plant is recovering from transplant shock. In all these cases, the plant can't access iron even if it's present in the soil.
Yellow between the veins while veins stay green
This is called interveinal chlorosis, and it's one of the most diagnostic symptoms in plant care. The tissue between the veins fades to pale yellow or lime green while the veins themselves stay dark.
This pattern almost always points to a micronutrient issue. Iron deficiency shows on the youngest leaves first. Magnesium deficiency shows on middle-aged leaves, often with a slightly bronzed or purplish tint.
Manganese deficiency is rare but possible in highly alkaline soils.
Grab a soil test kit before you start amending. Guessing and dumping supplements can lock out other nutrients and make things worse.
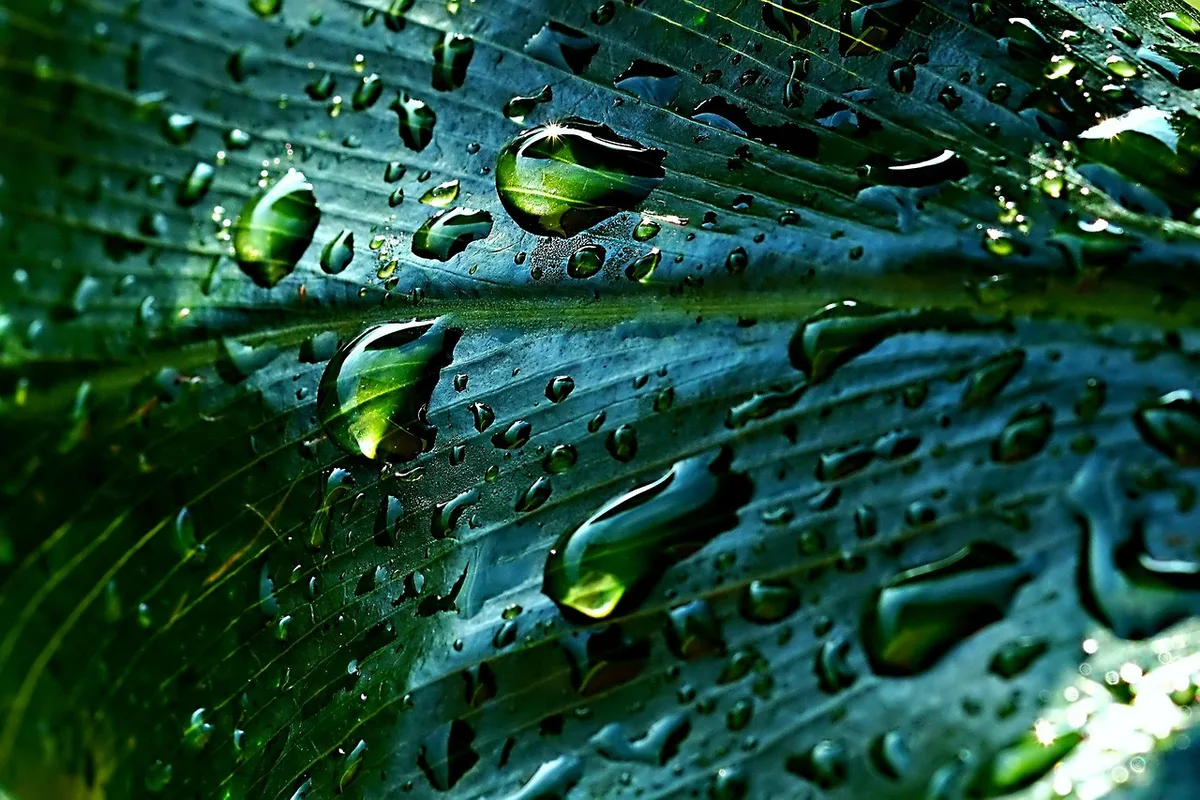
Image source: Pixabay / ignartonosbg (Pixabay Content License)
Yellowing with brown edges, curling, or spots
When yellowing comes with physical damage to the leaf tissue, you're likely dealing with a disease, pest pressure, or environmental injury.
Watch for brown, crispy leaf edges paired with yellowing, which suggests inconsistent watering or salt buildup from over-fertilization. Spots with yellow halos point to bacterial speck or fungal leaf spot, common in humid conditions. Curling and distortion with yellowing often means a viral infection or heavy aphid and whitefly feeding.
Wilting and yellowing together suggest root rot or a wilt disease.
If you see spots, take a photo and compare it to university extension symptom guides. Visual matching is one of the fastest ways to narrow it down.
Uniform yellowing across the whole plant
When the entire plant looks washed out and pale, the problem is usually systemic. Severe nitrogen deficiency, massive root damage, or a vascular wilt disease are the top suspects.
This pattern demands immediate action. Check the root ball for rot or nematode galls. Test soil pH and nutrient levels.
If the roots are gone or the vascular tissue is brown inside the stem, recovery is unlikely. Remove the plant and focus on protecting the remaining ones.
Check Your Soil First — It's the Most Common Culprit
Before you blame pests or disease, get your hands dirty. Soil problems cause more yellowing tomatillo leaves than anything else.
Is the soil staying too wet?
Tomatillos like consistent moisture but absolutely hate sitting in sopping soil. Overwatering is the number one cause of yellowing in home gardens.
Stick your finger two inches into the soil near the base of the plant. If it feels wet or muddy at that depth, you're watering too often or the drainage is inadequate. Soggy soil suffocates roots, which means they can't absorb nutrients, which means the leaves turn yellow even though everything looks correct on the surface.
Water only when the top inch of soil feels dry. Amend heavy clay beds with compost and perlite. Raise the planting area if drainage is chronically poor.
In containers, make sure pots have drainage holes and aren't sitting in saucers of standing water.
Image source: Pixabay / analogicus (Pixabay Content License)
What's your soil pH telling you?
Tomatillos perform best in soil between pH 6.0 and 7.0. Outside that range, certain nutrients become chemically unavailable even if they're physically present in the ground.
Alkaline soils above pH 7.0 are the bigger problem. Iron, manganese, and zinc get locked out, which creates the classic interveinal chlorosis pattern on new growth. Acidic soils below pH 5.5 can cause aluminum toxicity and lock out phosphorus and calcium.
An inexpensive soil test kit or a sample sent to your local university extension service will tell you exactly where you stand. Adjusting pH takes time, so the sooner you know, the better.
When did you last do a nutrient check?
If you've been growing in the same bed for years without amending, nutrient depletion is a real possibility. Nitrogen is the one that goes first because plants use it in the largest quantities and it leaches out relatively quickly.
A basic N-P-K test reveals nitrogen, phosphorus, and potassium levels. A more comprehensive test includes micronutrients like iron, magnesium, and manganese. Without testing, you're guessing.
Over-applying fertilizer can burn roots and create nutrient lockout, causing the exact symptoms you're trying to fix.
Pests and Diseases That Cause Yellowing on Tomatillos
If you've ruled out water and soil issues, it's time to look at biological threats. Pests and diseases can mimic nutrient deficiency symptoms, which is why so many gardeners misdiagnose the problem.
Root-knot nematodes
These microscopic roundworms invade tomatillo roots and form small galls that disrupt water and nutrient uptake. The plant slowly yellows and stunts, often looking like it's starving despite adequate fertilization.
The telltale sign is in the roots. Gently dig around the base of an affected plant and look for swollen, knobby root masses. Healthy roots are white and fibrous.
Nematode-damaged roots look distorted and may have a rotting odor.
Nematodes are difficult to eliminate once established. Crop rotation is the most effective long-term strategy. Research from the University of Florida IFAS Extension indicates that planting marigolds (Tagetes species) as a cover crop can have a suppressive effect, though results vary by nematode species and soil conditions.
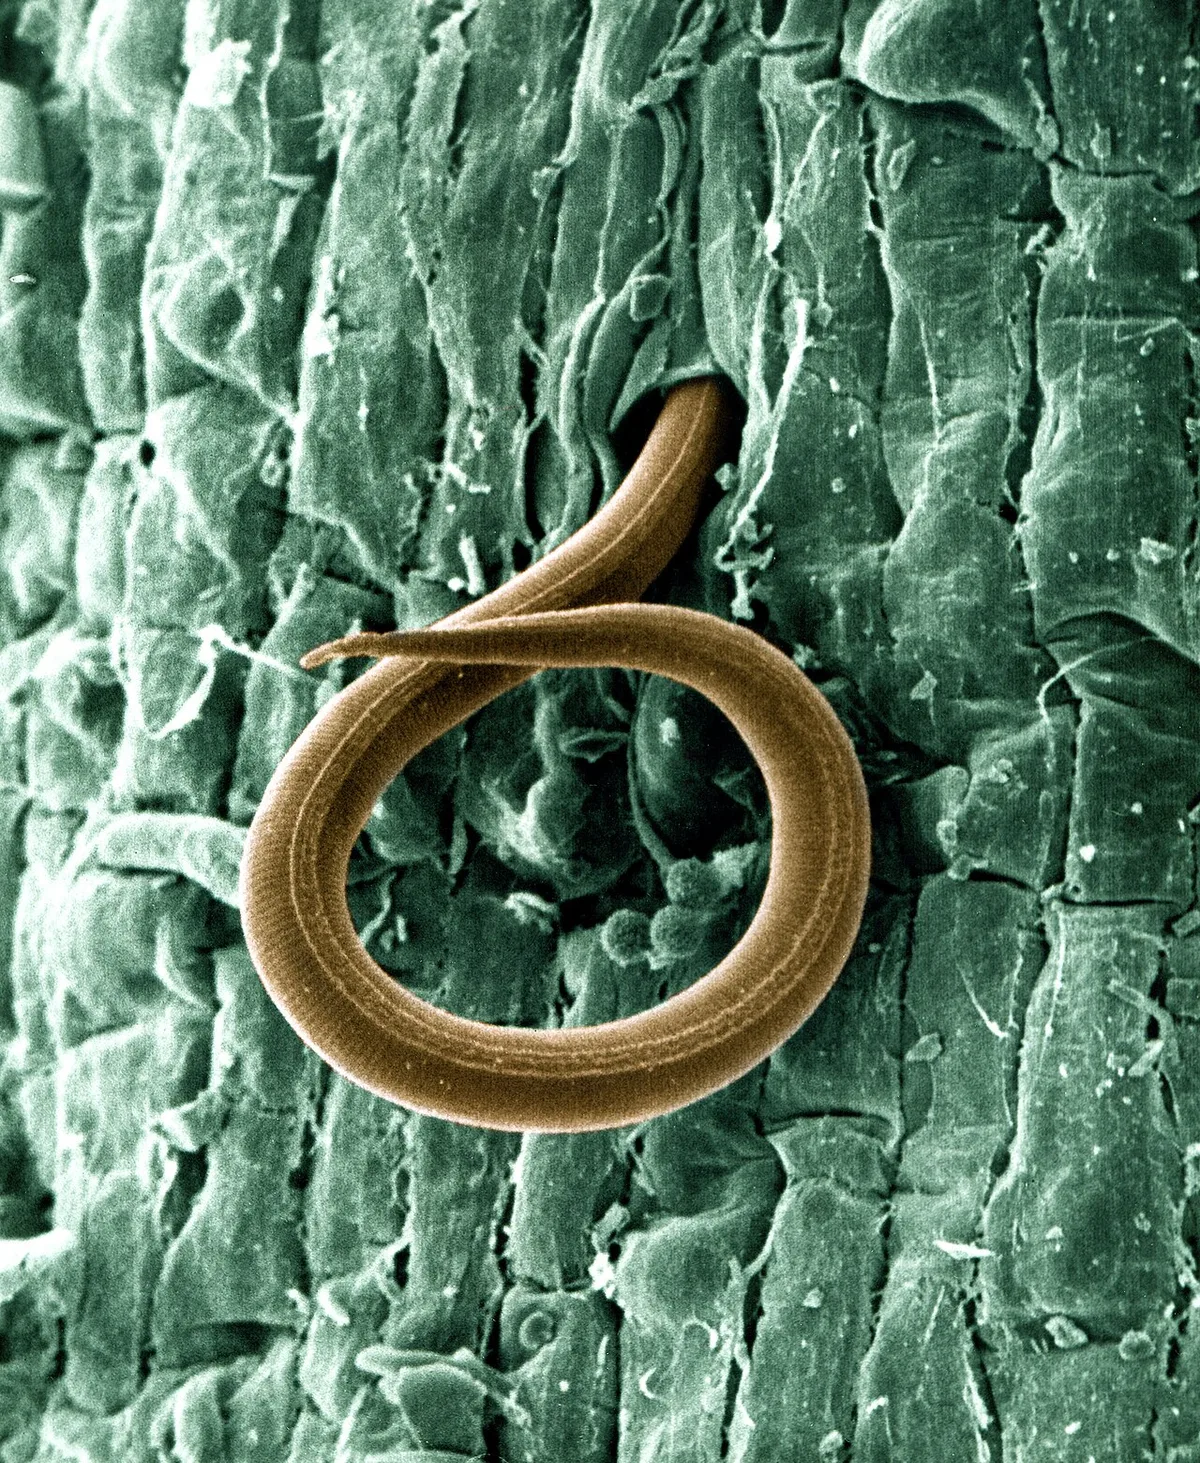
Image source: Wikimedia Commons / Photo by William Wergin and Richard Sayre. Colorized by Stephen Ausmus. U.S. Department of Agriculture (CC BY)
Fusarium and verticillium wilt
Both are soil-borne fungal diseases that invade through the roots and clog the plant's vascular system. The result is progressive yellowing, wilting, and eventual death, often starting on one side of the plant.
Fusarium wilt tends to show yellowing on one branch first, then spreads. Verticillium wilt often includes a brown discoloration inside the stem if you slice it open near the base. There is no cure for either once the plant is infected.
Remove affected plants promptly and do not compost them. Solarizing soil during the hottest weeks of summer can reduce fungal load for future plantings. Choosing resistant varieties when available is your best defense.
Viral infections (tomato yellow leaf curl virus)
Tomato yellow leaf curl virus (TYLCV) affects tomatillos as well as tomatoes. It's transmitted primarily by whiteflies. Infected plants show upward curling leaves, yellowing along leaf margins, and severe stunting.
Viral infections don't respond to any fertilizer or pesticide. The only management strategy is controlling the whitefly population and removing infected plants before the virus spreads. Reflective mulches and yellow sticky traps can help reduce whitefly numbers.
Aphids and whiteflies
Heavy feeding by either pest causes yellowing, leaf distortion, and a sticky residue called honeydew that can lead to sooty mold. Both insects cluster on the undersides of leaves and along new growth.
A strong spray of water from the hose knocks aphids off effectively. Insecticidal soap and neem oil work for both pests when applied thoroughly to leaf undersides. Encouraging beneficial insects like ladybugs and lacewings provides ongoing control without chemicals.
Environmental Stress Factors You Might Be Overlooking
Sometimes the problem isn't in the soil or on the leaves. It's in the air, the light, or the recent history of the plant.
Transplant shock
If you moved your tomatillo outdoors recently and leaves started yellowing within a week, transplant shock is likely. Roots disturbed during transplanting take time to reestablish, and the plant often sacrifices older leaves while it roots in.
Harden off seedlings gradually over 7 to 10 days before transplanting. Water consistently after the move, and avoid fertilizing for the first two weeks. Most plants bounce back once the roots catch up.
Heat stress and sunscald
Tomatillos love warmth, but extreme heat above 95°F (35°C) causes leaf scorch and yellowing, especially on plants that aren't acclimated. Sunscald shows as pale, bleached patches on leaves facing the afternoon sun.
Providing light afternoon shade during heat waves helps. Mulching around the base keeps root zones cooler. Container-grown tomatillos are especially vulnerable because their root balls heat up faster than in-ground soil.
Herbicide drift
If leaves are yellowing and curling in a pattern that doesn't match any deficiency or disease, consider whether a neighbor or lawn service recently applied herbicides. Drift from glyphosate or 2,4-D products can cause dramatic yellowing, leaf cupping, and stem twisting even at low exposure levels.
There's no fix for herbicide damage. Severely affected plants rarely recover. If you suspect drift, document the symptoms and contact your local agricultural extension office.
Natural leaf senescence
Not every yellow leaf is a crisis. As tomatillos mature and put energy into fruit production, the oldest lower leaves naturally yellow and drop. This is normal leaf aging.
If only a few bottom leaves are affected and the rest of the plant looks vigorous with active flowering, remove the yellowed leaves and move on. The plant is doing exactly what it should.
Step-by-Step: How to Fix Yellow Tomatillo Leaves Based on the Cause
Once you've identified the likely cause, here's how to act on it. Each protocol matches a specific diagnosis from the sections above.
The overwatering recovery protocol
Stop watering immediately and let the soil dry to at least a 2-inch depth before the next irrigation. If root rot has set in, remove the plant, trim away brown or mushy roots with clean pruners, and replant in fresh, well-draining mix.
Add perlite or coarse sand to heavy garden beds to improve drainage long-term. Going forward, water tomatillos deeply but less frequently. One to 1.5 inches per week is the general target, adjusted for rainfall and temperature.
How to correct nitrogen, iron, and magnesium deficiencies
For nitrogen deficiency, apply a balanced fertilizer with a higher first number (like a 10-5-5) or side-dress with composted manure. You should see improvement within 7 to 10 days. For iron deficiency, apply chelated iron as a foliar spray for fast results.
If soil pH is above 7.0, address that simultaneously or the iron will stay unavailable.
For magnesium deficiency, dissolve one tablespoon of Epsom salts per gallon of water and apply as a foliar spray or soil drench. Results often show within a week.
Improving drainage in beds and containers
Raised beds are the single best upgrade for chronic drainage issues. Even 8 to 12 inches of elevation makes a significant difference. For existing beds, work in 2 to 3 inches of compost and 1 inch of coarse perlite.
Avoid walking on planting areas since compaction destroys soil structure.
In containers, use quality potting mix rather than garden soil. Make sure every pot has drainage holes. A layer of gravel at the bottom helps prevent the holes from clogging.
Treating pests without wrecking your plant
Start with the least invasive method. A strong jet of water dislodges aphids and whiteflies without chemical residue. If that's not enough, insecticidal soap applied in the early morning or evening targets soft-bodied insects effectively.
Neem oil works as both a repellent and feeding deterrent but needs reapplication after rain. Yellow sticky traps near the plant canopy reduce adult whitefly populations. Introducing parasitic wasps (Encarsia formosa) provides ongoing control in enclosed spaces.
What to do when it's a disease you can't reverse
Fusarium wilt, Verticillium wilt, and viral infections have no cure. Remove the affected plant entirely, roots and all. Bag it and dispose of it in the trash, not the compost pile.
Sanitize your pruners with a 10% bleach solution before handling healthy plants.
Rotate nightshade crops to a different bed next season. If disease pressure is high, consider soil solarization: cover moistened soil with clear plastic for 4 to 6 weeks during the hottest part of summer to reduce fungal and nematode populations.
Mistakes That Make Yellowing Worse
Even well-intentioned gardeners can escalate the problem. Here are the most common missteps.
Over-fertilizing in panic. Dumping extra fertilizer on a yellowing plant doesn't help if the issue is root rot or disease. Excess salts burn roots and worsen yellowing. Always diagnose before you amend.
Ignoring the roots. Most people only look at the leaves. But the roots are where the story starts. If you haven't checked the root system, you're only seeing half the picture.
Watering on a schedule instead of by need. Setting a timer and watering every other day regardless of weather is a fast track to overwatering. Soil moisture varies with temperature, humidity, and rainfall. Check before you water.
Composting diseased plant material. If your tomatillo had a fungal or viral infection, tossing it in the compost pile can spread pathogens. Bag it and trash it.
Treating for pests that aren't there. Spraying insecticides when the real problem is a nutrient deficiency doesn't fix the yellowing and kills beneficial insects. Confirm the pest before you treat.
Tomatillo Leaf Yellowing vs. Tomato Leaf Yellowing
Tomatillos and tomatoes are close cousins in the Solanaceae family, so they share many of the same issues. But there are a few differences worth knowing.
Both crops show identical patterns for nitrogen deficiency, overwatering stress, and Fusarium wilt. If you've grown tomatoes before, your diagnostic instincts will transfer directly. Where tomatillos differ is in their tolerance for wet conditions.
They're more prone to root rot in poorly drained soil than most tomato varieties. They also show transplant shock more dramatically, especially if moved outdoors before nighttime temperatures consistently stay above 55°F (13°C).
Regarding viral infections, tomatillos with TYLCV often show milder symptoms than tomatoes. A yellowing tomatillo may still produce a reasonable crop, while a tomato plant with the same virus can be nearly destroyed.
The practical takeaway is to apply the same soil, water, and pest practices you use for tomatoes. Just keep a closer eye on drainage and give tomatillos a little extra time after transplanting.
When to Save It and When to Start Over
Not every yellowing tomatillo deserves a rescue effort. Sometimes the smartest move is to cut your losses.
Pull the plant if more than half the root system is rotted or covered in nematode galls, if the vascular tissue inside the stem is brown from base to mid-height, if a viral infection is confirmed and other nightshades are at risk, or if the plant is stunted with no new green growth after two weeks of corrected care.
Fight for the plant if yellowing is limited to lower leaves and the upper canopy is still growing, if the cause is a correctable nutrient deficiency with healthy roots, if the plant is mid-season with fruit already developing, or if you caught overwatering early and the roots are still firm. A tomatillo with healthy root tissue and active new growth can bounce back from significant leaf loss.
Frequently Asked Questions
Should I remove yellow leaves from my tomatillo plant?
Yes. Once a leaf has turned fully yellow, it won't recover. Removing it helps the plant redirect energy to healthy growth and improves air circulation.
Just don't strip more than a third of the foliage at once so the plant can still photosynthesize.
Can overwatering cause yellow leaves on tomatillos?
Absolutely. Overwatering is the most common cause of yellowing. Soggy soil suffocates roots, which prevents nutrient uptake and leads to chlorosis.
Let the top inch of soil dry between waterings and make sure containers drain freely.
How do I know if my tomatillo has a nutrient deficiency or a disease?
Nutrient deficiencies follow predictable patterns based on which leaves are affected and whether veins stay green. Diseases often come with spots, wilting, stem discoloration, or stunting. When in doubt, inspect the roots and test the soil before treating.
Is Epsom salt good for yellowing tomatillo leaves?
Epsom salt helps specifically when the problem is magnesium deficiency, which shows as interveinal chlorosis on middle-aged leaves. It won't fix nitrogen deficiency, overwatering, or disease. Test your soil first so you're treating the right issue.
Will my tomatillo recover from transplant shock?
In most cases, yes. Keep the soil consistently moist but not waterlogged, avoid fertilizing for the first two weeks, and protect the plant from extreme sun or wind. New green growth within 10 to 14 days is a strong sign of recovery.
What soil pH is best for tomatillos?
Tomatillos grow best in soil between pH 6.0 and 7.0. Iron and manganese become unavailable above pH 7.0, which causes yellowing on new growth. A simple soil test kit will tell you whether you need to amend.