Soil solarization is a powerful and eco-friendly technique used to improve soil health and control pests, pathogens, and weeds. If you’re looking for a natural way to enhance your garden’s productivity, this method can be a game-changer. By covering moist soil with clear plastic during the hottest months, you can trap solar energy, effectively heating the soil to temperatures that kill harmful organisms. This not only rejuvenates the soil but also creates a healthier environment for your plants. Ready to give your garden a boost? Let’s dive into the steps of soil solarization, so you can start reaping the benefits of this simple yet effective practice.

Soil Solarization And How To Do It
Soil solarization is a fascinating gardening technique that uses the sun’s energy to improve soil health and control pests. This method is especially valuable for organic gardeners looking to enhance their growing conditions without harmful chemicals. Let’s break down what soil solarization is and how you can easily do it at home.
What is Soil Solarization?
Soil solarization is the process of using transparent or clear plastic sheeting to trap solar energy in the soil. This heats the soil to high temperatures, which can kill weeds, pests, and pathogens. The whole process is eco-friendly and sustainable, making it an excellent choice for anyone interested in organic gardening.
- Improves soil health
- Controls pests and diseases
- Kills weeds
- Enhances nutrient availability
Using solarization can lead to a healthier garden ecosystem. Healthy soil is vital for growing strong plants, so using this technique can set your garden up for success.
Benefits of Soil Solarization
There are numerous benefits when it comes to soil solarization. Not only does it improve soil conditions, but it also helps to create an environment that is less hospitable to harmful organisms. Here are some key advantages:
- Reduces the population of soil-borne diseases
- Helps in weed management
- Encourages beneficial organisms
- Improves water retention in the soil
In addition to these benefits, solarization can lead to healthier plant growth and increased yields—an excellent return on your initial effort.
Choosing the Right Time for Soil Solarization
Timing is crucial when it comes to soil solarization. Late spring or early summer is generally the best period to perform this technique, as the sunlight is most powerful. Warmer temperatures will help ensure that the soil reaches the thermal levels needed for effective solarization.
Factors to Consider
Here are some factors that influence the effectiveness of soil solarization:
- Geographic location
- Weather conditions
- Soil type
- Vegetation present
By considering these factors, you can maximize the benefits of soil solarization in your garden.
How to Prepare for Soil Solarization
Preparation is the first step in successfully implementing soil solarization. Begin by selecting the area where you want to perform the solarization. Here are steps to get started:
1. **Clear the area:** Remove any existing plants, debris, or weeds. This will help the solarization process to be more effective.
2. **Soil testing:** Conduct a soil test to check for nutrients and any persistent problems. Knowing your soil’s condition will help you understand what you need to address.
3. **Moisten the soil:** Before covering it with plastic, lightly water the soil. The moisture helps to conduct heat more effectively.
Choosing the Right Plastic
Selecting the correct type of plastic is essential. Here are some options to consider:
- Clear plastic: Best for maximum sunlight penetration
- Black plastic: Effective for suppressing weeds
- Thickness: Use at least 1-2 millimeters thick for durability
Using clear plastic will generally yield the best results, but black plastic can also be beneficial depending on your garden’s specific needs.
How to Solarize Your Soil
Once you have prepared your soil, it’s time to conduct the solarization process. Follow these simple steps for effective solarization:
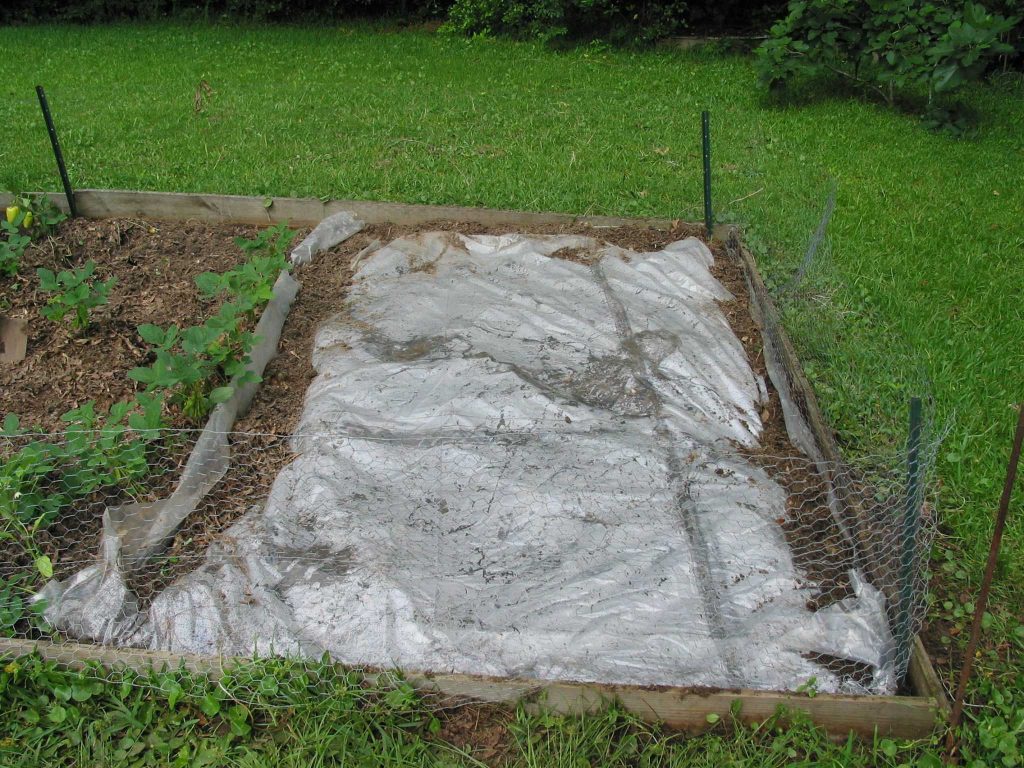
1. **Cover the soil:** Lay the plastic sheet over the prepared area. Ensure that the edges are secured, using soil or rocks to hold it down.
2. **Seal the edges:** Make sure there are no gaps, as this will let heat escape. The more airtight, the better the solarization process will be.
3. **Time it right:** Leave the plastic in place for about 4 to 8 weeks, depending on the climate. Warmer conditions will reduce the time needed.
4. **Monitor the process:** Check periodically. If you see any tears or gaps in the plastic, repair them promptly to maintain effectiveness.
After Solarization
Once the solarization period is complete, it’s time to remove the plastic. Here’s what to do next:
1. **Remove the plastic:** Gently pull back the plastic and dispose of it responsibly.
2. **Cultivate the soil:** Lightly till the soil to incorporate any dead organisms and improve soil structure.
3. **Planting:** After solarization, you can start planting your desired crops. The soil will be much healthier and ready to support plant growth.
Potential Challenges in Soil Solarization
While soil solarization is generally effective, there can be challenges. Here are some issues to watch out for:
- Inconsistent heating: Coverage that is not airtight may cause uneven heating.
- Bad weather: Rain or cloudy days may hinder effective solarization.
- Timing: Solarization can be time-consuming; patience is key.
By knowing these challenges ahead of time, you can be better prepared to resolve any issues that arise during the process.
Best Practices for Soil Solarization
To ensure the best results from your solarization efforts, keep the following best practices in mind:
- Choose a sunny location with good drainage.
- Use thick, clear plastic for maximum effectiveness.
- Monitor the soil temperature regularly.
- Consider starting in smaller areas to gauge results.
Implementing these best practices can help maximize the advantages of soil solarization.
Soil solarization is an amazing and natural method for improving soil health and managing pests. By following the steps outlined, you can effectively prepare your garden, boost its productivity, and enjoy the benefits of a thriving ecosystem. Embracing this technique will not only benefit your garden but also contribute positively to the environment. Happy gardening!
How to Use Solarization to Prepare Areas for Planting
Frequently Asked Questions
“`html
What are the main benefits of soil solarization?
Soil solarization effectively improves soil health by increasing temperature and moisture levels, which helps eliminate harmful pathogens, pests, and weeds. It enhances nutrient availability, promotes beneficial microbial activity, and prepares the soil for planting, leading to healthier crops and better yields.
How long does the soil solarization process take?
The soil solarization process typically requires 4 to 6 weeks of sunny weather, with temperatures consistently reaching at least 85°F (29°C) in the upper soil layer. The duration can vary based on climate, soil type, and the specific crop you plan to grow afterward.
What type of plastic is best for soil solarization?
Clear polyethylene plastic is the most effective for soil solarization. It allows sunlight to penetrate and heat the soil while trapping moisture. Using a thickness of 1 to 4 millimeters can provide an optimal balance between durability and effectiveness in heating the soil.
Can I solarize soil in cooler climates?
Yes, you can solarize soil in cooler climates, but the process may take longer. During warmer months, especially late spring to early summer, the effectiveness increases. Additionally, you can enhance the process by choosing darker plastic to absorb more heat or by covering the soil with organic materials beforehand to help retain warmth.
What should I do if the soil is too wet for solarization?
If the soil is excessively wet, it’s best to delay solarization until it dries out. Wet soil can lead to waterlogging, which may hinder the heating process. To speed up drying, consider improving drainage, tilling the soil to aerate it, or allowing it to dry naturally in sunny conditions before covering it with plastic.
“`
Final Thoughts
Soil solarization effectively improves soil health and manages pests. By covering moist soil with clear plastic, you trap heat and raise temperatures, leading to beneficial changes in the soil ecosystem.
To implement soil solarization and how to do it, begin in warm seasons for maximum impact. This method not only reduces harmful organisms but also enhances nutrient availability for plants.
Embracing soil solarization can lead to healthier crops and better yields. Make it a key practice in your gardening or farming routine for sustainable growth.