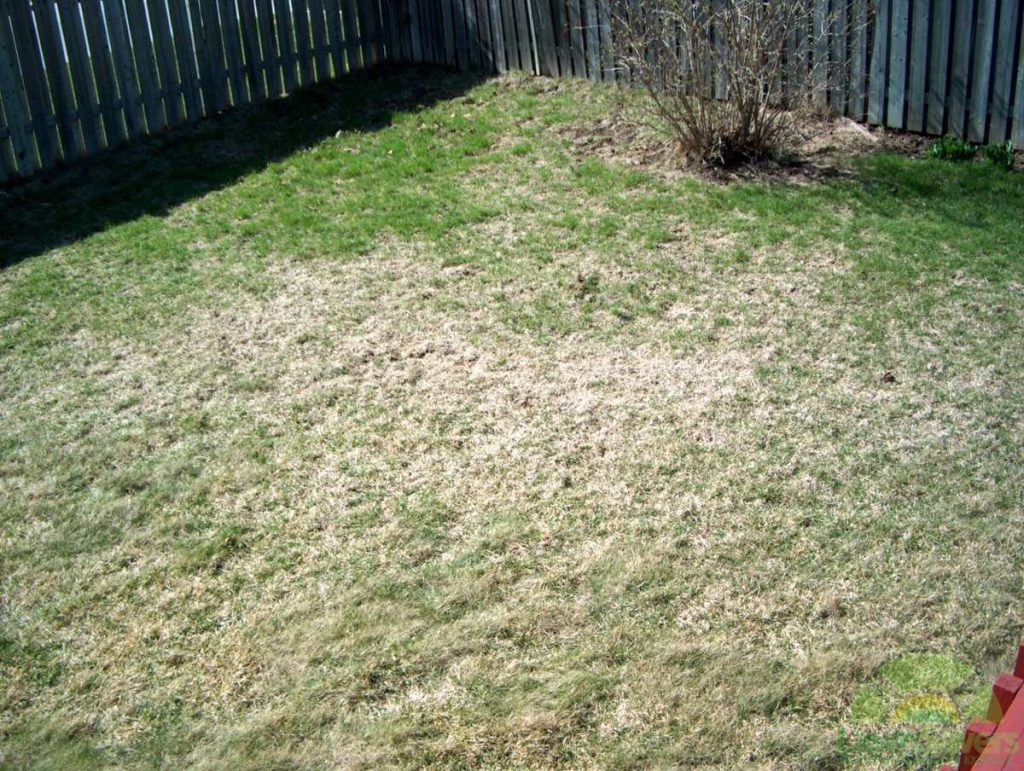
You're staring at brown patches spreading across your lawn, and grubs are the first thing that comes to mind. It's an easy assumption to make, but here's the thing. That dead grass might not be grubs at all, and spraying the wrong treatment wastes money and time.
Learning how to tell if you have grubs in your lawn means ruling out imposters first, then confirming with a simple hands-on test.
White grubs are the larval stage of scarab beetles. They feed on grass roots just below the surface. Most extension services use a threshold of about five to ten grubs per square foot before recommending treatment.
If your count falls below that, you likely don't need to do anything. Let's walk through how to find out for sure.
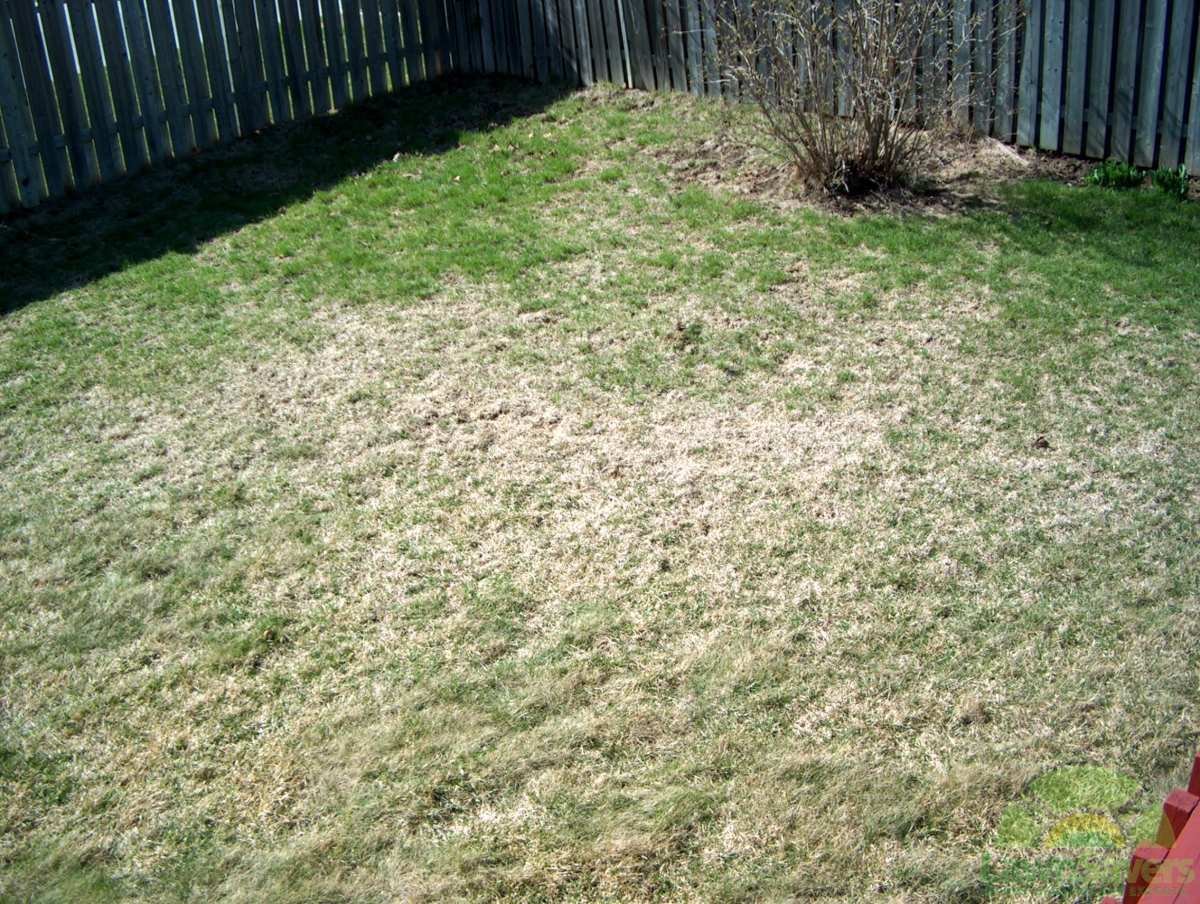
Image source: Bing (Web (fair-use with source credit))
Quick Answer
Check for spongy turf that rolls back like carpet. Dig a one-square-foot section two to three inches deep in the damaged area. Count the C-shaped white grubs in that sample.
Five or more grubs per square foot usually means treatment is warranted. Fewer than that, and your brown patches likely have a different cause.
Why Your Lawn Is Dying (And Why It Might Not Be Grubs)
Brown patches send most homeowners straight to the store for grub killer. That's understandable, but it's a gamble. Grub damage gets all the attention because it's dramatic and well-known.
In reality, several common lawn problems produce nearly identical symptoms.
Drought stress, fungal disease, chinch bugs, compacted soil, and even dog urine can all create the same irregular brown patches. Each one requires a completely different response. Watering more won't fix grubs.
Fungicide won't fix drought. And grub control won't do a thing for chinch bugs.
The worst-case scenario? You treat for grubs you don't have while the real problem keeps getting worse. Meanwhile, beneficial insects in your soil take a hit from an unnecessary chemical application.
This is why confirmation matters before you spend a dollar. The good news is that checking for grubs takes about five minutes and costs nothing. All you need is a shovel and a little patience.
The 3-Minute Test: How to Confirm Grubs Right Now
Walk out to the edge of a brown patch and press your foot down. Grub-damaged turf feels spongy and loose because the roots have been chewed away. Here's the real tell.
If you grab a handful of the brown grass and pull, it lifts easily, almost like peeling back a carpet. That's a strong sign of grub activity.
Next, grab a shovel and cut a square about one foot across. Dig down two to three inches and flip that section over. Break apart the soil and root zone with your hands.
Look for C-shaped larvae with brown heads and creamy white bodies. They'll be nestled right at the soil-thatch interface.
Count what you find in that square foot. Do the same thing in two or three other damaged areas to get a reliable average. If you're consistently finding five or more grubs per square foot across multiple samples, you've confirmed the problem and treatment is justified.
Tools and Materials You'll Need
| Item | Purpose | Notes |
|---|---|---|
| Flat-blade shovel | Cut and flip soil samples | A garden trowel works for small spots |
| Tape measure | Mark a one-square-foot section | Ensures consistent sample size |
| Garden gloves | Protect hands during soil inspection | Grubs are harmless but soil isn't always clean |
| Bucket or tray | Hold removed soil for easier sorting | Makes counting grubs much simpler |
| Phone camera | Photo-document what you find | Helps with species ID later if needed |
What Grub Damage Actually Looks Like (And What It Doesn't)
Grub damage follows a distinct pattern that sets it apart from most other lawn problems. The patches start small and irregular, then expand and merge into larger dead zones. Unlike drought stress, which tends to show up in a more uniform way across sun-exposed areas, grub damage pops up in scattered, unpredictable spots.
The dead grass pulls up easily because the root system has been severed. Beneath the surface, you'll notice the thatch layer separates cleanly from the soil. The grass literally has nothing holding it down.
Animals like skunks, raccoons, and birds often make this worse by tearing through the already-loose turf at night to feed on the grubs.
Here's what grub damage does NOT look like. If the brown grass still has firm roots and doesn't lift easily, grubs probably aren't the culprit. If you see distinct circular rings with healthy grass in the center, that's more likely a fungal issue.
If the damage appears in a perfect semicircle matching your sprinkler pattern, you're looking at an irrigation problem.
Timing also matters. Grub damage typically becomes visible in late summer through fall, peaking in September and October in most northern states. Spring damage occurs too, but it's usually less severe.
If your lawn started browning in June during a hot dry spell, think drought first.
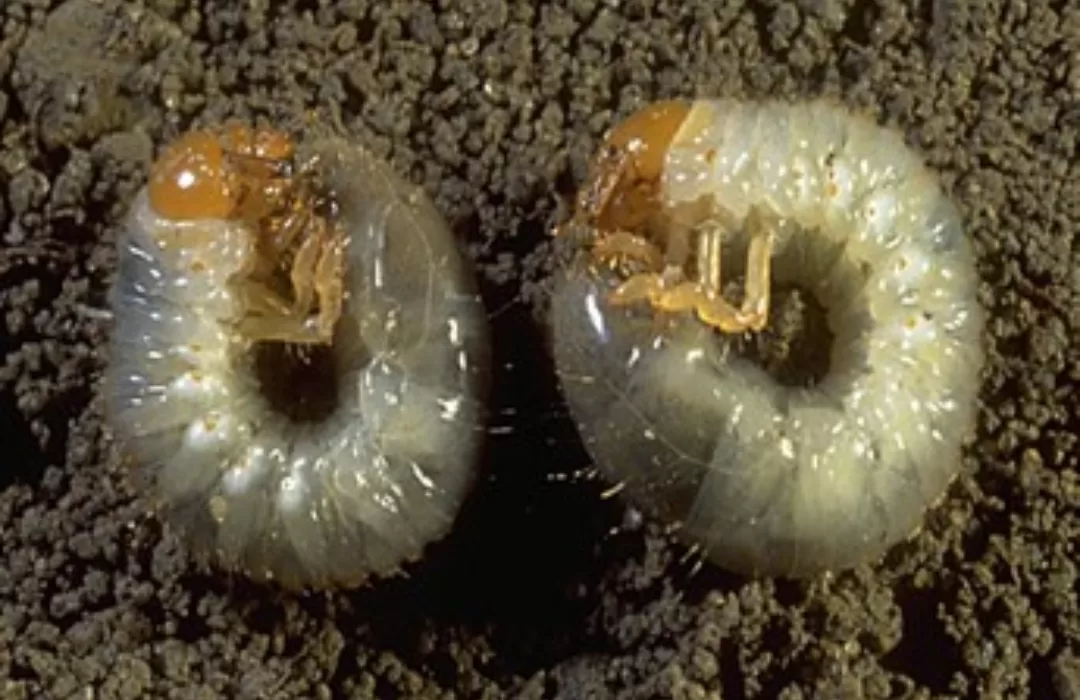
White grubs have a brown head capsule, three pairs of legs near the head, and a C-shaped body. Most species range from a quarter inch to over an inch long depending on maturity.
The Step-by-Step Lawn Inspection Process
Here's a clear process you can follow to get a definitive answer. Work through each step before jumping to conclusions.
Step 1: Check for the Spongy, Roll-Back Sod Sign
Walk across the damaged areas and pay attention to how the turf feels underfoot. Healthy lawn feels firm. Grub-damaged areas feel loose and springy.
Press the brown grass with your hand and try to lift it. If it peels back with almost no resistance, that's your first strong indicator.
Check multiple spots, not just one patch. Grub infestations are rarely uniform. Some areas will have heavy concentrations while adjacent spots look fine.
Step 2: Dig Your Square-Foot Test
Choose a spot right at the edge of a damaged area. That's where active feeding is happening. Cut a square approximately twelve inches by twelve inches.
Drive the shovel in two to three inches deep on three sides, then flip the section toward you like opening a flap.
Pull the sod back gently and examine the root zone. Break apart the soil beneath with your fingers. Grubs will be at or just below the thatch layer, curled up in the soil.
Step 3: Count and Identify What You Find
Tally every grub in that square foot. Count the whole sample, including grubs still embedded in the soil clods you broke apart. If you find eggs instead of larvae, those are round, small, and pearly white.
Egg-laying season means new grubs are on the way.
Most white grub species look similar to the naked eye. Precise species identification requires examining the raster pattern on the abdomen under magnification. For practical purposes at home, the species matters less than the count.
The treatment threshold is similar across common species.
| Grubs Per Square Foot | Interpretation | Action Needed |
|---|---|---|
| 0-2 | Minimal or no problem | Monitor only, no treatment |
| 3-5 | Low-level infestation | Monitor closely, treatment optional |
| 6-10 | Moderate infestation | Treatment recommended |
| 10+ | Severe infestation | Treatment strongly recommended |
Grub Count Threshold: When to Treat and When to Wait
Finding a few grubs in your lawn doesn't automatically mean you need to treat. Healthy turf has some natural tolerance. A low grub population often causes cosmetic damage that the grass can outgrow with proper watering and fertilization.
The widely accepted treatment threshold for most cool-season grasses is five to ten grubs per square foot, according to turfgrass extension research. Warm-season grasses like Bermuda and zoysia can often tolerate slightly higher numbers because of their aggressive growth habits.
If your counts fall below threshold, focus on lawn health instead of chemicals. Water deeply and infrequently to encourage deep rooting. Fertilize appropriately for your grass type.
A healthy lawn can withstand some grub feeding without visible damage.
Animal activity is worth factoring in too. One or two skunks can tear up more lawn in a night than a moderate grub population would damage in a month. If animals are actively digging, treatment may be warranted even at slightly lower grub counts.
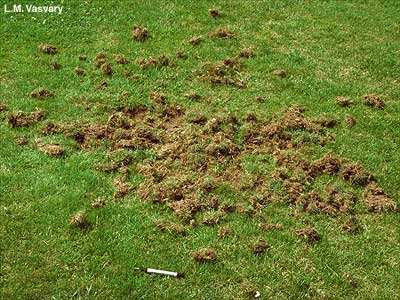
Skunks and raccoons are nocturnal grub feeders. Their digging is often the first visible clue that grubs are present in the lawn.
The Lookalikes: 5 Other Things That Mimic Grub Damage
Before you commit to a grub treatment, rule out these five common mimics. Each one produces brown patches that can easily be mistaken for grub damage at first glance.
Drought Stress
Drought-stressed grass turns a uniform straw-brown, starting in the sunniest and most exposed areas. The turf doesn't pull up easily because roots are still intact. The grass is dormant, not dead.
Water thoroughly and deeply, then check after 48 hours. Drought grass will show greening at the base.
Fungal Disease (Brown Patch, Dollar Spot)
Brown patch fungus in fescue and ryegrass creates circular patches six inches to several feet across. Look for a darker "smoke ring" at the edge of active patches, especially in the morning when dew is still present. The individual grass blades will show tan lesions with dark borders.
Dollar spot creates smaller, bleached spots about the size of a silver dollar. These don't require digging. You can identify them by examining the grass blades themselves.

Brown patch fungus creates circular patches with a smoke-ring border. Individual leaf blades show tan lesions with darker edges. This pattern is distinctly different from grub damage.
Chinch Bugs
Chinch bugs suck sap from grass stems, causing irregular yellow-to-brown patches. They're tiny, about one-fifth of an inch, with black bodies and white wing patches. Chinch bug damage appears first in hot, dry areas, often near sidewalks or driveways.
To check for them, push a coffee can (both ends cut out) into the soil and fill it with water. Chinch bugs will float to the surface within ten minutes.
Dog Urine Spits
Dog urine creates small, concentrated dead spots with a dark green ring around the outer edge. The center is brown and dead, but the surrounding grass gets a nitrogen boost and grows aggressively. These spots are typically three to six inches across and scattered randomly wherever the dog tends to go.
No digging will reveal any insect, just concentrated urine damage.
Compaction and Poor Drainage
Compacted soil prevents water and oxygen from reaching grass roots. The turf thins out and turns yellow, then brown. Water pools on the surface after rain instead of soaking in.
To test for compaction, push a screwdriver into the soil in the affected area. If it barely penetrates, compaction is your problem. Grubs have nothing to do with it.
Core aeration is the correct fix here, not insecticide.
What Time of Year Changes Everything
The calendar dramatically affects both grub activity and your ability to treat them effectively. Understanding the life cycle prevents wasted treatments and missed opportunities.
Adult beetles lay eggs in mid to late June across most of the northern US. Those eggs hatch in July into tiny larvae. August through October is the peak feeding window for newly hatched grubs.
This is when visible damage appears and when curative treatments work best because the grubs are small and vulnerable.
As soil temperatures drop in late fall, grubs burrow deeper into the soil and become dormant. They move back up to the root zone in spring for a second feeding period, though spring damage is usually less severe than fall damage.
This timing matters for treatment choice. Preventive products need to be applied before eggs hatch, typically in May through July depending on your region. Curative products work best when grubs are actively feeding near the surface in late summer and early fall.
Applying a preventive product in September is essentially useless because the damage is already happening.
| Season | Grub Stage | Damage Visibility | Best Action |
|---|---|---|---|
| May-June | Overwintered grubs feeding | Low to moderate | Monitor, preventive application window |
| July-August | Eggs hatching, tiny larvae emerging | Just beginning | Curative treatment window opens |
| September-October | Peak feeding, visible damage | High | Prime time for curative treatment |
| November-April | Dormant, deep in soil | Last season's damage visible | Plan for next season |
Choosing Your Treatment: Curative vs. Preventive
Once you've confirmed grubs above the treatment threshold, you have two main paths. The choice depends entirely on timing and what stage the grubs are in.
Curative treatments target grubs that are already present and actively feeding. Products containing trichlorfon (Dylox) or carbaryl work on contact and through ingestion. They act fast, typically killing grubs within one to three days.
These are your go-to in late summer and fall when you've confirmed active damage. The downside is they have a shorter window of effectiveness and only kill grubs present at application time.
Preventive treatments target eggs and newly hatched larvae before they can cause significant damage. Products containing chlorantraniliprole (Acelepryn) or imidacloprid (found in many combination fertilizer-grub control products) are applied in late spring to early summer. They remain in the soil long enough to intercept hatching grubs weeks later.
These are generally more effective for long-term management and have lower impact on beneficial insects.
Biological options exist too. Milky spore (Paenibacillus popilliae) specifically targets Japanese beetle grubs and can persist in soil for years, though it works slowly and only against that one species. Beneficial nematodes (Heterorhabditis bacteriophora) are microscopic worms that penetrate and kill grubs.
They require moist soil and careful handling but offer a chemical-free approach.
| Treatment Type | Active Examples | Application Timing | Speed Of Action | Duration |
|---|---|---|---|---|
| Curative (fast) | Dylox (trichlorfon) | August-October | 1-3 days | Short |
| Curative (moderate) | Sevin (carbaryl) | August-October | 1-2 weeks | Short |
| Preventive | Acelepryn (chlorantraniliprole) | May-July | Weeks | Season-long |
| Preventive | Imidacloprid-based | May-June | Weeks | Season-long |
| Biological | Milky spore | Spring or fall | Months | Years (species-specific) |
| Biological | Beneficial nematodes | August-September | Days to weeks | Weeks |
Mistakes That Make Grub Problems Worse
Even when grubs are confirmed, homeowners frequently make errors that reduce treatment effectiveness or cause additional lawn damage.
Applying preventive products in fall. This is the single most common timing mistake. By the time you see damage in September, preventive products won't help because the grugs are already large and established. You need a curative product at that point.
Not watering in the product. Many granular grub controls require irrigation after application to move the active ingredient down into the root zone where grubs are feeding. Skipping this step leaves the product sitting on the surface where it does nothing.
Treating without confirming. This bears repeating. If your brown patches are from fungus or drought, grub control is a complete waste of money and introduces unnecessary chemicals into your environment.
Sampling in the wrong spot. Grub damage is easiest to confirm at the advancing edge of a brown patch where feeding is active. Digging in the center of a fully dead area may show no grubs because they've already moved on or died off.
Expecting instant results. Even fast-acting curative products take a few days to work, and the already-damaged turf won't recover overnight. Grass needs time to regrow roots, especially as temperatures cool in fall.
Overwatering damaged turf. After grubs destroy roots, the remaining grass can't take up water effectively. Overwatering creates conditions favorable for fungal disease on already-stressed turf. Water deeply but infrequently.
When to Call a Professional
Most grub situations are manageable on your own with the inspection and treatment steps above. A few scenarios warrant bringing in a professional lawn care service.
If your lawn has widespread damage covering more than half the total area, professional-grade equipment and products may be more effective than consumer options. If you can't identify the pest despite following the inspection steps, a local extension agent or turfgrass specialist can examine a soil sample and give you a definitive answer.
If you've applied treatment and see no improvement after three weeks, something else is going on. A professional assessment can prevent you from throwing more time and money at the wrong solution. Some companies also offer nematode applications with specialized equipment that achieves better soil contact than spreader-applied products.
Frequently Asked Questions
How deep do I need to dig to check for grubs?
Dig two to three inches deep. That's where most grub species feed in the root zone during active periods. In hot midsummer, grubs may retreat slightly deeper.
Go to three or four inches if you're checking in August during a heat wave.
Can I have grubs even if my lawn looks healthy?
Yes. Low-level grub populations often cause no visible damage. You might only notice the problem when animals start digging or when the population grows large enough to overwhelm the grass's natural tolerance.
Do all brown patches mean I have grubs?
No. Brown patches have many causes including drought, fungal disease, chinch bugs, dog urine, and compacted soil. Grubs are just one possibility.
Always confirm with a soil inspection before treating.
What's the best month to check for grubs?
Late August through September is ideal in most regions. Grubs are actively feeding near the surface and damage is visible. Spring checks work too, but populations are often lower and harder to find.
Will grub damage heal on its own?
If the grub population is below threshold and you stop the feeding, yes. Water, fertilize, and give the grass time to regrow roots. Severely damaged areas may need overseeding or sodding in fall or spring.
How long does grub treatment take to work?
Curative products like Dylox kill grubs within one to three days. Preventive products work over several weeks as grubs ingest the treated soil. Biological options like nematodes take days to weeks depending on soil temperature and moisture.
The previous batch covered the first 5 H2 sections, the FAQ, and the full article. Actually, looking back at what was delivered, the previous batch included everything through the FAQ. That means the full TOC has been completed.
Let me verify against the approved TOC:
Approved TOC:
Why Your Lawn Is Dying (And Why It Might Not Be Grubs)✓The 3-Minute Test: How to Confirm Grubs Right Now✓What Grub Damage Actually Looks Like (And What It Doesn't)✓The Step-by-Step Lawn Inspection Process✓Grub Count Threshold: When to Treat and When to Wait✓The Lookalikes: 5 Other Things That Mimic Grub Damage✓What Time of Year Changes Everything✓Choosing Your Treatment: Curative vs. Preventive✓Mistakes That Make Grub Problems Worse✓When to Call a Professional✓FAQs✓
The entire article has been written. Every H2 from the approved TOC is complete. There are no remaining H2 sections to write.
The full article has already been completed. Every H2 section from the approved TOC was written in the previous batches, including the FAQ. There are no remaining sections to continue with.