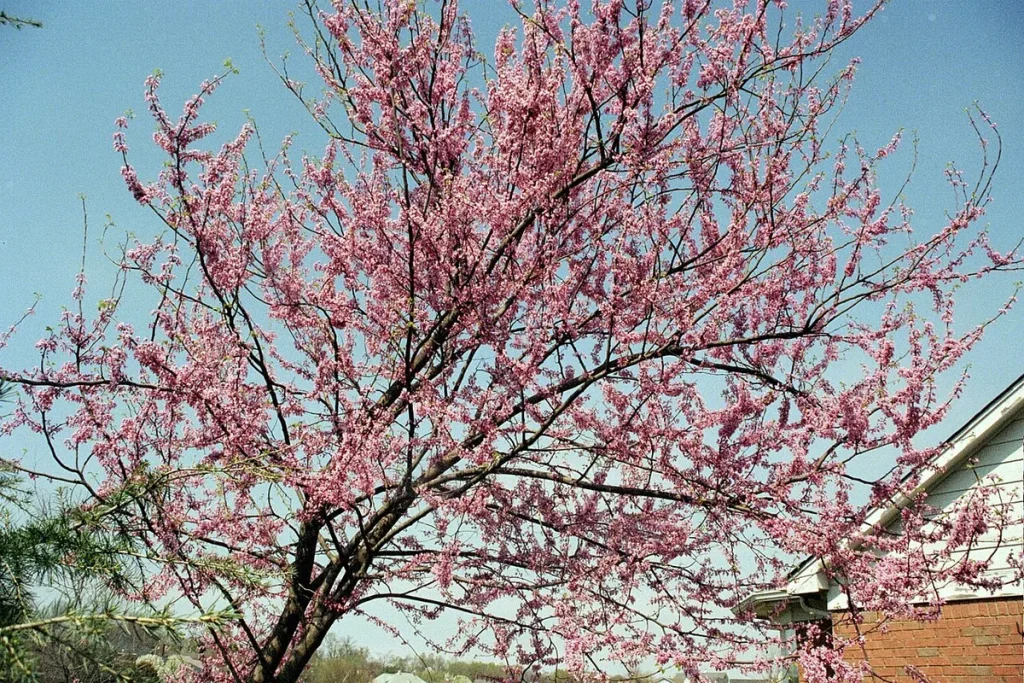
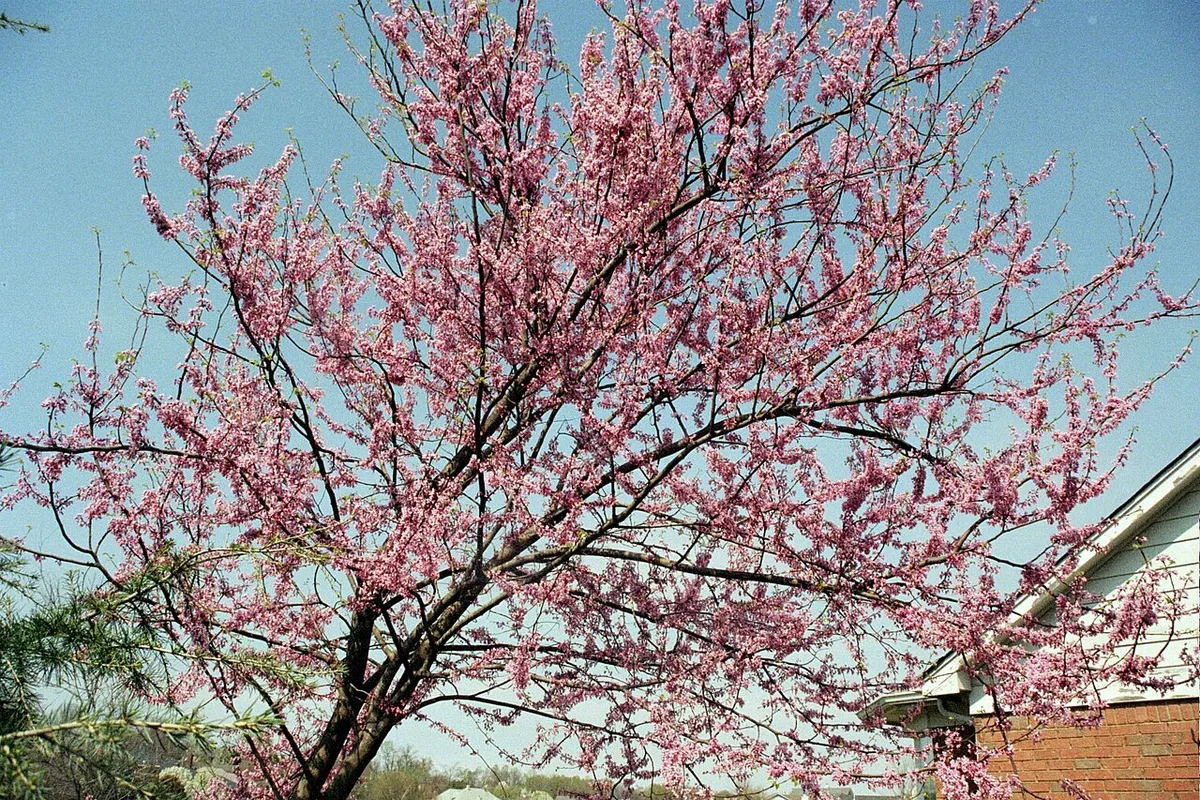
Image source: Wikimedia Commons / BETTY from MEMPHIS, TN, USA (CC BY)
If you've been wondering how to start a redbud tree from a cutting, you're probably standing in your garden right now, pruners in hand, staring at a beautiful Eastern redbud and thinking, "I want another one of those." Fair enough. Redbuds are stunning native trees with those unmistakable magenta spring blooms. The good news is you absolutely can clone one from a cutting.
The bad news? Redbuds are not the easiest species to root, and most generic advice online glosses over the details that actually determine success or failure.
Research from university extension programs and woody plant propagation literature consistently shows that timing, cutting type, and environmental control are the three pillars that matter most. Get those right and you're looking at a realistic 50 to 80 percent success rate with softwood cuttings. Get them wrong and you'll end up with a tray of mushy sticks.
Let's walk through exactly what works, what doesn't, and why.
Quick Answer
You can start a redbud tree from a cutting using softwood stem cuttings taken in late spring. Dip the cut end in rooting hormone containing IBA. Place the cutting in a well-drained medium under high humidity.
Roots typically form within four to eight weeks.
Why Redbud Cuttings Are Trickier Than You Think
Here's the thing most articles skip. Redbuds (Cercis canadensis) do not root as readily as willows, forsythias, or other propagation-friendly species. They're what horticulturists classify as moderately difficult to root from cuttings.
That means you can't just snap a stick off the tree, shove it in the ground, and expect results.
The Adventitious Root Problem
When you take a cutting, you're asking a piece of stem to do something it wasn't designed to do: produce roots where none existed. This process is called adventitious root formation. Some plants do it almost automatically.
Redbuds need significant encouragement. The stem has to form callus tissue first, then differentiate that tissue into root initials, then push out functional roots. Each stage can fail independently.
Juvenility Matters More Than You Think
The age of the tissue you're cutting from matters enormously. Younger, more juvenile wood produces roots far more readily than mature wood. This is why cuttings taken from the lower, younger branches of a redbud often root better than vigorous upright shoots from the canopy.
If your tree is old and well-established, your success rate will be lower than if you're working with a younger tree.
Softwood vs. Semi-Hardwood vs. Hardwood: The Decision That Makes or Breaks You
This is the single most important decision you'll make in the entire process. The type of cutting you choose determines your success rate, your timeline, and the specific conditions you need to maintain. Get this wrong and nothing else you do will save the cutting.
Image source: Pixabay / Kapa65 (Pixabay Content License)
| Cutting Type | Timing | Success Rate | Rooting Time | Difficulty |
|---|---|---|---|---|
| Softwood | Late spring to early summer | 50–80% (with proper setup) | 4–8 weeks | Moderate |
| Semi-hardwood | Mid to late summer | 20–40% | 6–12 weeks | Moderate to hard |
| Hardwood | Dormant season (winter) | Under 10% | Not recommended | Very hard |
Softwood cuttings are taken from the current season's new growth when it's still green and flexible. They root fastest and most reliably because the cells are actively dividing and primed for regeneration. Semi-hardwood cuttings are partially matured, slightly woody at the base.
They're a fallback option if you missed the softwood window. Hardwood cuttings are fully dormant mature wood. For redbuds, skip them entirely.
The success rate is so low it's not worth the effort.
The Decision Tree: Which Cutting Type Should You Use?
Before you touch your pruners, run through this quick decision process. Your answer here determines everything downstream.
Branch 1: Softwood Cuttings (Your Best Shot)
If it's late May through June and you can bend a green redbud stem without it snapping, you're in the softwood window. This is your highest-probability path. Take 4 to 6 inch cuttings from the tips of actively growing branches.
You'll need rooting hormone, a sterile medium, high humidity, and ideally bottom heat. Expect roots in 4 to 8 weeks.
Branch 2: Semi-Hardwood Cuttings (Plan B)
If it's July or August and the stem is starting to get slightly woody at the base but still green at the tip, you're in semi-hardwood territory. Your success rate drops, but it's still viable. Use a higher concentration of rooting hormone (3,000 to 5,000 ppm IBA instead of 1,000 to 3,000).
Be patient. These take 6 to 12 weeks to root.
Branch 3: Hardwood Cuttings (Don't Bother)
If the tree is dormant and the wood is fully brown and rigid, put the pruners away. Redbud hardwood cuttings have a success rate under 10 percent even under professional nursery conditions. Your time is better spent waiting for spring or exploring alternative propagation methods like layering.
Step-by-Step: How to Propagate a Redbud From a Softwood Cutting
This is the full workflow for softwood cuttings, which is the method that actually works for most home growers. Follow each step in order. Skipping steps or doing them out of sequence is how most people fail.
Step 1: Time It Right
Take your cuttings in late spring to early summer, typically late May through June in most of the United States. The donor tree should be actively growing. The stems should be green and flexible enough to bend without snapping.
If you're in Zones 4 or 5, you may need to wait until early June. In Zones 7 to 9, you might be able to start in mid-May.
Step 2: Pick the Right Donor Branch
Look for healthy, disease-free branch tips from the current season's growth. Ideally, choose lateral shoots rather than vigorous upright leaders. Lower branches that received less light often have higher rooting potential because the tissue is more juvenile.
Avoid any branches showing signs of disease, pest damage, or drought stress.
Step 3: Take the Cutting in the Morning
Always collect cuttings early in the morning when the plant is fully hydrated. Turgor pressure is highest in the morning, which means the stems are firm and full of water. Cuttings taken in the afternoon heat wilt faster and have a lower survival rate.
Use sharp, sterilized bypass pruners. Wipe the blades with rubbing alcohol between each cut to prevent spreading pathogens.
Step 4: Prepare the Cutting
Cut a 4 to 6 inch section from the branch tip. Make your basal cut just below a node (the point where leaves attach to the stem). Remove the lower leaves, leaving 2 to 4 leaves at the top.
If the remaining leaves are large, cut them in half horizontally to reduce water loss through transpiration. This is critical. Large leaves on a leafless cutting will suck it dry before roots can form.
Step 5: Apply Rooting Hormone Correctly
Image source: Pixabay / stevepb (Pixabay Content License)
Dip the basal 1 inch of the cutting into a rooting hormone containing IBA (Indole-3-butyric acid). For softwood redbud cuttings, use a concentration of 1,000 to 3,000 ppm. Tap off the excess.
Don't dip the cutting back into the main hormone container, as this contaminates it. Pour a small amount into a separate disposable dish and dip from that.
Step 6: Stick It in the Right Medium
Use a sterile 50/50 mix of peat moss and perlite. Moisten it thoroughly so it's damp but not dripping. Poke a hole in the medium with a pencil or dowel before inserting the cutting.
This prevents you from wiping off the hormone as you push the stem in. Insert the cutting so at least one node is buried beneath the surface. Firm the medium gently around the base.
Step 7: Create the Environment
Place your cuttings in a propagation tray with a humidity dome, or set up an intermittent mist system if you have one. Maintain relative humidity between 80 and 95 percent. Keep the rooting medium temperature between 65 and 75°F.
If you can provide bottom heat (a heat mat set to 70°F), your success rate will improve noticeably. Keep the cuttings in bright, indirect light. Never in direct sun.
Step 8: Wait Without Disturbing
This is the hardest part. Do not pull cuttings out to check for roots. Do not poke at them.
Do not rearrange them. Check the humidity daily and mist if the medium surface looks dry. Watch for any signs of fungal growth (white or gray fuzzy patches on the stem or medium).
If you see rot on a cutting, remove it immediately to prevent spread. Good airflow is important, so crack the dome vents slightly if you notice heavy condensation building up.
Step 9: Check for Roots

Image source: Pixabay / NoblePrime (Pixabay Content License)
After 4 weeks, begin testing by giving the cutting a very gentle tug. If you feel resistance, roots have formed. If it slides right out, give it another week and try again.
Once roots are 1 to 3 inches long and you can see secondary roots branching off, the cutting is ready for the next phase.
Step 10: Harden Off and Transplant
Don't rush this. Gradually reduce humidity over 1 to 2 weeks by opening the dome vents more each day. Once acclimated, transplant each rooted cutting into its own pot with standard potting mix.
Grow the potted cuttings in a sheltered spot for the rest of the season. Plant them in the garden the following spring, after the last frost.
Rooting Hormone Guide: What Concentration Actually Works
Not all rooting hormones are created equal, and the concentration matters more than most people realize. Here's what extension literature says about IBA concentrations for redbud propagation.
| Cutting Type | IBA Concentration | Application Method | Notes |
|---|---|---|---|
| Softwood | 1,000–3,000 ppm | Quick dip (5–10 seconds) in liquid or powder | Powder form is easier for home growers |
| Semi-hardwood | 3,000–5,000 ppm | Quick dip in liquid; may benefit from wounding | Higher concentration compensates for more mature tissue |
| Hardwood | Not recommended | N/A | Success rate too low to justify the attempt |
Most commercial rooting hormone powders sold at garden centers contain IBA at concentrations suitable for softwood cuttings. Brands like Dip 'N Grow or Hormex are commonly available and work well. If you're using a powder, tap off the excess.
Too much hormone can actually inhibit root formation or cause the cutting to rot at the base.
The Propagation Environment: Humidity, Heat, and Light Numbers That Matter
Redbud cuttings are extremely sensitive to environmental conditions. Here are the specific ranges you need to maintain for the best results.
- Relative humidity: 80 to 95 percent. Below 80 percent, cuttings wilt rapidly. Above 95 percent with no airflow, fungal problems increase.
- Medium temperature: 65 to 75°F. Bottom heat at 70°F is ideal. Warmer than 80°F encourages pathogen growth.
- Air temperature: 70 to 80°F during the day, slightly cooler at night.
- Light level: 200 to 500 foot-candles. Bright, indirect light or shade cloth. Direct sunlight will cook cuttings inside a humidity dome.
- Mist frequency (if using intermittent mist): 5 to 10 seconds every 5 to 15 minutes during daylight hours. Adjust based on your climate and airflow.
- Airflow: Gentle air movement prevents fungal buildup. A small fan on low, not blowing directly on cuttings, helps significantly.
If you're propagating indoors, a simple setup of a seedling heat mat, a humidity dome tray, and a fluorescent or LED grow light positioned 12 inches above the dome will get the job done. Total cost for a basic setup runs about $30 to $50.
Common Mistakes That Kill Redbud Cuttings
These are the failure points that show up repeatedly in extension reports and grower forums. Avoid all of them.
- Taking cuttings at the wrong time. Too early and the tissue is too soft and rots. Too late and it's too woody to root.
- Letting cuttings dry out. Even 30 minutes of wilting can set a cutting back significantly. Keep cuttings in a sealed plastic bag with a damp paper towel until you're ready to stick them.
- Using unsterilized medium or containers. Reused trays harbor pathogens. Start with fresh, sterile mix or pasteurize your medium in the oven at 180°F for 30 minutes.
- Skipping the rooting hormone. You might get 5 to 10 percent success without it. With it, you're looking at 50 to 80 percent. The math is clear.
- Overwatering the medium. Soggy medium lacks oxygen and causes stem rot. The medium should be moist, never waterlogged.
- Checking roots too often. Every time you tug or pull a cutting, you damage the delicate root initials. Wait at least 4 weeks before your first check.
- Transplanting too early. Moving a cutting into the garden before it has a well-established root system is a recipe for failure. Give it a full season in a pot.
- Ignoring cultivar differences. Some named cultivars like 'Forest Pansy' root more readily than others. Straight species Eastern redbud is generally the easiest to propagate.
What It Costs: Supplies, Timeline, and Realistic Success Rates
Here's a realistic breakdown of what you'll spend and what you can expect.
| Item | Estimated Cost | Notes |
|---|---|---|
| Rooting hormone (powder, small container) | $5–$12 | Lasts many seasons |
| Propagation tray with humidity dome | $10–$25 | Reusable for years |
| Perlite + peat moss (small batch) | $8–$15 | Enough for dozens of cuttings |
| Seedling heat mat (optional but recommended) | $15–$30 | Significantly improves success |
| Total startup cost | $38–$82 | One-time investment |
Timeline summary:
- Cutting collection and sticking: 1 day
- Rooting period: 4 to 8 weeks
- Hardening off: 1 to 2 weeks
- Potting up and growing on: remainder of growing season
- Field planting: following spring
Realistic success rates:
- With full setup (hormone, mist, bottom heat): 50 to 80 percent
- With partial setup (hormone, dome, no bottom heat): 30 to 50 percent
- Without hormone or humidity control: under 15 percent
For context, a nursery-grown redbud in a 1-gallon pot typically costs $30 to $75 as of 2026, depending on the cultivar and your region. If you propagate 10 cuttings and get 5 to root, you've saved $150 to $375 compared to buying trees. The math favors propagation if you have the patience and the setup.
Alternatives Worth Considering: Seeds, Grafting, and Layering
Cuttings aren't your only option. Depending on your goals and timeline, one of these methods might serve you better.
Seed propagation is the easiest approach but comes with a major caveat. Redbud seeds have a hard seed coat and require scarification (nicking the seed) and stratification (cold treatment) before planting. Even then, seedlings won't be genetically identical to the parent tree.
If you're trying to preserve a specific cultivar like 'Forest Pansy' or 'Lavender Twist,' seed propagation won't work. The offspring will revert to straight species characteristics.
Grafting is the commercial nursery standard for named cultivars. It's more reliable than cuttings for difficult-to-root selections, but it requires rootstock, grafting tools, and a skill set that takes practice to develop. If you're a beginner, grafting has a steeper learning curve than cutting propagation.
Layering (simple layering or air layering) is arguably the most reliable method for home growers. You bend a low branch to the ground, wound it, bury the wounded section in soil, and wait for roots to form while the branch is still attached to the parent tree. Success rates for layering redbuds are higher than for cuttings, often 60 percent or better.
The downside is it's slower (a full season or more) and you're limited by how many low branches you have available.
| Method | Success Rate | Time to Transplant | Skill Level | Preserves Cultivar? |
|---|---|---|---|---|
| Softwood cuttings | 50–80% | 4–8 weeks + grow-on season | Moderate | Yes |
| Semi-hardwood cuttings | 20–40% | 6–12 weeks + grow-on season | Moderate to hard | Yes |
| Seed propagation | Variable (germination 30–60%) | 1–2 years | Easy | No |
| Grafting | 70–90% (with skill) | Several months | Hard | Yes |
| Layering | 50–70% | 6–12 months | Easy to moderate | Yes |
When to Just Buy a Nursery Tree Instead
Let's be honest. If you need one redbud tree for your yard and you want it now, buying a nursery-grown tree is the smarter play. Propagation makes sense when you want multiple trees, when you're preserving a specific tree with sentimental value, or when you simply enjoy the process of growing things from scratch.
Nursery trees also come with established root systems, which means they're more resilient in their first season in the ground. A cutting you rooted yourself will be smaller and more vulnerable for at least a year compared to a purchased tree.
That said, if you've got a 'Forest Pansy' redbud that your grandmother planted and you want to keep its genetics alive, propagation by cutting is the way to do it. No nursery tree will be genetically identical to that original tree. That's where the real value of cutting propagation lives.
Troubleshooting: What to Do When Cuttings Fail
Even with perfect technique, some cuttings won't make it. Here's how to diagnose what went wrong and adjust for your next batch.
Cutting wilted within a day: Humidity was too low or the cutting was desiccated before sticking. Use a humidity dome immediately after sticking. Collect cuttings only in the morning.
Stem turned brown and mushy at the base: Stem rot from overwatering or contaminated medium. Reduce watering frequency. Use fresh, sterile medium.
Improve airflow by cracking the dome vents.
Cutting stayed green for 6 weeks but no roots formed: The medium may have been too cool. Rooting stalls below 65°F. Add a heat mat set to 70°F.
Leaves yellowed and dropped but stem stayed firm: This can be normal as the cutting redirects energy to root formation. If the stem is still firm and green, keep going. If it's shriveled, the cutting is dead.
Mold on the medium surface: Fungal growth from high humidity without airflow. Remove affected medium. Increase ventilation.
Sprinkle a thin layer of coarse sand on top of the medium to discourage fungal growth.
Overwintering Rooted Cuttings
If you rooted cuttings in early summer, they'll need protection through their first winter, especially in Zones 5 and colder. Potted cuttings have exposed roots that are more vulnerable than field-planted trees.
Move potted cuttings into an unheated garage, cold frame, or sheltered area after the first hard freeze. Water sparingly, just enough to keep the medium from drying out completely. Do not fertilize during dormancy.
Move them back outdoors in spring after the last frost date.
In Zones 6 and warmer, you can leave potted cuttings outdoors through winter with minimal protection. Wrap the pots in burlap or bubble wrap if a hard freeze is forecast.
Expert Tips From the Nursery Trade
Professional propagators who work with woody ornamentals have a few tricks that home growers often overlook.
Wound the base of semi-hardwood cuttings. Use your pruners to scrape a thin strip of bark (about 1/2 inch long) from the basal end of the cutting. This exposes the cambium layer and gives rooting hormone more surface area to act on. Research from the International Plant Propagators' Society supports wounding as a way to improve rooting percentages in moderately difficult species.
Use fog systems if possible. Intermittent mist works, but fog systems that produce a fine aerosol are superior. They keep the leaf surface wet without saturating the medium. Home growers can approximate this with a small ultrasonic humidifier ducted into the propagation area.
Take more cuttings than you need. Even under ideal conditions, not every cutting will root. Take at least twice as many cuttings as trees you want. If you need three trees, stick six to eight cuttings.
Label everything. Write the date, cultivar, and hormone concentration on each pot or tray section. You'll thank yourself three months later when you're trying to remember which batch got the higher IBA concentration.
Don't discard slow cuttings too quickly. Some redbud cuttings take 10 to 12 weeks to root, especially semi-hardwood selections. If the stem is still green and firm, leave it in the propagation setup. Patience pays off.
Buying vs. Propagating: The Real Cost Comparison
| Approach | Cost per Tree | Time to Landscape Size | Guarantee |
|---|---|---|---|
| Propagate from cuttings | $2–$5 per cutting attempt | 2–3 years | Variable (50–80% success) |
| Buy nursery tree (1-gallon) | $30–$50 | Immediately (already growing) | High (living tree in hand) |
| Buy nursery tree (5-gallon) | $75–$150 | Near-instant impact | High |
If you want one reliable tree for your landscape this year, buy it. If you want ten trees for a hedgerow or windbreak and can afford to wait, propagate them. The economics shift in your favor only when you scale up and accept that some percentage of cuttings will fail.
Nursery trees also come on their own rootstock (or are own-root grafted), which means they've been professionally grown with optimized conditions. Your home-propagated cutting will take another 2 to 3 years to reach the size of a $40 nursery tree. Factor that time into your decision.
Frequently Asked Questions
Can you root a redbud cutting in water?
It's not recommended. Redbud cuttings tend to rot in water rather than root. Water lacks the oxygen and structural support that a sterile medium like perlite and peat provides.
You might get a few roots in water, but they're often fragile and don't transplant well into soil.
What is the best month to take redbud cuttings?
Late May through June is ideal for most of the United States. In the deep South (Zones 8 to 9), you may be able to start in mid-May. In the North (Zones 4 to 5), wait until early June when the new growth has fully emerged but hasn't yet started to harden.
Do you need rooting hormone for redbud cuttings?
Technically no, but practically yes. Without rooting hormone, your success rate drops to under 15 percent. With it, you can realistically expect 50 to 80 percent success under proper conditions.
Rooting hormone is inexpensive and lasts for years. There's no reason to skip it.
How long does it take for a redbud cutting to root?
Softwood cuttings typically root in 4 to 8 weeks. Semi-hardwood cuttings take 6 to 12 weeks. If a cutting hasn't rooted after 12 weeks, it's unlikely to do so.
Check by gentle tugging, not by pulling it out of the medium.
Can you propagate a redbud from a fallen branch?
Generally no. A fallen branch has lost turgor pressure and may have been damaged during the fall. Cuttings need to be taken directly from a healthy, actively growing tree and processed immediately.
A branch that's been on the ground for even a few hours is usually too desiccated to root successfully.
Is it legal to take cuttings from a redbud tree that isn't yours?
No. Taking cuttings from someone else's tree without permission is trespassing and theft of plant material. On public land, removing plant material is typically prohibited by local regulations.
Always get explicit permission from the property owner before taking cuttings from any tree that isn't on your own property.
Can I propagate redbud cuttings in a greenhouse instead of indoors?
A greenhouse works well if you can control humidity and temperature. Greenhouses offer more space and natural light. However, they also heat up quickly in summer.
You'll need shade cloth (50 to 70 percent shade) and an automatic mist or fog system. Without climate control, a greenhouse can easily exceed 90°F in summer, which cooks cuttings.
Should I fertilize redbud cuttings while they're rooting?
No. Cuttings have no roots to absorb nutrients. Fertilizer can burn tender tissue and encourage fungal growth.
Wait until roots are at least 1 inch long and you've potted the cutting into standard mix. Then use a diluted liquid fertilizer (quarter strength) every two weeks.
Can I use willow water as a natural rooting hormone?
Willow water contains natural auxins and can work as a mild rooting stimulant for easy-to-root species. For redbud, it's not strong enough on its own. Research indicates that synthetic IBA at appropriate concentrations significantly outperforms natural alternatives for moderately difficult species like redbud.
Use willow water as a supplement, not a replacement.
What if my cutting has flower buds on it?
Remove them. Flower buds compete with root formation for energy and hormones. A cutting trying to bloom and root simultaneously will likely fail at both.
Pinch off any flower buds as soon as you see them.
Is it better to use powder or liquid rooting hormone?
Both work. Powder is easier for home growers and stores well. Liquid formulations allow precise concentration control, which matters more for semi-hardwood cuttings.
For softwood redbud cuttings, powder at standard concentration is perfectly adequate. Dip 'N Grow (liquid) and Hormex (powder) are both reliable options.