To replace the belt on your Craftsman self-propelled lawn mower quickly, first disconnect the spark plug for safety. Then, remove the mower’s belt cover, release tension from the belt, and slide it off the pulleys before installing the new belt in reverse order. Make sure everything is aligned properly before reassembling.
In just a few steps, you can get your mower running smoothly again by replacing the worn or broken belt. The key is to carefully release tension, remove the old belt, and ensure the new one is seated properly on all pulleys. This simple maintenance task helps extend the life of your mower and keeps your lawn looking pristine.
Replacing the belt on your Craftsman self-propelled mower might seem challenging, but with the right tools and some patience, it’s a straightforward process. Over time, the belt can wear out or snap, making it impossible for your mower’s self-propulsion system to function properly. Knowing how to replace it saves you time and money, avoiding a trip to the repair shop. Whether you’re a seasoned DIYer or a first-timer, this guide will walk you through the steps to get your mower back in working order, so you can enjoy a perfectly manicured lawn without hassle.

How to Replace Belt on Craftsman Self Propelled Lawn Mower
Understanding the Belt System of Your Craftsman Mower
Knowing how the belt system works helps in replacing the belt efficiently. The belt connects the engine to the blades and other moving parts, allowing the mower to cut grass smoothly. Over time, belts can wear out, become cracked, or slip, which reduces the mower’s performance.
A typical Craftsman self-propelled mower uses a V-belt that runs through pulleys and guides. This belt is usually made of durable rubber with reinforcing cords for strength. If your mower struggles to propel forward or the blades stop turning, the belt might need replacement.
Tools and Materials Needed for Belt Replacement
Before starting, gather all necessary tools to make the process easier. Here is a list of items you might need:
- Socket wrench set
- Screwdrivers (flathead and Phillips)
- Replacement belt compatible with your model
- Work gloves for safety
- Owner’s manual for specific model instructions
Having these tools ready helps you avoid delays during the replacement process. Always ensure your replacement belt matches the model number for proper fitment.
Safety Precautions Before Starting
Safety is crucial when working with mechanical parts. First, disconnect the spark plug wire to prevent accidental starting. Wear gloves to protect your hands from sharp edges and rough surfaces.
Make sure the mower is on a flat surface to prevent slipping. If necessary, engage the parking brake to keep the mower from moving while you work. Reading your owner’s manual for specific safety instructions is always recommended.
Preparing the Mower for Belt Replacement
Start by turning off the engine and removing the spark plug wire. Tilt the mower onto its side with the air filter side up, or elevate it securely on a workbench. This position provides easy access to the underside components.
Next, remove any covers or shields that block access to the belt. These are usually secured with screws or clips. Keep these screws in a safe place for reinstallation.
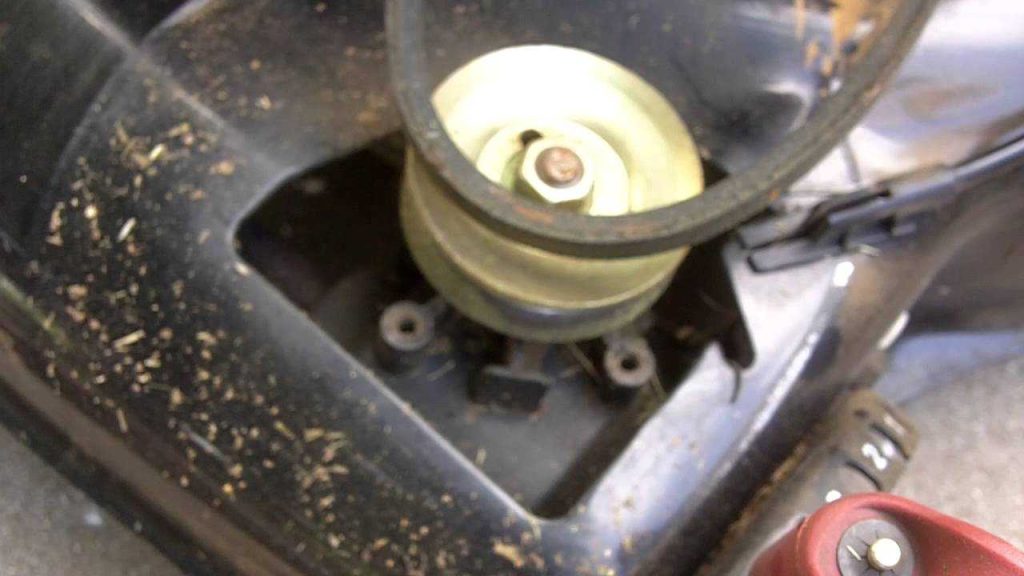
Locating the Belt and Pulleys
Identify the belt and pulleys connected to the blades and drive system. The belt typically runs from the engine pulley to a smaller pulley on the transmission or blade assembly.
Look for signs of wear such as cracks, fraying, or glazing on the belt. Check for any misalignment or slipping pulleys that could cause belt issues. Taking a photo of the setup can help during reinstallation.
Removing the Old Belt
Loosen the tensioner pulley to release the belt’s tension. Use a socket wrench to turn the tensioner and carefully slide the belt off the pulleys. Some models may have a belt guide or clip holding the belt in place, which needs removal as well.
Be cautious to not damage other components during this step. If the belt is stuck or difficult to remove, gently work it free without forcing or pulling excessively.
Inspecting and Cleaning Components
Before installing the new belt, inspect pulleys and guides for damage or debris. Clean any dirt, grass, or oil from the pulley surfaces with a cloth or brush.
Check for worn or damaged pulleys and replace if necessary. Proper alignment of pulleys ensures the new belt runs smoothly and lasts longer.
Installing the New Belt
Begin by looping the new belt around the larger pulley connected to the engine. Follow the same path as the old belt, making sure it sits properly in the pulley grooves.
Use the tensioner pulley to take up slack and fit the belt over the smaller pulley or transmission pulley. Confirm that the belt is seated correctly in all pulley grooves. Proper tension is important for effective performance.
Adjusting Belt Tension
Ensure the belt has the right tension—tight enough to prevent slipping but not so tight that it strains other parts. Some mowers have an automatic tensioner, making this step easier.
For models without an automatic tensioner, manually adjust the pulley or belt guide to achieve proper tension. Refer to your owner’s manual for specific tensioning instructions.
Reattaching Covers and Shields
Once the new belt is installed and tensioned correctly, reattach any covers or shields removed earlier. Secure them tightly using the screws or clips. This protects the belt and pulleys during operation and ensures safety.
Double-check that all fasteners are tight to prevent any parts from coming loose during mowing.
Testing the Mower After Belt Replacement
Reconnect the spark plug wire and start the engine. Engage the self-propel function to see if the mower moves smoothly and the blades spin properly. Listen for unusual noises or vibrations indicating a problem.
If the belt slips or the mower doesn’t propel forward, turn off the engine and recheck the belt tension and alignment. Make any necessary adjustments.
Tips for Maintaining Your Belt System
Regular inspection keeps your mower running well. Check the belt periodically for signs of wear or cracks. Adjust tension as needed and clean pulleys from debris.
Replace the belt as recommended by the manufacturer, usually every few years or after significant wear. Proper maintenance extends the life of your mower’s components.
Common Challenges and How to Troubleshoot
Sometimes, belts can slip or break unexpectedly. If the belt keeps slipping, check pulley alignment and tension. Misaligned pulleys cause premature belt wear and should be corrected.
If the belt breaks during mowing, replace it immediately and examine pulleys for damage. Replacing worn-out pulleys prevents future belt failure.
Additional Resources and Support
Consult your Craftsman mower’s owner’s manual for detailed diagrams and instructions specific to your model. Manufacturer websites often have tutorials and replacement parts.
If unsure about any step, consider seeking help from a professional or a local repair shop. Proper installation ensures safety and optimal performance.
Final Thoughts on Belt Replacement
Replacing the belt on your Craftsman self-propelled mower is a manageable task with the right tools and information. Taking your time to follow each step carefully will extend the life of your mower and keep it running smoothly. Regular maintenance and inspections help prevent future belt issues and ensure your mower is always ready for use.
Craftsman Self-Propelled Lawnmower Belt Replacement
Frequently Asked Questions
What are the necessary tools for replacing the belt on a Craftsman self-propelled lawn mower?
To replace the belt on your Craftsman self-propelled lawn mower, gather essential tools such as a socket wrench set, screwdrivers, pliers, and possibly a belt tensioner tool. These tools will help you remove the mower deck cover, detach the old belt, and install the new one securely. Having a clean workspace and a towel or rag to wipe excess grease can also make the process smoother.
How can I safely access the drive belt on my lawn mower?
Start by disconnecting the spark plug to ensure the mower doesn’t accidentally start. Tilt the mower onto its side or turn it over carefully to access the underside. Remove any covers or guards that protect the belt using the appropriate tools. Keep track of all screws and parts so reassembly remains straightforward. Always wear gloves to protect your hands from sharp edges.
What steps should I follow to properly install a new belt on my mower?
Remove the old belt by releasing the tensioner or disengaging any pulleys holding it in place. Clean any debris or dirt from the pulleys and belt area. Loop the new belt around the pulleys, ensuring it sits correctly in the grooves. Use the tensioner to tighten the belt snugly, checking that it moves smoothly without slipping. Replace any covers and ensure all screws and bolts are secure before testing the mower.
How do I know if I have installed the belt correctly after replacement?
After installation, manually rotate the pulleys to ensure the belt moves smoothly and is properly seated in all grooves. Reassemble the mower and start it to observe proper belt operation. The belt should run quietly without slipping or slipping off the pulleys. If the mower moves as expected and the belt remains in place during operation, your installation is successful.
What maintenance should I perform to extend the lifespan of the new belt?
Regularly inspect the belt for signs of wear, cracks, or fraying. Keep the belt and pulleys clean from dirt and debris that can cause slipping. Ensure proper tension—neither too tight nor too loose—to prevent premature wear. Lubricate moving parts if recommended by the manufacturer, and replace the belt if you notice significant damage to avoid breakdowns during operation.
Final Thoughts
To replace the belt on a Craftsman self-propelled lawn mower, start by disconnecting the spark plug for safety. Remove the mower deck cover and note the belt path. Loosen or remove the pulley and take off the old belt.
Next, install the new belt along the same path, ensuring it sits properly on all pulleys. Reattach the pulley and replace the deck cover securely. Finally, reconnect the spark plug and test the mower to confirm proper operation.
In conclusion, how to replace belt on craftsman self propelled lawn mower involves careful removal and installation. Following these steps ensures your mower runs smoothly again.