
Learning how to get to the grub in the hive is one of the most practical skills a beekeeper develops, and it's trickier than most beginners expect. The brood isn't just sitting in one obvious spot waiting for you. It's nestled in the heart of the colony, surrounded by honey stores and pollen, and your job is to reach it without crushing your queen or chilling the nest.
The good news is that once you understand how brood nests are structured and what to look for on each frame, the whole process clicks into place. You'll spend less time fumbling around and more time making smart decisions about your colony's health.
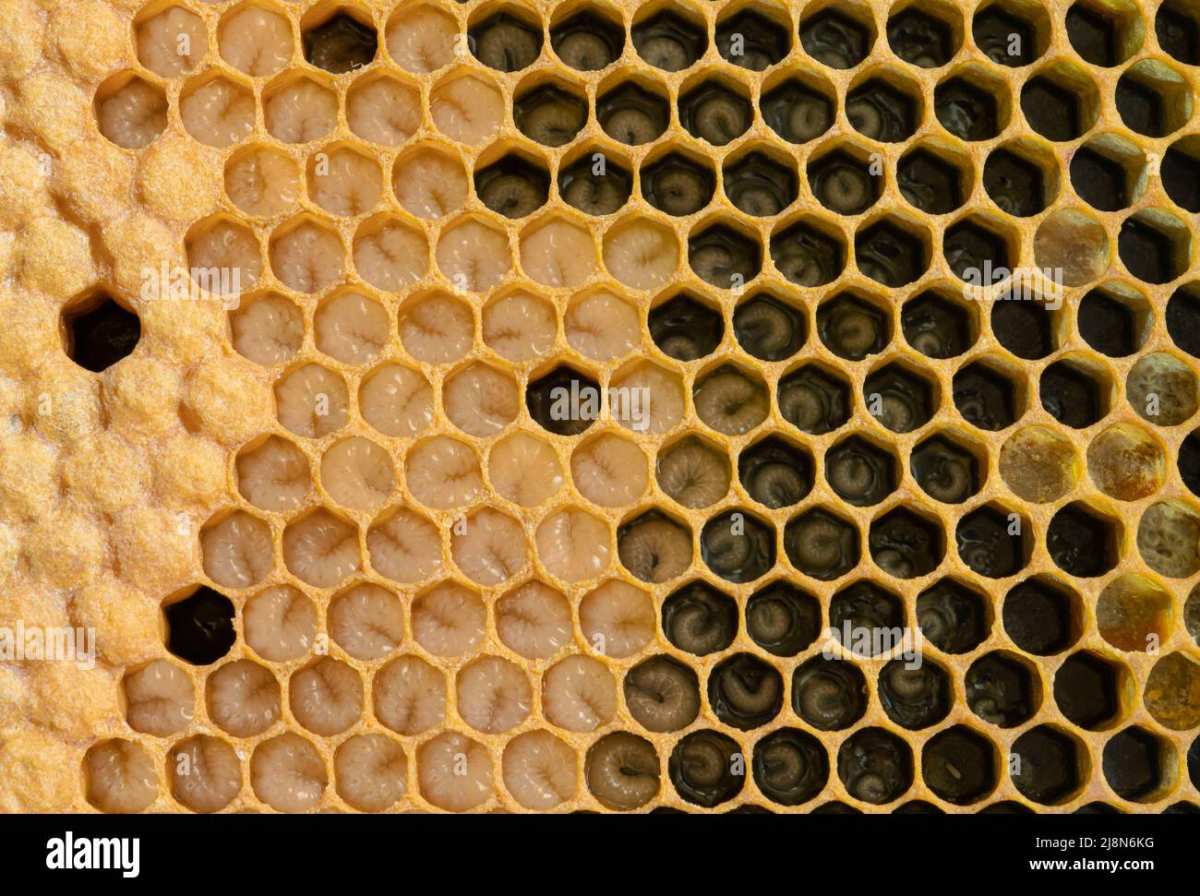
Image source: Bing (Web (fair-use with source credit))
Quick Answer
To get to the grub in the hive, you work from the outside in. Start by removing the outer and inner covers. Pull the first one or two frames since those usually hold honey.
Keep working toward the center. Brood frames show capped cells, larvae, or eggs. In a Langstroth hive, the brood nest sits in the bottom box.
Inspect during calm weather above 60°F.
Read on for a detailed visual walkthrough, common mistakes to avoid, and how to read what the brood pattern is telling you.
Quick Visual Guide: What Brood Actually Looks Like
If you've never stared at a frame trying to figure out what's brood and what's honey, don't worry. Everyone struggles with this at first. The visual differences become second nature fast once you've seen them up close a few times.
Capped Worker Brood
Worker brood cappings are flat or slightly domed, tan to light brown, and tend to be relatively uniform in color. When the pattern is solid, you're looking at frames covered with few empty cells. That's a sign of a strong, healthy queen who's laying consistently.
The cappings have a nice cork-like texture and don't have any holes punctured through them.
Uncapped Larvae (The Actual "Grub")
This is the wiggly, pearly white curled-up larvae sitting at the bottom of open cells. If you hold the frame at an angle with sunlight hitting it from behind, you'll see them clearly. Nurse bees feed these larvae constantly, so you might also spot brood food (a milky liquid) pooling in the cells.
This stage lasts about six days before the cell gets capped.
Drone Brood
Drone brood is your most common source of confusion. The cappings are distinctly raised and dome-shaped, almost bullet-like. Drone cells are slightly larger than worker cells, too.
If you see a cluster of these bulging cappings, you're looking at drone brood perfectly normal and nothing to worry about. Some drone brood in the colony is expected.
Pollen (Your Landmark, Not Your Target)
Pollen frames are the bright, colorful bands of yellow, orange, red, or even blue-green packed into cells near the edges of the brood nest. Experienced beekeepers use pollen as a visual breadcrumb trail. If you're seeing pollen, you're close to the brood.
Keep pulling frames inward.

Image source: Wikimedia Commons / Waugsberg (CC BY-SA)
How Hive Type Changes Your Approach
Not all hives are built the same, and that changes how you physically reach the brood. The three most common setups each have their own rhythm.
Langstroth Hives
This is what most beekeepers use. Boxes stack vertically, and frames hang on rabbets inside each box. The brood nest almost always lives in the bottom deep box (the brood chamber).
You'll typically find honey stored in the frames along the outer edges of the upper boxes. A queen excluder separates the brood chamber from the honey supers above, which keeps things predictable. Start your inspection at the bottom box and work toward the center frames.
Top-Bar Hives
Top-bar hives are horizontal. Bars sit across the top of the hive like a row of hanging tabs. Honey is usually stored at one end (often the entrance side), and the brood nest sits further back.
You pull bars one at a time starting from the honey end and work your way toward the brood. The comb here isn't in a frame, so you need to be gentler. These combs are more fragile and can break if you twist or tilt them too aggressively.
Warré Hives
Warré hives use top bars too, but they stack vertically like a Langstroth. New boxes are added underneath the existing ones (nadiring), so the brood nest tends to migrate downward over time. Honey is stored in the upper boxes.
Getting to the brood means working from the top down, which feels backwards if you're used to Langstroth hives. It's a less common system, but the principle is the same: honey on the outside, brood in the center.
Step-by-Step: Reaching the Brood Nest Without Causing Chaos
Here's the actual workflow for getting to the grub efficiently while keeping your bees calm and your queen safe.
Pre-Inspection Prep
- Pick the right time. Inspect during mid-morning or early afternoon when most foragers are out. The hive is less crowded, and the bees are calmer.
- Gear up. A lit smoker with cool, white smoke is non-negotiable. Have your hive tool ready. Wear your veil at minimum, full suit if your bees tend to be defensive.
- Check the weather. Avoid opening the hive in rain, high winds, or temperatures below about 60°F (15°C). Chilling brood can cause serious problems.
Opening the Hive
- Approach from behind or the side. Don't stand directly in front of the entrance. You'll block returning foragers and agitate the guard bees.
- Puff smoke at the entrance. Two or three slow puffs is enough. Wait about 30 seconds for the alarm pheromone response to settle.
- Puff smoke under the inner cover. Crack the lid slightly, puff, then lift gently. This calms the bees clustered on the top bars.
- Remove the outer cover and inner cover. Set the outer cover upside down on the ground behind the hive. You can rest the inner cover on it while you work.
Working Toward the Brood Center
- Pull the wall frame first. In a standard 10-frame Langstroth box, the frames against the hive walls are almost always honey or pollen. Lift it out and set it aside (lean it against the hive or place it on the outer cover). This gives you room to work.
- Work one frame at a time. Use your hive tool to gently pry the frame up from the rabbets. Lift slowly and steadily. Don't jerk or twist.
- Check each frame before moving on. Hold it at a slight angle with the sun behind you. Look for eggs (tiny white standing upright in the cell), larvae, or capped brood. If it's just honey, set it aside outside the hive.
- Follow the pollen. As mentioned earlier, pollen bands are your visual guide. Once you start seeing pollen-heavy frames, the brood is one or two frames away.
- Find the brood nest center. The queen is usually somewhere near the middle of the brood nest. Move carefully. Don't rush through frames once you're in the brood area.
- Replace frames in the same order. Put everything back exactly as you found it. The bees have an organized structure, and scrambling it creates unnecessary work for them.
- Don't exceed 10 minutes with the hive open. Prolonged inspections stress the colony and risk chilling brood, especially in cooler weather.
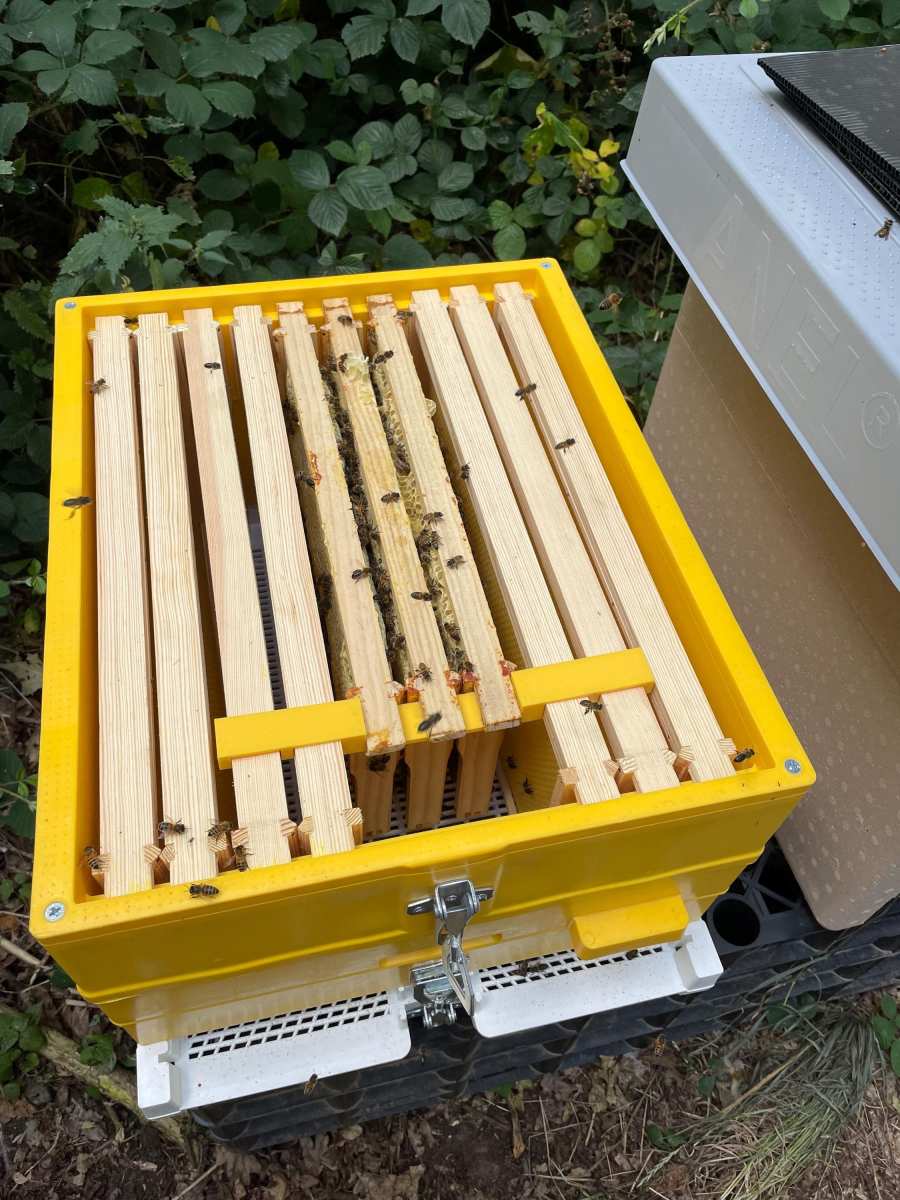
Image source: Bing (Web (fair-use with source credit))
Reading the Brood Pattern: What It Tells You
Once you've found the brood, the real diagnostic work begins. The pattern of brood on the frames tells you a lot about your queen's performance and the colony's overall health.
Solid Pattern = Healthy Queen
A solid brood pattern means most cells in the brood area are filled with eggs, larvae, or capped brood. You'll see very few empty cells scattered throughout. This is what you want.
It indicates your queen is laying well, the workers are feeding the brood properly, and the colony is functioning as a cohesive unit. A strong colony in peak season might have six or more solid frames of brood.
Spotty Pattern = Potential Problems
A spotty or "shotgun" pattern has lots of empty cells mixed in with capped brood. A few empty cells here and there is normal. Widespread spotty brood can indicate a failing queen, disease, or pesticide exposure.
It can also happen in early spring when the queen is just ramping up her laying. Context matters. If you see a heavily spotty pattern in the middle of the active season, that's a red flag worth investigating.
Drone in Worker Cells = Red Flag
If you see drone brood scattered throughout worker-sized cells, that usually means you have a laying worker or a failing queen that's run out of sperm. A queen without stored sperm can only lay unfertilized eggs, which become drones. And those eggs get placed in worker cells, resulting in raised cappings in the wrong cell size.
This is one of the most important things to catch during a brood inspection.
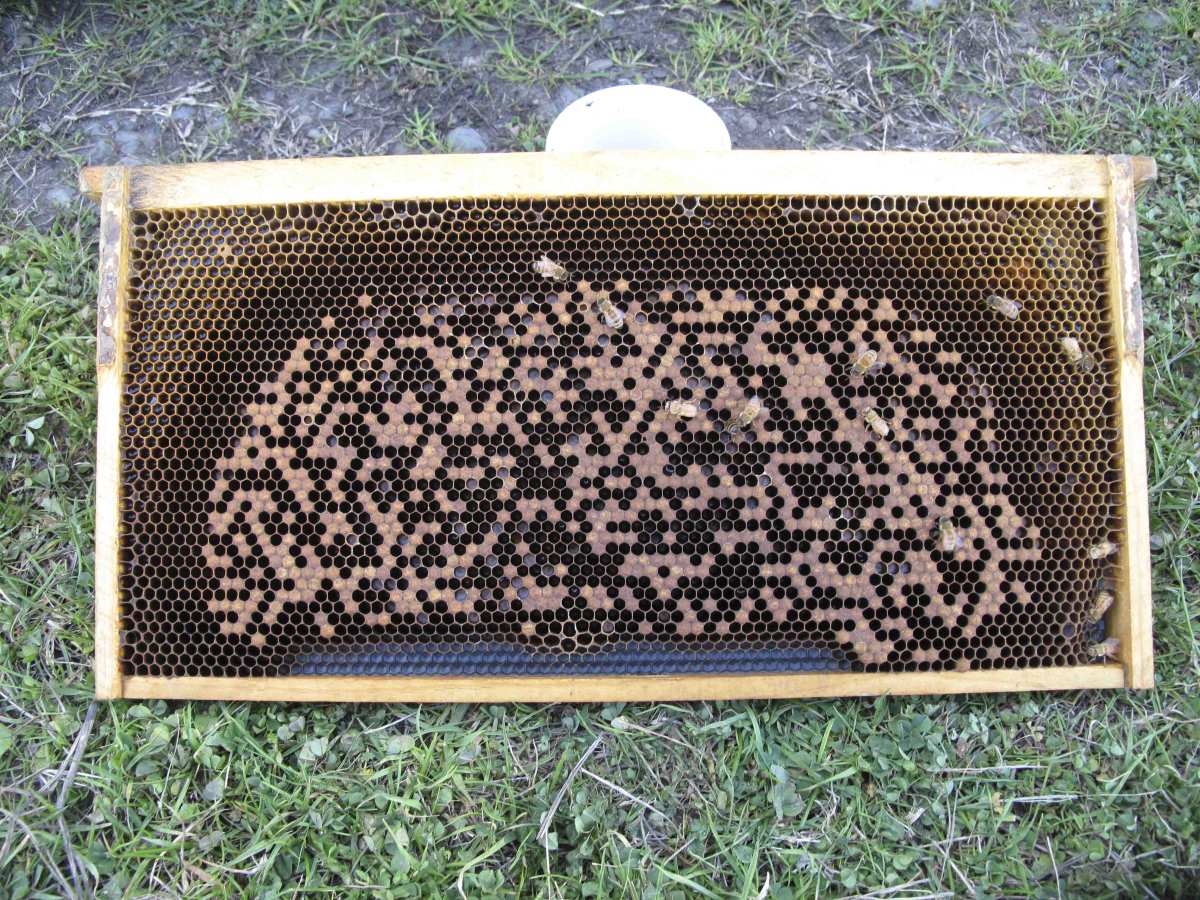
Image source: Bing (Web (fair-use with source credit))
Common Visual Mistakes New Beekeepers Make
Even when you know the theory, the practical side trips people up. Here are the mistakes we see most often.
Confusing capped honey with capped brood. Honey cappings are white or light and slightly wet-looking. Brood cappings are tan/brown and have a drier, more textured appearance. Hold the frame at an angle and look closely. The color difference becomes obvious once you've seen both side by side.
Not checking for eggs. Eggs are tiny and sit upright at the bottom of cells. If you can see eggs, you know the queen was within the last three days. That's valuable information. Use a headlamp or position yourself with the sun behind the frame to spot them.
Spending too long searching for the queen. You don't need to see the queen every inspection. Finding eggs is proof enough that she's present and working. Save yourself the stress.
Ignoring the edges of the brood nest. The outer frames of the brood area often hold the most recent eggs. If you only check the center frames, you might miss fresh eggs and incorrectly assume the queen isn't laying.
Tilting frames incorrectly. Always tilt the frame so sunlight comes from behind you and down into the cells. Facing the sun casts shadows inside the cells and makes it nearly impossible to see larvae or eggs clearly.
When You Need to See Brood (And When You Don't)
Not every hive inspection requires you to dig into the brood nest. Sometimes you just need to confirm the colony is healthy from the outside or check honey stores.
You should pull brood frames when:
- Assessing queen quality or confirming she's present
- Checking for signs of disease like American foulbrood or chalkbrood
- Planning a split or making a nucleus colony
- Evaluating whether the colony is ready for a honey super
- Monitoring varroa mite levels through brood inspection
You can skip deep brood inspection when:
- You're just checking honey super fullness
- The colony is extremely defensive and conditions aren't ideal
- It's late fall and you're doing a quick winter prep check
- You've already confirmed a solid brood pattern recently
The key is being intentional. Every time you open the brood nest, you're disrupting the colony's temperature and pheromone balance. Make each inspection count.
Quick Reference: Brood Inspection Cues at a Glance
| What You See | What It Means | Action |
|---|---|---|
| Solid capped brood, few empty cells | Strong, healthy queen | No action needed |
| Eggs standing upright in cells | Queen present within 3 days | Good sign, continue monitoring |
| Spotty brood with many empty cells | Possible failing queen or disease | Re-inspect in 2 weeks, consider requeening |
| Drone brood in worker cells | Laying worker or failing queen | Check for queen, combine with queenright colony if needed |
| Raised, bullet-shaped cappings | Drone brood (normal) | Normal, no concern |
| Perforated or sunken cappings | Possible foulbrood or varroa | Investigate further, contact extension service if suspected AFB |
| Pollen surrounding brood frame | Brood nest is adjacent | Keep pulling frames inward |
Frequently Asked Questions
How deep into the hive should I go to find brood?
In a standard Langstroth setup, the brood nest lives in the bottom deep box. You'll usually find it by the third or fourth frame from the wall once you start pulling. In double-brood setups, check both deep boxes.
Can I check brood without finding the queen?
Absolutely. Finding eggs is proof the queen was there within the last three days. You don't need to spot her personally.
Most experienced beekeepers rarely see the queen during routine inspections.
What if I can't find any brood?
First, make sure you're looking at the right frames. Check the center frames of the bottom box. If there's truly no brood, no eggs, and no queen, you may have a queenless colony.
Look for emergency queen cells as a sign the bees are trying to fix the problem.
How often should I inspect the brood nest?
During the active season, every two to three weeks is a solid routine. More frequent inspections increase stress on the colony. Less frequent and you might miss early signs of disease or queen failure.
Is it okay to pull brood frames for splits?
Yes, and it's one of the most common reasons to inspect brood. Just make sure each split gets enough brood frames, honey stores, and nurse bees to survive on its own. A typical three-frame split needs at least two frames of brood and one frame of honey.
What temperature is too cold for brood inspection?
Below 60°F (15°C) is risky. Brood can chill quickly when frames are exposed to cold air. If you must inspect in cooler weather, work fast and keep frames covered with a cloth when they're out of the hive.
Common Visual Mistakes New Beekeepers Make
Even when you know the theory, the practical side trips people up. Here are the mistakes we see most often.
Confusing capped honey with capped brood. Honey cappings are white or light and slightly wet-looking. Brood cappings are tan or brown and have a drier, more textured appearance. Hold the frame at an angle and look closely. The color difference becomes obvious once you've seen both side by side.
Not checking for eggs. Eggs are tiny and sit upright at the bottom of cells. If you can see eggs, you know the queen was there within the last three days. That's valuable information. Use a headlamp or position yourself with the sun behind the frame to spot them.
Spending too long searching for the queen. You don't need to see the queen every inspection. Finding eggs is proof enough that she's present and working. Save yourself the stress.
Ignoring the edges of the brood nest. The outer frames of the brood area often hold the most recent eggs. If you only check the center frames, you might miss fresh eggs and incorrectly assume the queen isn't laying.
Tilting frames incorrectly. Always tilt the frame so sunlight comes from behind you and down into the cells. Facing the sun casts shadows inside the cells and makes it nearly impossible to see larvae or eggs clearly.
When You Need to See Brood (And When You Don't)
Not every hive inspection requires you to dig into the brood nest. Sometimes you just need to confirm the colony is healthy from the outside or check honey stores.
You should pull brood frames when:
- Assessing queen quality or confirming she's present
- Checking for signs of disease like American foulbrood or chalkbrood
- Planning a split or making a nucleus colony
- Evaluating whether the colony is ready for a honey super
- Monitoring varroa mite levels through brood inspection
You can skip deep brood inspection when:
- You're just checking honey super fullness
- The colony is extremely defensive and conditions aren't ideal
- It's late fall and you're doing a quick winter prep check
- You've already confirmed a solid brood pattern recently
The key is being intentional. Every time you open the brood nest, you're disrupting the colony's temperature and pheromone balance. Make each inspection count.
Quick Reference: Brood Inspection Cues at a Glance
| What You See | What It Means | Action |
|---|---|---|
| Solid capped brood, few empty cells | Strong, healthy queen | No action needed |
| Eggs standing upright in cells | Queen present within 3 days | Good sign, continue monitoring |
| Spotty brood with many empty cells | Possible failing queen or disease | Re-inspect in 2 weeks, consider requeening |
| Drone brood in worker cells | Laying worker or failing queen | Check for queen, combine with queenright colony if needed |
| Raised, bullet-shaped cappings | Drone brood (normal) | Normal, no concern |
| Perforated or sunken cappings | Possible foulbrood or varroa | Investigate further, contact extension service if suspected AFB |
| Pollen surrounding brood frame | Brood nest is adjacent | Keep pulling frames inward |
Frequently Asked Questions
How deep into the hive should I go to find brood?
In a standard Langstroth setup, the brood nest lives in the bottom deep box. You'll usually find it by the third or fourth frame from the wall once you start pulling. In double-brood setups, check both deep boxes.
Can I check brood without finding the queen?
Absolutely. Finding eggs is proof the queen was there within the last three days. You don't need to spot her personally.
Most experienced beekeepers rarely see the queen during routine inspections.
What if I can't find any brood?
First, make sure you're looking at the right frames. Check the center frames of the bottom box. If there's truly no brood, no eggs, and no queen, you may have a queenless colony.
Look for emergency queen cells as a sign the bees are trying to fix the problem.
How often should I inspect the brood nest?
During the active season, every two to three weeks is a solid routine. More frequent inspections increase stress on the colony. Less frequent and you might miss early signs of disease or queen failure.
Is it okay to pull brood frames for splits?
Yes, and it's one of the most common reasons to inspect brood. Just make sure each split gets enough brood frames, honey stores, and nurse bees to survive on its own. A typical three-frame split needs at least two frames of brood and one frame of honey.
What temperature is too cold for brood inspection?
Below 60°F (15°C) is risky. Brood can chill quickly when frames are exposed to cold air. If you must inspect in cooler weather, work fast and keep frames covered with a cloth when they're out of the hive.