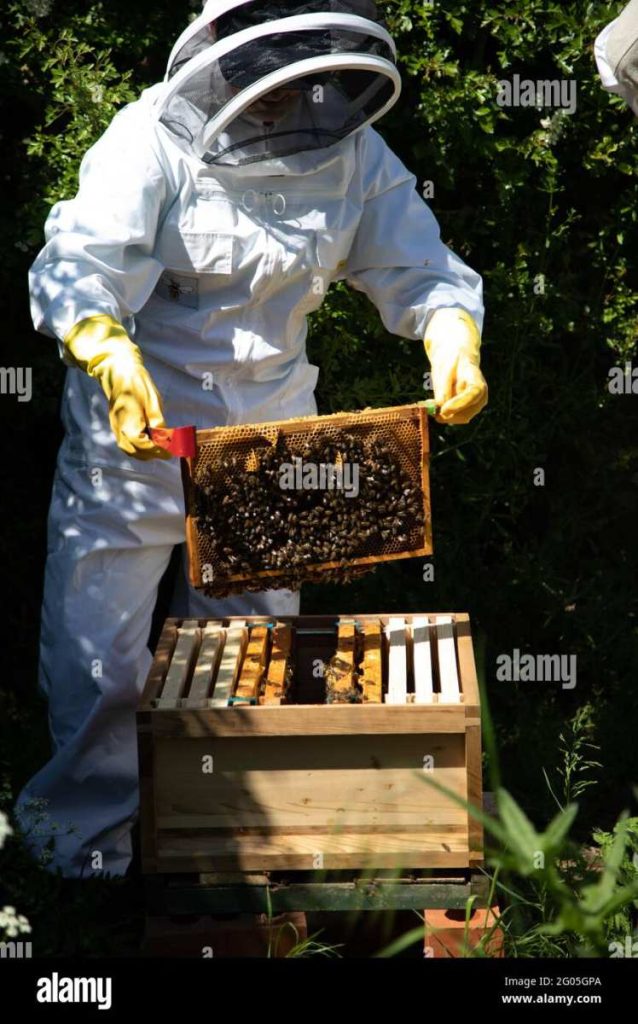
If you're wondering how to get the grub in the hive, the answer isn't complicated, but the technique matters more than most new beekeepers realize. "Grub" is the common beekeeping term for bee larvae, the creamy white C-shaped larvae curled up in wax cells that represent the next generation of colony members. Getting eyes on those larvae is the backbone of every meaningful hive inspection.
Checking brood isn't about pulling frames for fun. It's the only reliable way to confirm your queen is laying, catch disease before it spreads, and make smart splits or management decisions. Per standard apiary inspection protocols, a full colony check takes roughly 7 to 10 minutes once you've got the hang of it.
Let's walk through exactly how to do it right.
##quick answer
To check for grub (larvae), open the hive on a warm calm day, remove the outer and inner cover, and pull the center brood frames one at a time. Hold each frame over the open hive, look for white C-shaped larvae in uncapped cells or tan domed capping over developing pupae. A healthy queen covers 5 or more frames with brood in solid patterns.
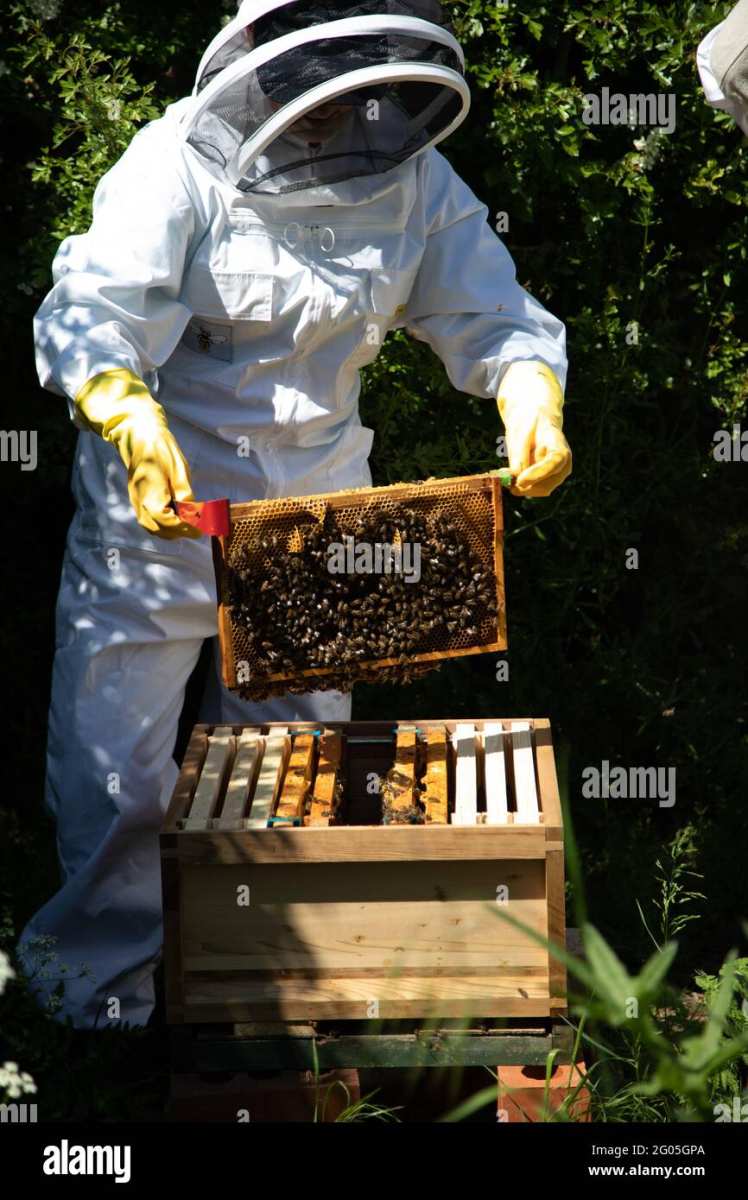
Image source: Bing (Web (fair-use with source credit))
What "Grub" Actually Means in a Beehive
"Grub" is shorthand for the larval stage of honey bees, the second step in their four-step life cycle. The full cycle goes egg, larva, pupa, adult. The larva stage is when that tiny egg has hatched into a pale, segmented, C-shaped grub floating in a bed of royal jelly (or worker jelly for regular larvae).
This is the feeding stage.
When beekeepers talk about "getting the grub," they mean physically inspecting the brood nest to see what's developing inside those wax cells. You're looking for three things: eggs (tiny white slivers standing upright in the cell base), larvae (the grubs themselves), and capped brood (tan domed wax caps sealing in pupae). Each tells you something different about colony health.
The brood nest lives in the deepest box of a Langstroth hive, usually the bottom deep super. That's where the queen does her laying, surrounded by nurse bees who tend the developing young. If you open a hive and never get down into that brood box, you're essentially guessing about your colony's condition.
Why You Need to Check Brood in the Hive
You can't manage what you can't see. Entrance observations and weight checks give you clues, but brood inspection is the gold standard for colony assessment. Here's what a proper brood check tells you:
- Queenrightness. Seeing fresh eggs means your queen was present and laying within the last 72 hours. No eggs means you need to investigate immediately.
- Brood pattern quality. A solid pattern of capped cells with few gaps signals a healthy, well-mated queen. A spotty pattern with scattered empty cells raises red flags.
- Disease detection. American foulbrood, European foulbrood, sacbrood, and chalkbrood all show visible symptoms in the brood nest. Catching them early can save your colony and neighboring apiaries.
- Colony strength assessment. Counting frames of brood tells you whether your colony is building up, holding steady, or declining heading into a critical season.
- Timing decisions. Brood status determines when to add honey supers, when to split, and when to requeen.
Skipping brood checks is like driving with your eyes closed and listening to the engine noise. You might be fine for a while, but you won't see trouble coming.
When to Open the Hive for a Brood Inspection
Timing matters more than most beginners think. Open the hive at the wrong moment and you'll chill brood, agitate the colony, and get unreliable information because bees are clustered tight instead of spread across the frames.
Ideal conditions:
- Temperature at or above 65°F (18°C)
- Mid-morning to early afternoon, when foragers are out and the colony is less congested
- Low wind, calm conditions
- No rain in the forecast for at least a few hours
Seasonal timing:
- Spring. Every 7 to 9 days during buildup. You're tracking how fast the queen is ramping up laying.
- Summer. Every 10 to 14 days. Watch for swarm cells and disease pressure during dearth periods.
- Fall. One thorough check in early fall to confirm adequate winter bee production. After that, minimize openings.
- Winter. Don't open the hive. Use external weight checks and brief entrance observations instead.
In our research, aggregate beekeeper feedback consistently shows that inspections done outside these windows lead to more defensive colonies, more chilled brood, and more queen accidents. Respect the conditions and the bees will cooperate.
What You'll Need Before You Start
Gather your gear before you crack the hive. Fumbling around mid-inspection agitates bees and wastes time.
Essential equipment:
- Smoker. Puff cool white smoke at the entrance and across the top bars before opening. Use pine needles, burlap, or commercial smoker fuel. Keep it lit and ready.
- Hive tool. You'll need it to pry apart propolis-sealed boxes and frames. A standard J-hook hive tool works fine.
- Bee suit or jacket with veil. Full protection isn't mandatory for gentle colonies, but a veil is non-negotiable. Bees target the face.
- Gloves. Leather or nitrile, your preference. Many experienced keepers skip gloves for better dexterity, but new beekeepers should wear them.
- Frame grip or careful hands. Lift frames by the lugs (the top tabs), never by the comb itself.
Optional but helpful:
- Notebook or phone app for recording brood pattern, queen sightings, and frame counts
- Magnifying glass or reading glasses for spotting eggs
- Spray bottle with light sugar water to calm bees on exposed comb
Step-by-Step: How to Get Eyes on the Brood
Here's the actual process, frame by frame. Follow this sequence every time and you'll get consistent, reliable information without unnecessary disruption.
Step 1: Approach and smoke.
Walk to the hive from the side or rear, not directly in front of the entrance. Give two or three puffs of cool smoke into the entrance. Wait 30 to 60 seconds.
Then lift the outer cover slightly and puff smoke across the top bars before removing it completely.
Step 2: Remove covers.
Set the outer cover upside down on the ground behind the hive. You'll stack equipment on it later. Remove the inner cover the same way, using your hive tool to break any propolis seal first.
Step 3: Identify the brood nest.
In a standard Langstroth setup, the bottom deep box is almost always where the brood lives. If you have two deeps, the brood nest spans both. The queen typically lays in the center frames first, working outward.
Step 4: Start with an outer frame.
Pull one of the outermost frames first. This creates working space in the center. Check it quickly for honey or pollen, then set it aside (lean it against the hive or place it on the inverted outer cover).
You're not looking for brood here, you're just making room.
Step 5: Work toward the center, one frame at a time.
Lift each frame slowly and steadily. Hold it over the open hive so any falling bees drop back in. Look at both sides.
You're searching for:
- Eggs. Tiny white slivers standing upright in the cell base. Hard to see. Tilt the frame to catch light at an angle.
- Larvae (the grub). Creamy white, C-shaped, floating in liquid. Size varies by age, from tiny commas to fat grubs nearly filling the cell.
- Capped brood. Tan, domed wax caps. Slightly darker and more convex than the flat, translucent capping over honey.
Step 6: Check the pattern, not just presence.
A solid brood pattern shows capped cells clustered tightly with few empty gaps. A spotty pattern with scattered empty cells among the capped brood suggests a failing queen, disease, or drone-laying issues. Count how many frames show brood coverage.
Step 7: Return frames in order.
Place each frame back exactly where you found it, maintaining the same orientation (the side that faced center stays facing center). This preserves the brood nest architecture and keeps nurse bees oriented.
Step 8: Close up.
Replace the inner cover, then the outer cover. Don't rush, but don't dawdle. Total inspection time should stay under 10 minutes in active season.
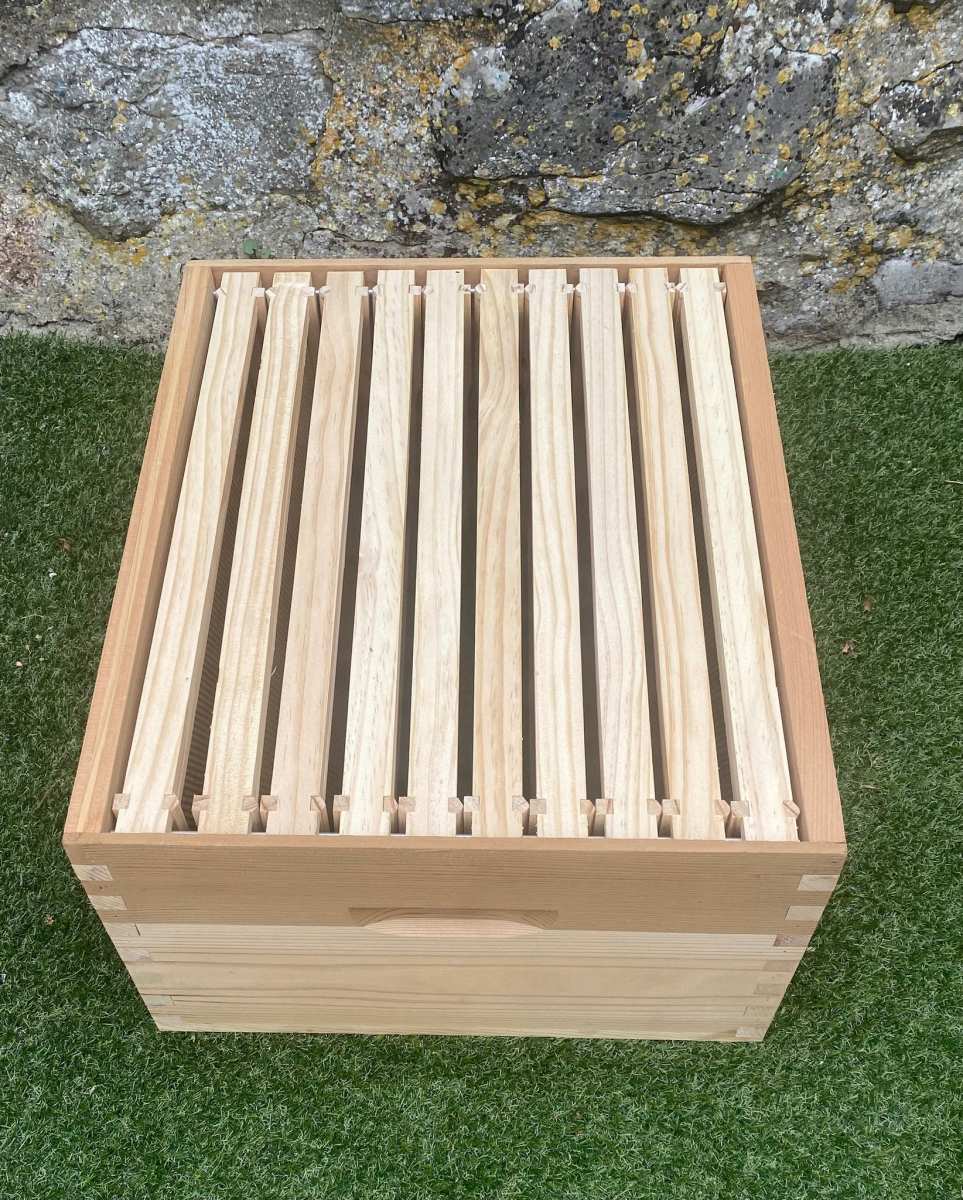
Image source: Bing (Web (fair-use with source credit))
What Healthy Brood Should Look Like
Knowing what you're looking for is half the battle. Here's what a textbook healthy brood nest shows you.
Eggs. Tiny, white, standing upright in the cell base. One per cell. You need good light and decent eyesight (or magnification).
If you see eggs, your queen was there within the last three days. That's your green light.
Larvae. Creamy white, glossy, C-shaped, lying in a bed of milky liquid. Young larvae are small and curved. Older larvae are plump and nearly fill the cell.
All should look uniform in color and posture. Discolored, twisted, or dried-out larvae are warning signs.
Capped brood. Worker brood capping is tan, slightly domed, and uniform across the frame. Drone brood capping is more bullet-shaped and raised. A healthy frame shows 80 to 90 percent cell coverage with capped brood and minimal empty cells scattered through the pattern.
Brood pattern. This is the single most important visual cue. A solid pattern means the queen is well-mated, healthy, and laying consistently. Each cell in a cluster should contain a developing bee at roughly the same stage.
Gaps and holes in the pattern suggest problems.
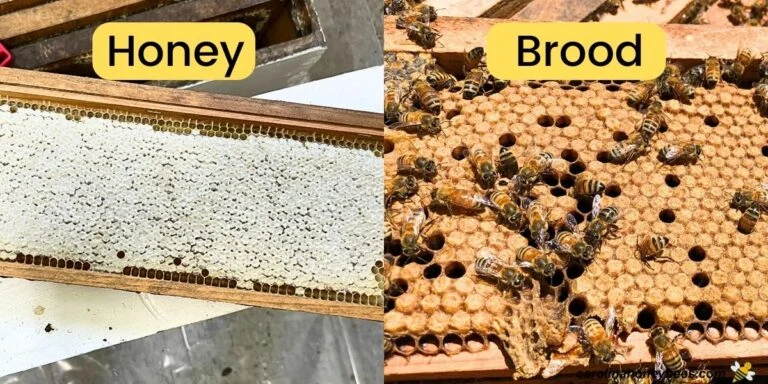
Image source: Bing (fair-use with source credit)
Capped brood vs. capped honey. This trips up every beginner. Capped brood is tan, slightly domed, and often has a subtle porous texture. Capped honey is whiter, flatter, and more translucent.
If you're unsure, look at location. Brood stays in the center of the brood nest. Honey frames sit on the outer edges and in supers above.
What to Do If Things Look Wrong
Not every inspection reveals a perfect brood nest. Here's how to interpret common problems and what action to take.
No eggs, no larvae, no queen cells. Your colony is queenless. You have roughly 3 to 4 weeks before the population crashes. Order a new queen or combine the colony with a queenright one immediately.
Spotty brood pattern. Could be a poorly mated queen, disease (especially sacbrood or EFB), or pesticide damage. If the pattern is consistently spotty across multiple inspections, requeen. If you see sunken, perforated, or discolored cappings, suspect foulbrood and contact your state apiary inspector.
Drone brood in worker cells. Multiple eggs per cell, eggs on cell walls instead of the base, and bulging drone capping in worker-sized cells all point to a laying worker. The colony is functionally queenless with no viable queen to introduce. Combining with a strong queenright colony is usually the only practical solution.
Chalkbrood mummies. Hard, chalky white or gray larval remains in cells or on the bottom board. This fungal disease flares in cool, damp conditions. Improve ventilation, requeen with hygienic stock, and clean out mummies when practical.
American foulbrood symptoms. Sunken, greasy-looking cappings, ropy brown larval remains that stretch 1 to 2 inches when probed with a stick, and a distinctive foul odor. This is a reportable disease in most states. Do not attempt home treatment.
Contact your state apiary inspector immediately.
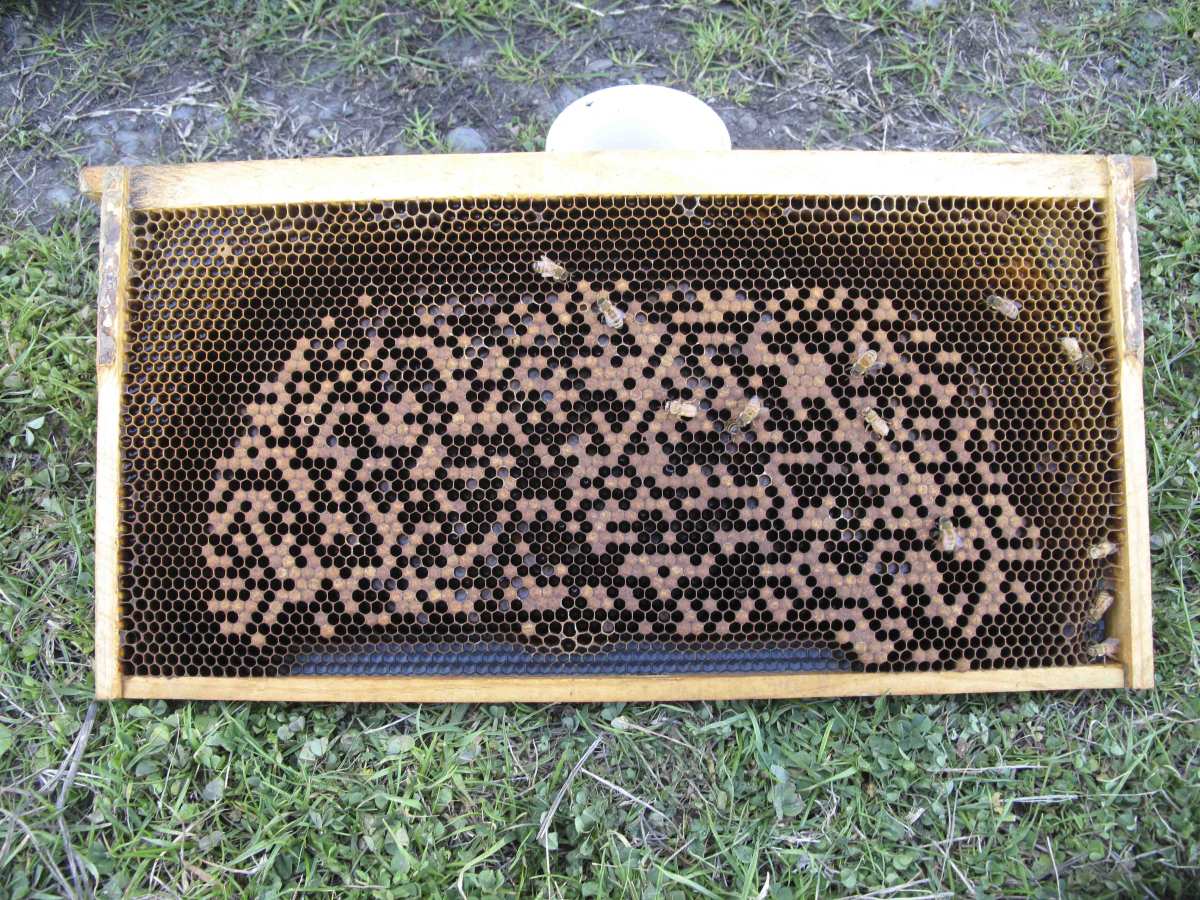
Image source: Bing (Web (fair-use with source credit))
Mistakes That Ruin a Brood Check
Even experienced beekeepers slip up sometimes. These are the errors that cause the most problems.
Rolling the queen. When you slide frames back together without looking, you can crush the queen against the frame edge. Always visually confirm the queen's location before pushing frames together. Some keepers use a queen excluder temporarily during inspections to keep her in the brood box, though that's overkill for most situations.
Leaving the hive open too long. Every minute the inner cover is off, brood is exposed to temperature swings and light. In cool weather, you can chill developing larvae. Keep inspections focused and efficient.
If you need to search for the queen, limit your search to 5 to 7 minutes before closing up and coming back another day.
Inspecting in poor conditions. Cold, windy, or rainy days force bees into tight clusters. You'll get a defensive colony, poor visibility of brood, and potential chilling damage. Wait for a better day.
Crushing larvae when handling frames. Jerky movements and tilting frames too steeply can spill larvae out of cells. Hold frames vertically over the hive and rotate slowly. If you see larvae falling out, you're moving too fast or tilting too far.
Ignoring what you see. Spotting a spoty pattern and doing nothing is worse than not inspecting at all. The whole point is to catch problems early. If something looks off, take action within days, not weeks.
Forgetting to record findings. Memory is unreliable. Write down what you saw: number of brood frames, pattern quality, queen sighting, any abnormalities. Over time, these records reveal trends you'd otherwise miss.
How Often You Should Really Be Doing This
The standard recommendation is every 7 to 10 days during active brood-rearing season. That interval matches the honey bee development cycle closely enough to catch problems before they cascade.
More frequent checks make sense when:
- You've just installed a package or nuc and need to confirm the queen is laying
- You're monitoring for swarm cells before peak swarm season
- Disease is suspected or confirmed in your apiary
- You've recently requeened and want to verify acceptance
Less frequent checks are fine when:
- The colony is strong, healthy, and in a stable period
- Weather conditions prevent safe inspection
- You're heading into winter and want to minimize disturbance
Over-inspecting stresses the colony. Each opening disrupts temperature and humidity regulation, sets back honey production slightly, and increases the chance of accidentally injuring the queen. Find the balance between staying informed and leaving the bees to do their work.
Handling Specific Situations
Not every brood check follows the textbook. Here's how to adapt when circumstances change.
Two-deep brood nests. If your colony occupies two deep boxes, you need to check both. The queen may have moved up into the second deep. Separate the boxes gently, set the top one on the inverted outer cover, and inspect the bottom box first.
Then check the top box the same way.
Top-bar hives. Instead of frames, you're working with individual bars. Remove bars from the end of the hive and work toward the brood nest in the center. Hold bars vertically and inspect both sides.
The same visual cues apply: eggs, larvae, capped brood, pattern quality.
New package or nuc. Wait 5 to 7 days after installation before your first inspection. You're looking for eggs and young larvae to confirm the queen has been released (if caged) and accepted. Don't disturb them before then.
Swarm season. In spring, check for swarm cells along the bottom bars of frames. These large, peanut-shaped queen cells mean the colony is preparing to swarm. If you find them, you need to act within days, either by splitting the colony or performing a Demaree or similar swarm control method.
Defensive colonies. If bees are bouncing off your veil and stinging through your suit, close up and come back another day. Smoke more heavily, work slower, and consider requeening with gentler genetics. Some colonies are just hot, and fighting them every inspection isn't sustainable.
After the Inspection: Making Decisions From What You Saw
The inspection itself is only half the job. What you do with the information determines whether your beekeeping improves or stagnates.
If everything looks solid. Great. Record your findings, note the date, and schedule your next inspection. If brood volume is high and swarm cells are absent, consider adding a honey super if nectar flow is on.
If the queen is missing or failing. You have options depending on the situation. If you have queen cells, the colony may raise its own replacement. If not, order a mated queen or combine with a queenright colony.
Don't wait hoping things will fix themselves. They won't.
If disease is suspected. Isolate affected equipment, stop sharing gear between hives without sterilizing, and contact your state apiary inspector for confirmation. American foulbrood requires specific legal responses in most states, including potential equipment destruction.
If the colony is weak. Assess why. Small population, poor forage, mites, disease, or old queen genetics could all be factors. Sometimes the best move is combining two weak colonies into one strong one rather than trying to nurse both through.
If swarm cells are present. Decide whether you want to let them swarm (you shouldn't, in most managed apiaries) or intervene. Splits, checkerboarding, and Demaree methods all work. Pick one and execute within a few days.
Frequently Asked Questions
How do I know if I'm looking at brood or honey?
Brood capping is tan, slightly domed, and sits in the center of the nest. Honey capping is whiter, flatter, and appears on outer frames or in supers above. If you see white C-shaped larvae in cells, that's brood, no question.
Can I check brood without a smoker?
Technically yes, but you shouldn't. Smoke masks alarm pheromones and calms the colony. Without it, inspections are more stressful for the bees and more dangerous for you.
A smoker is basic essential equipment.
What if I can't see eggs but I see larvae?
That's normal and still useful. Larvae mean the queen was laying 4 to 9 days ago. You don't need to see eggs every single inspection.
If you see young larvae, your queen is present and active.
How many frames of brood should a healthy colony have?
In peak spring buildup, a strong colony covers 6 to 10 frames with brood across both deep boxes. In early spring or late fall, 3 to 5 frames is more typical. Context matters more than a single number.
Is it bad to inspect brood too often?
Yes. Every opening disrupts the hive's internal climate and stresses the colony. Stick to 7 to 10 day intervals during active season.
More frequent checks cause more harm than good.
What does a queenless brood pattern look like?
A queenless colony eventually shows no eggs, no young larvae, and only old capped brood emerging. You may see multiple eggs per cell (laying workers) and drone brood in worker cells. The population declines steadily with no young bees replacing losses.
Frequently Asked Questions
How do I know if I'm looking at brood or honey?
Brood capping is tan, slightly domed, and sits in the center of the nest. Honey capping is whiter, flatter, and appears on outer frames or in supers above. If you see white C-shaped larvae in cells, that's brood, no question.
Can I check brood without a smoker?
Technically yes, but you shouldn't. Smoke masks alarm pheromones and calms the colony. Without it, inspections are more stressful for the bees and more dangerous for you.
A smoker is basic essential equipment.
What if I can't see eggs but I see larvae?
That's normal and still useful. Larvae mean the queen was laying 4 to 9 days ago. You don't need to see eggs every single inspection.
If you see young larvae, your queen is present and active.
How many frames of brood should a healthy colony have?
In peak spring buildup, a strong colony covers 6 to 10 frames with brood across both deep boxes. In early spring or late fall, 3 to 5 frames is more typical. Context matters more than a single number.
Is it bad to inspect brood too often?
Yes. Every opening disrupts the hive's internal climate and stresses the colony. Stick to 7 to 10 day intervals during active season.
More frequent checks cause more harm than good.
What does a queenless brood pattern look like?
A queenless colony eventually shows no eggs, no young larvae, and only old capped brood emerging. You may see multiple eggs per cell (laying workers) and drone brood in worker cells. The population declines steadily with no young bees replacing losses.
Frequently Asked Questions
How do I know if I'm looking at brood or honey?
Brood capping is tan, slightly domed, and sits in the center of the nest. Honey capping is whiter, flatter, and appears on outer frames or in supers above. White C-shaped larvae in cells is brood, no question.
Can I check brood without a smoker?
Technically yes, but you shouldn't. Smoke masks alarm pheromones and calms the colony. Without it, inspections are more stressful for the bees and more dangerous for you.
What if I can't see eggs but I see larvae?
That's normal and still useful. Larvae mean the queen was laying within the last 4 to 9 days. You don't need to see eggs every single inspection.
How many frames of brood should a healthy colony have?
In peak spring buildup, expect 6 to 10 frames across both deep boxes. In early spring or late fall, 3 to 5 frames is more typical.
Is it bad to inspect brood too often?
Yes. Every opening disrupts the hive's internal climate and stresses the colony. Stick to 7 to 10 day intervals during active season.
What does a queenless brood pattern look like?
No eggs, no young larvae, and only old capped brood emerging. You may also see multiple eggs per cell and drone brood in worker cells. Population declines steadily without replacement bees.