To clean a grass cutter carburetor efficiently, start by removing the carburetor from the engine, then disassemble it carefully. Soak the parts in a carburetor cleaner, scrub away any debris or buildup, and reassemble everything properly before reinstalling. This quick process can restore your grass cutter’s performance in no time!
In short, cleaning your grass cutter carburetor involves removing it from the engine, soaking and scrubbing the parts with a specialized cleaner, and reassembling everything correctly. Regular maintenance prevents clogging and keeps your machine running smoothly.
A dirty or clogged carburetor is a common reason for a grass cutter to run poorly or not start at all. Over time, debris, dirt, and stale fuel can cause blockages inside the carburetor, reducing fuel flow and engine efficiency. Fortunately, cleaning it is a straightforward task anyone can do with basic tools and a bit of patience. With the right approach, you can quickly restore your grass cutter’s power and extend its lifespan, making yard work easier and more enjoyable.

How to Clean Grass Cutter Carburetor: A Step-by-Step Guide
Cleaning the carburetor of your grass cutter is an essential maintenance task that keeps your machine running smoothly. A dirty or clogged carburetor can cause the engine to stall, run unevenly, or refuse to start. Luckily, with the right tools and simple steps, you can effectively clean the carburetor and extend the life of your equipment.
Understanding the Role of the Carburetor
The carburetor mixes air and fuel to provide the right combustion mixture for the engine. If this mixture is off due to dirt, debris, or buildup, your grass cutter may perform poorly or not at all. Recognizing the importance of a clean carburetor is the first step toward proper maintenance.
Signs That Your Carburetor Needs Cleaning
- The engine stalls unexpectedly during operation.
- Difficulty starting the grass cutter, especially after long periods of inactivity.
- Reduced engine power or uneven running.
- Engine runs but produces excessive smoke or fumes.
- Fuel leaks from the carburetor area.
Gathering the Necessary Tools and Supplies
Before beginning, gather the following items:
- Screwdrivers (flat-head and Phillips)
- Wrench set
- Carburetor cleaner spray
- Compressed air or air blower
- Clean cloths or rags
- Replacement gaskets or seals (if needed)
- Container for soaking parts
- Protective gloves and safety glasses
Preparing to Clean the Carburetor
Ensure the grass cutter is turned off and cooled down. Disconnect the spark plug to prevent accidental starting. Remove the air filter to access the carburetor easily.
Removing the Carburetor from the Grass Cutter
Locate the carburetor, usually attached to the engine with bolts or screws. Use appropriate screwdrivers and wrenches to carefully detach it. Keep track of all screws and small parts to avoid losing them.
Disassembling the Carburetor
Carefully take apart the carburetor, noting the position of each part. Use a container to soak smaller components in carburetor cleaner if needed. Be gentle to avoid damaging delicate components like jets and diaphragms.
Cleaning Components of the Carburetor
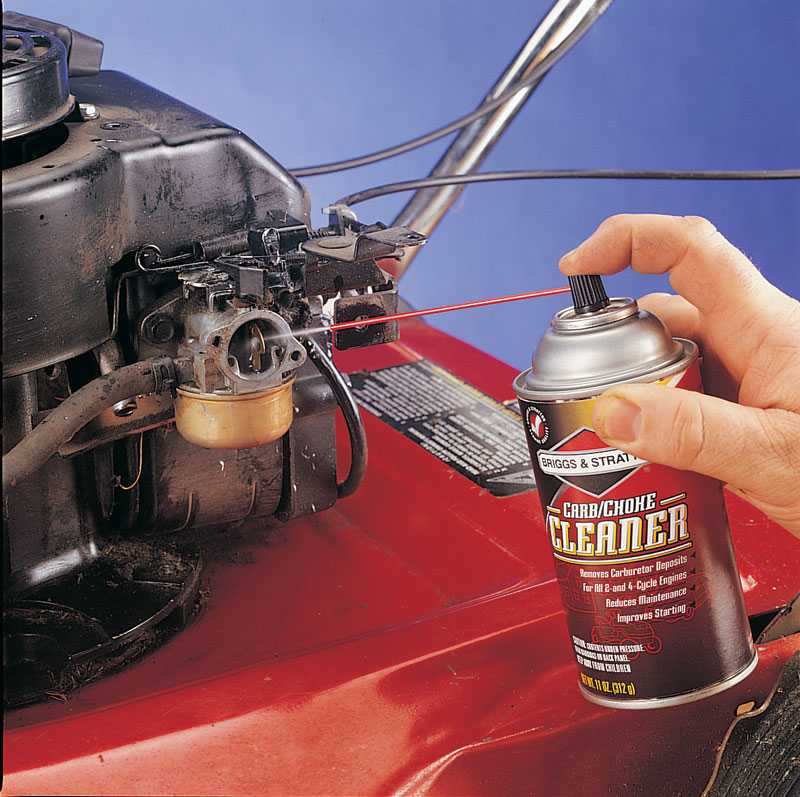
Cleaning the Carburetor Body
Spray the carburetor cleaner generously on all surfaces of the body. Use a brush or cloth to remove dirt, varnish, and grime. For stubborn residues, let the cleaner sit for a few minutes before scrubbing.
Cleaning the Jets and Passages
Jets and passages are critical for proper fuel flow. Use compressed air to blow out these tiny openings. For clogged passages, a fine needle or wire can help dislodge debris.
Cleaning the Float and Needle Valve
Check the float for any damage or sticking. Clean the needle valve with carburetor cleaner and ensure it moves freely. Replace if it shows signs of wear or damage.
Checking and Replacing Gaskets
Inspect all gaskets and seals for cracks or deterioration. Replace damaged gaskets to prevent fuel leaks and ensure proper sealing during reassembly.
Reassembling the Carburetor
Carefully put all the cleaned parts back together in the correct order. Use new gaskets where necessary. Make sure all screws and bolts are tight but not overly tight to avoid damage.
Reinstalling the Carburetor on Your Grass Cutter
Attach the carburetor back to the engine, reconnecting all hoses and securing bolts tightly. Reinstall the air filter and ensure everything is correctly assembled.
Testing the Grass Cutter After Cleaning
Reconnect the spark plug wire, start the engine, and observe its behavior. If the engine runs smoothly and responds well, the cleaning was successful. If not, recheck for any missed clogs or loose connections.
Tips for Maintaining a Clean Carburetor
- Regularly check and replace the air filter to prevent dirt from entering the carburetor.
- Use fresh, clean fuel to reduce varnish buildup inside the carburetor.
- Perform periodic inspections, especially after prolonged storage or use in dusty conditions.
- Apply a fuel stabilizer if the grass cutter is stored for long periods.
Additional Advice for Troubleshooting Carburetor Issues
If cleaning the carburetor doesn’t resolve engine problems, consider examining other components like the spark plug, fuel lines, or the choke. Sometimes, carburetor issues are related to underlying problems elsewhere in the engine.
Understanding When to Seek Professional Help
If you encounter persistent issues despite cleaning, or if parts are damaged beyond simple repair, consult a qualified technician. Professional service might be necessary for complex repairs or replacements.
Summary of Key Steps
| Step | Description |
|---|---|
| Preparation | Turn off engine, disconnect spark plug, remove air filter |
| Removal | Detach carburetor using tools, keep track of parts |
| Disassembly | Take apart carefully, noting part positions |
| Cleaning | Use carburetor cleaner, blow out jets, scrub surfaces |
| Inspection and Replacement | Check gaskets, replace worn parts, reassemble |
| Reinstallation | Attach carburetor, reconnect hoses, secure everything |
| Testing | Start engine, check for proper operation |
Cleaning your grass cutter carburetor is a simple yet vital task to keep your machine in top shape. Regular maintenance prevents engine problems and prolongs the lifespan of your equipment. With patience and attention to detail, you can ensure your grass cutter always performs at its best.
“cleaning” EXTREMELY DIRTY carburetor on an echo two cycle engine (string trimmer) weedwhacker
Frequently Asked Questions
What are the steps to safely remove the carburetor for cleaning?
To safely remove the carburetor, first turn off the grass cutter and disconnect the spark plug to prevent accidental starting. Drain any fuel from the tank to avoid spills. Loosen the nuts or screws securing the carburetor using appropriate tools, and carefully detach the carburetor from the engine. Take note of the connections and linkages to reassemble correctly later.
How can I identify clogged jets in my grass cutter’s carburetor?
Look for signs of poor engine performance, such as difficulty starting, sputtering, or irregular idling. Remove the carburetor and inspect the small jets and passages for debris or buildup. Using a fine needle or compressed air, gently clear any blockages. If jets are damaged or heavily clogged, consider replacing them for better results.
What cleaning solutions are effective for removing deposits inside the carburetor?
Use a carburetor cleaner spray designed specifically for small engines. Submerge the cleaned parts in the cleaner or spray liberally into the jets and passages. Let the parts soak for 15–30 minutes to loosen stubborn deposits. Avoid using harsh chemicals that could damage plastic components. Rinse with clean water and allow the parts to dry thoroughly before reassembling.
How often should I clean the carburetor of my grass cutter?
Clean the carburetor at least once a season or after every 25–30 hours of use. Regular maintenance prevents buildup of dirt and deposits that could impede engine performance. If you notice engine struggles or irregular operation, inspect and clean the carburetor sooner to maintain optimal functioning.
Final Thoughts
Properly cleaning the grass cutter carburetor ensures optimal performance. Remove the carburetor carefully and disassemble it, noting each component. Use a carburetor cleaner to remove dirt and fuel residues effectively.
Reassemble the parts once they are clean and dry, ensuring all components fit snugly. Regular maintenance prevents clogs and improves engine efficiency.
To clean grass cutter carburetor, follow these steps diligently for best results and keep your equipment running smoothly.