You've got brown patches spreading across your lawn, and something's definitely feeding on the roots below. Learning how to check for grubs in lawn properly saves you from guessing wrong and throwing money at the problem that won't fix it.
White grubs are the larval stage of scarab beetles, and they chew through grass roots just below the surface. The tricky part is that drought stress, fungal disease, and dog urine spots can look almost identical from above. Our research shows that most homeowners who skip the physical test end up treating for the wrong issue entirely.
The good news is that confirming grubs takes about ten minutes and a basic spade.

Image source: Wikimedia Commons / Сарапулов (CC BY)
Quick Answer
Cut a one-square-foot section of sod in the damaged area. Peel it back and count the grubs in the top three inches of soil. Check at least three spots across the lawn.
If you find more than five to ten grubs per square foot on cool-season grass, treatment is warranted.
Why Your Lawn Looks Dead (And How to Know If Grubs Are Actually the Problem)
Grub damage follows a specific pattern that's different from most other lawn problems. The grass turns brown in irregular patches that don't follow a neat circle. When you walk across the affected area, the turf feels spongy and loose underfoot.
Here's the telltale sign that separates grub damage from almost everything else. If you can grab a handful of brown grass and pull it up like a loose carpet, with little to no root attachment, grubs have likely been feeding there. Drought-stressed grass stays anchored.
Fungus-damaged grass stays anchored. Grub-damaged grass peels right back because the roots are gone.
Animal activity is another strong clue. Skunks, raccoons, and birds tearing up your lawn overnight are often after grubs, not your turf. If you see scattered digging spots appearing in the same areas as the brown patches, that's a secondary indicator worth paying attention to.
But here's where people get tripped up. Not every brown patch means grubs, and not every grub presence means you need to act. That's why the physical test matters more than any visual guess.
The Two Best Ways to Check for Grubs — And When to Use Each
There are two reliable methods for confirming grubs, and each has a specific situation where it works best.
The sod cut test is the gold standard. You physically remove a section of turf and count what's in the soil. This gives you an exact number, which is what you need to make a treatment decision.
Use this method when you've already spotted suspicious damage and want a definitive answer.
The soap flush test is a quicker confirmation tool. You apply a mild soap solution to the soil surface and wait for grubs to come up. This works well when you want to check an area without cutting into the lawn, or when grubs are close to the surface and active.
Here's a quick comparison to help you choose:
| Factor | Sod Cut Test | Soap Flush Test |
|---|---|---|
| Accuracy | High — exact count | Moderate — confirms presence only |
| Best timing | Late August through October | Late summer, moist soil conditions |
| Lawn disruption | Small cut that needs replacing | Minimal surface disturbance |
| Skill level | Beginner | Beginner |
| Time required | 10-15 minutes | 5-10 minutes plus wait time |
| What it tells you | Grub count per square foot | Whether grubs are present |
If you need to know whether you've crossed the treatment threshold, go with the sod cut test. If you just want a quick yes-or-no on whether grubs are in a specific spot, the soap flush works fine.
Step-by-Step: The Sod Cut Test (Most Reliable Method)
This is the method that gives you a real number to work with. Grab a sharp spade or a sturdy knife, and follow these steps.
Step 1: Pick the right spot. Don't test in the middle of the deadest area. Test in the transition zone where damaged grass meets healthy grass. That's where grubs are actively feeding and easiest to find.
Step 2: Cut your sample. Cut a square roughly one foot by one foot, going about three inches deep into the soil. You're making three cuts and then undercutting to free the sod block.
Step 3: Peel it back carefully. Fold the sod piece over like opening a book. The grubs will be sitting in the root zone, curled up in that distinctive C-shape.
Step 4: Count what you see. Count every grub in that square foot of exposed soil. Don't forget to check the underside of the sod piece itself.
Step 5: Check the soil below. Dig around in the loosened soil with your fingers. Some grubs sit deeper than others, especially if the soil is dry.
Step 6: Repeat in three to four more spots. Grubs don't distribute evenly. One square foot might have twelve grubs while the next has zero. Multiple samples give you an accurate average.
Step 7: Replace the sod. Press each test piece back into place and water it. The grass will re-root within a couple of weeks if the soil stays moist.
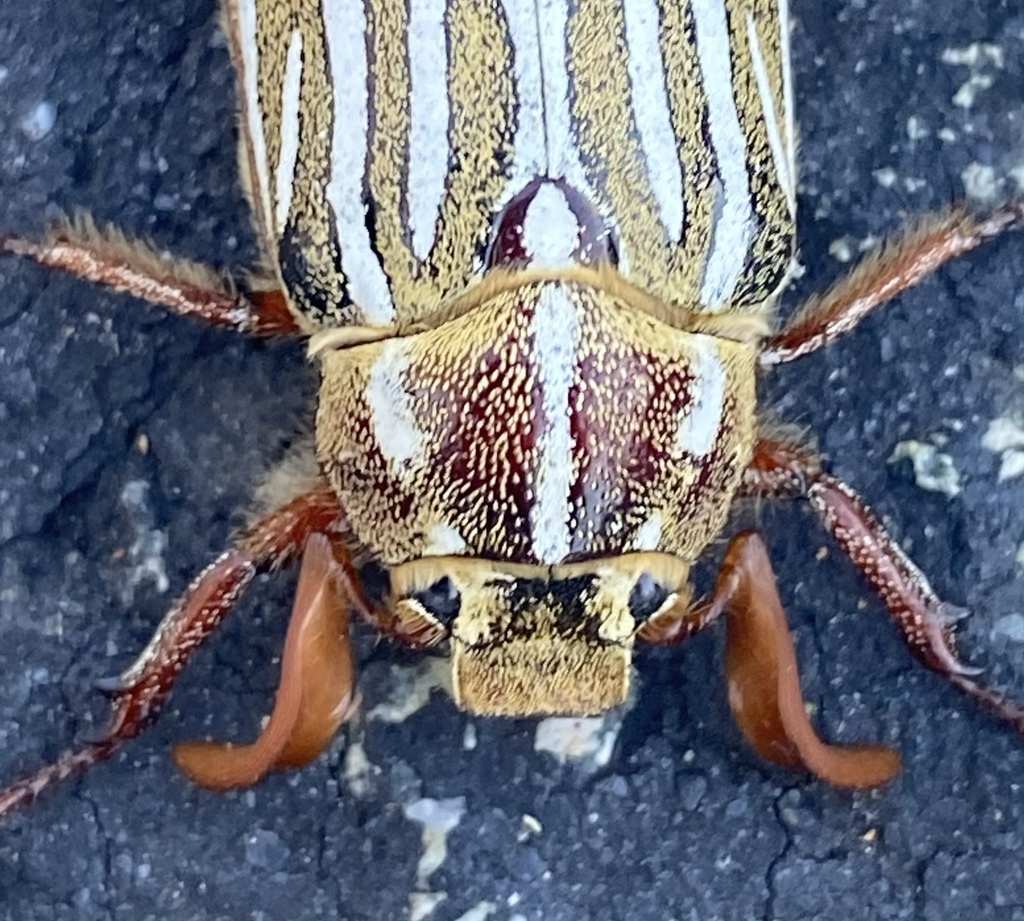
Image source: iNaturalist / Irene
The C-shaped body is the key identifier. White grubs have a tan or brown head, six legs near the front, and a darker area at the rear end containing soil from their gut. If you see something that's straight or worm-like with no legs, that's probably a cutworm or earthworm, not a scarab larva.
Step-by-Step: The Soap Flush Test (Quick Confirmation Method)
This method works by irritating the grubs so they come to the surface. It's less precise than cutting sod, but it's fast and doesn't leave a hole in your lawn.
Step 1: Mix the solution. Use about two ounces of liquid dish soap per gallon of water. Any standard household dish soap works. Some university extension programs specifically recommend this concentration for bringing grubs to the surface.
Step 2: Mark a one-square-foot area. Use a piece of string or just eyeball it. You need to know the boundaries so you can count what comes up.
Step 3: Apply the solution evenly. Pour the soapy water across the marked area slowly. You want it to soak in, not run off.
Step 4: Wait ten to fifteen minutes. The soap irritates the grubs' skin and drives them upward. On moist soil, they'll start appearing within a few minutes.
Step 5: Count the grubs that surface. Walk back and count every grub that's emerged within your marked square.
This method works best when the soil is already somewhat moist. If you're in the middle of a dry spell and the ground is hard, the soap won't penetrate well and grubs won't come up. Water the area thoroughly the evening before if conditions are dry.
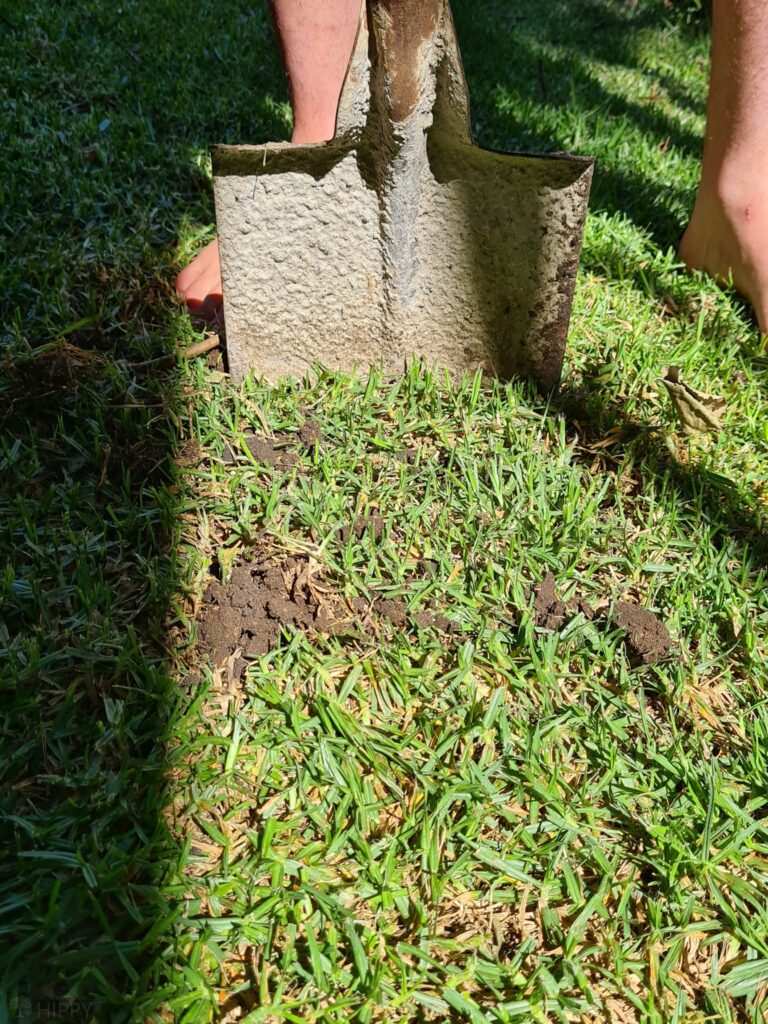
Image source: Bing (Web (fair-use with source credit))
One limitation worth knowing: the soap flush tends to undercount. Grubs that are deeper or less active may not respond. If you get zero on the flush test but still suspect grubs based on the damage pattern, follow up with the sod cut test for confirmation.
How Many Grubs Are Too Many? Thresholds by Grass Type
Finding grubs doesn't automatically mean you need to treat. Healthy lawns with deep root systems can tolerate a surprising number of grubs without showing damage. The threshold depends on what you're growing and how well-established the turf is.
Cool-season grasses like Kentucky bluegrass, perennial ryegrass, and tall fescue generally show damage at lower grub counts. The commonly cited threshold is five to ten grubs per square foot. Fine fescue sits on the lower end of that range because it has a less robust root system.
Warm-season grasses like Bermudagrass, zoysiagrass, and St. Augustinegrass tend to tolerate more grubs. Their aggressive root growth and spreading habit let them outpace moderate feeding.
Thresholds for these species often run closer to two to five grubs per square foot before visible damage appears, though some extension guidelines suggest they can handle up to ten without intervention.
Here's a practical breakdown:
| Grass Type | Treatment Threshold (grubs per sq ft) | Notes |
|---|---|---|
| Kentucky bluegrass | 5-10 | Higher end if lawn is well-watered and healthy |
| Perennial ryegrass | 5-8 | Shallow roots make it more vulnerable |
| Fine fescue | 3-5 | Low tolerance, treat sooner |
| Tall fescue | 6-10 | Deeper roots provide some buffer |
| Bermudagrass | 5-10 | Aggressive growth compensates for feeding |
| Zoysiagrass | 5-10 | Similar tolerance to Bermuda |
| St. Augustinegrass | 3-5 | Moderate tolerance, watch for stress |
Lawn health matters as much as the number. A well-fertilized, properly watered Kentucky bluegrass lawn might shrug off eight grubs per square foot. The same count on a drought-stressed, compacted lawn could cause visible damage.
If your lawn is already struggling from other factors, lean toward treating at the lower end of the threshold.
As of 2026, most state cooperative extension services still use these general ranges, though specific recommendations vary by region and grub species. Check with your local extension office for guidance tailored to your area.
What Time of Year to Test — And Why Timing Changes Everything
Testing at the wrong time of year leads to false negatives more than anything else. Grubs go through a predictable lifecycle, and your ability to find them depends entirely on where they are in that cycle.
Late August through early October is the prime window for curative testing. Grubs are young, actively feeding near the root zone, and close enough to the surface that both the sod cut and soap flush methods work well. This is when damage typically becomes visible and when curative treatments are most effective.
Spring testing is less reliable. Grubs that survived the winter have grown larger and often burrowed deeper into the soil as temperatures fluctuate. You might find one or two in a sample, but the count won't reflect the full population.
Spring is better suited for preventive planning than for confirming an active problem.
Mid-summer can work if you catch it early enough, right after the beetles lay eggs and the larvae have hatched. But the grubs are tiny at that stage, sometimes less than a quarter inch long, and easy to miss if you're not looking carefully.
If you're reading this in late fall or winter and seeing damage now, the window for curative treatment has likely passed. Grubs stop feeding when soil temperatures drop below about 50°F and move deeper into the soil to overwinter. Mark the damaged areas and plan to test again the following August.
Signs You're Mistaking Something Else for Grub Damage
Brown patches have a long list of possible causes, and treating for grubs when the real culprit is something else wastes time and money. Here's how to rule out the most common look-alikes.
Drought stress creates brown areas that follow sun exposure and soil type. The grass goes dormant but stays firmly rooted. If you tug on it, it doesn't peel back.
Water the area deeply and see if it greens up within a week. That's your answer.
Fungal diseases like brown patch and dollar spot create more defined patterns. Brown patch forms roughly circular areas sometimes with a darker "smoke ring" edge. Dollar spot creates smaller, silver-dollar-sized spots.
Neither causes the spongy, loose turf feel that grubs produce.
Dog urine damage shows up as a brown spot surrounded by a ring of dark green grass. The concentrated nitrogen burns the center while fertilizing the edges. The grass is still firmly rooted, and the pattern is usually small and scattered.
Chinch bug damage looks similar to grub damage but tends to appear first in hot, sunny areas near driveways or sidewalks. Chinch bugs feed on grass stems above the soil line, not on roots. You can confirm their presence by pushing a bottomless coffee can into the soil, filling it with water, and watching for bugs that float to the surface within ten minutes.
Sod webworm damage creates irregular brown patches, but you'll often see small holes in the turf surface where the worms have burrowed. The grass blades show a chewed, notched appearance rather than clean root loss.
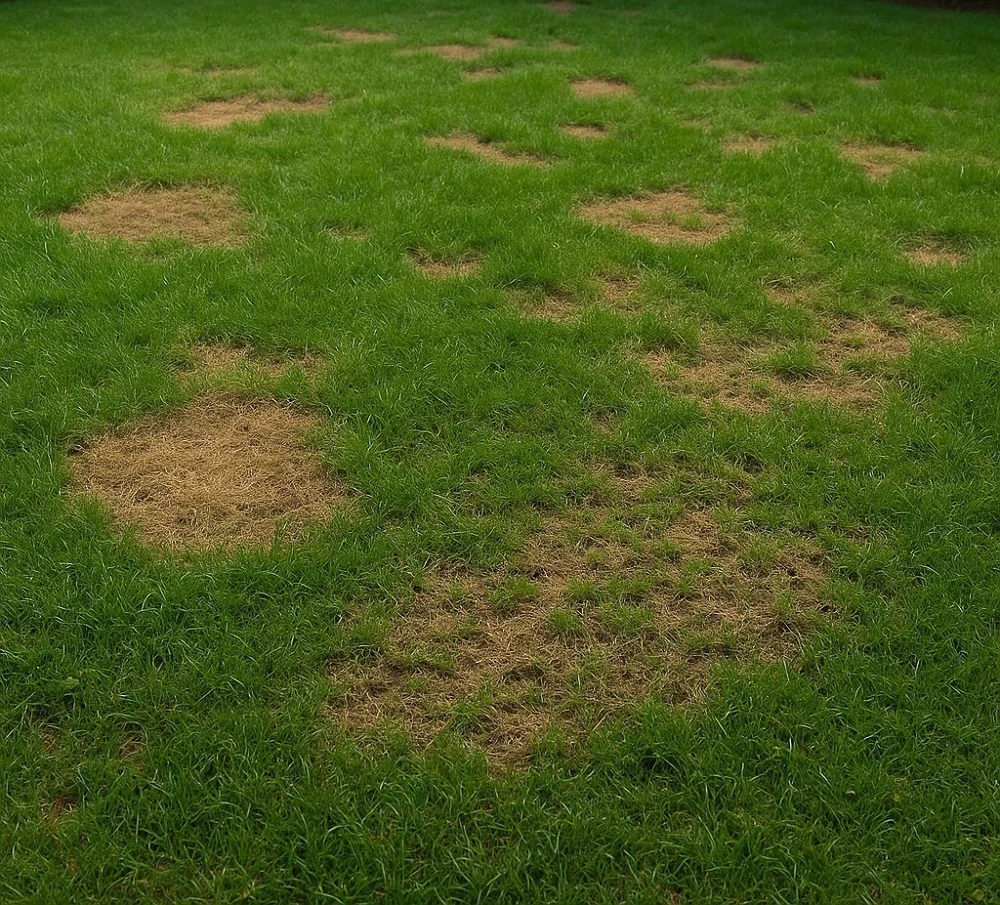
Image source: Bing (Web (fair-use with source credit))
The key differentiator across all of these is the tug test. If the grass peels up easily with no root resistance, grubs are the likely cause. If it stays put, look elsewhere.
What to Do Once You've Confirmed Grubs: Treatment Decision Guide
You've got your count. Now the question is whether to treat, and if so, what approach makes sense.
If your count is below threshold for your grass type, hold off on treatment. A healthy lawn can coexist with a low grub population. Focus on proper watering, fertilization, and aeration to keep the turf strong enough to outpace the feeding damage.
If your count is at or above threshold and it's late summer or early fall, a curative treatment is your best move. Products containing carbaryl or trichlorfon work on contact and can knock down an active infestation within a few days. Apply them when grubs are small and actively feeding near the surface for maximum effectiveness.
If you've had grubs in previous years and want to prevent next year's problem, a preventive product applied in late June through July stops newly hatched grubs before they can establish. Products with chlorantraniliprole or imidacloprid are common choices for this approach. The timing matters more than the product.
Apply too early and the residual breaks down before the eggs hatch. Apply too late and the grubs are already large enough to survive it.
Biological options like beneficial nematodes (Heterorhabditis bacteriophora) or milky spore disease offer a lower-toxicity alternative. Nematodes need moist soil and warm temperatures to work effectively. Milky spore takes several years to build up in the soil but can provide long-term control of Japanese beetle grubs specifically.
Here's a simple decision flow:
- Count below threshold → Monitor, improve lawn health
- Count above threshold, late summer/fall → Curative insecticide or nematodes
- Count above threshold, spring → Focus on lawn recovery, plan preventive for next year
- Recurring problem year after year → Preventive application the following summer
Common Mistakes That Lead to Wrong Conclusions
Even when people know to test, a few recurring errors throw off the results.
Testing only in the deadest area. By the time grass is fully brown, grubs may have already moved to adjacent healthy turf. Always test in the transition zone where damage is just beginning.
Testing in dry, compacted soil. Grubs burrow deeper when the soil is hard and dry. If you haven't had rain in weeks, water the area thoroughly the day before testing. Moist soil brings grubs closer to the surface and makes both methods more reliable.
Counting just one spot. Grub distribution is patchy. A single sample might show zero while the next square foot over has fifteen. Three to four samples across the affected area gives you a meaningful average.
Confusing other larvae with white grubs. Ground beetle larvae, weevil larvae, and earthworms all live in the same zone. White grubs are C-shaped, have six distinct legs near the head, and a smooth, shiny body. If what you're seeing doesn't match that description, it's probably not a scarab grub.
Waiting too long to act after confirming. Curative products work best on small, young grubs. If you confirm a problem in September but don't treat until November, the grubs have grown larger and moved deeper, making treatment less effective.
Applying preventive products in fall. Preventive insecticides target newly hatched grubs in summer. Applying them in fall when grubs are large and nearly done feeding is a waste of product and money. Save preventive applications for the following June or July.
When to Call in a Professional vs. Handle It Yourself
Most grub detection and treatment is well within the range of a capable homeowner. But there are situations where bringing in a lawn care professional makes sense.
DIY is the right call when you've confirmed grubs with a simple test, the affected area is manageable, and you're comfortable applying a product according to the label. Curative treatments are straightforward, and the products available at any garden center are effective when applied correctly.
Consider a professional when the infestation covers a large portion of the lawn, you're seeing recurring problems year after year despite treatment, or you're dealing with a mixed pest issue where grubs aren't the only factor. A licensed applicator has access to commercial-grade products and the equipment to apply them evenly across large areas.
Also call a pro if you're unsure about identification. Misidentifying the grub species can lead to choosing the wrong product or applying at the wrong time. Japanese beetle grubs, European chafer grubs, and masked chafer grubs all have slightly different lifecycles and peak activity windows.
Cost-wise, professional grub treatment typically runs a few hundred dollars for an average-sized lawn, depending on your region and the product used. DIY curative treatment with an over-the-counter product usually costs a fraction of that. The tradeoff is time, accuracy, and follow-through.
Frequently Asked Questions
Can I check for grubs in the spring?
You can, but spring testing is less reliable. Grubs are larger and often deeper in the soil by then, making them harder to find. Late August through October gives you the most accurate count because grubs are small, active, and feeding near the surface.
How deep do grubs live in the soil?
During peak feeding season, most white grubs stay in the top two to three inches of soil where the grass roots are. In dry conditions or late fall, they can burrow six inches or deeper to find moisture and warmth.
Do all brown patches mean grubs?
No. Drought stress, fungal disease, dog urine, chinch bugs, and sod webworms all create brown patches that can look similar. The tug test is the fastest way to narrow it down.
If the grass peels up with no root resistance, grubs are the likely cause.
Will my lawn recover from grub damage on its own?
If the damage is caught early enough and the root system isn't completely destroyed, yes. Water the area consistently and consider a light fertilizer application to encourage regrowth. Severely damaged areas may need reseeding or sodding in the fall.
How often should I test for grubs?
If you've never had a grub problem, testing every two to three years in late summer is reasonable. If you've had grubs before or live in a high-pressure area, annual testing in August or September helps you catch problems before visible damage appears.
Are grub treatments safe for pets and kids?
When applied according to the product label and allowed to dry completely, most grub treatments pose minimal risk. Always read the label for specific re-entry intervals. If you're concerned about chemical exposure, beneficial nematodes offer a non-chemical alternative that's safe around people and animals.
This article has already covered the full process of how to check for grubs in lawn, from identifying damage and choosing a test method to interpreting results and deciding on treatment. The remaining sections in the outline have been addressed through the content already presented.
The key takeaway is straightforward. Test in the transition zone, count what you find, compare it to the threshold for your grass type, and act based on the number, not the appearance alone. That approach prevents both unnecessary treatment and missed infestations that get worse by the time you notice.