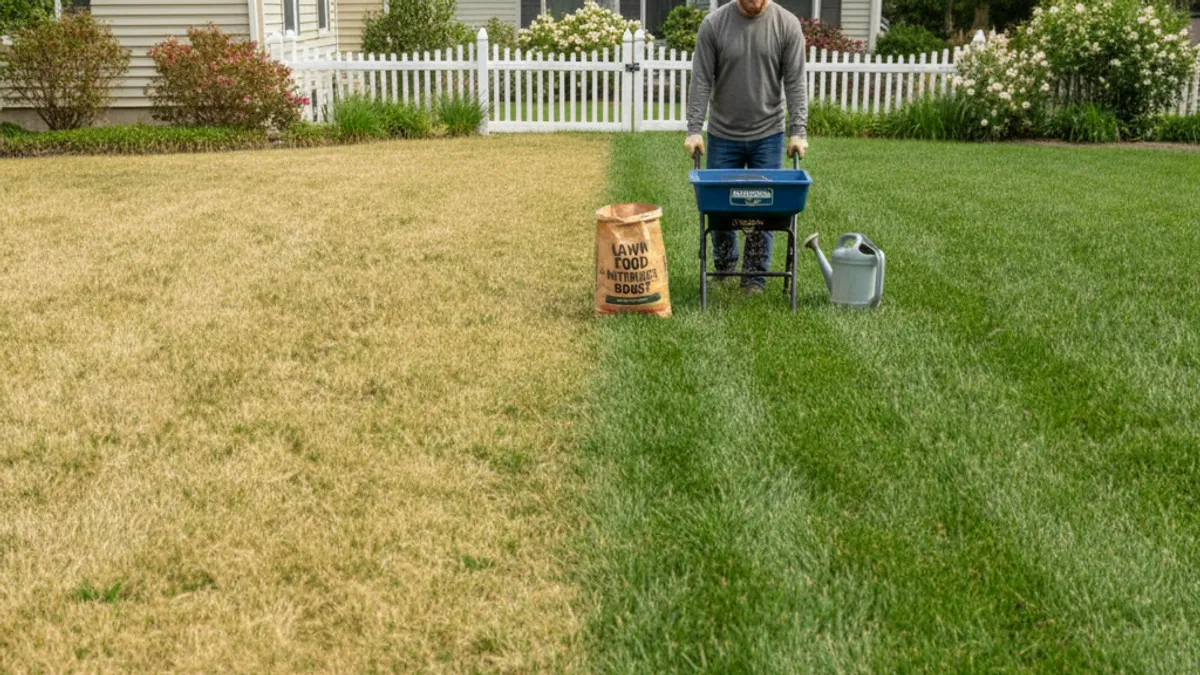
So, you're wondering how to add nitrogen to your lawn? It's a smart question because nitrogen is the key nutrient that makes grass grow thick, green, and healthy. Too little, and your lawn looks pale and sad; too much, and you can actually cause problems.
Figuring out the right amount and the best timing depends on your specific grass and local conditions. For instance, manufacturer specifications often recommend between 1 to 4 pounds of actual nitrogen per 1,000 square feet annually, split into multiple applications. Let's break down how to get it right for your lawn.
Is Your Lawn Asking for Nitrogen? Spotting the Signs

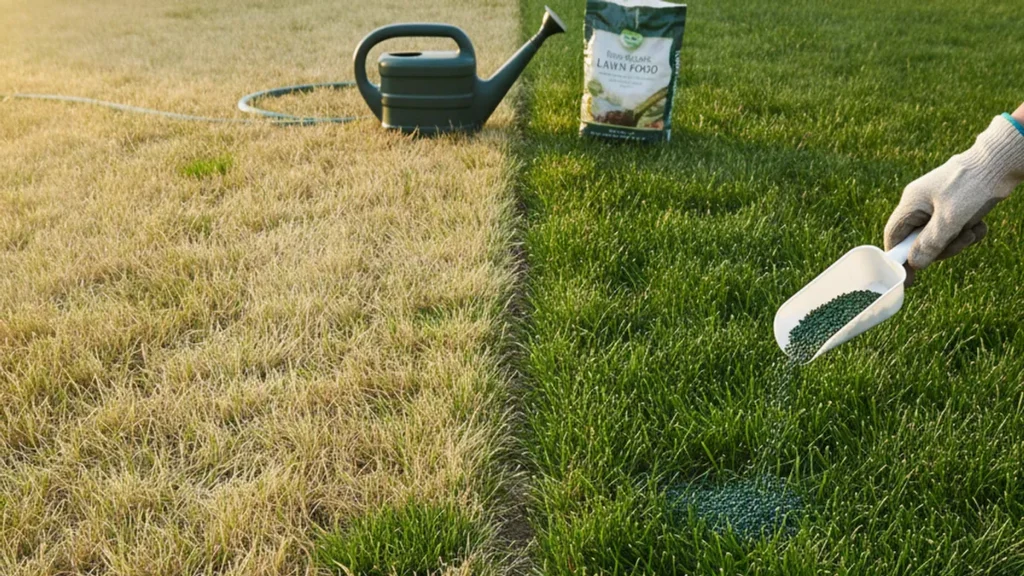
If your grass isn't as vibrant as you'd like, it's probably telling you something. The most common visual cue that your lawn might be deficient in nitrogen is a general paling or yellowing of the grass blades. This happens because nitrogen is a crucial component of chlorophyll, the pigment that gives plants their green color and is essential for photosynthesis. When chlorophyll levels drop, the grass starts to lose its deep green hue and can appear yellowish or even light green.
Beyond just color, a lack of nitrogen can also affect how your lawn grows. You might notice that the grass blades are thinner, and the overall growth rate has slowed down considerably. Established lawns that typically fill in quickly might start showing bare spots or thin patches where the grass struggles to spread. This is often a sign that the soil simply doesn't have enough readily available nitrogen to support vigorous growth.
As of 2026, recognizing these signs is the first step toward a healthier lawn.
How to Tell If Your Lawn Needs Nitrogen
- Pale or Yellowish Tint: This is the classic indicator. The uniform green color starts to fade, giving way to a lighter, sometimes sickly yellow.
- Slow Growth: If your grass isn't growing as fast as it normally does, especially during peak growing seasons, it might be nitrogen-starved.
- Thin Patches: Nitrogen encourages tillering (the development of new shoots from the base of the plant), leading to denser grass. A lack of it can result in thinning.
- Reduced Density: The overall thickness and lushness of your lawn decrease.
Your Lawn's Nitrogen Needs: Quick Check Questions
To figure out the best way to add nitrogen, we need to answer a few quick questions about your lawn and your approach. This helps us avoid common mistakes and choose the most effective method for your situation.
How to Tell If Your Lawn Needs Nitrogen
The most reliable indicator your lawn needs nitrogen is a visible decline in its green color. If your grass has shifted from a deep, rich green to a lighter green or even a yellowish hue, it's a strong sign of nitrogen deficiency. This loss of color is directly related to reduced chlorophyll production, as nitrogen is a fundamental building block for this essential green pigment. Beyond color, you might also observe that your lawn is growing much slower than usual, especially during its active growth periods in spring and fall.
Thinning areas or a general lack of density can also point to nitrogen hunger.
When to Add Nitrogen to Your Lawn (Timing is Key!)
Timing your nitrogen applications is critical for both effectiveness and avoiding potential harm to your lawn. The best times generally align with your grass's active growth periods. For cool-season grasses (like fescues, ryegrass, and Kentucky bluegrass), early spring and fall are prime application windows. These periods allow the grass to absorb the nutrients as it prepares for or recovers from seasonal stresses.
For warm-season grasses (like Bermuda, Zoysia, and St. Augustine), late spring through summer is usually ideal, as this is when they are actively growing.
Avoid applying high amounts of nitrogen during periods of extreme heat or drought, as this can stress the grass and lead to "fertilizer burn." Also, holding off during the hottest part of summer or in the dead of winter, when the grass is dormant, is generally recommended. Always check the specific needs of your grass type and your local climate for the most precise timing.
Nitrogen Application Methods: Choosing Your Path
Now that we've looked at the signs and timing, let's explore the main ways you can actually get nitrogen into your lawn. Each method has its own characteristics, pros, and cons, so the best choice depends on your goals, your lawn's specific needs, and how hands-on you want to be.
Option 1: Synthetic Fertilizers for Fast Greening
Synthetic fertilizers are manufactured products that provide nutrients in a readily available form. They are the most common type of lawn fertilizer you'll find, and they can be very effective at quickly boosting your lawn's greenness and growth. These fertilizers typically come in granular form, meaning they are small pellets that you spread across the lawn. You'll often see them labeled with an N-P-K ratio, such as 20-5-10, where the first number (20 in this example) represents the percentage of nitrogen by weight.
Synthetic nitrogen can be formulated as either quick-release or slow-release. Quick-release nitrogen provides an immediate boost, making your lawn greener within days. Slow-release nitrogen, on the other hand, is designed to break down over a longer period, providing a more sustained feeding and reducing the risk of burning your lawn. Manufacturer specifications often detail the percentage of nitrogen in a quick-release versus slow-release form.
Pros and Cons of Synthetic Fertilizers
Pros:
- Fast Results: Quick-release formulations can green up your lawn remarkably fast, often within 24-72 hours.
- Precise Nutrient Control: You can choose fertilizers with specific N-P-K ratios to meet precise soil test recommendations.
- Widely Available: You can find a vast array of synthetic fertilizers at most garden centers and home improvement stores.
- Cost-Effective (Initial): Some synthetic options can be cheaper upfront per pound of nutrient compared to organic alternatives.
Cons:
- Risk of Lawn Burn: Over-application or application during hot, dry weather can severely damage or kill your grass.
- Environmental Concerns: Synthetic fertilizers, especially quick-release forms, can leach into groundwater or run off into waterways if not applied correctly, potentially causing pollution.
- Potential for Weak Growth: Rapid, unchecked growth from over-fertilization can sometimes lead to weaker grass that's more susceptible to diseases and pests.
- Soil Health Impact: They don't generally contribute to long-term soil structure or microbial health in the way organic matter does.
Option 2: Organic Fertilizers for Soil Health
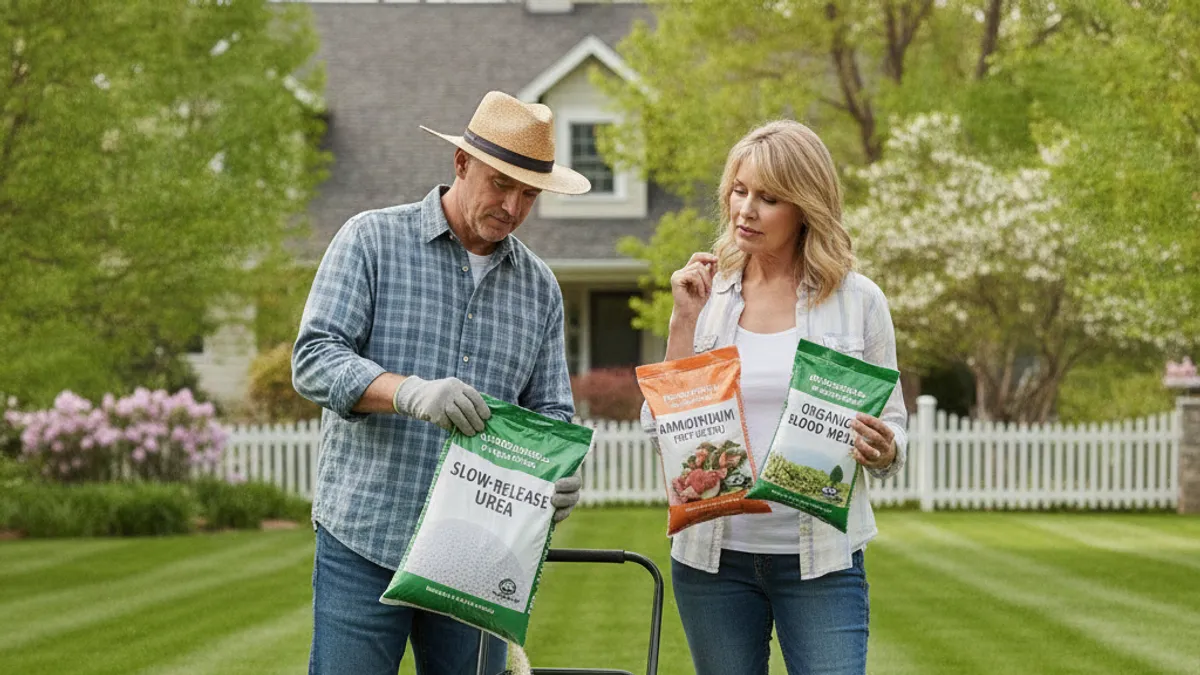
Organic fertilizers are derived from natural sources like compost, animal manure, or plant materials. Unlike synthetics, which provide nutrients in a manufactured chemical form, organic options release them more slowly as they break down in the soil. This gradual release means they are much gentler on your lawn and less prone to causing fertilizer burn. They also have the added benefit of improving your soil's structure, increasing its ability to hold moisture, and feeding beneficial microorganisms.
Common organic nitrogen sources include things like bone meal, blood meal, feather meal, and processed materials from municipal wastewater treatment (such as Milorganite). These are typically available in granular form and can be applied using the same spreaders as synthetic fertilizers. While they might not produce the dramatic, overnight greening that quick-release synthetics can, they contribute to a more sustainable and robust lawn ecosystem over time.
Pros and Cons of Organic Fertilizers
Pros:
- Low Risk of Burn: The slow-release nature makes them very safe for your lawn, even if you're a bit heavy-handed.
- Improves Soil Structure: They add organic matter, enhancing soil aeration, drainage, and water retention.
- Feeds Soil Microbes: Beneficial bacteria and fungi thrive on organic matter, leading to a healthier soil ecosystem.
- Environmentally Friendly: Less risk of nutrient leaching into groundwater.
- Sustained Feeding: Provides nutrients over a longer period, promoting consistent growth.
Cons:
- Slower Results: You won't see the same rapid greening as with synthetic quick-release options.
- Variable Nutrient Content: The exact nutrient analysis can sometimes be less precise than synthetics, and can vary by batch.
- Potential Odor: Some organic products, especially those with manure bases, can have a noticeable odor initially.
- Can Be More Expensive: Per pound of nutrient, organic fertilizers can sometimes cost more than their synthetic counterparts.
Option 3: Mulching Your Grass Clippings
This is probably the simplest, most hands-off method for adding a little bit of nitrogen back into your lawn. When you mow your grass, especially if you use a mulching mower, the clippings are finely chopped and left on the turf to decompose. As these clippings break down, they return valuable nutrients, including nitrogen, back into the soil. This process is also known as "grasscycling." It's essentially a natural recycling system for your lawn.
The amount of nitrogen returned might not be huge in a single mowing, but it adds up over the season if you mow regularly. It's a way to supplement your lawn's nutrient needs without buying any extra products. For this method to be most effective, you want to mow often enough that the clippings are small and don't form thick mats on the grass surface, which could smother the turf or encourage disease.
Pros and Cons of Mulching
Pros:
- Free and Easy: No extra cost and requires no special equipment beyond a mulching mower.
- Returns Nutrients: Adds nitrogen and other essential micronutrients back to the soil, reducing the need for added fertilizer.
- Improves Soil: Contributes organic matter, which enhances soil structure and moisture retention.
- Reduces Waste: Less debris to bag and dispose of.
Cons:
- Limited Nitrogen Input: The amount of nitrogen provided is relatively small and may not be sufficient for lawns with significant deficiencies or high nitrogen demands.
- Not a Complete Solution: It's unlikely to be enough on its own to achieve deep greening or rapid growth for struggling lawns.
- Thatch Concerns: If clippings are large and thick, they could potentially contribute to thatch buildup if not managed properly.
How to Choose the Right Nitrogen Source for You
Deciding between synthetic, organic, or just mulching your clippings comes down to what you prioritize for your lawn and your willingness to invest time and effort. If you're looking for a quick fix to a pale lawn and have a standard lawn fertilizer spreader, a synthetic option might be your go-to. However, if you're concerned about environmental impact or want to build better soil health for the long haul, organic fertilizers are a fantastic choice.
For many homeowners, a combination approach works best. For example, you might use a slow-release organic fertilizer in the spring and fall for consistent feeding and soil improvement, while also practicing regular mulching throughout the mowing season. This strategy provides a good balance of immediate greening, long-term health, and environmental responsibility. Your choice will ultimately depend on your budget, your time, and your specific gardening philosophy.
Decision Guide: Synthetic vs. Organic vs. Mulching
| Feature | Synthetic Fertilizer | Organic Fertilizer | Mulching Grass Clippings |
|---|---|---|---|
| Primary Goal | Fast greening, quick nutrient boost | Long-term soil health, sustained feeding, gentle feeding | Supplementing nutrients, organic matter addition, waste reduction |
| Release Rate | Quick-release (days) to Slow-release (weeks/months) | Slow-release (weeks/months) | Slow (as clippings decompose) |
| Green Up | Very fast (quick-release), moderate (slow-release) | Moderate, gradual | Minimal, gradual |
| Soil Impact | Minimal to none; can contribute to salt buildup | Improves structure, water retention, feeds microbes | Adds organic matter |
| Burn Risk | High (quick-release), moderate (slow-release) | Very low | Extremely low |
| Application | Spreader; must be watered in | Spreader; generally watered in | Integral to mowing |
| Cost | Often lower upfront per lb of nutrient | Can be higher upfront per lb of nutrient | Free |
| Best For | Quick visual improvement, addressing immediate deficiency | Building soil health, sustainable care, low-risk feeding | Maintaining established lawns, supplementing other methods |
Getting Started: Steps for Applying Nitrogen
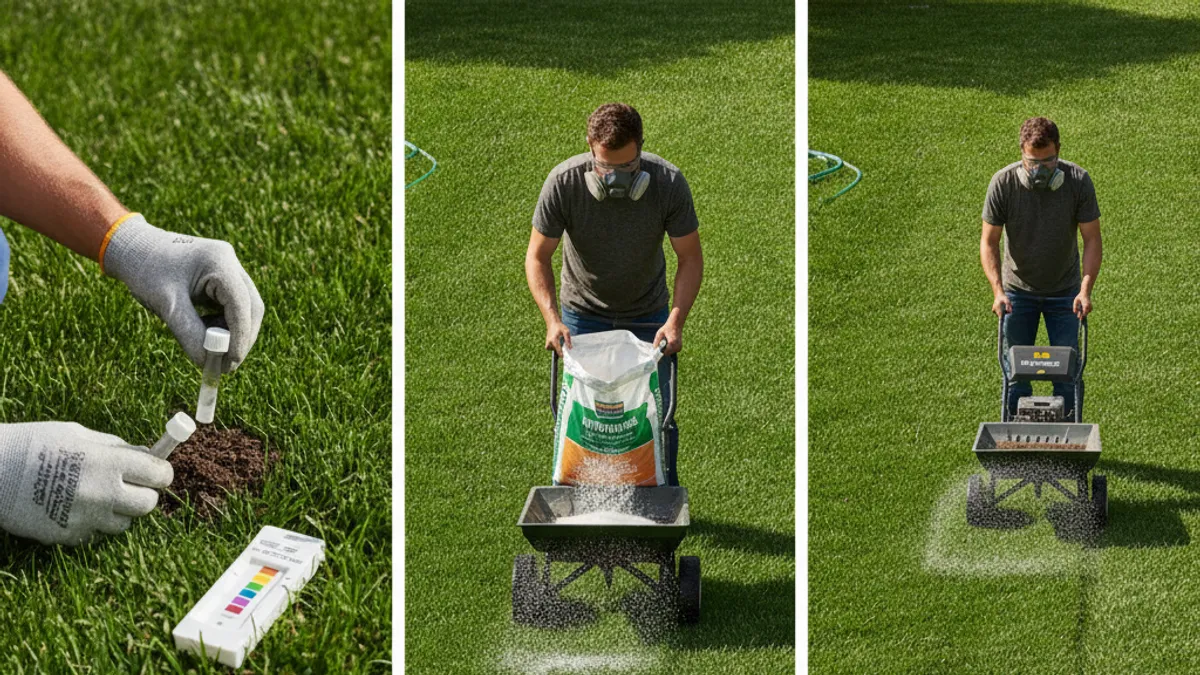
Once you've decided on your nitrogen source, whether it's a synthetic granular fertilizer, an organic amendment, or even just preparing to mulch your clippings, the application process is fairly straightforward. However, following these steps carefully helps ensure you get the best results and avoid common pitfalls.
Preparing for Application
Before you grab your spreader or bag of fertilizer, take a moment to prepare. First, ensure your lawn is in a suitable condition. For granular fertilizers, it's best to apply them when the grass blades are dry, as this helps prevent the fertilizer from sticking to the blades and causing burn. If your lawn is already wet from dew or recent rain, wait for it to dry.
Next, check the weather forecast. If heavy rain is expected within 24-48 hours, postpone your application. Excessive rain can wash the fertilizer away before it has a chance to benefit the grass, potentially leading to nutrient runoff into storm drains or local waterways. However, a light rain or watering after application is usually beneficial to help dissolve and move the nutrients into the soil.
Finally, if you're using a granular product, make sure your spreader is calibrated correctly. Different fertilizers have different densities and granule sizes, so what worked for one product might not work for another. Refer to the fertilizer bag for specific spreader settings or consult your spreader's manual. An improperly calibrated spreader can lead to over-application in some areas and under-application in others, resulting in uneven growth and color.
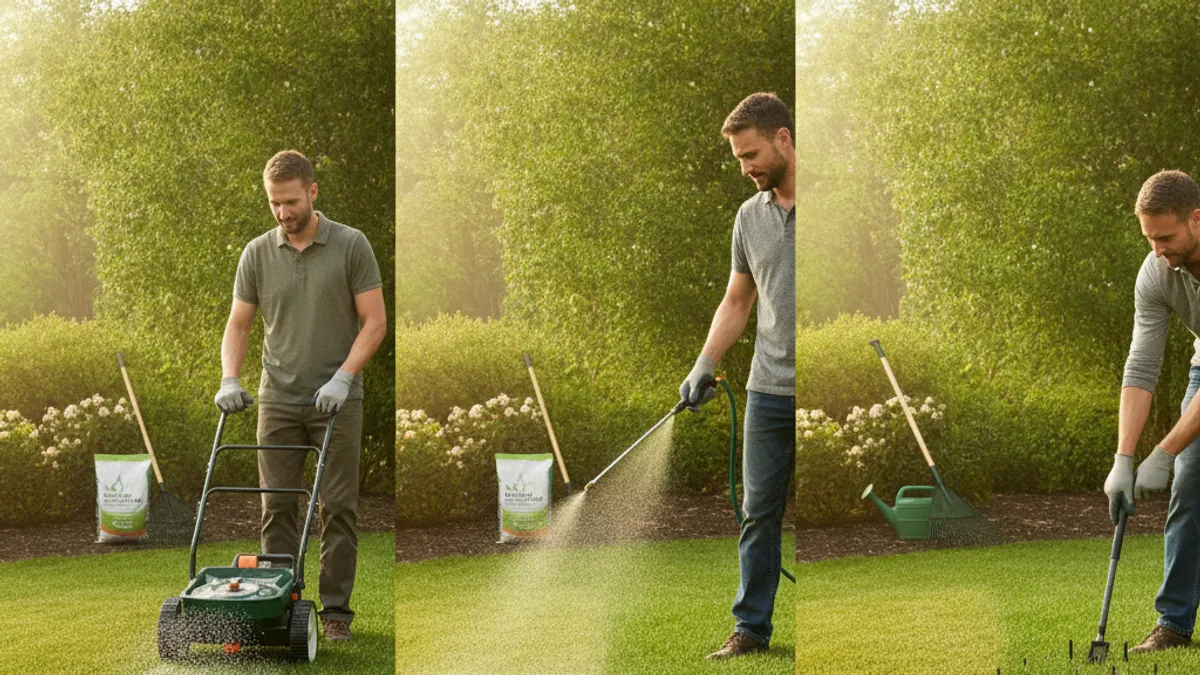
Applying Your Chosen Nitrogen Source (Step-by-Step)
Here’s a general process for applying granular fertilizers (both synthetic and organic), which are the most common forms for lawn nitrogen application.
- Measure Your Lawn: Know the square footage of the area you need to fertilize. This is crucial for calculating the correct amount of product to use. You can estimate this by splitting your lawn into rectangular sections and summing their areas.
- Read the Fertilizer Label: This is the most important step. The label will state the recommended application rate, usually in pounds of product per 1,000 square feet. It will also specify the bag’s N-P-K analysis, so you can calculate how much actual nitrogen you're applying. For example, if a bag of 20-0-0 fertilizer weighs 50 lbs and covers 10,000 sq ft, it contains 20% nitrogen, meaning 10 lbs of actual nitrogen per bag. If the recommendation is 1 lb of nitrogen per 1,000 sq ft, you'd need 10 lbs of this product for 1,000 sq ft.
- Load Your Spreader: Fill your calibrated spreader with the measured amount of fertilizer. It's often easier to partially fill it, apply to a section of your lawn, and then refill as needed to avoid spills.
- Apply Evenly: Start by walking around the perimeter of your lawn with the spreader shut off. Then, begin applying the fertilizer in overlapping passes, either in a back-and-forth pattern or in a circular motion, depending on your spreader type. Ensure even coverage to prevent streaks of darker green or burnt patches. Shut off the spreader when you reach the edges of your lawn or turn to avoid over-applying to sidewalks, driveways, or garden beds.
- Clean Up Spills: Immediately sweep or blow any fertilizer granules that land on hard surfaces back onto the lawn. Fertilizer left on concrete can be washed into storm drains.
If you're using a liquid fertilizer, follow the dilution instructions on the product label carefully and apply using a hose-end sprayer or a pump sprayer. Ensure uniform coverage. If you're simply mulching, continue mowing as usual, ensuring the mower is set to mulch.
Watering In Your Fertilizer
For granular fertilizers (both synthetic and organic), watering them in after application is a critical step that many people overlook. The primary reason for watering is to help dissolve the fertilizer granules. This process helps them move through the thatch layer of your lawn and reach the soil where the grass roots can absorb the nutrients effectively. If left on the surface, especially quick-release synthetics, granules can be more prone to causing "fertilizer burn" by scorching the grass blades they sit on.
A light to moderate watering of about 1/4 to 1/2 inch is typically sufficient. You want to moisten the soil deeply enough to dissolve the fertilizer but not so much that you cause significant runoff. If rain is expected within a day or two, it can serve the same purpose, provided it’s not a downpour that could wash the product away. For liquid fertilizers, they are often diluted to be absorbed directly with minimal need for further watering unless the label specifies otherwise.
Mulched grass clippings require no additional watering beyond your normal lawn care routine.
Common Mistakes When Adding Nitrogen to Your Lawn
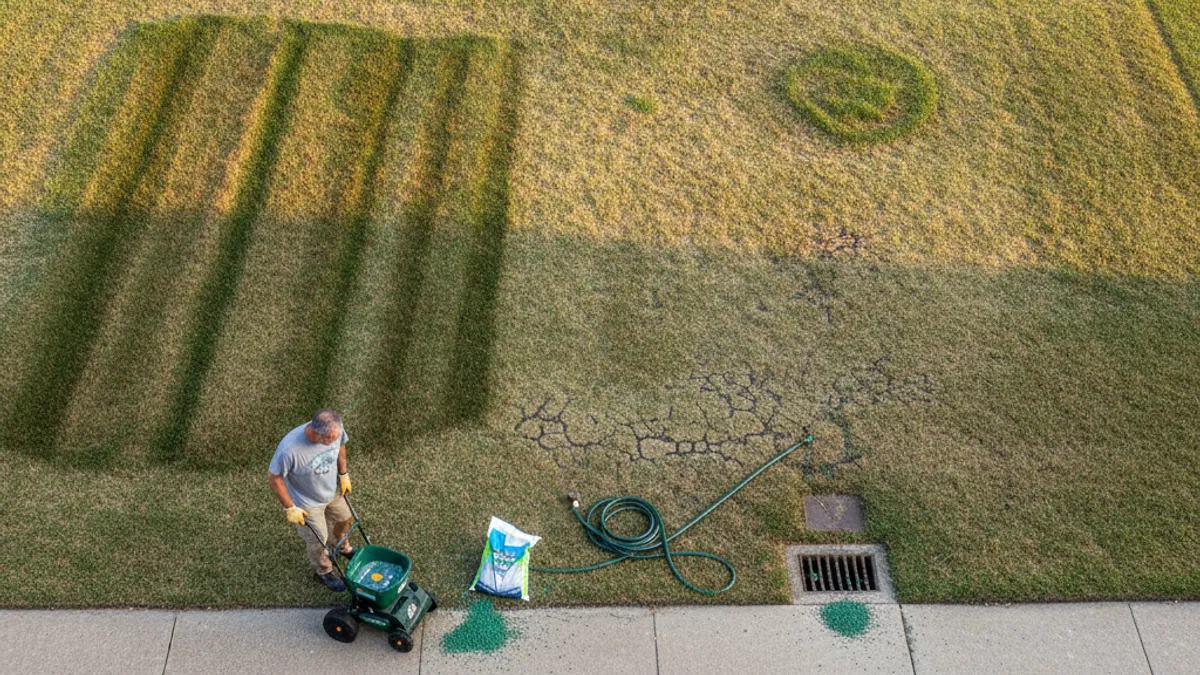
Even with the best intentions, it's easy to make mistakes when fertilizing your lawn. Understanding these common errors can save you from potential damage and wasted effort. One of the most frequent missteps is over-application. This happens when you use too much product, either because you didn't measure your lawn correctly, didn't calibrate your spreader, or simply tried to "give it extra." Overdoing it is a primary cause of fertilizer burn, where the excess salts in the fertilizer draw moisture from the grass blades, causing them to dry out and turn brown.
Another significant mistake is fertilizing at the wrong time. Applying nitrogen during the peak heat of summer can stress a lawn that's already struggling with the temperature, while fertilizing dormant grass in winter is largely a waste of product and money. Incorrect application is also common; failing to water in granular fertilizer can leave it sitting on the grass blades, increasing burn risk, and applying it near water bodies without precautions can lead to environmental contamination. Finally, not reading the product label is a universal error that leads to all sorts of other problems, from incorrect dosages to understanding the specific type of nitrogen you’re using.
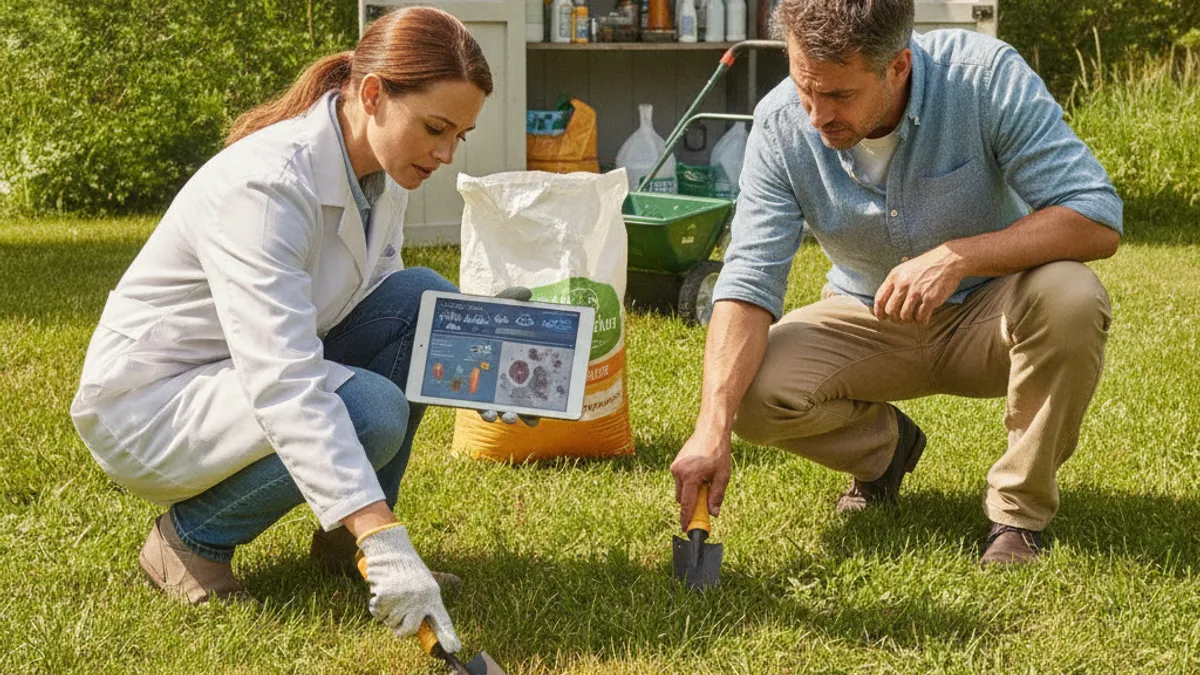
When to Seek Expert Advice for Lawn Nutrition

While many lawn care tasks are manageable for the average homeowner, there are times when seeking professional guidance is the smartest move. If you've followed the steps, used good judgment, and still find your lawn struggling with poor color, thinning, or unusual growth patterns, it's time to call in an expert. A professional lawn care service or a local university extension office can provide more advanced diagnostics, such as a detailed soil test that goes beyond basic nutrient levels to analyze pH, organic matter content, and even the presence of soil-borne diseases.
Furthermore, if you're dealing with recurring problems like persistent weeds, fungal diseases, or insect infestations that seem linked to your lawn's health, an expert can help identify the root cause, which is often related to improper nutrient balance or soil conditions. They have the knowledge and specialized equipment to diagnose complex issues and recommend tailored solutions, whether that involves precise fertilization programs, advanced soil amendments, or specific treatment plans that go beyond general lawn care advice. This is especially true if your lawn has unique challenges, like being established on poor soil or recovering from a specific stress event.
Common Mistakes When Adding Nitrogen to Your Lawn
Even with the best intentions, it's easy to make mistakes when fertilizing your lawn. Understanding these common errors can save you from potential damage and wasted effort. One of the most frequent missteps is over-application. This happens when you use too much product, either because you didn't measure your lawn correctly, didn't calibrate your spreader, or simply tried to "give it extra." Overdoing it is a primary cause of fertilizer burn, where the excess salts in the fertilizer draw moisture from the grass blades, causing them to dry out and turn brown.
Another significant mistake is fertilizing at the wrong time. Applying nitrogen during the peak heat of summer can stress a lawn that's already struggling with the temperature, while fertilizing dormant grass in winter is largely a waste of product and money. Incorrect application is also common; failing to water in granular fertilizer can leave it sitting on the grass blades, increasing burn risk, and applying it near water bodies without precautions can lead to environmental contamination. Finally, not reading the product label is a universal error that leads to all sorts of other problems, from incorrect dosages to understanding the specific type of nitrogen you’re using.
When to Seek Expert Advice for Lawn Nutrition
While many lawn care tasks are manageable for the average homeowner, there are times when seeking professional guidance is the smartest move. If you've followed the steps, used good judgment, and still find your lawn struggling with poor color, thinning, or unusual growth patterns, it's time to call in an expert. A professional lawn care service or a local university extension office can provide more advanced diagnostics, such as a detailed soil test that goes beyond basic nutrient levels to analyze pH, organic matter content, and even the presence of soil-borne diseases.
Furthermore, if you're dealing with recurring problems like persistent weeds, fungal diseases, or insect infestations that seem linked to your lawn's health, an expert can help identify the root cause, which is often related to improper nutrient balance or soil conditions. They have the knowledge and specialized equipment to diagnose complex issues and recommend tailored solutions, whether that involves precise fertilization programs, advanced soil amendments, or specific treatment plans that go beyond general lawn care advice. This is especially true if your lawn has unique challenges, like being established on poor soil or recovering from a specific stress event.
Is My Lawn's Problem Just a Lack of Nitrogen?
If your lawn is consistently pale, yellow, or just not growing vigorously, especially after the initial spring surge, it's a very strong possibility that nitrogen is the missing ingredient. You'll often see a uniform lack of color across the whole lawn, rather than specific spots or patches of disease or weed infestation. Slow growth is another major clue; if your grass isn't producing much thatch or isn't needing frequent mowing, it's likely hungry for nitrogen. However, if you see irregular brown patches, signs of insect damage, or distinct weed clusters, the problem might be more complex than just a simple nitrogen deficiency.
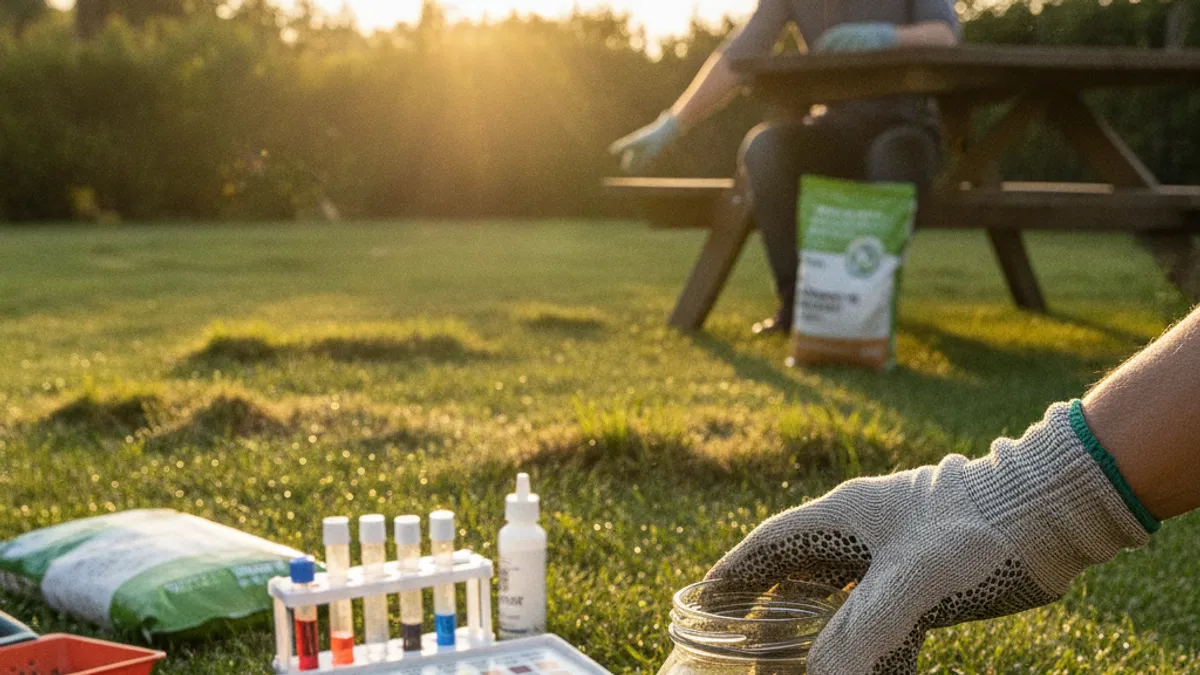
When Are Soil Tests Truly Necessary?
A soil test is your lawn's personal nutritionist report. You might truly need one if your lawn has consistently failed to respond to fertilization, if you suspect a specific nutrient deficiency (beyond just nitrogen), or if you're experiencing persistent issues like poor pH that affect nutrient uptake. Also, if you're planning a major lawn renovation or are new to a property and unsure of its history, a comprehensive soil test gives you a baseline for success. Manufacturer specifications for many fertilizer products often recommend a soil test before applying any amendments to ensure you're providing what the grass actually needs.
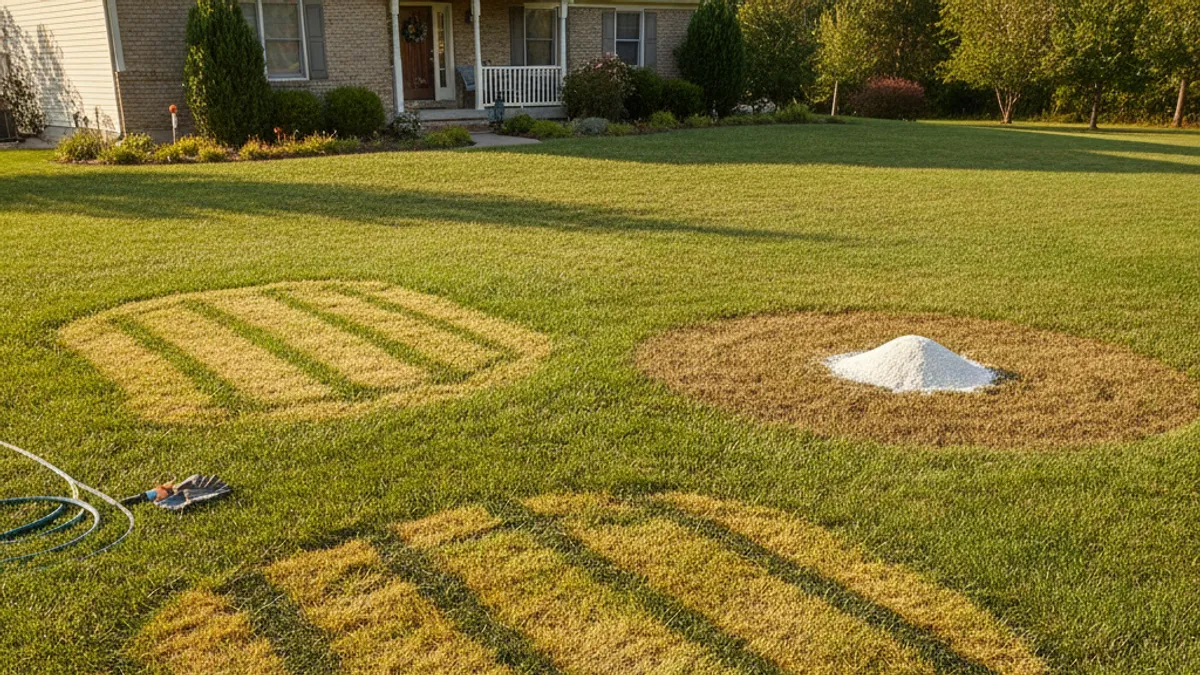
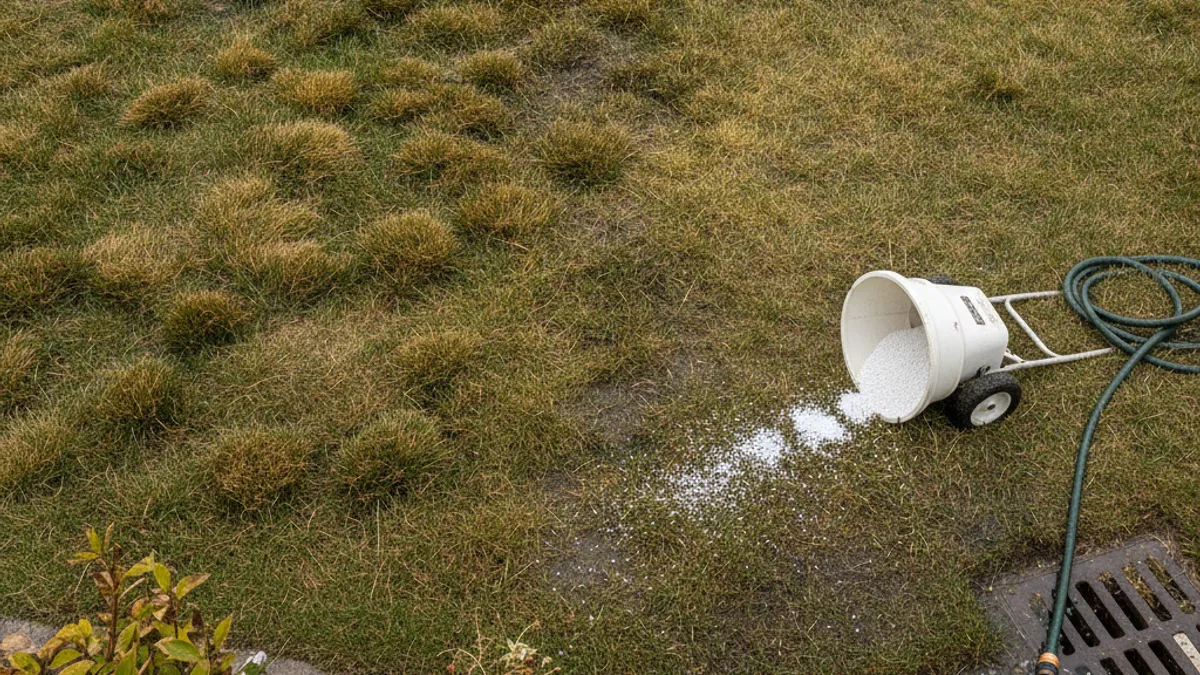
What Kind of Problems Can Too Much Nitrogen Cause?
Applying too much nitrogen to your lawn is a common and damaging mistake. The most immediate problem is fertilizer burn, where the high salt concentration in the fertilizer actually desiccates the grass blades, turning them brown and crispy. Beyond visible burn, excessive nitrogen can lead to a surge of rapid, lush top growth that requires much more water and can make the grass weaker and more susceptible to diseases like brown patch or dollar spot, as well as insect pests. It can also promote excessive thatch buildup when the grass grows faster than it can decompose.
Is My Lawn's Problem Just a Lack of Nitrogen?
If your lawn is consistently pale, yellow, or just not growing vigorously, especially after the initial spring surge, it's a very strong possibility that nitrogen is the missing ingredient. You'll often see a uniform lack of color across the whole lawn, rather than specific spots or patches of disease or weed infestation. Slow growth is another major clue; if your grass isn't producing much thatch or isn't needing frequent mowing, it's likely hungry for nitrogen. However, if you see irregular brown patches, signs of insect damage, or distinct weed clusters, the problem might be more complex than just a simple nitrogen deficiency.
When Are Soil Tests Truly Necessary?
A soil test is your lawn's personal nutritionist report. You might truly need one if your lawn has consistently failed to respond to fertilization, if you suspect a specific nutrient deficiency (beyond just nitrogen), or if you're experiencing persistent issues like poor pH that affect nutrient uptake. Also, if you're planning a major lawn renovation or are new to a property and unsure of its history, a comprehensive soil test gives you a baseline for success. Manufacturer specifications for many fertilizer products often recommend a soil test before applying any amendments to ensure you're providing what the grass actually needs.
What Kind of Problems Can Too Much Nitrogen Cause?
Applying too much nitrogen to your lawn is a common and damaging mistake. The most immediate problem is fertilizer burn, where the high salt concentration in the fertilizer actually desiccates the grass blades, turning them brown and crispy. Beyond visible burn, excessive nitrogen can lead to a surge of rapid, lush top growth that requires much more water and can make the grass weaker and more susceptible to diseases like brown patch or dollar spot, as well as insect pests. It can also promote excessive thatch buildup when the grass grows faster than it can decompose.
What Does a Soil Test Actually Tell Me?
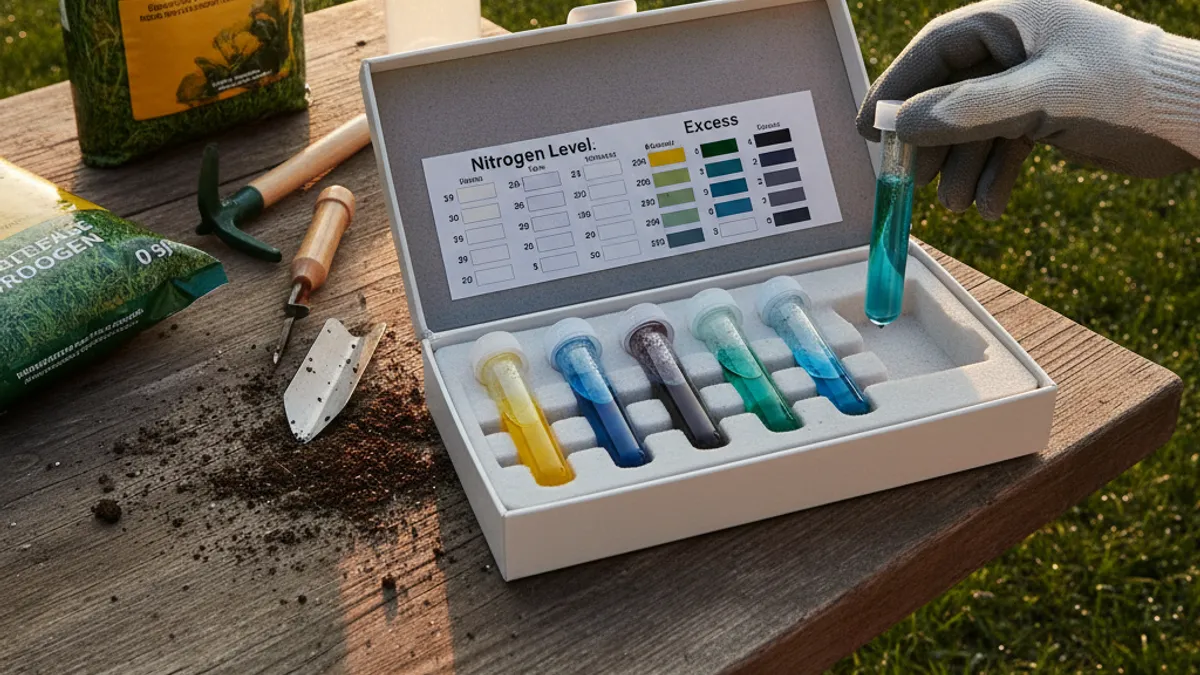
A soil test provides a detailed analysis of your soil's composition, offering insights that go beyond just knowing if nitrogen is low. It will report on the levels of key macronutrients like phosphorus (P) and potassium (K), as well as micronutrients that are vital for healthy plant function. Critically, it also measures your soil’s pH level. The pH dictates how well plants can absorb available nutrients; if the pH is too high or too low, your grass might not be able to access nitrogen or other nutrients even if they are present in the soil.
Some tests also assess organic matter content, which is fundamental for soil structure and fertility.
Key Components of a Soil Test Report
- Macronutrient Levels: Measures of Nitrogen (N), Phosphorus (P), and Potassium (K).
- Micronutrient Levels: Assesses trace elements like iron, manganese, zinc, etc.
- pH Level: Indicates soil acidity or alkalinity, crucial for nutrient availability.
- Organic Matter Content: Shows how much decomposed plant and animal material is in the soil.
- Cation Exchange Capacity (CEC): A measure of the soil's ability to hold onto positively charged nutrients.
How Often Should I Test My Soil?
How often you should test your soil depends on your lawn's condition and your specific goals. For ongoing lawn maintenance, testing once every 1-3 years is generally sufficient for most established lawns. If you're experiencing persistent problems, have made significant amendments, or are planning major lawn changes like overseeding or sod installation, a test might be warranted more frequently, perhaps annually, to monitor progress and make necessary adjustments. A soil test report from a reputable source like a university extension service will usually come with recommendations on how often to retest based on your initial results and the types of plants you're growing.
Manufacturers of certain specialty fertilizers might also suggest testing frequencies to optimize their product’s effectiveness.