To clean your Honda lawn mower’s carburetor quickly, start by removing the carburetor from the mower, then disassemble it and soak the parts in a carburetor cleaner. Use a small brush or compressed air to clear any blockages, reassemble, and reinstall. This simple process can restore your mower’s performance swiftly.
If your Honda lawn mower isn’t starting or running smoothly, a clogged carburetor might be the culprit. Cleaning it involves carefully removing the carburetor, cleaning out dirt and varnish from the jets and passages, and ensuring everything is free-flowing. With a few basic tools and some patience, you can tackle this maintenance task and get your mower back to peak performance. Regular cleaning helps prevent future issues and keeps your mower running efficiently all season long.
When your Honda lawn mower begins to sputter, stall, or refuse to start, it’s often due to a dirty or blocked carburetor. This vital component mixes air and fuel for the engine, but over time, varnish, dirt, and debris can clog its tiny passages. Luckily, cleaning the carburetor isn’t complicated and can be done at home with some basic tools and supplies. Pick a warm, well-ventilated space, gather your supplies, and follow a step-by-step process to remove, disassemble, clean, and reassemble the carburetor. Regular maintenance ensures your mower performs efficiently and helps avoid costly repairs down the line.

How to Clean Carburetor Lawn Mower Honda
Understanding the Importance of Carburetor Cleaning
A clean carburetor is essential for your Honda lawn mower to run smoothly. Over time, dirt, debris, and fuel deposits can clog its tiny passages. This clogging causes issues like hard starting, stalling, or poor engine performance. Regular cleaning prevents these problems and extends the life of your mower.
Signs Your Honda Lawn Mower Carburetor Needs Cleaning
Indicators that your carburetor requires cleaning include:
- Difficulty starting the mower
- Engine stalls during operation
- Reduced power or speed
- Engine runs unevenly or roughly
- Black smoke from the exhaust
If you notice these symptoms, it’s time to inspect and clean the carburetor.
Tools and Materials Needed for Cleaning
Preparing the right tools makes the process easier. You’ll need:
- Replacement gaskets and seals
- Carburetor cleaner spray
- Screwdrivers (Phillips and flat-head)
- Wrenches or socket set
- Needle or small wire brushes
- Clean cloths or rags
- Container for soaking parts
Ensure you have these items ready before starting the cleaning process.
Safety Precautions Before Starting
Before you begin, make sure the mower is turned off and cooled down. Disconnect the spark plug wire to prevent accidental starting. Work in a well-ventilated area and wear gloves and eye protection for safety.
Step-by-Step Guide to Cleaning the Honda Lawn Mower Carburetor
1. Remove the Air Filter and Cover
Start by taking off the air filter cover. Remove the air filter carefully to access the carburetor. A dirty or clogged air filter can affect engine performance.
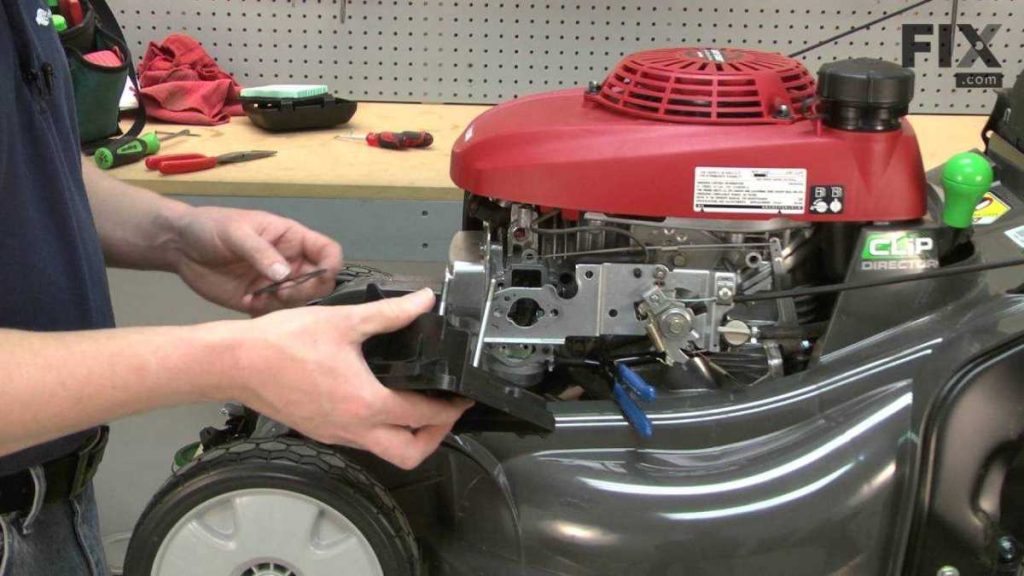
2. Detach the Carburetor
Locate the carburetor, which is usually attached to the intake manifold. Use screwdrivers or wrenches to disconnect the mounting bolts. Be cautious not to damage the gasket.
3. Drain Fuel from the Carburetor
Before disassembly, drain any remaining fuel from the carburetor bowl. Carefully remove the bowl drain screw and allow the fuel to flow into a container. Dispose of the fuel safely.
4. Disassemble the Carburetor
Remove the top cover and float assembly. Take note of how parts fit together for reassembly. Carefully remove the jets and other small components for cleaning.
5. Clean the Components
Spray carburetor cleaner generously into all passages, jets, and the float bowl. Use small brushes or needles to clear any stubborn deposits. Never scratch or damage delicate parts.
6. Soak Parts if Necessary
For tough grime, soak small parts in a container filled with carburetor cleaner for about 15-20 minutes. Rinse with water if recommended by the cleaner’s instructions and dry thoroughly.
7. Check and Replace Worn Parts
Inspect gaskets, seals, and the float for damage or wear. Replace any parts that show cracks or deterioration to prevent future problems.
8. Reassemble the Carburetor
After cleaning and inspection, put the carburetor back together in reverse order. Ensure all screws and bolts are tightened securely but not overly tight.
9. Reinstall the Carburetor and Air Filter
Attach the carburetor to the intake manifold, replace the gasket if needed, and secure it with screws. Reinstall the air filter and cover.
10. Add Fuel and Test Run
Reconnect the spark plug wire. Add fresh fuel to the tank. Start the mower and observe its performance. Adjust the choke or throttle if necessary for smooth operation.
Tips for Maintaining a Clean Carburetor
Regular maintenance helps keep your carburetor in top shape. Use fresh fuel and add fuel stabilizer if storing the mower for long periods. Clean or replace air filters often and avoid running the mower on low fuel to prevent varnish buildup.
Common Mistakes to Avoid
Avoid forcing jets or small parts during cleaning, as this can cause damage. Do not neglect replacing old gaskets, which can cause leaks and poor performance. Always follow manufacturer guidelines for your specific Honda mower model.
Additional Tips for Top-Notch Lawn Mower Performance
Regularly inspect and clean the entire fuel system, including the fuel lines and filter. Keep the carburetor neat and free of dirt to ensure optimal airflow. Proper storage during winter also helps prevent issues caused by fuel degradation.
Related Topics to Consider
- How to Adjust a Honda Lawn Mower Carburetor
- Best Fuel for Lawn Mowers and How to Use It
- Replacing Spark Plugs in Honda Lawn Mowers
- Preventive Maintenance Tips for Lawn Mowers
Following these detailed steps and tips ensures your Honda lawn mower runs smoothly and efficiently. Regular cleaning and maintenance of the carburetor save you money and time in the long run, keeping your mower ready for every yard work session.
HOW TO CLEAN A HONDA HRN216VKA CARBURETOR FOR BEGINNERS
Frequently Asked Questions
What are the signs indicating my Honda lawn mower’s carburetor needs cleaning?
If your mower is experiencing difficulty starting, sputtering during operation, or inconsistent engine performance, it may be time to clean the carburetor. Additionally, if you notice black smoke from the exhaust or the engine stalls frequently, these can also signal clogging or dirt buildup in the carburetor.
What tools and supplies should I gather before cleaning the carburetor?
Prepare a flat-head screwdriver, needle-nose pliers, carburetor cleaner spray, a small brush, clean rags, and safety gloves. It’s also helpful to have a carburetor gasket kit if you plan to replace any worn seals or gaskets during the cleaning process. Ensuring all tools are readily available helps you work efficiently and avoid interruptions.
Can I clean my Honda lawn mower’s carburetor without removing it from the engine?
While it is possible to clean the carburetor without detaching it, removing it allows easier access for thorough cleaning. Removing the carburetor involves disconnecting fuel lines and linkages carefully, which helps prevent damage. Once detached, you can clean all parts more effectively, ensuring better engine performance afterward.
What are the steps to prevent future carburetor issues after cleaning?
Regularly check and replace the fuel filter to prevent debris from entering the carburetor. Use fresh, stabilized fuel and avoid letting the mower sit unused for extended periods. Clean the air filter frequently to ensure proper airflow, and perform routine inspections to catch potential problems early. These practices help maintain clean fuel delivery and engine longevity.
What precautions should I take during the carburetor cleaning process?
Always work in a well-ventilated area and wear protective gloves to avoid contact with fuel and cleaning chemicals. Make sure the engine is off and cool before starting. Handle small parts carefully to prevent losing any components. Properly dispose of used cleaning solution and fuel residues according to local regulations to ensure safety and environmental care.
Final Thoughts
To clean the carburetor of your Honda lawn mower, start by removing the air filter and disconnecting the spark plug for safety. Drain any fuel and take out the carburetor from the engine. Use carburetor cleaner spray to remove dirt and deposits, making sure to clean all jets and passages thoroughly. Reassemble the parts carefully, ensuring everything is properly fitted.
In summary, knowing how to clean carburetor lawn mower Honda helps maintain optimal performance. Regular cleaning prevents issues and prolongs your mower’s lifespan.