If you're searching "how do I clean the gas cap on my lawn mower?" your engine probably died mid-mow. It started fine, ran strong, then sputtered out. The culprit usually isn't the carburetor.
It's a clogged vent hole hidden inside the cap itself.
There's a reason this happens every spring. Pump gas containing 10% ethanol can start forming gum deposits within about 30 days, per Outdoor Power Equipment Institute fuel guidance. That varnish plugs the cap's pin-sized breather.
Cleaning takes about 15 minutes with dish soap and a straight pin, so let's confirm the cap is really your problem first.
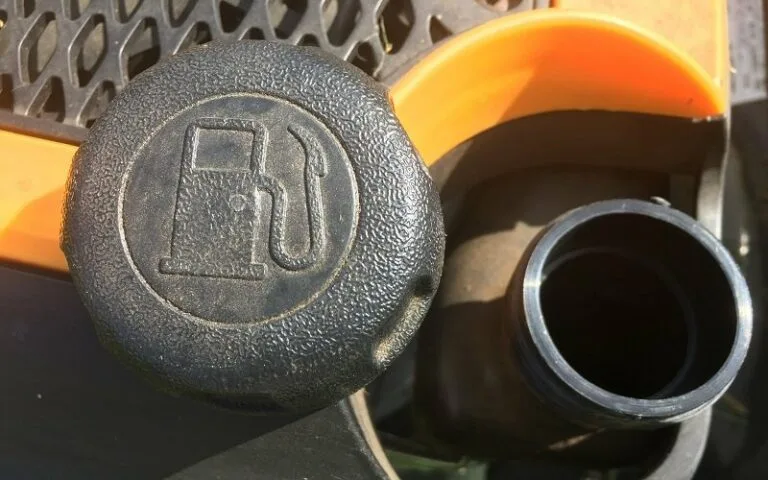
Quick Answer: Clean or Replace in 15 Minutes
Cleaning a lawn mower gas cap takes about 15 minutes. Remove the cap once the engine is cool. Wash it in warm soapy water with a soft brush.
Clear the tiny vent hole using a pin or thin wire. Rinse, air dry completely, then reinstall hand-tight.
Skip the cleaning and buy a replacement if the gasket is cracked or the threads are stripped. New OEM caps run $8 to $25 for most models.
Why Your Mower Dies Mid-Mow: The Gas Cap Nobody Suspects
Small-engine shops hear the same story every week. The mower starts cold and runs strong. Ten or twenty minutes into the cut, it bogs down and quits.
Park it awhile and it fires right back up.
That rest-then-restart cycle is the classic vent signature. While the mower sits, air sneaks past the partial blockage and pressure equalizes. Fuel flows again until the vacuum rebuilds.
People burn real money on this one. They replace spark plugs, fuel filters, even entire carburetors, then stall out anyway. A blocked breather costs nothing to fix, while a carburetor job runs well past $100.
So test the cheap theory first. Fold a quick cap inspection into your yearly mower checklist, especially if you follow a season-by-season feeding plan and mow weekly. Five seconds under the cap beats an afternoon of guesswork.
What's Actually Inside Your Gas Cap (Vent Hole, Gasket, and Baffle)
From the outside, a gas cap looks like a simple plastic lid. Underneath, it's a small engineered assembly with three jobs. It seals the tank, keeps debris out, and lets air in without letting vapor escape.
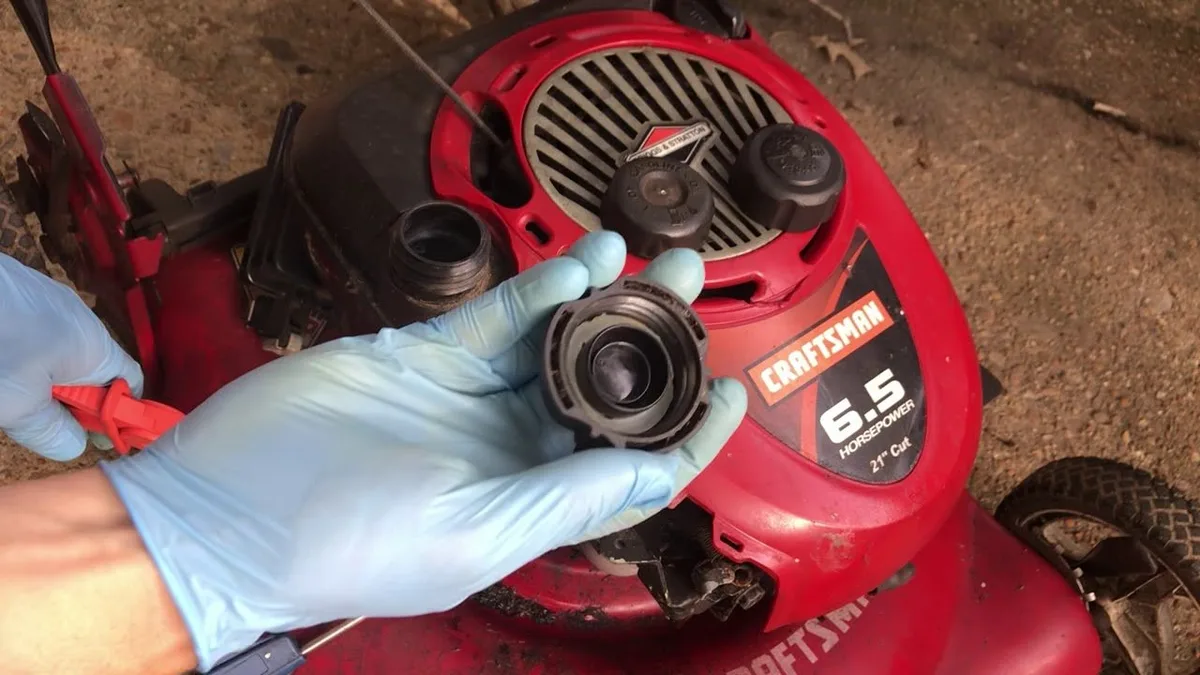
Three parts matter when you're cleaning:
| Part | What it does | How it fails |
|---|---|---|
| Vent hole (roughly 1 mm) | Lets air replace burned fuel | Gum and dust clog it shut |
| Gasket or O-ring | Seals the cap to the filler neck | Hardens, cracks, or flattens |
| Anti-splash baffle | Stops fuel sloshing out the vent | Traps varnish and grit |
Newer caps, especially on emissions-era mowers, often use a one-way valve instead of a drilled hole. Air moves inward only, keeping fuel vapors inside the tank. Tethered caps, the kind that stay attached to the mower, work the same way but flip or twist open on some models rather than unscrewing completely.
Briggs & Stratton's own service literature lists a blocked vent among the first things to inspect when an engine stalls. Knowing which design you have tells you how gently to clean it.
How a Clogged Vent Starves Your Engine
Your engine doesn't pull fuel from the tank on its own. Atmospheric pressure pushes fuel toward the carburetor. As fuel leaves the tank, fresh air has to rush in through that tiny vent to take its place.
Block the vent and a vacuum builds instead.
Vacuum beats gravity, so fuel flow slows, then stops. The carburetor runs lean, the engine surges, and it finally dies. Heat makes it worse because a hot tank adds vapor pressure on top of the vacuum.
That's why the failure takes ten-plus minutes to appear. The vacuum needs time to build. As of 2026, E10 remains the standard pump fuel across most of the U.S., with federal rules allowing up to 10% ethanol in ordinary gasoline.
The gumming problem isn't going away, so the vent deserves a glance every season.
First Test Before You Clean Anything: The Loosen-the-Cap Trick
This two-minute test confirms the diagnosis before you touch a wrench. Run the mower until it starts to sag, then loosen the gas cap one slow turn while the engine idles. Work outdoors and keep the cap away from your face, because trapped pressure can release with a hiss.
Then watch what happens:
- If the engine smooths out within seconds, you've confirmed a clogged vent. Move on to cleaning.
- If you hear air rushing in when you crack the cap loose, the tank was pulling a vacuum. Same conclusion.
- If nothing changes, the cap probably isn't your problem. Check the fuel filter, fuel line, and carburetor bowl next.
Never fully remove a hot cap with the tank full, and keep every ignition source far away. One loosened turn is plenty to equalize pressure. Skipping diagnosis entirely is the expensive mistake here, and the beginner-friendly yard care basics cover the handful of other checks that save money.
Once the vent test points at the cap, cleaning is straightforward.
Decision Point: Dirty Cap, Clogged Vent, Bad Gasket, or Cracked Cap?
Each finding calls for a different response, and inspection takes about two minutes. Hold the cap up to daylight and check the vent, gasket, threads, and underside baffle. Then follow the branch that matches what you see.
Dirty but intact? Wash it
Grass dust and a greasy film on the cap body mean a soap-and-water job. Nothing underneath is damaged. Warm soapy water and a soft brush finish this in ten minutes.
Varnish in the vent? Carb cleaner
An amber, shiny, or sticky plug in that tiny hole is ethanol gum. Soap won't touch hardened varnish. A one-second burst of carburetor cleaner dissolves it without harming the plastic.
Hardened or missing gasket? Replace it
Squeeze the rubber seal with your fingers. A healthy gasket flexes like a fresh eraser. If it feels rock hard, shows cracks, or flakes off, it can't seal anymore, and no amount of cleaning brings it back.
Cracked body or stripped threads? Replace, no debate
Hairline cracks and rounded-over threads are structural failures. Cleaning fixes neither one. Running with a cracked cap lets rainwater pour into the tank, triggering corrosion and phase separation in ethanol fuel.
How to Remove the Cap Safely Without Stripping It
Work outdoors on a cool engine. Hot tanks hold pressure, and hot plastic threads strip far easier. Crack the cap loose one slow turn first so any hiss escapes safely.
Almost every mower cap uses right-hand threads, so turn counterclockwise using palm pressure only. If it's stuck, skip the pliers, because jaws crush plastic caps quickly. Wrap a rubber jar opener around the lid or use a strap wrench for grip instead.
Tethered caps, common on Honda and newer Toro machines, turn the same way but stay attached to the tank. Flip or rotate them as your manual describes. Force is the wrong tool with every design.
Step-by-Step: Washing, Clearing the Vent, and Drying It Right
Start with a low tank, or siphon fuel into an approved container if it's fuller than half. Less fuel means less slosh and less skin exposure. Then run this sequence.
- Wash the whole cap in warm, soapy water with a soft-bristle brush. Regular dish soap cuts grease fine.
- Scrub the underside baffle and the threads, where grit loves to hide.
- Poke the vent gently from both sides using a pin, toothpick, or single wire strand. Push debris out rather than packing it deeper.
- Give the vent a one-second blast of carb cleaner if varnish remains. Let it flash off fully before continuing.
- Rinse everything and shake the water out.
- Air dry for 30 to 60 minutes. Moisture trapped in the vent drips straight into your fuel otherwise.
- Reinstall hand-tight only.
- Run the engine 15 minutes to confirm smooth, steady operation.
That drying window is handy downtime. Knock out blade checks or deck scraping while the cap sits, because those pair well with fuel-system jobs.
When Cleaning Isn't Enough: OEM vs. Aftermarket Replacement Caps
If inspection failed the cap, replacement wins over cleaning every time. Both routes stay cheap, so this choice is easy.
| Factor | OEM cap | Aftermarket cap |
|---|---|---|
| Price | $8 to $25 | $5 to $15 |
| Fit | Exact match by model number | Close match, occasional variance |
| Vent quality | Built to engine spec | Verify on arrival |
| Sold through | Dealers, manufacturer sites | Hardware stores, online |
Order OEM using the model and serial tag on the deck or engine housing. Briggs & Stratton offers an official parts lookup that matches the right cap to your engine in seconds. Brands like Stens and Oregon cover older machines the factories stopped supporting.
Verified buyer feedback flags one recurring aftermarket problem: caps arriving with a sealed or missing vent. Puff air through it before you install anything.
What a Fix Should Cost You (and What It Saves)
Here's the honest math. Cleaning runs $0 to $8, depending on whether you already own a can of carb cleaner. A new OEM cap lands between $8 and $25 shipped.
Now compare the wrong turns people take.
| Path | Typical cost | Result |
|---|---|---|
| Clean the vent | $0 to $8 | Fixes most clogs |
| New OEM cap | $8 to $25 | Fixes clogs plus worn seals |
| Unneeded carb rebuild | $80 to $150+ | Never touches the real problem |
Small-engine shops typically charge $40 to $75 just for a diagnostic bench fee before repairs even start. Fifteen minutes with a pin and some dish soap protects that entire spend. The savings fund nicer things anyway, like a solid DIY fertilizing plan or a fresh set of blades before spring.
Mistakes That Ruin Caps, Tanks, and Mowers
A few well-meaning shortcuts turn a free fix into a bigger repair. These are the errors small-engine techs see most often.
- Drilling the vent larger. A bigger hole invites rainwater and dust straight into the tank. Modern caps also fall under EPA evaporative-emissions rules, so drilling defeats equipment designed to limit vapor.
- Using brake cleaner, acetone, or WD-40 on the cap. Harsh solvents swell or craze plastic. Stick to dish soap or a one-second burst of dedicated carb cleaner.
- Reaming the vent with a drill bit or thick wire. You'll widen the calibrated opening instead of clearing it. A pin or single strand does the job.
- Reinstalling the cap while damp. Trapped moisture drips into the fuel and speeds phase separation in ethanol blends. Respect the full drying window.
- Wrenching the cap down. Hand-tight seals fine. Pliers crack housings and strip threads in one squeeze.
- Ignoring a hardened gasket after successful cleaning. A spotless cap with a brittle seal still leaks vapor and pulls in water.
Every one of these converts a 15-minute job into a tank-flush project. Slow down and the cap comes through fine.
Fuel Safety Rules for Working Around Gasoline
Gasoline vapor ignites easily, and carb cleaner burns even faster. Set the whole job up with that in mind before touching anything.
- Work outdoors on a cool engine, far from sparks, flames, cigarettes, and water-heater pilots. Garages trap vapor, so wheel the mower outside.
- Wear nitrile gloves and safety glasses. Both fuel and solvent irritate skin quickly.
- Siphon with a hand pump only. Never start one by mouth.
- Keep displaced fuel in an approved container with a tight lid, never an open jug.
- Lay solvent-soaked rags flat outside to dry before disposal. Bunched-up rags can build enough heat to self-ignite.
- Take stale fuel to a hazardous-waste drop-off. The EPA's household hazardous waste resources list local collection sites, and drains are always off-limits.
None of this adds real time. It's thirty seconds of setup against a genuinely bad afternoon.
Keep It Clear: Storage Tips So the Vent Doesn't Clog Again
Cleaning fixes today's clog. Storage habits prevent next spring's repeat performance.
- Fill the tank nearly full with stabilized fuel before storage. Less air space means less condensation on the tank walls, and both Honda and Briggs & Stratton manuals recommend this approach.
- Run the engine three to four minutes after adding stabilizer so treated fuel reaches the carburetor bowl.
- Use non-ethanol (E0) fuel for the season's last fill wherever a local station sells it. It resists gum formation far longer than E10.
- Wipe the filler neck before every refill so grit never rides in on the cap threads.
- Glance at the vent during your spring tune-up. A five-second look beats another mystery stall in June.
Pair the cap check with whatever keeps the rest of your yard in shape, and it becomes automatic instead of forgettable.
FAQs: Tethered Caps, Sealed Caps, E10 Gum, and "Can I Drill a Vent?"
Can I drill a bigger vent hole in my gas cap?
No. Modern caps use calibrated vents or one-way valves as part of the evaporative emissions system required by the EPA and California CARB. Drilling enlarges the opening, lets water and dust pour in, and leaves you with a leaky, non-compliant cap.
A $10 replacement solves the clog properly.
How do I clean a tethered gas cap?
Clean it while it hangs attached, because the tether rarely detaches cleanly. Rest a bowl of warm soapy water beneath the cap, scrub with a soft brush, and clear the vent with a pin. Rinse using a damp cloth, then let everything dry fully before snapping it closed.
What if my gas cap is sealed and won't come apart?
Plenty of newer caps are one-piece designs with no removable gasket or internals. You can still wash the outside and clear the top vent opening, but internal varnish stays out of reach. If the loosen-the-cap test confirmed a blockage and surface cleaning fails, order the OEM replacement.
Does ethanol fuel really cause the gum in the vent?
Yes. E10 starts oxidizing within about 30 days and leaves amber varnish behind as it ages. That varnish is exactly what plugs a pin-sized breather.
Non-ethanol fuel and a splash of stabilizer slow the process dramatically between cuts.
How often should I clean the gas cap?
Once a season covers most mowers. Do it at your spring tune-up, or immediately if the engine develops the stall-after-ten-minutes pattern. Frequent refueling in dusty conditions earns the vent a mid-season glance too.
Will a universal aftermarket cap fit my mower?
Sometimes, but verify first. Thread pitch and cap diameter vary across brands, and buyer feedback repeatedly flags listings shipping caps with sealed or missing vents. Match your model and serial number when ordering, then puff air through the new vent before installing it.
The Verdict: Your Clean-vs-Replace Decision Guide
Here's the whole call in one pass.
- If the loosen-the-cap trick revived a stalling engine, clean the vent with soap, a pin, and patience. Total cost lands near zero.
- If the vent clears but the gasket is hard or cracked, order a new cap. Seals don't recover.
- If the housing is cracked or threads are stripped, replace it the same day. Water intrusion costs far more than a $15 part.
- If cleaning and replacement don't stop the stalls, move downstream to the fuel filter, fuel line, and carburetor bowl.
Either way, you've spent fifteen minutes and pocket change protecting a machine that would otherwise land on a shop bench. Handle the cap yourself, or lean on a proven full-season care program if you'd rather not track each task alone. Either route ends with a mower that fires on the first pull all year.