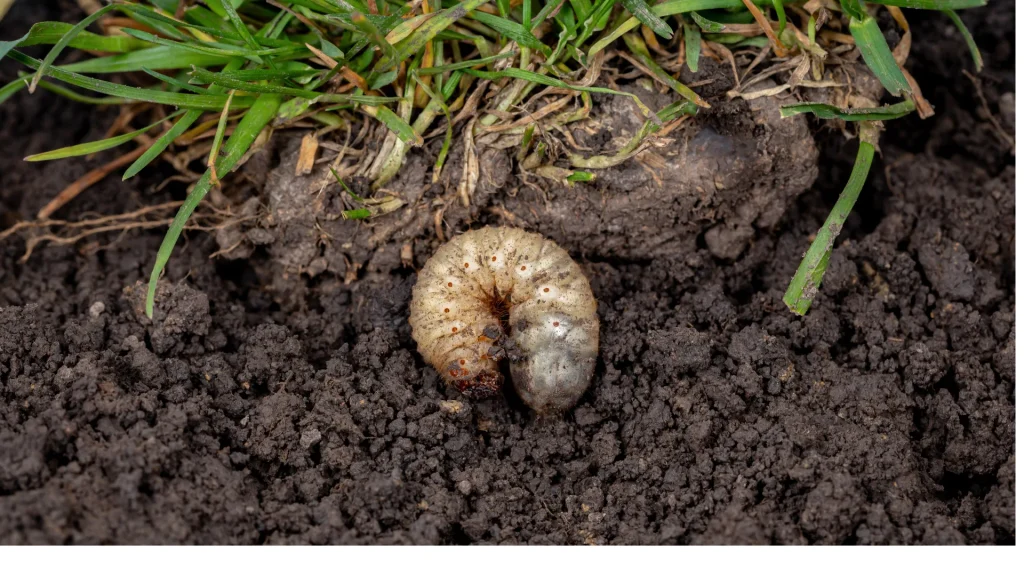
When you're staring at brown patches in your lawn and wondering when is the best time to put down grub killer, the answer isn't a single date on the calendar. It depends on what type of product you're using, what stage the grubs are in right now, and where you live. Get the timing right and one application solves the problem.
Get it wrong and you've wasted money while the grubs keep eating.
The reason timing matters so much comes down to grub biology. White grubs, the larval stage of beetles like Japanese beetles and European chafers, go through a predictable life cycle each year. The window when they're small and vulnerable is narrow, and different products are designed to hit different stages of that cycle.
Soil temperature is the most reliable trigger, with egg hatch typically beginning when soil at a 2 to 4 inch depth reaches around 60°F (15.5°C).
Quick Answer
The best time to put down grub killer depends on your product type. Preventative products go down in late spring to early summer, before eggs hatch. Curative products work best in late summer when grubs are small and actively feeding near the soil surface.
Soil temperature at 60°F signals the start of egg hatch in most regions. Missing either window means reduced effectiveness.
Why Timing Is Everything with Grub Killer
Here's the thing most people miss. Grub killer isn't one-size-fits-all timing. The product you choose dictates when you apply it, not the other way around.
If you grab a preventative product in August, you're already too late. If you apply a curative product in May, it'll break down before the grubs even show up.
Think of it like this. Preventative products work by creating a treated zone in the soil that kills grubs shortly after they hatch. They need to be in place and active before those tiny larvae start feeding.
Curative products, on the other hand, are designed to kill grubs that are already there and actively damaging your lawn. They work fast but don't last long in the soil.
The cost of bad timing is real. You'll spend the same money on the product either way, but mistimed applications often lead to visible lawn damage, costly renovation, and a second round of treatment. In our research, aggregate user reviews consistently show that people who matched their product type to the correct seasonal window reported significantly better results than those who applied on a fixed calendar date without checking grub stage.
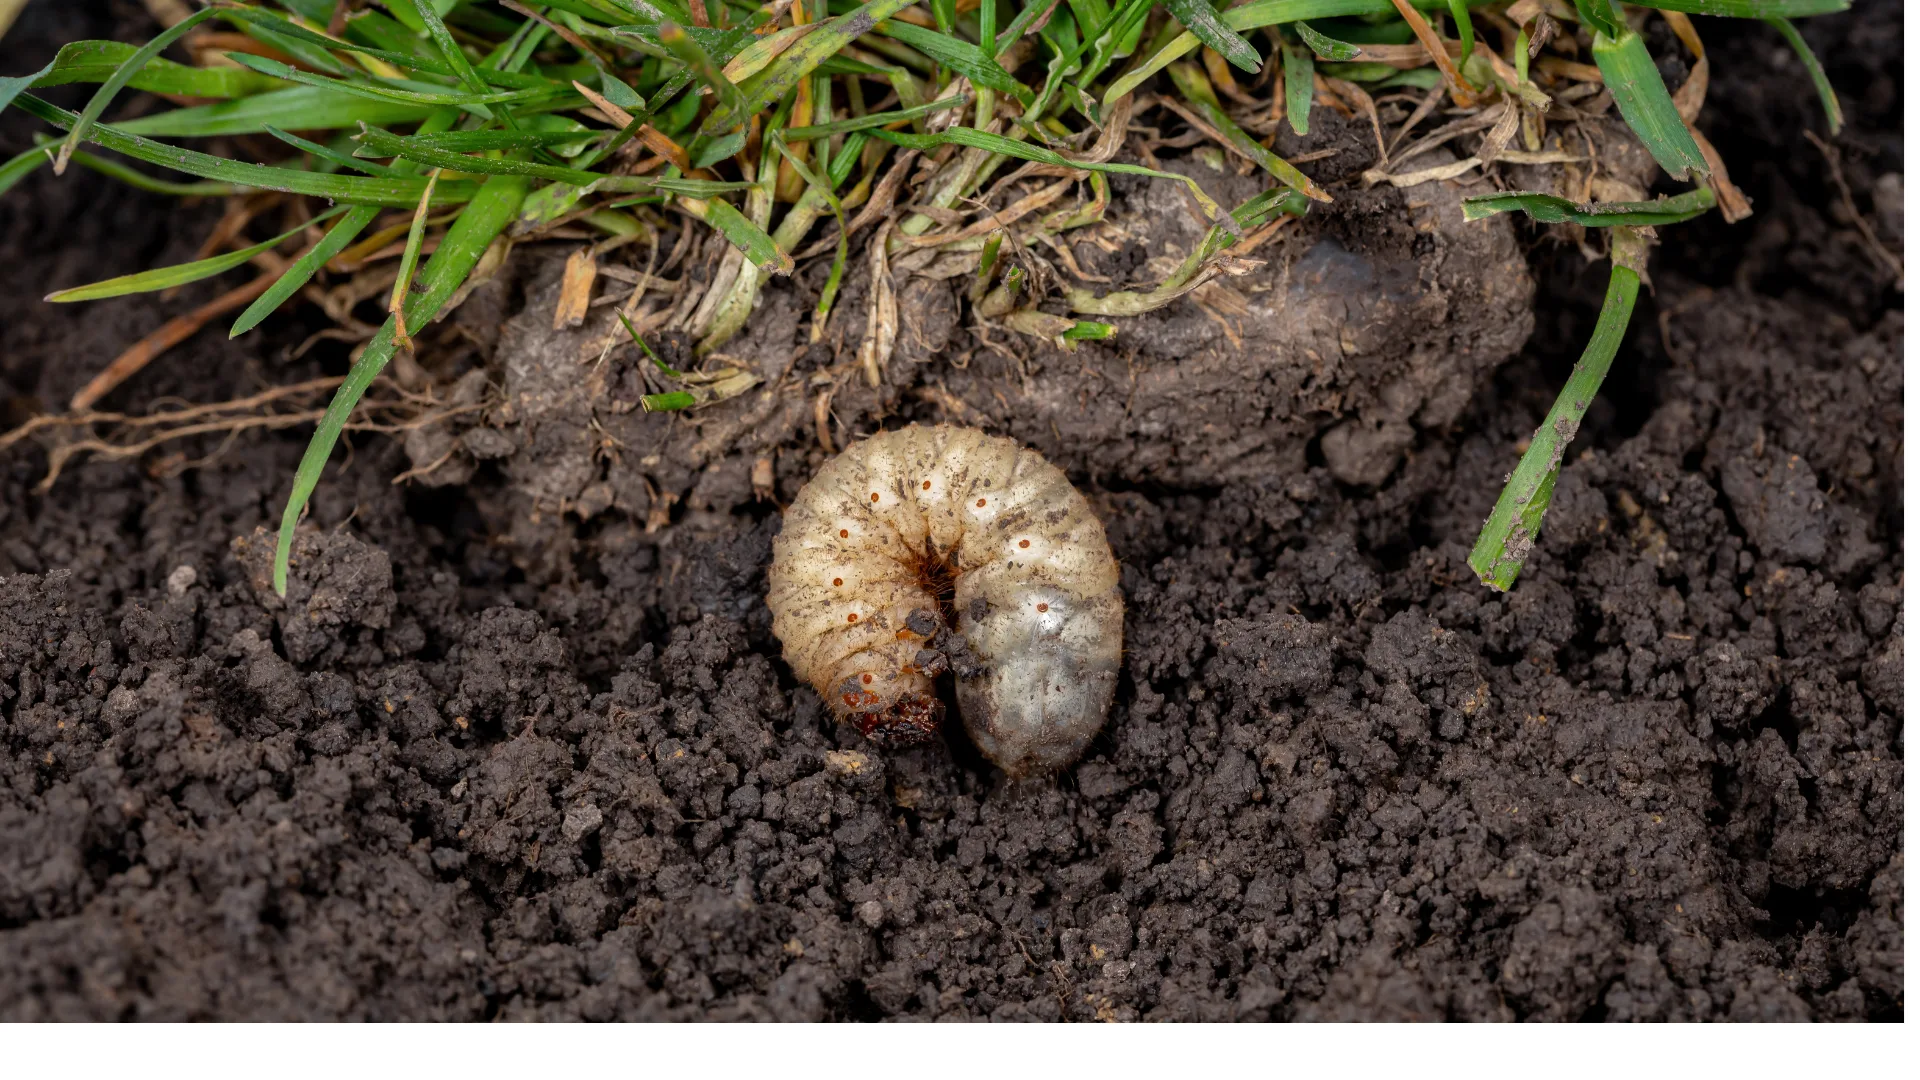
Image source: Bing (Web (fair-use with source credit))
How the Grub Life Cycle Determines Your Application Timing
Understanding the grub life cycle is the foundation of getting your timing right. White grubs aren't just randomly appearing in your lawn. They follow a predictable annual pattern driven by soil temperature and beetle activity.
Adult beetles emerge from the soil in late spring to early summer. Japanese beetles typically start flying in June across the northern US, while in the southern states this can begin as early as May. European chafers follow a similar pattern, often peaking a week or two earlier than Japanese beetles in the same region.
Once above ground, adult beetles feed on ornamental plants, mate, and then females burrow back into the soil to lay eggs. This egg-laying period is your trigger point. Eggs hatch within about two weeks, and the tiny first-instar grubs begin feeding on grass roots.
This is the stage you want to hit with preventative products.
The grubs go through three growth stages, called instars. First instars are tiny, under a quarter inch, and relatively easy to kill. By the third instar, usually reached by mid to late summer, they're half an inch or larger and doing the most root damage.
This is when curative products need to go down, while grubs are still small enough to control effectively.
As soil temperatures drop in fall, grubs burrow deeper into the soil to overwinter. They become harder to reach with any product at this stage. They return to the root zone the following spring for a final feeding period before pupating and emerging as adults, completing the cycle.
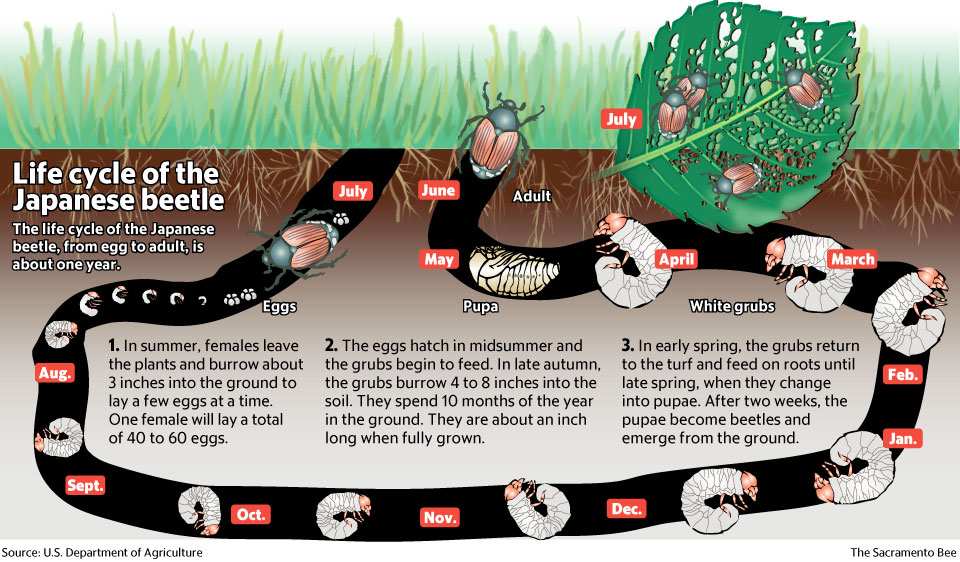
Image source: Bing (Web (fair-use with source credit))
The Two Main Types of Grub Products and When Each Works
Grub control products fall into two distinct categories, and each one has its own application window. Choosing the right category for your situation is the single most important decision you'll make.
Preventative Products (Chlorantraniliprole / IGRs) — Early Season Window
Preventative grub killers are designed to be applied before or just as eggs are hatching. They create a residual barrier in the soil that kills young grubs during their most vulnerable first instar stage.
The most widely used preventative active ingredient is chlorantraniliprole, found in products like GrubEx. It's a low-toxicity option that provides season-long control from a single application. Other preventative options include insect growth regulators like halofenozide (Mach 2), which disrupt the grub's ability to molt and develop properly.
When to apply preventatives:
- Northern US and Canada: mid-May through late June
- Transition zone: mid-May through early June
- Southern US: April through mid-May
The key is getting the product down and watered in before egg hatch begins. Once you see adult beetles feeding on your roses or lindens, you're in the application window. Soil temperature reaching 60°F at a 2 to 4 inch depth is the most reliable indicator that egg hatch is imminent.
Preventative products need to be watered in after application, typically with about half an inch of irrigation or rainfall. This moves the active ingredient into the root zone where grubs will be feeding. Without adequate watering, the product sits on the surface and breaks down before it can do its job.
Curative Products (Trichlorfon / Dylox) — Late Summer Rescue Window
Curative grub killers are your go-to when you've missed the preventative window or when you're discovering active grub damage in your lawn. These products work fast, killing existing grubs within 24 to 72 hours of application.
Trichlorfon, sold under the brand name Dylox, is the primary curative option available to homeowners. It's a contact insecticide that kills grubs on contact and through ingestion. Unlike preventatives, it has very short residual activity in the soil, which is actually a good thing for this application timing.
When to apply curatives:
- Northern US and Canada: late July through early September
- Transition zone: mid-July through mid-September
- Southern US: July through August
The sweet spot for curative application is when grubs are in their first and second instar stages, typically under half an inch long. At this size they're still near the soil surface and actively feeding, making them easy to reach. By the time grubs reach full size in late summer, they're harder to kill and have already done significant root damage.
Curative products also need to be watered in after application, but the goal is different. You want to move the active ingredient down to the root zone where grubs are feeding, but you don't need the long residual activity that preventatives provide. Speed of kill is what matters here.
How to Tell Which Timing Window You're In Right Now
Rather than guessing based on the calendar, use these three methods to determine exactly where you are in the grub life cycle and which product type you need.
Check Your Soil Temperature
Soil temperature is the most objective way to time grub control. Egg hatch for most common grub species begins when soil at a 2 to 4 inch depth consistently reaches 60°F (15.5°C).
You can use a basic soil thermometer, available at most garden centers for under ten dollars. Take readings in the morning for several consecutive days. When you're hitting 60°F or above, adult beetles are laying eggs and hatch is imminent.
This is your signal to apply a preventative product if you haven't already. If soil temps have been above 60°F for more than three weeks, eggs have likely already hatched and you should shift to a curative approach.
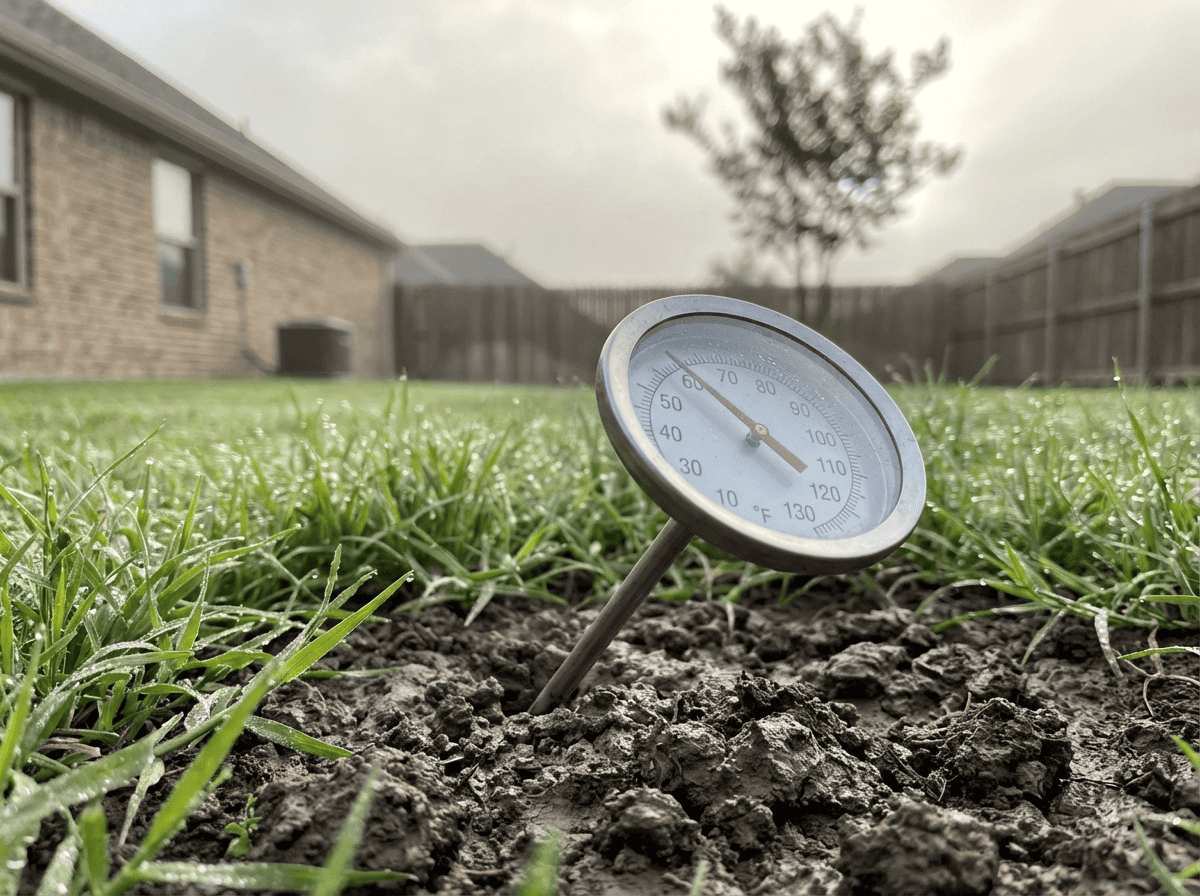
Image source: Bing (Web (fair-use with source credit))
Look at Your Lawn for Active Damage
Grub damage has a distinctive appearance that's different from drought stress or disease. The turf will have irregular brown patches that don't respond to watering. The grass feels spongy underfoot because the roots have been severed.
The telltale sign is that the damaged turf lifts easily, almost like peeling back a carpet. That's because the grubs have chewed through the root system, disconnecting the sod from the soil underneath.
If you're seeing this type of damage in late summer, you're in the curative window. The grubs are already there and actively feeding. A preventative product won't help at this point because it's designed to kill newly hatched larvae, not established grubs that are already causing visible harm.
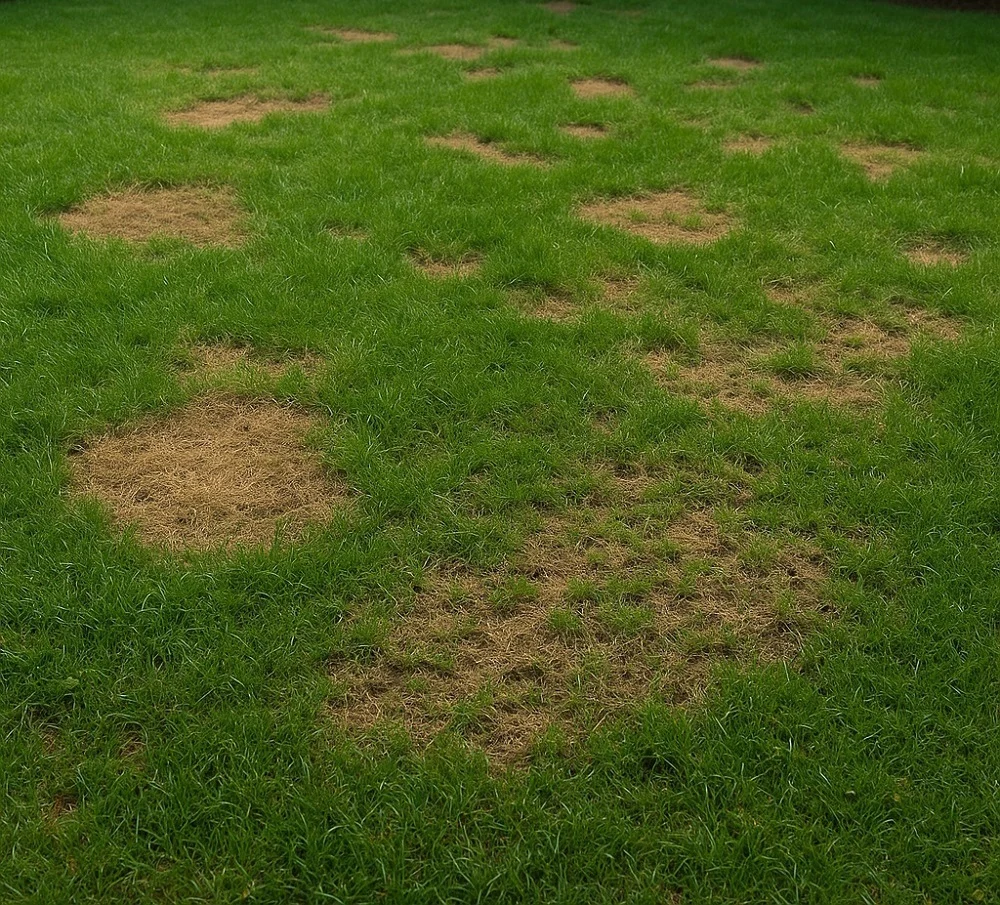
Image source: Bing (Web (fair-use with source credit))
Do the Tug Test and Squares Check
Before you buy any product, confirm you actually have a grub problem. Cut a one-foot square of turf at the edge of a damaged area and peel it back. Count the grubs you find in the soil underneath.
The treatment threshold varies by grass type, but generally:
- Cool-season grasses (fescue, bluegrass, ryegrass): treat at 5 to 10 grubs per square foot
- Warm-season grasses (Bermuda, zoysia, St. Augustine): treat at 3 to 5 grubs per square foot
If you find fewer grubs than the threshold, your brown patches may have another cause. Over-treating when you don't need to wastes money and introduces unnecessary chemicals into the soil. If grub counts are well above threshold, you have a significant infestation that warrants immediate curative treatment.
Regional Timing Differences You Can't Ignore
Your location shifts the entire grub control calendar. What works in Minnesota won't work in Georgia, and applying on someone else's schedule is one of the most common mistakes homeowners make.
In the northern US and Canada, the frost-free season is shorter and everything happens later. Adult Japanese beetles may not emerge until late June, pushing egg hatch into July. That means your preventative window extends into early July, and curative applications can work well into September before grubs burrow deep for winter.
The transition zone, roughly from southern Pennsylvania through the mid-Atlantic and into the lower Midwest, is the trickiest region. You often get overlapping generations of different beetle species. European chafers may be laying eggs while Japanese beetles are still feeding above ground.
In this zone, monitoring soil temperature becomes even more important because calendar dates alone won't tell you what's happening underground.
The southern US operates on a completely different schedule. Adult beetle flight can begin in April, with egg hatch following in May. Your preventative window opens in April and may close by early June.
Curative applications need to happen in July and August before the heat pushes grubs deeper into the soil. Warm-season grasses like Bermuda and zoysia also have lower treatment thresholds, meaning you need to act at lower grub densities.
Coastal regions and areas with mild winters, like the Pacific Northwest, may see extended beetle activity. European chafers dominate in many of these areas, and their timing can differ from Japanese beetle patterns by a week or two. Check with your local cooperative extension service for species-specific timing recommendations in your county.
Step-by-Step: How to Apply Grub Killer at the Right Time
Once you've identified your window and chosen the right product type, proper application technique determines whether the treatment actually works.
Step 1: Mow your lawn first. Cut the grass to your normal height before applying granular products. This ensures the granules reach the soil surface instead of getting trapped in tall grass blades.
Step 2: Check the weather forecast. You want a day when rain isn't expected for at least 24 hours after application, unless you plan to water in with irrigation. Heavy rain immediately after application can wash granular products off target or cause runoff into storm drains.
Step 3: Calibrate your spreader. Read the product label for the correct application rate, usually given in pounds per 1,000 square feet. Set your broadcast or drop spreader to the recommended setting listed on the bag. Over-applying wastes product and increases environmental risk.
Under-applying leaves gaps in coverage where grubs survive.
Step 4: Apply evenly. Walk at a steady pace and overlap your passes slightly to avoid streaks. Uneven application creates patches of untreated soil where grubs continue feeding. If you're using a liquid curative product, use a hose-end sprayer or pump sprayer and maintain consistent pressure.
Step 5: Water in thoroughly. This is the step most people skip or do incorrectly. Granular preventative products need about half an inch of water to move the active ingredient into the root zone. Curative products need a quarter to half inch.
Run your sprinklers long enough to deliver that amount, which typically takes 20 to 30 minutes depending on your system.
Step 6: Keep traffic off the lawn. Avoid mowing, walking, or allowing pets on the treated area for at least 48 hours after watering in. This gives the product time to bind to soil particles and begin working.
Biological and Organic Alternatives — And When to Use Them
Chemical insecticides aren't your only option. Biological controls work on different timelines and can be effective when used correctly.
Beneficial nematodes, specifically Heterorhabdacter bacteriophora, are microscopic worms that seek out and kill grubs in the soil. They're a living organism, so timing and handling matter more than with chemical products. Nematodes need soil temperatures between 55°F and 85°F to be active, and they require moist soil conditions to move through the soil profile.
Apply nematodes in the evening or on overcast days. UV light kills them quickly, so direct sunlight during application drastically reduces effectiveness. Water the lawn before application and keep the soil moist for at least two weeks afterward.
The best application window for nematodes is late August through September when grubs are small and soil is warm.
Milky spore, caused by the bacterium Paenibacillus popilliae, is a long-term biological control specific to Japanese beetle grubs. It's not a quick fix. Milky spore takes two to four years to establish fully in the soil, but once established it can persist for ten years or more.
Apply it once when soil temperatures are above 60°F and forget about it. It won't help with European chafer or other grub species.
Neem oil and azadirachtin products offer some repellent and growth-regulating effects on grubs. They're less effective than dedicated grub killers but can be part of an integrated approach. These work best as preventative treatments applied during the same window as chemical preventatives.
Mistakes That Make Grub Killer Fail
Even the right product at the right time can fail if you make one of these common errors.
Applying to dry soil without watering in. Granular products sitting on the soil surface degrade in sunlight and never reach the root zone where grubs are feeding. This is probably the number one reason for treatment failure reported in user reviews.
Using preventative products on large, established grubs. Chlorantraniliprole and other preventatives work best on first and second instar grubs. If you're finding half-inch grubs in your lawn, a preventative product won't kill them effectively. Switch to a curative product instead.
Applying curative products too late in the season. Once soil temperatures drop below 50°F, grubs move deeper into the soil and feeding slows. Curative products can't reach them at depth. If you're finding large grubs in October, treatment won't be effective.
Focus on preventing next year's population instead.
Ignoring the product label rate. More is not better with grub insecticides. Over-application increases cost, environmental contamination, and potential harm to non-target organisms without improving grub control. Under-application leaves surviving grubs that reproduce and rebuild the population.
Treating the entire lawn when damage is localized. If grub damage is confined to one area, spot-treat that section and a buffer zone around it rather than treating the whole property. This saves money and reduces the total chemical load in your soil.
Confusing grub damage with other problems. Drought stress, fungal disease, dog urine spots, and compacted soil can all cause brown patches that look similar to grub damage. Always confirm grubs are present before treating. The tug test takes five minutes and can save you an unnecessary application.
Quick Reference: Timing Chart by Grub Species and Region
Different grub species have slightly different life cycles, which shifts your timing by a week or two depending on what you're dealing with.
| Species | Adult Flight | Egg Hatch | Preventative Window | Curative Window |
|---|---|---|---|---|
| Japanese beetle | June to July (north), May to June (south) | July to August (north), June to July (south) | Mid-May to early July | Late July to September |
| European chafer | May to June (north), April to May (south) | June to July (north), May to June (south) | Mid-May to late June | July to August |
| May/June beetle | April to June | May to July | April to June | July to August |
| Black turfgrass ataenius | May to June | June to July | May to June | July to August |
| Masked chafer | June to July | July to August | Mid-May to early July | August to September |
These windows are general guidelines based on aggregate data from university extension programs. Your specific location may vary by one to two weeks depending on local soil conditions and seasonal weather patterns. When in doubt, use soil temperature as your primary trigger rather than calendar dates.
Frequently Asked Questions
Can I apply grub killer in the fall?
Fall applications of curative products can work in early September while grubs are still near the surface. By late October, most grubs have burrowed too deep for effective control. If you're past early fall, skip treatment and plan a preventative application for next spring instead.
How long does grub killer take to work?
Curative products like Dylox kill grubs within 24 to 72 hours. Preventative products like GrubEx work more slowly, killing grubs over several days as they ingest treated soil. You won't see dead grubs on the surface with either type.
The grubs die underground in the root zone.
Do I need to water after applying grub killer?
Yes, watering in is essential for granular products. Apply about half an inch of water after spreading to move the active ingredient into the root zone. Without watering, the product sits on the surface and degrades before reaching the grubs.
Can I use grub killer and fertilizer at the same time?
Many combination products pair grub preventer with granular fertilizer for convenience. If you're using separate products, you can apply them together as long as both get watered in properly. Just make sure you're not exceeding the recommended rate for either product.
Will grub killer hurt earthworms?
Chlorantraniliprole-based products have minimal impact on earthworms. Older chemistries like trichlorfon are more broadly toxic and can reduce earthworm populations temporarily. If earthworm activity is a priority for your soil health, stick with preventative products or biological controls like nematodes.
How do I know if my grub treatment worked?
Check the treated area two to three weeks after application. Cut a small square of turf and look for grubs. Dead grubs will be discolored, often turning brown or shriveled.
If you're still finding healthy, active grubs, you may have applied at the wrong time or used the wrong product type for the grub size present.
Final Decision Guide: Which Window Are You In and What to Do Today
Use this quick decision tree to figure out your next move based on what's happening right now.
If it's April to June and you haven't seen damage yet: Apply a preventative product with chlorantraniliprole. Water it in well. You're protecting against the upcoming hatch.
If it's July and you see adult beetles on your plants: Check soil temperature. If it's been above 60°F for less than two weeks, you can still apply a preventative. If it's been warmer longer, switch to a curative product.
If it's August and you find grubs when you peel back damaged turf: Apply a curative product like Dylox immediately. Water it in. Act fast because grubs are growing quickly and root damage accelerates through August.
If it's October or later and you're finding grubs: Hold off on treatment. They're too deep and too large to control effectively now. Mark your calendar for a preventative application next May.
If you're not sure what you're dealing with: Do the tug test. Count the grubs. Check your soil temperature.
Those three pieces of information will tell you exactly which product to use and whether it's worth treating at all.
The bottom line is that grub control isn't about finding one perfect date. It's about matching your product to the grub's life stage, and that changes throughout the season. Pay attention to soil temperature, confirm grubs are actually present, and choose the right product type for where you are in the cycle.
Do those three things and you'll get results.