Witnessing germinating Bermuda grass emerge is an exciting first step towards a vibrant lawn. Initially, you’ll spot tiny, thread-like sprouts followed by two small, opposing leaves called cotyledons. As the seedlings mature, they develop true blades and begin tillering, signaling robust growth and the start of Bermuda’s characteristic spreading habit. Understanding these stages is key to proper care and successful establishment.
What Does Germinating Bermuda Grass Look Like?
Building a beautiful Bermuda grass lawn from seed is a rewarding journey, but it requires patience and a keen eye. One of the most common questions new planters have is: “What exactly does germinating Bermuda grass look like?” It’s a great question because knowing what to look for helps you understand if your efforts are paying off and if your new lawn is on the right track. This guide will walk you through every visual stage of Bermuda grass germination, from the very first subtle signs to the emergence of sturdy seedlings, helping you identify and nurture your growing lawn successfully.
You’ll learn to recognize the delicate initial sprouts, understand how they develop into true grass blades, and even how to tell them apart from common weeds. We’ll also cover the ideal conditions for Bermuda grass germination and essential care tips to ensure your new lawn thrives. Get ready to watch your dream lawn come to life, one tiny sprout at a time!
Key Takeaways
- Patience is Crucial: Bermuda grass germination typically takes 7-30 days, depending on conditions. Don’t expect immediate results.
- First Signs are Subtle: The very first visible sign of germinating Bermuda grass is a tiny, white, thread-like root, soon followed by two small, oval “cotyledon” leaves.
- True Leaves Emerge Later: After the cotyledons, the seedling will develop its first “true” grass blade, which looks more like a traditional Bermuda grass leaf. This marks stronger development.
- Distinguish from Weeds: Learn to differentiate young Bermuda grass from common weeds by observing leaf shape, growth pattern, and the timing of emergence.
- Optimal Conditions Matter: Consistent moisture, warm soil (65-90°F / 18-32°C), and plenty of sunlight are vital for successful Bermuda grass germination.
- Post-Germination Care is Key: Continue gentle, consistent watering and avoid heavy traffic. Mowing and light fertilization should only begin once the grass is established enough to handle it.
- Troubleshooting is Possible: If germination is poor, re-evaluate soil temperature, moisture levels, seed depth, and seed quality. Adjust your approach if necessary.
Understanding Bermuda Grass Germination
Germination is the amazing process where a seed wakes up and begins to grow into a plant. For Bermuda grass, this transformation is crucial for establishing a dense, healthy lawn. It starts with the seed absorbing water, swelling, and then pushing out its first root and shoot. Recognizing these early stages is vital for knowing your watering schedule is correct, your soil temperature is ideal, and that your seed is viable. Without this understanding, you might accidentally mistake a healthy sprout for a weed or even damage delicate new growth.
The Ideal Environment for Bermuda Grass Germination

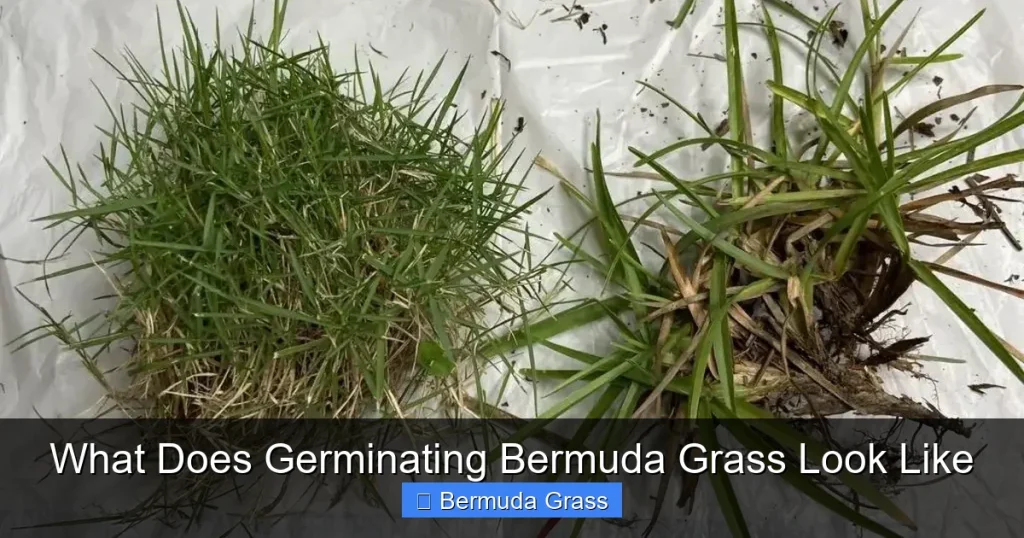
Visual guide about What Does Germinating Bermuda Grass Look Like
Image source: batonrougesod.com
Before we dive into what germinating Bermuda grass looks like, let’s briefly discuss the perfect conditions that help it sprout. Setting up the right environment dramatically increases your chances of success.
H3 Soil Preparation is Key
A well-prepared seedbed is fundamental. Your soil should be loose, well-draining, and free of large clumps or debris. A thin layer of topsoil or compost can enrich the planting area and provide a good medium for seeds to take root. Rake the area smooth, ensuring good seed-to-soil contact.
H3 Consistent Moisture
Bermuda grass seeds need consistent moisture to germinate. This doesn’t mean waterlogging the area; rather, the top inch or two of soil should remain damp, not soggy. We’ll discuss watering more in detail later, but remember, dry seeds won’t sprout.
H3 Warm Soil Temperatures
Bermuda grass is a warm-season grass, meaning it loves heat. For optimal germination, the soil temperature needs to be consistently between 65°F and 90°F (18°C to 32°C). Trying to plant when soil temperatures are too cool will lead to very slow or no germination. Use a soil thermometer for accuracy.
H3 Plenty of Sunlight
Bermuda grass needs full sun, typically 6-8 hours a day, even as a seedling. Ensure your planting area receives ample sunlight to encourage strong, healthy growth from the start.
Stage 1: The Initial Sprout – Cotyledons Emerge
This is the moment of truth! After you’ve spread your seeds and kept the soil moist and warm, you’ll eagerly scan the ground for any signs of life. Patience is a virtue here, as Bermuda grass can take anywhere from 7 to 30 days to germinate, with an average of 10-21 days under ideal conditions.
H3 The Tiny White Thread
The very first thing you might spot, if you look incredibly closely, is a tiny, almost translucent white thread pushing out of the seed. This is the radical, or primary root, anchoring the seedling to the soil. It’s hard to see and often happens just before the visible shoot.
H3 The First Visible Signs: Cotyledons
Within a day or two of the root taking hold, a small, green shoot will emerge from the soil. This shoot will soon unfurl into two very small, somewhat oval or elongated leaves. These are called “cotyledons” or “seed leaves.”
* Appearance: They are typically very delicate, thin, and often slightly pointed or rounded at the tips. They usually appear opposite each other.
* Color: Light green, sometimes almost yellowish-green, and very vibrant.
* Size: Very tiny, often just a few millimeters long. You might have to get down on your hands and knees to spot them!
* Density: Initially, these sprouts will be sparse. Over days, you’ll see more and more appear, giving a faint green haze to your soil.
These cotyledons are the plant’s first energy source, providing nourishment until the true leaves (which can perform photosynthesis more efficiently) develop. They don’t look much like the Bermuda grass blades you’re used to seeing, so don’t be alarmed if they seem unfamiliar. This is perfectly normal for germinating Bermuda grass.
Stage 2: Developing True Leaves
Once the cotyledons are established, the seedling quickly moves to develop its “true” leaves. This stage marks a significant step towards becoming a recognizable blade of grass.
H3 The Appearance of True Blades
Growing between the two cotyledons, you’ll notice a single, slender blade begin to emerge. This is the first true leaf.
* Appearance: It looks much more like a typical grass blade. It will be longer and thinner than the cotyledons, with a more upright growth habit.
* Color: The true leaves are usually a slightly darker green than the cotyledons, indicating more chlorophyll production.
* Form: Initially, it might be just one blade, but soon, additional true leaves will emerge from the same base, forming a small clump.
This stage signifies that the plant is no longer entirely reliant on the stored energy in the seed and is actively photosynthesizing. The cotyledons may start to yellow and wither as the true leaves take over, eventually falling off.
Stage 3: Tillering and Spreading
As more true leaves develop, the young Bermuda grass plant enters a rapid growth phase. This is where it starts to develop its characteristic density and spreading habit.
H3 Tillering Begins
Tillering is the process where a grass plant produces new shoots (tillers) from its base. These tillers are essentially new grass plants genetically identical to the parent, emerging from underground buds.
* Appearance: You’ll see the small clumps of grass becoming denser as more blades emerge from the center. This gives the plant a bushier, more robust appearance.
* Effect: Tillering is crucial for creating a thick, uniform lawn. Each initial seedling will produce several tillers, quickly filling in space.
H3 Rhizomes and Stolons (Spreading)
Bermuda grass is famous for its aggressive spreading. It does this through two types of horizontal stems:
* Stolons: These are above-ground runners that creep along the soil surface. As they grow, nodes along the stolon can root and produce new shoots.
* Rhizomes: These are similar to stolons but grow underground. They also root and send up new shoots, contributing significantly to Bermuda’s dense turf and ability to repair itself.
At this stage, your lawn will begin to look less like individual sprouts and more like a continuous mat of young grass. This is a sign of strong, healthy establishment.
Distinguishing Germinating Bermuda Grass from Weeds
This is a critical skill for any new lawn grower! Many weeds germinate around the same time as Bermuda grass, and some can look surprisingly similar to young grass sprouts. Pulling healthy Bermuda seedlings by mistake is a common, heartbreaking error.
H3 Key Differences to Look For:
* Leaf Shape:
* Bermuda Cotyledons: Two small, opposite, often slightly rounded or oval leaves.
* Bermuda True Leaves: Thin, upright blades, similar to mature grass but smaller.
* Grassy Weeds (e.g., Crabgrass, Foxtail): Often have wider, coarser blades than young Bermuda grass. Crabgrass, in particular, has a distinct boat-shaped tip when very young and often emerges with two cotyledons, but they can be wider.
* Broadleaf Weeds (e.g., Clover, Dandelion): These are generally easier to identify as they have wide, non-grass-like leaves.
* Growth Pattern:
* Bermuda: Starts as individual clumps that then tiller and spread horizontally.
* Grassy Weeds: Often emerge more vigorously, and some (like crabgrass) quickly form a more sprawling, star-like pattern from a central point.
* Speed of Emergence:
* Some weeds can germinate faster than Bermuda, giving them a head start. If you see very robust, fast-growing sprouts before your expected Bermuda germination window, they might be weeds.
* Seed Placement:
* If you carefully broadcasted your Bermuda grass seed, the sprouts should appear in a relatively even pattern. Any random, isolated, or unusually vigorous plants might be weeds.
H3 Practical Tip: Observe and Wait
When in doubt, observe! Allow a few days for the plant to develop more true leaves. Most broadleaf weeds will quickly reveal their non-grass-like nature. For grassy weeds, comparing their blade width and texture to your known Bermuda seedlings can help. If you’re unsure, it’s safer to leave a suspicious sprout for a few more days rather than pulling out a potentially healthy Bermuda seedling. Avoid using herbicides on new seedlings, as they are very sensitive.
Factors Influencing Germination Success
Beyond just identifying germinating Bermuda grass, understanding the factors that impact its success is essential.
H3 Soil Temperature (The Most Critical Factor)
As mentioned, Bermuda grass absolutely needs warm soil. If your soil temperature is consistently below 65°F (18°C), germination will be very slow, patchy, or may not happen at all. Conversely, extremely hot soil above 95°F (35°C) can also be detrimental. A soil thermometer is a worthwhile investment.
H3 Consistent Moisture, Not Saturation
The seeds need to stay consistently moist, but not waterlogged. Overwatering can lead to rot, disease, and washing away of seeds. Underwatering means the seeds dry out, halting the germination process and potentially killing the nascent sprout. A light, frequent watering schedule is best (2-3 times a day, very lightly, during peak germination).
H3 Seed Quality and Depth
Always start with fresh, high-quality Bermuda grass seed. Coated seeds often have better germination rates. Plant seeds at the correct depth – typically very shallow, ¼ inch or less, often just pressed into the soil or covered with a very thin layer of top dressing. Seeds buried too deep won’t have enough energy to reach the surface.
H3 Sunlight Exposure
Bermuda grass needs full sun. Shady areas will lead to thin, weak germination and poor establishment.
Nurturing Your New Bermuda Grass Lawn
Once you see those beautiful sprouts, your job isn’t over! Proper care is vital to help those tiny seedlings grow into a strong, resilient lawn.
H3 Continued Gentle Watering
Maintain your consistent, light watering schedule. The young root systems are still shallow, so they dry out quickly. As the grass matures (after a few weeks), you can gradually transition to deeper, less frequent watering to encourage deeper root growth.
H3 The First Mow
Resist the urge to mow too early! Wait until your Bermuda grass seedlings are at least 2-3 inches tall and have developed several true leaves. Use a sharp mower blade set to the highest possible setting. Only remove the top third of the blade. Mowing too short or with a dull blade can stress and damage the delicate young grass.
H3 Gentle Fertilization
Avoid heavy fertilization immediately after germination. A starter fertilizer, low in nitrogen and high in phosphorus (the middle number in N-P-K), can be applied before seeding or very lightly once the grass has developed several true leaves and is about 1 inch tall. Follow product instructions carefully to avoid burning the new growth.
H3 Weed Control (Carefully!)
Once you’ve confirmed a weed, it’s best to remove it by hand if possible, especially in the early stages. Pre-emergent herbicides cannot be used when seeding a new lawn, as they prevent all seeds from germinating. Post-emergent herbicides are generally too harsh for young Bermuda grass and should be avoided until the lawn is well-established (usually after 2-3 months and several mowings).
Troubleshooting Common Germination Issues
Sometimes, despite best efforts, things don’t go perfectly. Here are some common problems and what to do if your germinating Bermuda grass isn’t performing as expected.
H3 No Germination or Very Patchy Spots
* Issue: You’ve waited 2-3 weeks, and still no signs of green, or only isolated sprouts.
* Possible Causes:
* Soil Temperature: Too cold. Check with a soil thermometer.
* Lack of Moisture: Seeds dried out.
* Seeds Buried Too Deep: Small seeds can’t push through too much soil.
* Poor Seed-to-Soil Contact: Seeds need to be nestled into the soil.
* Old/Non-Viable Seed: Sometimes seeds are just duds.
* Solution: Re-evaluate your conditions. If soil is too cold, wait for warmer weather. Improve watering. Lightly rake the area and reseed, ensuring proper depth and contact. Consider a fresh batch of seed.
H3 Seedlings Turning Yellow or Dying
* Issue: You saw sprouts, but now they are yellowing, wilting, or dying off.
* Possible Causes:
* Overwatering: Roots suffocating, leading to rot.
* Underwatering: Soil drying out too much.
* Disease (Damping-Off): Fungal diseases can attack young seedlings, especially in overly wet conditions.
* Nutrient Deficiency: Less common in very young seedlings but possible.
* Solution: Adjust watering immediately. Ensure good drainage. If disease is suspected, reduce humidity and moisture. Avoid walking on wet seedlings.
H3 Heavy Weed Competition
* Issue: Weeds are growing faster and more robustly than your Bermuda grass.
* Possible Causes:
* Existing Weed Seeds: Your soil had a high bank of weed seeds.
* Fertilizing Weeds: If you used a general fertilizer, you fed everything.
* Solution: Hand-pull visible weeds carefully, especially broadleaf types. For grassy weeds, careful identification is key. Be patient; a dense Bermuda lawn will eventually choke out many weeds once established.
Tips for a Lush Bermuda Lawn
* Patience is Paramount: Don’t rush the process. Bermuda grass takes its time to establish.
* Soil Test: Before planting, a soil test can tell you exactly what your soil needs, optimizing conditions for germination and growth.
* Even Seed Spreading: Use a broadcast spreader for uniform coverage. Uneven seeding leads to patchy germination.
* Protect New Growth: Avoid walking on your newly germinated Bermuda grass as much as possible to prevent damage to the delicate sprouts.
* Monitor Conditions Daily: Especially soil moisture and temperature. Adjust your watering based on daily evaporation and rainfall.
Conclusion
Watching your Bermuda grass germinate is a truly rewarding experience. From the almost invisible root to the delicate cotyledons, and then to the developing true leaves and tillering shoots, each stage signifies progress towards a resilient, beautiful lawn. By understanding what germinating Bermuda grass looks like at each phase, providing the ideal environmental conditions, and offering careful, consistent care, you are setting the stage for a thriving landscape. Remember to be patient, observe closely, and troubleshoot any issues proactively. Soon, those tiny sprouts will grow into the dense, vibrant Bermuda grass lawn you’ve always wanted, ready to withstand summer heat and activity. Happy growing!