You can sharpen lawn mower blades without removing them using a bench grinder, file, or sharpening stone—saving time and effort. This guide walks you through safe, step-by-step methods to maintain sharp blades, improve cut quality, and extend blade life. With the right tools and technique, you’ll get a cleaner, healthier lawn without the hassle of disassembly.
Key Takeaways
- You can sharpen blades without removing them: Use tools like a bench grinder or file while the mower stays in place, saving time and effort.
- Proper angle is critical: Most blades need a 30–35-degree sharpening angle for optimal performance.
- Balance matters: A balanced blade reduces vibration and extends engine life, even when sharpened in place.
- Clean before sharpening: Remove grass clippings and debris to see the blade edges clearly and avoid damage.
- Safety first: Always disconnect the spark plug and wear gloves and eye protection during the process.
- Test your results: Run the mower briefly to check for smooth operation and uneven cutting.
- Maintenance prevents dullness: Regular sharpening every 20–25 hours of use keeps your lawn looking its best.
How to Sharpen Lawn Mower Blades Without Removing
Keeping your lawn mower blades sharp doesn’t have to mean taking apart your machine. In fact, with the right tools and a little patience, you can sharpen your lawn mower blades without removing them at all. This method saves time, reduces mess, and helps maintain your mower’s performance. Whether you’re dealing with a push mower or a riding lawn mower, sharpening blades in place is a practical, cost-effective solution.
In this guide, you’ll learn how to sharpen lawn mower blades without removing them, using simple tools like a bench grinder or hand file. You’ll also discover tips to ensure the process is safe, effective, and doesn’t damage your mower. By the end, you’ll be confident in maintaining your mower’s cutting edge—no garage or extra space required.
Why Blade Sharpness Matters
Sharp blades cut grass cleanly, like scissors slicing through paper. Dull blades crush and tear grass, leading to brown tips, disease, and a ragged lawn. A clean cut also helps the grass recover faster and resist weeds. Over time, blades lose their edge from constant contact with soil, rocks, and grass. This wear reduces cutting efficiency and increases strain on the engine.
Regular sharpening restores the blade’s cutting ability and can extend its lifespan. Most experts recommend sharpening blades every 20 to 25 hours of use. Instead of removing the blades every time, you can sharpen them in place—saving time and effort. This method works best with gas-powered mowers, especially those with easily accessible blade edges.
Tools You’ll Need
Sharpening blades without removing them requires minimal tools. Most of what you need is already in your garage or workshop. Here’s what to gather before starting:
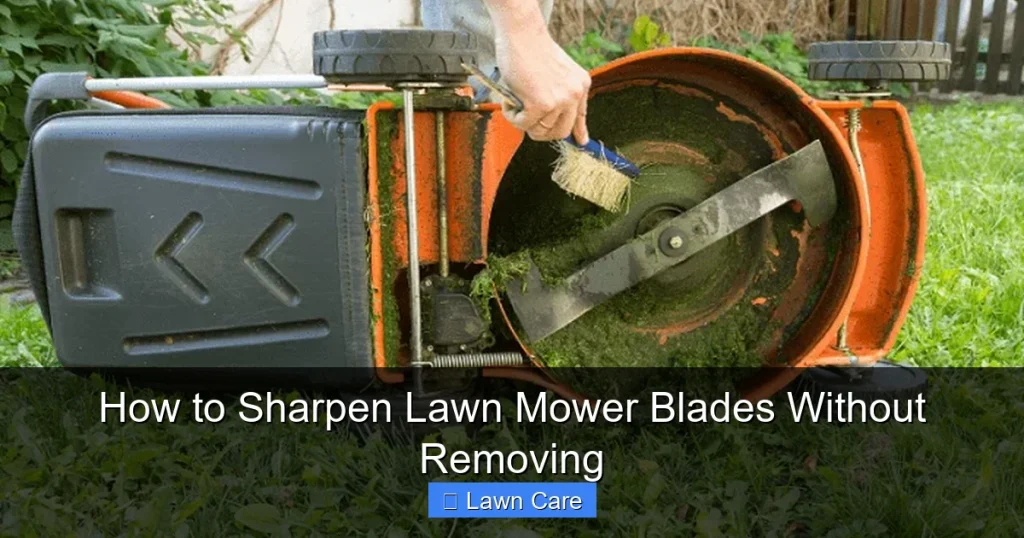
Visual guide about How to Sharpen Lawn Mower Blades Without Removing
Image source: mowersboy.com
- Bench grinder: Ideal for quick, consistent sharpening. Look for one with a wire brush wheel for cleaning.
- Flat file or sharpening stone: A good alternative if you don’t have a grinder.
- Wire brush: Helps remove rust and grass buildup.
- Marker or paint pen: To mark the cutting edge for reference.
- Work gloves and safety glasses: Protect your hands and eyes from metal shards.
- Stable work surface or mower deck support: Ensures the blade stays steady during sharpening.
You don’t need expensive equipment. A basic grinder or even a metal file will do the job. The key is maintaining the correct sharpening angle and avoiding overheating the blade.
Step-by-Step: How to Sharpen Lawn Mower Blades Without Removing Them
Step 1: Prepare Your Work Area
Start by clearing a flat, stable surface near your lawn mower. If you’re working on a riding mower, park it on level ground and engage the parking brake. Make sure the engine is off and cool. Then, disconnect the spark plug wire to prevent accidental starts. This is a critical safety step—always do it before handling the blades.
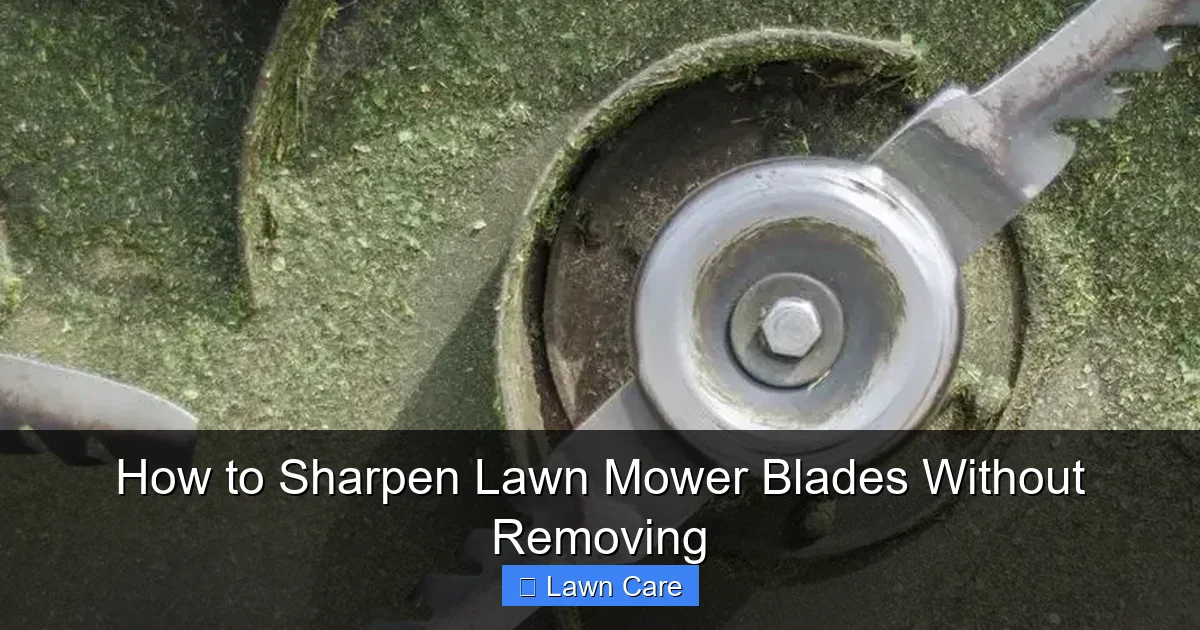
Visual guide about How to Sharpen Lawn Mower Blades Without Removing
Image source: mowersboy.com
Next, inspect the mower deck. Remove any visible grass clippings or debris around the blades. You can use a brush or compressed air to clean the area. A clean deck makes it easier to see the blade edges and reduces the risk of accidental contact with the grinder.
Step 2: Secure the Blade
Even though you’re not removing the blade, it must stay stable during sharpening. For push mowers, you can place the mower on its side with the air filter facing up to avoid oil leaks. For riding mowers, use a jack or block to lift the front end slightly so the blade is accessible. You can also use a blade support bar or ask someone to hold the mower steady.
Ensure the blade is locked in place. Some mowers have a locking pin or bolt that prevents the blade from spinning. If yours doesn’t, you may need a helper or a vice grip to hold the blade in position. Never rely on your hand to hold the blade still—safety is more important than convenience.
Step 3: Clean the Blade
Use a wire brush to remove rust, dirt, and grass residue from the blade surface. This step reveals the actual cutting edge and prevents grinding debris from contaminating the grinder. Pay attention to the back of the blade, where buildup often hides.
If the blade is heavily corroded, consider lightly grinding the surface with the grinder’s rough wheel. But avoid removing too much metal—this weakens the blade over time.
Step 4: Mark the Cutting Edge
Use a marker to draw a line along the top edge of the blade. This helps you track how much material you’re removing and ensures you sharpen both sides evenly. The goal is to maintain the original bevel and thickness of the blade.
For reference, most lawn mower blades have a 30 to 35-degree sharpening angle. If you’re unsure, consult your mower’s manual. Some blades have a slight curve or “hook” shape—follow the natural contour during sharpening.
Step 5: Sharpen the Blade
Turn on the bench grinder and let it reach full speed. Hold the blade firmly and guide the edge along the grinder’s wheel at the correct angle. Apply steady, even pressure—don’t force it. Move the blade back and forth across the wheel to avoid overheating or warping.
Sharpen each side of the blade equally. Use the marker line as a guide to ensure both edges are the same length. If you’re using a file, stroke it along the edge in one direction only, following the original bevel. Repeat until the edge is sharp and shiny.
Tip: Keep the blade cool by pausing every 10–15 seconds. Overheating can soften the metal and reduce blade life.
Step 6: Check for Balance
Even if you’re not removing the blade, it’s wise to check balance. A balanced blade reduces vibration and improves mower performance. To test, tape a small nail or screw to the tip of the blade and spin it on a nail through the center hole. If one side dips, that side needs more material removed.
You can balance the blade in place by adjusting the tip with the grinder or file. Make small, controlled cuts until the blade spins evenly. This step is especially important for riding mowers, where imbalance can strain the transmission.
Step 7: Reassemble and Test
Once sharpened and balanced, reattach any removed parts and reconnect the spark plug wire. Start the mower and let it run for a minute to ensure smooth operation. Listen for unusual vibrations or noises. Then, mow a small test area to check the cut quality. The grass should look clean, not torn or shredded.
If the blade still feels dull or the mower pulls to one side, you may need to repeat the sharpening process. But avoid over-sharpening—too much metal removal shortens the blade’s life.
Troubleshooting Common Issues
Sometimes, sharpening in place can lead to uneven results or damage. Here’s how to fix common problems:
- Blade won’t stay still: Use a vice grip or blade lock. If the mower doesn’t have a built-in lock, improvise with a C-clamp or helper.
- Grinder slips: Apply gentle, consistent pressure. Don’t force the blade—let the grinder do the work.
- Uneven sharpening: Use your marker line to guide both sides. Compare the edges frequently.
- Blade overheats: Pause often and let it cool. Overheating weakens the metal.
- Excessive vibration after sharpening: Recheck balance. Remove small amounts from the heavier side.
If the blade is severely bent or cracked, it’s better to remove it and replace it. Continuing to use a damaged blade can harm the mower’s engine or deck.
Tips for Long-Term Blade Maintenance
Sharpening blades in place is efficient, but regular maintenance ensures lasting performance. Here are a few best practices:
- Sharpen regularly: Every 20–25 hours of use keeps blades in top shape.
- Inspect blades monthly: Look for nicks, bends, or excessive wear.
- Clean after each use: Remove grass clippings and debris to prevent rust.
- Store properly: Keep the mower covered and in a dry place.
- Use a blade balancer: Optional but helpful for precision work.
For more advanced sharpening techniques, consider learning how to sharpen lawn mower blades with a grinder or file. These methods offer more control and are ideal for precision work. You can also explore how to balance a lawn mower blade without a balancer for DIY accuracy.
Conclusion
Sharpening lawn mower blades without removing them is a smart, time-saving technique that keeps your mower running smoothly. With a bench grinder, file, and basic safety precautions, you can restore the blade’s edge in minutes. This method works for most gas-powered push and riding mowers, reducing downtime and maintenance costs.
Remember to prioritize safety, maintain the correct sharpening angle, and check blade balance. With consistent care, your blades will cut cleaner, last longer, and help your lawn thrive. Whether you’re a weekend warrior or a seasoned gardener, this skill belongs in every lawn care toolkit.
For more lawn mower tips, check out our guides on how to clean a lawn mower carburetor without removing it or how to drain gas from a lawn mower without a siphon. These resources help you maintain your equipment efficiently—no disassembly required.