To replace the gas tank on your Husqvarna riding lawn mower, start by safely disconnecting the spark plug, draining any remaining fuel, then carefully removing the old tank before installing the new one in reverse order. Make sure all connections are secure and there are no leaks before testing the mower.
If you want to replace the gas tank on your Husqvarna riding mower, the process is straightforward. First, ensure safety by disconnecting the spark plug and emptying the fuel. Remove the existing tank, clean any debris, then attach the new tank, reconnect fuel lines and fittings, and test for leaks. With patience and attention to detail, you’ll have your mower running smoothly in no time.
Replacing the gas tank on a Husqvarna riding lawn mower might seem challenging at first, but with the right steps, it can be a manageable DIY project. Over time, tanks can crack, rust, or develop leaks, making replacement necessary to keep your mower functioning efficiently. The key is to approach the task systematically: safety first, then carefully disconnect the fuel system, remove the old tank, and install the new one securely. This not only restores your mower’s performance but also extends its lifespan. Whether you’re a seasoned DIY enthusiast or a beginner, following these steps will help you get your machine back in top shape quickly and safely.

How to Replace Gas Tank on Husqvarna Riding Lawn Mower
Understanding the Importance of Replacing Your Gas Tank
Replacing the gas tank on your Husqvarna riding lawn mower can be necessary for several reasons. A damaged or corroded tank may cause fuel leaks, which can lead to safety hazards and poor mower performance. Ensuring your mower’s fuel system is in good shape helps it run efficiently and safely.
Tools and Materials Needed for the Job
Before starting the replacement process, gather all essential tools and parts. These include:
- Screwdrivers (flathead and Phillips)
- Wrenches or socket set
- Replacement gas tank compatible with your Husqvarna model
- Fuel line clamps or pliers
- Drain pan to catch residual fuel
- Protective gloves and safety goggles
- Clean cloths or rags
Having everything ready makes the process smoother and safer.
Safety Precautions Before Starting
Working with fuel involves potential hazards. Always work in a well-ventilated area away from open flames or heat. Turn off the mower and disconnect the spark plug to prevent accidental startup. Wear protective gloves and goggles to keep fuel and debris away from your skin and eyes.
Preparing the Lawn Mower
Start by parking the mower on a flat, stable surface. Engage the parking brake and turn off the ignition. Use a wrench to disconnect the negative terminal of the battery if your model has one for additional safety. Drain any remaining fuel from the tank into a secure container using a drain pan.
Removing the Old Gas Tank
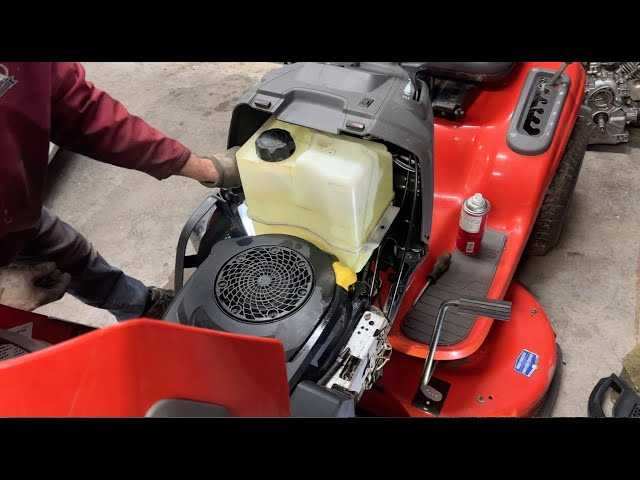
Locate the gas tank beneath the mower’s body, usually near the engine area. Carefully remove any covers or shields blocking access using screwdrivers. Disconnect the fuel line by loosening the clamps with pliers or a screwdriver. Be prepared for residual fuel leakage during this step.
Handling Fuel Line Disconnection
Gently slide off the fuel line from the tank’s inlet, taking care not to damage the line. If the fuel line is stuck, use a screwdriver to loosen the clamps carefully. Cap or seal the line to prevent fuel spillage.
Detaching the Old Tank and Installing the New One
Once the fuel line is disconnected, remove the mounting bolts or straps holding the tank in place. Carefully lift out the damaged or old tank, making sure not to damage surrounding parts. Position the new tank in place, aligning it with the mounting points.
Securing the New Gas Tank
Fasten the new tank using the original bolts or straps, ensuring it is snug but not overly tight. Reconnect the fuel line to the tank’s inlet and clamp it securely. Check that the line is undamaged and seated properly to prevent leaks.
Refilling and Checking for Leaks
Add fresh fuel into the new tank through the fill opening, but avoid overfilling. Wipe away any spilled fuel with a cloth. Turn on the mower and start the engine to check for leaks around the connections. Observe closely for any signs of fuel escaping.
Test Run After Replacement
Let the mower run for a few minutes to ensure the new tank is functioning properly. Listen for any unusual sounds and watch for leaks or fuel odors. If everything appears normal, turn off the mower and wipe down any areas that may have gotten wet with fuel.
Final Steps and Maintenance Tips
After replacing the gas tank, return all panels or covers to their original positions. Regularly inspect the tank and fuel lines for cracks or leaks to prevent future issues. Keep the fuel cap tightly closed when the mower is not in use to prevent contamination.
Related Topics to Consider
- How to clean a Husqvarna riding lawn mower carburetor
- Replacing spark plugs on Husqvarna riding mower
- Maintenance tips for prolonging mower life
- How to troubleshoot common Husqvarna mower problems
Additional Tips for a Smooth Replacement Process
It helps to have a friend assist with lifting or holding the tank during installation. Always double-check fuel line connections before fully securing the tank. Keep a clean workspace to avoid losing small parts or screws during the process.
Troubleshooting Common Issues During Gas Tank Replacement
If your mower doesn’t start after installation, recheck all fuel line connections. Look for cracks or damages in the fuel lines or tank. If the mower leaks fuel during operation, ensure all clamps are tight and properly seated.
Maintaining Your New Gas Tank
Periodically inspect the tank for signs of corrosion or cracks. Use a fuel stabilizer if you store the mower for long periods. Keep the vent cap clean and functioning correctly to maintain proper fuel flow.
Replacing the gas tank on your Husqvarna riding lawn mower may seem daunting, but with the right tools and steps, it becomes a manageable task. Proper installation ensures safety, efficiency, and longevity for your mower. Always follow manufacturer guidelines and safety procedures to keep your equipment in top shape.
How to fix Husqvarna riding mower gas tank leak-(YTH1542XP)
Frequently Asked Questions
What are the necessary tools to replace the gas tank on a Husqvarna riding mower?
To replace the gas tank on a Husqvarna riding mower, you need several basic tools. These include a socket wrench set, screwdrivers (both flat-head and Phillips), pliers, and possibly a drain pan to catch remaining fuel. Additionally, you might require gloves for safety and rags to clean spills. Having these tools on hand will make the replacement process smoother and safer.
How can I safely remove the old gas tank from my Husqvarna mower?
Start by turning off the mower and disconnecting the spark plug to prevent accidental starting. Drain any remaining fuel from the tank into a safe container. Remove the seat or access panel if necessary to reach the gas tank. Carefully disconnect any fuel lines and mounting brackets holding the tank in place. Use your tools to loosen bolts or screws securing the tank, then lift the old tank out gently to avoid damaging nearby components.
What steps should I follow to install a new gas tank on my Husqvarna riding mower?
Position the new tank in the designated area, aligning it with existing mounting points. Reconnect the fuel lines securely, ensuring they fit snugly to prevent leaks. Attach the tank using the bolts or screws you previously removed, tightening them firmly but without over-tightening. Double-check all connections, then refill the tank with fresh fuel. Reassemble any panels or seat parts you removed during the process, and perform a test run to verify the installation.
Final Thoughts
To replace the gas tank on a Husqvarna riding lawn mower, start by disconnecting the spark plug for safety. Drain any remaining fuel and remove the old tank carefully, noting how it fits into the mower. Install the new tank, ensure all connections are secure, and refill with fresh fuel.
Remember, following these steps guides you through how to replace gas tank on husqvarna riding lawn mower efficiently. Keep safety in mind and double-check all connections before starting your mower again.