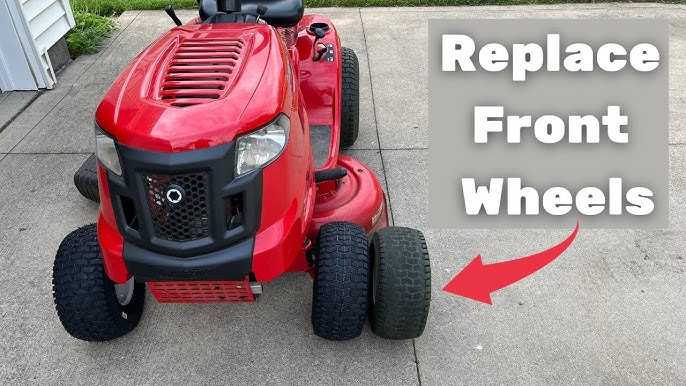
To replace the front wheel on your Craftsman riding lawn mower quickly, start by safely parking the mower on a flat surface, engaging the parking brake, and turning off the engine. Loosen the axle nut, remove the old wheel, and then install the new one, tightening everything securely. Finally, recheck the wheel’s attachment before testing your mower.
Replacing a front wheel on your Craftsman riding mower might seem daunting, but it’s a straightforward process with the right tools and some basic steps. First, ensure the mower is turned off and parked securely to prevent any accidents. You’ll need a wrench or socket set to remove the axle nut and detach the wheel. After removing the damaged wheel, align the new one onto the axle, tighten the nut firmly, and double-check that everything is secure. This simple task can save you time and money, avoiding a trip to the repair shop. Keep reading for a detailed step-by-step guide to get your mower rolling smoothly again!

How to Replace Front Wheel on Craftsman Riding Lawn Mower
Replacing the front wheel on your Craftsman riding lawn mower might seem tricky at first, but with the right steps, you can do it easily. Knowing how to replace a front wheel saves you time and money, especially when your mower’s wheel is damaged or worn out.
Gather the Necessary Tools and Parts
Before starting, make sure you have all the tools needed for the job. Common tools include a socket wrench, screwdrivers, pliers, and possibly a mallet. You will also need the correct replacement front wheel that fits your Craftsman lawn mower model.
- Socket wrench set
- Screwdrivers (flathead and Phillips)
- Pliers
- Replacement front wheel
- Lubricant spray (optional but helpful)
- Gloves for hand protection
Prepare Your Workspace
Park your lawn mower on a flat, stable surface and turn it off. Engage the parking brake to prevent the mower from moving. Clearing the area of debris and tools will help your work go smoothly.
It’s also helpful to wear gloves to protect your hands from sharp edges and dirt. Keep a container nearby for small parts that you remove during the process.
Safely Lift the Lawn Mower
To access the wheel, you need to lift the front of the mower. Use a jack or ramp if available, or carefully tilt the mower onto its side. Support the mower with blocks or stands to prevent it from falling.
Ensure the mower is stable before proceeding. Never work under the mower without proper support to avoid injury.
Remove the Damaged or Old Front Wheel
Loosen the Wheel Nut or Bolt
Locate the wheel bolt or nut holding the wheel in place. Use your socket wrench to turn the nut or bolt counterclockwise to loosen and remove it. If the nut is tight, applying lubricant can help loosen it.
Detaching the Wheel
After removing the nut or bolt, gently pull the wheel away from the hub. Sometimes, dirt or rust can cause the wheel to stick. Use pliers or a mallet to tap lightly if necessary.
If the wheel is stuck, avoid forcing it too hard to prevent damage to the hub. Applying a lubricant spray around the hub can make removal easier.
Inspect and Clean the Hub
Once the wheel is removed, inspect the hub for wear, rust, or damage. Clean the hub with a rag or wire brush to remove dirt and rust. Lubricating the hub lightly can help the new wheel spin smoothly.
Check that the hub’s threaded area is in good condition to ensure proper fitting of the new wheel.
Install the New Front Wheel
Align the New Wheel
Line up the new wheel with the hub, ensuring the holes on the wheel match the threaded hub or axle. If the wheel has a specific orientation, verify it before proceeding.
Secure the Wheel
Insert the bolt or nut through the wheel and into the hub. Hand-tighten the nut or bolt first to keep the wheel aligned. Then, use the socket wrench to tighten it securely.
Ensure the nut or bolt is tight enough to hold the wheel firmly without over-tightening that could damage the components.
Final Checks and Reassembly
Once the new wheel is installed, double-check all nuts and bolts for tightness. Remove any supports or blocks holding the mower and carefully lower it back onto the ground.
Test the wheel by spinning it manually to verify it turns smoothly. Also, give the mower a gentle push forward to make sure the wheel is properly secured.
Lower the Mower Safely
If you used a jack or ramp, carefully lower the mower to the ground. Be cautious to avoid dropping or damaging the mower or injuring yourself.
Ensure everything looks secure before turning on the mower for a test run.
Test the Mower
Start the mower and engage the blade. Move the mower forward slowly to check if the new wheel moves smoothly and is properly aligned. Listen for unusual noises that may indicate improper installation.
If everything seems normal, your front wheel replacement is complete and your lawn mower is ready for use.
Additional Tips for a Smooth Replacement
- Always check your mower’s user manual for specific instructions related to your model.
- Use new fasteners if old ones are worn or damaged for better security.
- Keep spare parts and tools organized to avoid losing small components during the process.
- Consider replacing both front wheels simultaneously if both are worn out for balanced performance.
Common Problems and How to Address Them
Wheel Won’t Come Off
If the wheel is stuck, spray lubricant around the hub and let it sit for a few minutes. Use gentle taps with a mallet, but avoid excessive force.
Wobbly or Unsecured Wheel
Double-check that the bolt or nut is fully tightened. If the wheel still wobbles, inspect the hub for damage or wear and replace if necessary.
Difficulty Installing the New Wheel
Ensure the hole aligns correctly and that the axle or hub is clean. Lubricate the contact points to facilitate easier installation.
Maintaining Your Lawn Mower After Wheel Replacement
Regularly inspect your front wheels for wear and tear, cleaning them free of grass and dirt after each use. Proper maintenance extends the life of your mower’s wheels and other components.
Lubricate the wheel hubs periodically to keep them turning smoothly and prevent rust buildup.
By following these detailed steps, you can confidently replace the front wheel on your Craftsman riding lawn mower, ensuring it runs smoothly and efficiently for many mowing seasons to come. Proper maintenance and careful handling during the replacement process will keep your mower in top shape and save you from costly repairs down the line.
How to Replace the Wheel on a Riding Lawn Mower Craftsman Murray Troy Bilt MTD
Frequently Asked Questions
What tools are needed to replace the front wheel on a Craftsman riding lawn mower?
To replace the front wheel on your Craftsman riding lawn mower, gather a wrench or socket set, a jack or lifting device, and possibly a mallet or rubber hammer. Ensure you have gloves for safety and replace any parts such as cotter pins or retaining rings if needed. Having these tools ready will help you perform the task efficiently and safely.
How do I safely lift the lawn mower to access the front wheel?
Use a sturdy jack or lift designed for lawn equipment. Position the jack under the frame near the wheel to be replaced, ensuring the mower is on a flat surface. Lift the mower gradually until the front wheel is off the ground. Place supporting blocks or stands under the frame for additional stability before removing the wheel. Always follow the manufacturer’s safety guidelines when lifting equipment.
Can I replace only the wheel or do I need to replace the entire axle?
In most cases, you can replace just the wheel if the axle and other components are in good condition. Carefully remove the wheel and inspect the axle for any damage or wear. If the axle shows signs of damage, corrosion, or excessive wear, replacing the entire axle or related parts may be necessary for safe operation. Always check the manufacturer’s recommendations to determine the best course of action.
What is the correct way to secure the new wheel onto the mower?
Align the new wheel with the axle and slide it into position, ensuring it seats properly on the axle or hub. Reinstall any retaining clips, cotter pins, or nuts that secure the wheel, tightening them firmly but not excessively to avoid damage. Spin the wheel by hand to confirm it moves freely without wobbling or resistance. Double-check all fasteners before lowering the mower back onto the ground.
How can I verify that the front wheel replacement was successful?
After securing the new wheel, slowly lower the mower back onto the ground and remove any supporting stands. Test the wheel by pushing the mower forward and backward, listening for unusual noises and feeling for wobbling or resistance. Inspect the wheel to ensure it remains secure and spins smoothly. Take a short test drive to confirm the mower handles well and the wheel stays firmly in place during operation.
Final Thoughts
Replacing the front wheel on your Craftsman riding lawn mower is straightforward. First, park the mower on a flat surface and engage the parking brake. Remove any hub caps or covers, then loosen and remove the axle bolt.
Lift the wheel off the axle and replace it with the new one, ensuring it’s properly aligned. Tighten the axle bolt securely and reattach any covers.
In conclusion, knowing how to replace front wheel on craftsman riding lawn mower simplifies maintenance and keeps your mower running smoothly.