To fix a string on a lawn mower, simply loosen the tension, replace or reposition the string, and ensure it’s wound correctly to prevent cutting issues. Start by turning off the mower and carefully removing the cover to access the string. Once you have the old string out, thread the new one through the designated guides, and tighten the tension to keep it secure during operation.
If your lawn mower’s string is frayed or broken, don’t worry—it’s a quick fix. You’ll need to remove the cover, carefully take out the damaged string, and replace it with a fresh one wound tightly and correctly. Just make sure you adjust the tension so the string cuts smoothly without slipping or breaking. With a little patience, your mower will be back in shape in no time, making your yard work easier and more efficient.
If your lawn mower string is broken or worn out, fixing it is straightforward. Turn off the mower, access the string area, remove the damaged part, and replace it with a new string, ensuring proper tension. This quick repair can significantly improve your mower’s performance and save you from costly repairs later.
Starting your lawn mower and noticing it’s not cutting properly? The culprit might be a worn or broken string. Replacing the string is a simple process: turn off the mower, remove the cover, take out the old string, and thread a new one through the guides. Adjust the tension to keep it secure, and you’re all set for a clean, even cut. Regular maintenance of the string will ensure your lawn mower runs smoothly, making yard work less of a chore.

How to Fix a String on a Lawn Mower
Understanding the Role of the String in Your Lawn Mower
The string, often called the grass trimmer line, is a key part of your lawn mower’s trimming head. It helps cut grass and weeds that are hard to reach with the mower deck. Without a properly functioning string, your grass trimming will be uneven and less effective.
Common Reasons Why a String Breaks or Gets Damaged
A string can break or wear out for several reasons. Over time, it can become brittle from exposure to sunlight and weather. Hitting rocks, concrete, or other hard objects also causes it to break. Lastly, using the wrong type or size of string can lead to frequent breakage.
Tools and Supplies Needed for Fixing the String
Before starting, gather these tools and supplies:
- Replacement trimmer string (check your mower’s manual for size)
- Scissors or a utility knife
- Screwdriver (if needed to remove the trimming head)
- Work gloves (to protect your hands)
- Clean cloth or brush (to clear debris)
Having everything ready makes the process smoother and faster.
Preparing Your Lawn Mower for String Replacement
First, turn off the mower and disconnect the spark plug wire to prevent accidental starting. Lay the mower on a flat surface, preferably on a tarp or ground cloth. Use gloves to protect your hands and clear away any grass or debris around the trimming head.
Removing the Trimming Head to Access the String
Different models have various methods to access the string. Usually, you will:
- Unscrew or detach the protective shield if necessary.
- Use a screwdriver or wrench to remove the trimming head cover.
- Carefully take off the spool or reel holding the string.
Be cautious to keep all parts organized for reassembly.
Inspecting the Old String and Spool
Check the current string for signs of damage or wear. Remove any remaining pieces of old string, making sure the spool is clean. If the spool is cracked or damaged, replace it with a new one compatible with your mower model.
Measuring and Cutting New String
Consult your user manual for the correct length of string, usually around 15 to 25 feet. Cut a piece of new string to this length using scissors or a utility knife. Using the right size ensures optimal performance and prevents excessive wear.
Loading the New String onto the Spool
Follow these steps:
- Insert one end of the new string through the hole in the spool.
- Wind the string in the direction indicated by the arrow on the spool. Keep tension on the string as you wind.
- Leave about 3 to 4 inches of string unwound once the spool is full.
- Secure the loose ends with a notch or slit on the spool to prevent unwinding during use.
Ensure the string is wound evenly to avoid jams.
Reassembling the Trimming Head
Put the spool back into the trimming head. Make sure the strings are aligned properly and extend out evenly on both sides. Reattach the cover or cap and tighten all screws securely. Reinstall any protective shields you removed earlier.
Adjusting the Length of the String
Once reassembled, check the length of the exposed string. It should be about 1/4 inch above the edge of the trimming guard. Adjust the length if necessary by pulling or trimming the excessive string.
Testing and Fine-Tuning the New String
Reconnect the spark plug wire and start the mower. Test the trimming head by gently pressing it against a patch of grass or weeds. If the string extends correctly and cuts well, your job is done. If not, recheck the installation and ensure the string is wound tightly and securely.
Tips for Maintaining Your Trimming String
To prolong the life of your string:
- Avoid hitting hard objects like rocks or sidewalks.
- Use the correct string size specified by your mower manufacturer.
- Clear debris from the trimming head regularly to prevent jamming.
- Replace the string before it becomes too short or thin.
Additional Advice for Better Lawn Trimming
Consider these tips for more efficient trimming:
- Trim when grass is dry for cleaner cuts and less strain on the string.
- Adjust the mowing height for a cleaner, more uniform look.
- Use the right string type—nylon is most common and durable.
- Maintain your mower’s blades and engine regularly for optimal performance.
Related Topics
Choosing the Right Trimmer Line
Different weeds or grass types may require specific string types or thicknesses. Using the right size reduces the risk of breaking and improves cutting performance.
When to Replace the Spool
If the spool shows cracks or warping, replace it immediately. Damaged spools can cause uneven string feed and damage to the trimmer head.
How to Store Spare Strings and Parts
Keep spare strings in a cool, dry place. Store small parts in labeled containers to stay organized and ready for your next maintenance session.
Safety Precautions During Repair
Always wear gloves and eye protection during repair. Never attempt to service your mower when it is running or still hot. Follow manufacturer instructions closely for safe handling.
By following these detailed steps, you can efficiently fix the string on your lawn mower and keep your yard looking its best. Proper maintenance and timely replacements prevent future issues and extend the lifespan of your tools.
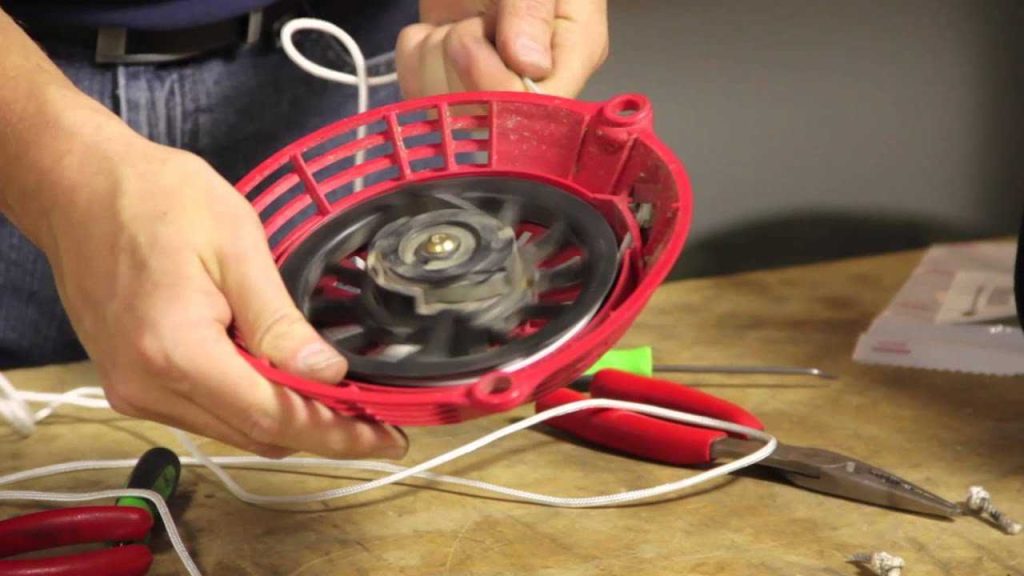
How to Replace a Pull String on a Push Mower : Lawnmower Maintenance & Repair
Frequently Asked Questions
How can I replace a broken string on my lawn mower?
To replace a broken string, first disconnect the spark plug to prevent accidental starting. Remove the mower’s cover or spool head by unscrewing or unclipping it. Carefully take out the old string, noting how it’s wound. Cut a new length of string specified by the mower’s manual, usually about 15-20 feet. Thread the new string through the spool, following the original winding pattern. Wind the string evenly in the same direction as indicated, leaving enough slack. Reassemble the cover or spool head securely, then reconnect the spark plug. Test the mower to ensure the string feeds properly.
What tools do I need to fix or replace a string on my lawn mower?
You’ll need a few basic tools including a screwdriver to remove the cover or spool head, pliers to handle the string and spool, and possibly a pair of scissors to cut the string to the correct length. It’s also helpful to wear gloves for protection against sharp edges and to have the new string ready, typically specified in your mower’s manual. Having the user manual on hand ensures you follow the correct procedures and use the right string length and type.
How do I prevent the string from breaking in my lawn mower?
Regularly inspect the string for signs of wear and replace it before it becomes too thin. Use the correct type and size of string recommended by the manufacturer, as inappropriate material can cause frequent breakage. Avoid mowing over rocks, thick brush, or other hard objects that can snap the string. Maintain the mower’s tension settings to prevent the string from being overly tight or slack. Properly winding and securing the string during replacement reduces the risk of it unraveling or breaking during operation.
Can I fix a broken string without removing the entire spool or cover?
In most cases, replacing the string requires removing the spool or cover. This process ensures you can properly access and wind the new string correctly. Attempting to fix the string without removal may result in improper winding or additional damage. Carefully follow your mower’s manual instructions for removal and reassembly to avoid damaging components or affecting safety features. If you’re unsure, consult a professional or refer to the manufacturer’s guidance for visual instructions.
Final Thoughts
In conclusion, fixing a string on a lawn mower involves carefully removing the cover and inspecting the spool. Replace or reattach the string, ensuring it is the correct length and tension. Regularly check the string to prevent future issues. Knowing how to fix a string on a lawn mower helps maintain efficient operation and prolongs its lifespan.