You've pulled up a section of lawn and now you're staring at a pile of grass and dirt, wondering what on earth to do with it. Learning how to compost sod is one of the smartest moves you can make, because that old turf is packed with organic matter your garden will love. Instead of hauling it to the curb, you can turn it into rich, dark compost right in your backyard.
Here's the thing though. Sod doesn't break down the same way kitchen scraps or fallen leaves do. It's heavy, dense, and full of a thick root mat that resists decomposition if you just pile it up and walk away.
Done right, though, you'll have finished compost in as little as two to three months using hot composting, or six to twelve months with a passive approach. The method you choose depends on your timeline, your space, and one critical question we need to tackle first.
Quick Answer
Compost sod by cutting it into manageable pieces, then building a hot compost pile with alternating layers of sod and carbon-rich browns like straw or cardboard. Keep the pile between 130 and 160 degrees Fahrenheit, turn it every few days, and maintain moisture like a wrung-out sponge. Hot composting produces finished compost in two to three months.
Cold composting takes six to twelve months with minimal effort.
Why Most People Get Composting Sod Wrong
The biggest mistake is treating sod like any other yard waste. Sod comes with a dense root system and a layer of soil that's often heavy in clay or clay-loam. That soil adds weight and compacts easily, which cuts off oxygen flow to the microbes doing the actual decomposition work.
Without proper aeration and layering, you end up with a slimy, smelly mess instead of compost.
Another common error is skipping the chopping or breaking-up step. A solid slab of sod sitting at the bottom of a pile will take years to break down. You need to cut it into pieces no larger than six inches across.
Think of it like chopping vegetables before cooking. Smaller pieces mean more surface area for bacteria and fungi to attack.
Then there's the moisture problem. Sod straight off the ground is often too wet, especially if your soil doesn't drain well. That excess water fills the air pockets in your pile, pushing the whole thing anaerobic.
Anaerobic decomposition is slow, stinky, and produces compounds that can harm plant roots. Getting the moisture level right from the start is half the battle.
The One Question That Changes Everything: Was Your Lawn Ever Treated With Herbicides?
Before you do anything, you need to answer this. If your lawn was treated with persistent herbicides containing aminopyralid, clopyralid, or picloram, composting that sod could produce a finished product that damages or kills sensitive crops like tomatoes, beans, and peas. These herbicides survive the composting process and remain active in the finished compost.
Here's how to think about it. If you know the property's lawn care history and can confirm no persistent herbicides were applied in the past 12 to 24 months, you're clear to compost freely. If you're unsure, or if a commercial lawn service treated the turf, you should run a bioassay test before using the compost on any food crops.
How to Test Compost for Persistent Herbicides (Bioassay)
This is simple and takes about two to three weeks. Plant a few bean or tomato seeds in a pot using your finished compost mixed 50/50 with a trusted potting mix. Plant the same seeds in a control pot using only the trusted mix.
If the seedlings in the compost mix show curled stems, twisted leaves, or stunted growth while the control looks normal, your compost still has herbicide residue. Don't use it on food gardens. You can still use it on ornamental beds.
University extension services like the University of Illinois Extension and the Cornell Waste Management Institute both publish guidance on this testing method. It's the same approach used by commercial composting operations across the country as of 2026.
How to Compost Sod: Choosing the Right Method for Your Situation
Not every situation calls for the same approach. The right method depends on how much sod you have, how much space you're working with, and how quickly you need results. Here are the three main paths, each with a clear use case.
Hot Composting Sod (Fast Results, Active Management)
Hot composting is your best bet if you want finished compost in two to three months and you're willing to put in some regular work. This method uses thermophilic bacteria that thrive between 130 and 160 degrees Fahrenheit to rapidly break down organic matter. The high heat also kills most weed seeds and pathogens.
This approach works best when you have at least one cubic yard of material (roughly a 3-foot by 3-foot by 3-foot pile). Smaller piles can't retain enough heat to sustain thermophilic activity. If you're composting sod from a typical residential lawn removal, you'll likely have enough volume.
Best for: Gardeners who want compost fast, have a decent volume of sod, and can commit to turning the pile every three to five days.
Cold or Passive Composting Sod (Low Effort, Slow Timeline)
Cold composting is the "pile it and forget it" approach. You stack your sod pieces, mix in some carbon material, and let nature take its course over six to twelve months. Mesophilic bacteria and fungi do the work at ambient temperatures.
There's no turning schedule, no thermometer checking, and no strict moisture management.
The tradeoff is time and weed seed survival. Without sustained heat, weed seeds in your sod may survive the process and sprout when you spread the finished compost. If your sod was full of crabgrass or other aggressive weeds, cold composting might just relocate the problem.
Best for: People with limited time, smaller amounts of sod, or those who aren't in a hurry to use the finished compost.
Lasagna / Sheet Composting With Sod (No Pile Required)
This method skips the pile entirely. You place sod pieces directly on top of the ground where you want to build new garden beds, layer them with cardboard and organic matter, and let decomposition happen in place. It's essentially sheet mulching with sod as the nitrogen layer.
The advantage is zero hauling. You're building soil right where you need it. The downside is that it takes longer (six months to a year before you can plant directly into the area), and you need enough covering material like cardboard, straw, or leaves to smother the grass completely.
Best for: Homeowners converting lawn to garden beds in place, people with mobility limitations, or anyone who wants to avoid managing a compost pile.
Step-by-Step: Hot Composting Sod the Right Way
Hot composting sod is the most efficient method when done correctly. Here's the full process from removal to finished compost.
What You'll Need
Before you start, gather your materials and tools. Having everything on hand makes the process much smoother.
| Item | Purpose |
|---|---|
| Sod cutter or flat spade | Cutting and lifting sod from the ground |
| Axe, machete, or sharp spade | Chopping sod into small pieces |
| Carbon materials (straw, cardboard, dried leaves, wood chips) | Balancing the C:N ratio |
| Nitrogen materials (fresh grass clippings, manure, coffee grounds) | Feeding thermophilic bacteria |
| Compost thermometer (20-inch probe) | Monitoring internal pile temperature |
| Garden hose or watering can | Maintaining moisture levels |
| Pitchfork or compost aerator | Turning and aerating the pile |
| Tarp (optional) | Covering the pile during heavy rain |
Prepping the Sod Before It Hits the Pile
This step makes or breaks your composting success. Sod straight from the ground is too dense and too wet to compost efficiently. You need to break it up.
Cut your sod into strips no wider than one foot. Then chop those strips into pieces roughly four to six inches across. An axe or a sharp spade works well for this.
If the sod is very wet, let it dry in the sun for a day or two before chopping. Dry sod is lighter, easier to cut, and less likely to compact into an airless mass.
Spread the chopped pieces out and let them dry slightly. You want them damp but not dripping. A good test: pick up a handful and squeeze it.
If water streams out, it's too wet. If it crumbles apart immediately, it's too dry. If it holds together loosely and releases just a drop or two, you're in the sweet spot.
Building the Pile: Layering for Decomposition
Start with a four-to-six-inch layer of coarse carbon material at the bottom. Twigs, small branches, or coarse straw work well. This base layer creates air channels at the foundation of your pile, which is critical for maintaining aerobic conditions.
Add a two-to-three-inch layer of your chopped sod. Then cover it with a four-to-six-inch layer of carbon-rich browns. Shredded cardboard, dried leaves, straw, or aged wood chips all work.
The goal is to maintain a carbon-to-nitrogen ratio of roughly 25:1 to 30:1 across the entire pile. Sod with soil attached is relatively high in nitrogen, so you need plenty of brown material to balance it.
Spray each layer lightly with water as you build. Don't soak it. Just dampen each layer enough that the material is uniformly moist.
Continue alternating sod and carbon layers until your pile reaches at least three feet in height and width. Cap the top with a thick layer of carbon material to trap heat and moisture.
Managing Moisture, Temperature, and Air
This is where most people lose the battle. Hot composting demands active management, and the three variables you're tracking are moisture, temperature, and oxygen.
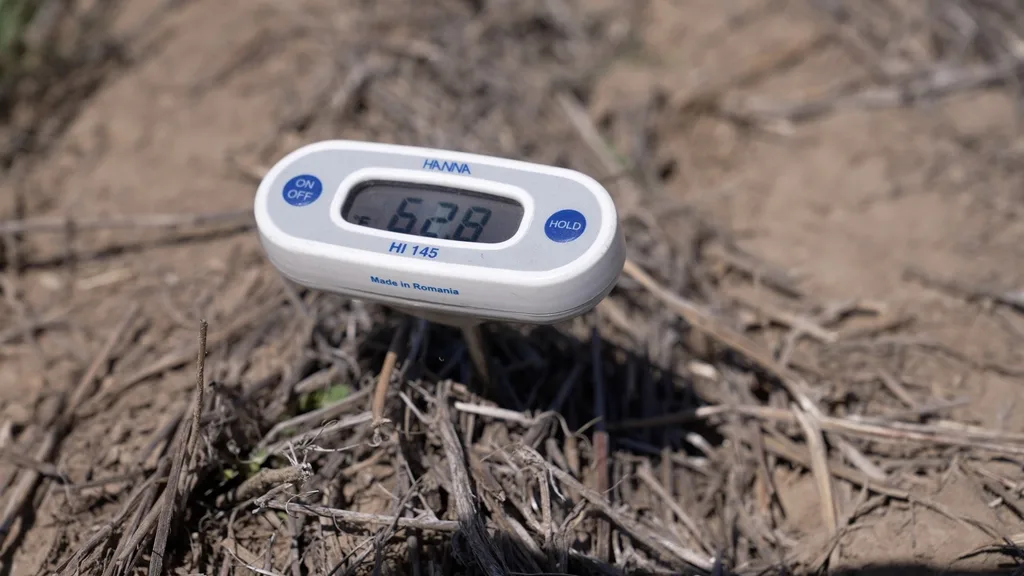
Temperature. Stick your compost thermometer into the center of the pile. Within 24 to 48 hours of building, the internal temperature should climb above 130 degrees Fahrenheit. If it doesn't, your pile is either too small, too dry, or needs more nitrogen material.
If it exceeds 160 degrees, you're risking killing off the beneficial microbes. Turn the pile to release excess heat.
Moisture. Check moisture every time you turn the pile. Grab a handful of material from the center and squeeze. It should feel like a wrung-out sponge.
If it's too dry, water lightly while turning. If it's too wet, add dry carbon material and turn to increase airflow.
Turning schedule. Turn the pile every three to five days during the active phase. Move material from the outside edges into the center. This redistributes the thermophilic bacteria to fresh material and reintroduces oxygen throughout the pile.
Each turn should cause a temporary temperature dip, followed by a rebound within 12 to 24 hours as bacteria recolonize the freshly aerated material.
When Is It Done?
Your compost is finished when the internal temperature drops below 100 degrees Fahrenheit and stays there even after turning. The material should be dark brown to black, crumbly, and smell like earth. You shouldn't be able to identify individual sod pieces or other original materials.
At this point, let the pile cure for two to four weeks without turning. This allows mesophilic bacteria and fungi to finish breaking down any remaining tough materials. If you want a finer finished product, screen the compost through half-inch hardware cloth to remove any undecomposed chunks.
Toss those chunks back into your next active pile.
Step-by-Step: Lasagna Composting With Sod (Kill Grass and Build Soil in Place)
If you don't want to manage a separate compost pile, lasagna composting lets you decompose sod right where you need better soil. You're essentially building a new garden bed on top of your old lawn. The sod becomes the nitrogen layer in a stacked decomposition system.
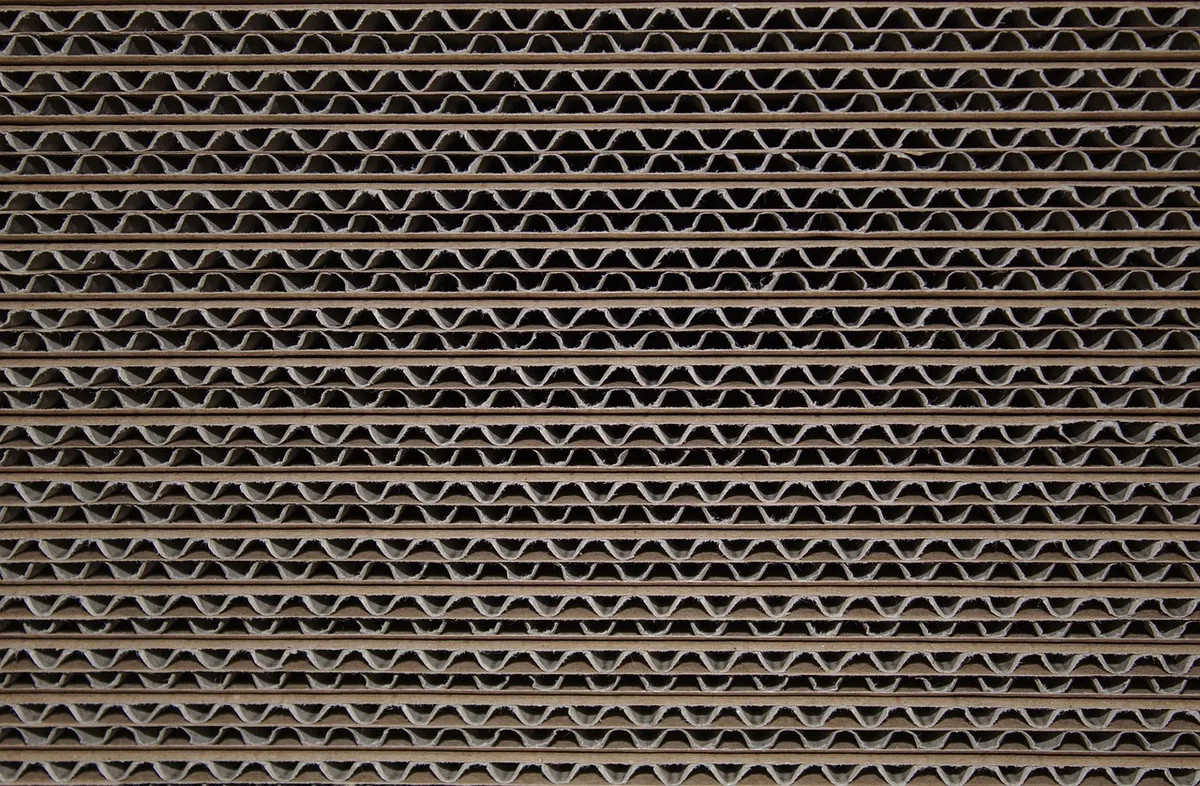
Start by mowing the area as short as possible. Don't remove the grass clippings. Lay overlapping sheets of cardboard directly over the lawn.
Use plain brown cardboard with all tape and staples removed. Overlap the edges by at least six inches so grass can't push through gaps.
Wet the cardboard thoroughly. Then add a two-to-three-inch layer of sod pieces, grass-side down, on top of the cardboard. Cover that with four to six inches of carbon material like straw, shredded leaves, or wood chips.
Add another layer of nitrogen material (grass clippings, coffee grounds, or manure). Keep alternating layers until you've built a bed 12 to 18 inches thick.
Wait six months to a year before planting directly into the bed. The cardboard smothers the existing grass, the sod decomposes in place, and by the time you're ready to plant, you've got rich, loose soil where compacted lawn used to be. This method works especially well when starting in fall.
By spring, the layers will have settled and decomposed enough for planting.
Common Mistakes That Stall Decomposition or Ruin Your Compost
Even when you follow the basics, a few specific errors can derail the whole process. Here are the ones we see most often.
Piling sod in thick, unbroken layers. A solid mat of sod two inches thick acts like a waterproof barrier. Water can't penetrate it, air can't reach it, and bacteria can't break through. Always chop sod into small pieces and mix it with carbon material rather than stacking it in solid sheets.
Ignoring the carbon-to-nitrogen ratio. Sod with soil attached is nitrogen-heavy. Without enough carbon material to balance it, your pile produces ammonia gas. That sharp smell means nitrogen is escaping into the air instead of staying in your compost where plants need it.
Aim for roughly three parts carbon material to one part sod by volume.
Letting the pile dry out in summer. Hot compost piles lose moisture fast in warm weather. If the internal material dries below 40 percent moisture, bacterial activity stops completely. Check your pile weekly during summer and water it whenever the center feels dry to the touch.
Turning too often or not enough. Turning every day stresses the thermophilic bacteria because they need sustained heat to thrive. Turning less than once every week lets the pile go anaerobic in the center. The sweet spot is every three to five days during the active phase.
Using compost before it's fully cured. Immature compost contains phytotoxic compounds that inhibit seed germination and damage plant roots. If your compost still has visible sod pieces, a sour smell, or a temperature above ambient, it needs more time. Patience here pays off.
Composting Sod vs. Other Lawn Removal Methods
Composting isn't the only way to deal with old sod. Here's how it stacks up against the alternatives.
| Method | Time | Effort | Cost | End Result |
|---|---|---|---|---|
| Hot composting | 2–3 months | High | Free | Usable compost |
| Cold composting | 6–12 months | Low | Free | Usable compost |
| Lasagna composting | 6–12 months | Medium | Free (plus cardboard/straw) | New garden bed |
| Hauling to green waste facility | Same day | Medium | Dump fees ($20–$75/yard) | Nothing retained |
| Sod cutter + landfill | Same day | High | Rental + dump fees | Nothing retained |
| Solarization (plastic sheeting) | 6–8 weeks | Low | $10–$30 for plastic | Dead lawn, no compost |
Hauling sod to a municipal green waste facility is the fastest option if you just want it gone. But you lose all those nutrients, and dump fees add up fast. A cubic yard of wet sod weighs roughly 1,500 to 2,000 pounds.
That's a heavy load to transport and an expensive one to dispose of.
Composting keeps the value on your property. The finished compost improves your soil structure, feeds beneficial microbes, and reduces your need for bagged amendments. If you're removing sod to expand a garden, composting is the logical choice.
If you're clearing land for construction or a patio, hauling makes more sense.
How Climate and Season Affect Sod Composting
Where you live changes everything about how fast your sod breaks down. Warm, humid climates accelerate decomposition because the bacteria and fungi that drive composting thrive in heat and moisture. In the southeastern United States, hot composting sod can finish in as little as six to eight weeks during summer.
Cooler northern climates slow the process significantly. In USDA hardiness zones 3 through 5, you'll need to start your pile in late spring to have any chance of finished compost before fall. Winter freezes halt decomposition entirely.
A pile that's frozen solid won't resume activity until it thaws completely in spring.
Seasonal timing matters even in moderate climates. Starting a hot compost pile in October in zone 6 means the pile will cool as temperatures drop in November. You might get one good month of thermophilic activity before winter shuts things down.
Starting in April or May gives you four to five months of warm weather to work with.
Rainfall patterns also play a role. In drought-prone areas like the Southwest, you'll need to water your pile regularly to maintain moisture. In the Pacific Northwest or the Southeast, you may need to cover your pile during wet periods to prevent waterlogging.
A simple tarp draped over the pile during heavy rain does the trick.
Costs, Time Commitment, and What to Expect
Composting sod is one of the cheapest ways to handle lawn removal and build soil at the same time. Here's a realistic breakdown.
Materials cost: Essentially free if you have cardboard, leaves, or straw on hand. If you need to buy carbon materials, a bale of straw runs about $8 to $15 and covers a large pile. A compost thermometer costs $15 to $25 and lasts for years.
Tool costs: A decent pitchfork runs $25 to $40. A sod cutter rental costs roughly $50 to $75 per day from most equipment rental shops. If you're doing a small area, a flat spade and some elbow grease work fine.
Time commitment: Hot composting requires about 15 to 20 minutes of work every three to five days during the active phase. That's turning the pile, checking temperature, and adjusting moisture. Over a three-month active phase, you're looking at roughly six to eight hours of total work.
Cold composting requires almost no time after the initial pile is built.
Volume reduction: Expect your pile to shrink by 50 to 70 percent as decomposition progresses. A pile that starts at three feet tall will finish at about one to one-and-a-half feet. That's normal.
The finished compost is denser and more concentrated than the raw materials.
Finished compost yield: For every cubic yard of sod you compost, you'll get roughly one-third to one-half cubic yard of finished compost. That's enough to top-dress a 100-square-foot garden bed with two to three inches of compost.
Frequently Asked Questions
Can I compost sod with weed seeds in it?
Yes, but only if your pile reaches 140 degrees Fahrenheit for at least three consecutive days. That temperature kills most common weed seeds. If you're cold composting, weed seeds will likely survive and spread when you use the finished compost.
How long does it take to compost sod?
Hot composting takes two to three months with proper management. Cold composting takes six to twelve months. Lasagna composting in place takes six months to a year before the area is ready for planting.
Do I need to remove the soil from sod before composting?
No. The soil attached to sod adds microbial life and some nitrogen to your pile. Just be aware that soil-heavy sod is heavier to handle and compacts more easily.
Mix it thoroughly with carbon material to prevent matting.
Can I add sod to a compost tumbler?
You can, but only in small amounts. Tumblers work best with small batches of kitchen scraps and light yard waste. Sod is too heavy and dense for most tumblers to aerate effectively.
A large tumbler loaded with sod will struggle to turn and may develop anaerobic pockets.
Will composting sod smell bad?
Not if you manage it correctly. A well-aerated hot compost pile smells earthy, not foul. Bad odors come from anaerobic conditions.
If your pile smells like ammonia, add more carbon material. If it smells like rotten eggs, turn it immediately and add dry browns.
The Bottom Line: Which Method Should You Use?
If you want compost fast and you're willing to put in the work, hot composting is the way to go. Chop your sod small, build a proper pile with plenty of carbon, and stay on top of turning and moisture. You'll have garden-ready compost in two to three months.
If you're converting lawn to garden beds and you're not in a rush, lasagna composting is the lowest-effort option. You skip the pile entirely and build soil right where you need it. Just be patient and give those layers time to break down.
Either way, you're keeping valuable organic matter on your property instead of paying to dump it. That's good for your garden and good for your wallet.