To quickly clean a Briggs and Stratton lawn mower carburetor, remove the carburetor and soak it in a carb cleaner solution, then carefully scrub away any debris with a soft brush. Reassemble everything and ensure all connections are tight before testing your mower. This straightforward process can significantly improve your mower’s performance without the need for professional help.
If your lawn mower isn’t running smoothly or idling roughly, a clogged carburetor could be the culprit. Cleaning it involves removing the carburetor, disassembling it, and cleaning each part thoroughly with a specialized cleaner. With a little patience and the right tools, you can restore your mower’s power and efficiency, saving money and time.
Getting your Briggs and Stratton lawn mower back in shape doesn’t have to be complicated. The carburetor is a vital component that mixes air and fuel for optimal engine performance. Over time, dirt, debris, and varnish buildup can clog it, causing your mower to sputter or stall. Cleaning the carburetor is an essential maintenance task that can be done at home with some basic tools and a carburetor cleaner. In this guide, we’ll walk through simple steps to dismantle and clean your mower’s carburetor, helping you keep it running smoothly and extend its lifespan. Whether you’re a seasoned DIYer or a beginner, these tips will equip you with the knowledge to troubleshoot and maintain your lawn mower effectively.

How to clean a Briggs and Stratton lawn mower carburetor
Understanding the importance of a clean carburetor
A clean carburetor is essential for your lawn mower to run smoothly. Over time, dirt, old fuel, and debris can clog the tiny passages inside, causing poor engine performance. Regular cleaning ensures the engine starts easily and runs efficiently.
Signs your Briggs and Stratton carburetor needs cleaning
- The engine is difficult to start or won’t start at all
- Reduced power or uneven mowing
- Engine stalls frequently
- Black smoke coming from the exhaust
- Increased fuel consumption
Recognizing these signs early can help prevent more serious engine issues down the line.
Gathering the necessary tools and supplies
Before cleaning, make sure you have the right tools:
- Screwdrivers (Phillips and flat-head)
- Wrench or socket set
- Carburetor cleaner spray
- Compressed air
- Clean cloths or rags
- Protective gloves and safety glasses
- Replacement parts if needed (such as gaskets or float needle)
- Float chamber: holds fuel and maintains level
- Jets: control fuel flow; main jet and pilot jet
- Needle valve: regulates fuel entering the carburetor
- Throttle and choke linkages: control airflow and fuel mixture
- Use fresh, high-quality fuel to prevent deposits
- Clean or replace the air filter regularly
- Store the mower properly during off-season, using fuel stabilizer
- Perform periodic inspections and cleanings to avoid buildup
- Clogged fuel lines or filters
- Worn or damaged parts that need replacement
- Incorrect assembly or linkage adjustments
- How to replace a Briggs and Stratton mower air filter
- When to replace your lawn mower’s spark plug
- Maintaining the fuel system for optimal performance
- Troubleshooting common lawn mower problems
Having everything ready before starting will make the process smoother and safer.
Preparing your lawn mower for cleaning
Start by turning off the mower and disconnecting the spark plug wire. This prevents accidental starting. If your mower has a fuel shut-off valve, turn it off and drain the fuel tank to avoid spills. Let the mower cool down if it was recently used.
Removing the carburetor from the mower
Accessing the carburetor typically involves removing the air filter cover and air filter. Once exposed, disconnect the fuel line carefully, catching any spills in a container. Unscrew the mounting bolts or screws holding the carburetor in place. Keep track of all parts and screws for reassembly.
Identifying the parts of the carburetor
Understanding the components helps with cleaning and inspection:
Taking note of each part during removal makes reassembly easier.
Cleaning the carburetor: step-by-step instructions
1. Disassemble the carburetor carefully
Remove the parts within the carburetor, including the float, needle, and jets. Be gentle to avoid damaging delicate components.
2. Soak parts in carburetor cleaner
Submerge metal parts in a suitable carburetor cleaning solution for at least 15-20 minutes. This dissolves grime and deposits.
3. Use compressed air to clear passages
Blow through all tiny passages, jets, and orifices to remove loosened debris. Always blow in the direction of fuel flow.
4. Clean the float and needle
Wipe with a clean cloth, checking for signs of wear or damage. Replace if necessary.
5. Check and replace gaskets and seals
Inspect rubber gaskets and seals for cracks or deterioration. Replace them to prevent air leaks and ensure proper operation.
Reassembling the carburetor
Carefully put all parts back in place, ensuring jets are correctly seated and linkages are connected. Use new gaskets if applicable to prevent leaks. Tighten all screws and bolts securely but avoid overtightening.
Installing the carburetor back onto the mower
Reconnect fuel lines, ensuring a tight seal to prevent leaks. Reattach the carburetor to the mounting bracket and secure it with screws. Reinstall the air filter and cover. Double-check all connections before testing.
Testing the lawn mower after cleaning
Refill the fuel tank with fresh fuel and reconnect the spark plug wire. Start the mower and observe performance. It should start easily, run smoothly, and produce steady power. If issues persist, repeat cleaning or inspect for additional problems.
Tips for maintaining a clean carburetor
Regular maintenance prolongs engine life and keeps your mower running efficiently.
Additional considerations and troubleshooting
If cleaning doesn’t resolve issues, check for:
Consult your mower’s manual for specific details or seek professional service if needed.
Related topics to explore
HOW TO CLEAN A CARBURETOR ON A BRIGGS & STRATTON 550EX ENGINE FOR BEGINNERS (Yard Machines Mowers)
Frequently Asked Questions
What are the steps to remove the carburetor from a Briggs & Stratton lawn mower?
Start by turning off the mower and disconnecting the spark plug wire for safety. Drain any fuel from the tank to prevent spills. Remove the air filter and then use a wrench or screwdriver to detach the carburetor mounting bolts. Carefully disconnect the fuel line and linkages connected to the carburetor. Keep track of all parts and screws to ensure proper reassembly. Once removed, you can proceed with cleaning or inspecting the carburetor.
How can I safely clean the carburetor using household items?
Remove the carburetor from the mower following the proper steps. Rinse the carburetor parts with a carburetor cleaner or use a mixture of soap and water if cleaner is unavailable. Use a soft brush or compressed air to remove stubborn deposits from jets and passages. Be cautious not to damage delicate components. After cleaning, dry all parts thoroughly before reassembling to prevent corrosion or blockages.
What are the signs that indicate I need to clean my carburetor?
If your lawn mower has trouble starting, stalls during operation, or runs unevenly at different speeds, these could be signs of a dirty or clogged carburetor. Additionally, if you notice decreased engine power or increased fuel consumption, cleaning the carburetor might resolve these issues. Regular maintenance can prevent the buildup of debris and ensure the mower runs smoothly.
Final Thoughts
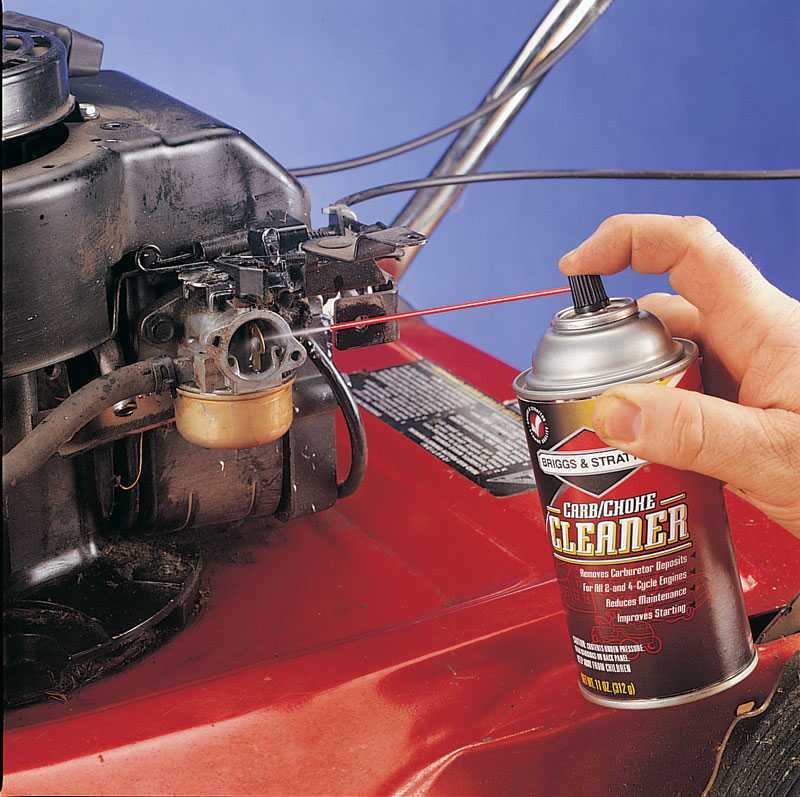
To clean a Briggs and Stratton lawn mower carburetor, first disconnect the spark plug wire and remove the carburetor from the mower. Use a carburetor cleaner to spray all passages and jets thoroughly.
Take care to clear any debris and buildup, ensuring proper airflow. Reassemble the carburetor carefully and test the mower. Knowing how to clean a Briggs and Stratton lawn mower carburetor helps maintain optimal performance and prolongs the mower’s lifespan.