Finding a grasshopper indoors can be a surprise, but don’t panic! This guide offers simple, humane ways to catch and release these fascinating insects. You’ll learn how to safely approach, capture, and relocate your unexpected guest, ensuring both your comfort and the grasshopper’s well-being. Discover effective techniques and useful tools to make the process stress-free.
# How to Catch a Grasshopper in My House
It’s a warm summer day, and you’re enjoying the quiet hum of your home when suddenly, a distinct chirping sound breaks the silence. You look around, and there it is – a grasshopper, hopping across your floor! While these backyard visitors are usually a sign of a healthy ecosystem, finding one inside can be a bit startling. But don’t worry, catching a grasshopper in your house doesn’t have to be a frantic chase. With a few simple techniques, you can humanely capture and release your unexpected guest back into the great outdoors.
This guide will walk you through everything you need to know to successfully catch a grasshopper inside your home. We’ll cover the best tools to use, step-by-step methods for capture, and tips for a safe release. You’ll learn how to be patient, how to avoid stressing the insect, and how to prevent future visits. Let’s get started on making your home grasshopper-free again!
## Understanding Your Grasshopper Visitor
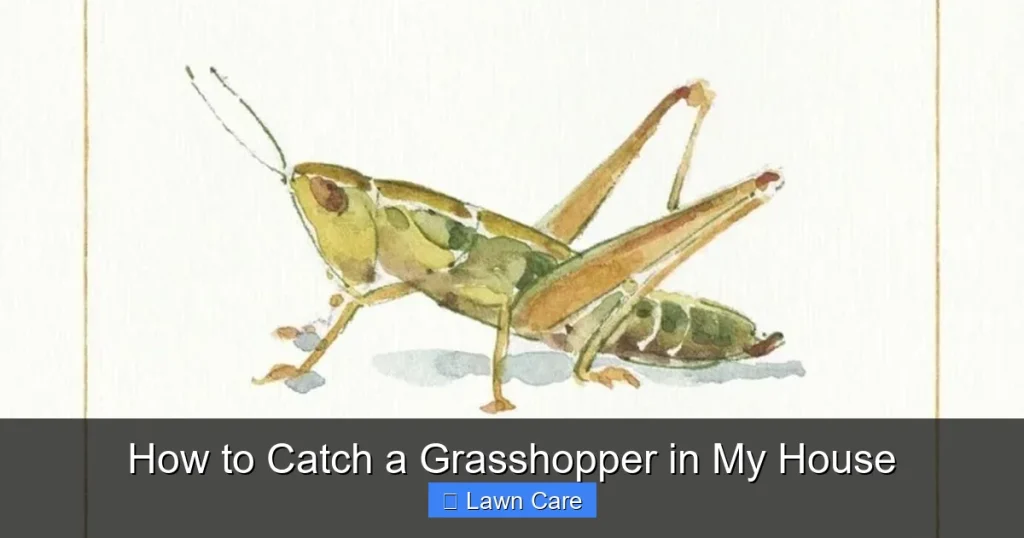
Before you grab the nearest broom, it’s helpful to understand a little about grasshoppers. These insects are known for their powerful hind legs, which allow them to jump impressive distances. They are herbivores, meaning they feed on plants. Their chirping sound, often heard in fields and gardens, is produced by rubbing their legs against their wings. While they can seem a bit alarming with their sudden movements, they are generally harmless to humans. They don’t bite or sting.
The most important thing to remember when dealing with a grasshopper indoors is to approach it with calm and gentleness. A frightened grasshopper is more likely to jump erratically, making it harder to catch and potentially leading to it getting injured or lost within your home.
## Preparation: Gathering Your Tools
Success in catching a grasshopper often comes down to being prepared. Having the right tools at hand will make the process much smoother and less stressful for both you and the insect.
### Essential Containment Devices
The primary goal is to safely contain the grasshopper. Here are some excellent options:
* Clear Glass Jar or Plastic Container: This is your best bet. A large glass jar (like a pickle jar) or a clear plastic food container with a lid works perfectly. The transparency allows you to see the grasshopper, and a lid ensures it can’t escape. Make sure the container is tall enough so the grasshopper can’t easily jump out when you’re trying to capture it.
* Bucket or Small Bin: For larger grasshoppers or if you don’t have a suitable jar, a clean bucket or a small plastic storage bin can also work.
### The Capture Aids
Once you have your container, you’ll need something to help guide the grasshopper into it.
* Sturdy Paper or Cardstock: A piece of thin but stiff cardboard or cardstock is ideal. It’s smooth enough to gently slide under the grasshopper and guide it. Old file folders or even a thick greeting card can be repurposed.
* Butterfly Net (Optional but Recommended): If you have one, a small butterfly net can be incredibly useful, especially if the grasshopper is in a difficult-to-reach spot or if it’s a particularly fast jumper. The mesh allows you to gently scoop it up.
* Gloves (Optional): If you’re squeamish about touching insects, wearing a pair of thin gardening gloves can give you a bit more confidence.
### Ensuring Airflow
It’s crucial that your container allows for ventilation.
* Making Holes: If your container lid is solid plastic, you’ll need to poke several small holes in it using a nail, an awl, or even a heated needle. This is vital for the grasshopper to breathe. If you’re using a jar with a metal lid, poking holes with a hammer and nail is a good option.
## Step-by-Step Guide to Catching a Grasshopper
Now that you’re equipped, it’s time to put your plan into action. Remember, patience and a calm demeanor are your greatest allies.
### Step 1: Locate and Observe
First, try to pinpoint where the grasshopper is and where it’s heading. Observe its movement patterns. Is it resting on a wall? Is it hopping across the floor? Knowing its location will help you plan your approach. Try not to make any sudden movements that might cause it to leap away.
### Step 2: Prepare Your Container
Have your chosen container ready and within easy reach. If you’re using a jar or bin, ensure the lid is off and positioned nearby so you can quickly secure it once the grasshopper is inside. If you’ve poked air holes, make sure they are adequate.
### Step 3: The Gentle Approach
This is the most critical step. Move slowly and deliberately towards the grasshopper. Avoid loud noises or sudden gestures. If it’s on the floor, try to get down to its level. If it’s on a wall, position yourself below it.
### Step 4: Guiding the Grasshopper (Paper/Card Method)
This method is excellent for grasshoppers on flat surfaces like floors or walls.
#### H3: Gently Slide the Card
Carefully and slowly slide your piece of paper or cardstock underneath the grasshopper. The goal is to coax it onto the card rather than trying to scoop it up aggressively. Start from behind it and slowly nudge it forward.
#### H3: Move Towards the Container
Once the grasshopper is on the card, hold the card steady and slowly bring your container over it. The idea is to get the grasshopper to walk or jump from the card into the container. You might need to gently tilt the card to encourage its movement.
#### H3: Secure the Lid
As soon as the grasshopper is inside the container, carefully slide the card away and quickly place the lid on top. Make sure it’s sealed securely. Congratulations, you’ve caught your grasshopper!
### Step 5: Capturing with a Net (If Needed)
If the grasshopper is in a high place, or if it’s very active, a net can be more effective.
#### H3: Position the Net
Gently move the net towards the grasshopper, trying to get it inside the net’s opening.
#### H3: Scoop and Transfer
Once the grasshopper is in the net, carefully twist the handle or close the net’s opening to prevent it from escaping. Then, gently transfer it into your prepared container. This might involve tipping the net so the grasshopper falls into the container, or carefully guiding it with your hand or a piece of paper.
## Releasing Your Grasshopper
Catching the grasshopper is only half the battle. The next step is releasing it back into its natural habitat.
### Step 1: Choose a Suitable Release Location
Find an area outdoors that provides plenty of vegetation for the grasshopper to eat and hide in. A garden, a park, or a grassy field are ideal. Avoid releasing it too close to your house, as it might find its way back in. Also, consider if the area is safe from predators or harsh weather. For instance, if you’ve had issues with drainage, you might want to avoid releasing it near areas prone to flooding. [This ties into broader lawn care considerations for maintaining a healthy environment.]
### Step 2: Transporting the Grasshopper
Carry the container carefully to your chosen release spot. Try to keep the container upright to prevent the grasshopper from being unnecessarily jostled.
### Step 3: The Release
Once you’re at your destination, open the lid of the container. Gently tip it sideways, allowing the grasshopper to hop out on its own. Don’t try to pull it out. Let it make its own way into the grass or foliage. You can give it a gentle nudge with a leaf if it seems hesitant, but usually, they’re eager to get back to nature.
## What to Do If It Escapes or You Can’t Catch It
Sometimes, despite your best efforts, the grasshopper might elude capture. Here’s what to do:
### If it Jumps Away
If the grasshopper makes a dramatic escape, don’t chase it relentlessly. This will only stress it out and make it harder to find again. Instead, try to remain calm. It might settle down somewhere else in the room. Give it some time, and then try your approach again, perhaps from a different angle.
### If It’s in a Difficult Spot
If the grasshopper is in a place that’s hard to reach – like behind a bookshelf or high up on a ceiling – you might need to be creative. A long broom handle with a net attached to the end could work, or you could try to gently guide it towards an open window or door using a broom (without touching it directly, of course).
### If You Can’t Catch It and It’s a Problem
If the grasshopper is causing significant disruption or you simply can’t catch it, consider leaving a window or door open. Grasshoppers are naturally drawn to the outdoors. Sometimes, giving them an easy exit is all they need.
## Prevention: Keeping Grasshoppers Out
Once you’ve successfully removed the grasshopper, you might want to take steps to prevent future indoor guests.
### Seal Entry Points
* Check Window Screens: Ensure your window screens are intact and free of holes. Repair or replace any damaged screens.
* Door Seals: Check the weather stripping around your doors. Gaps can allow insects to enter.
* Cracks and Crevices: Inspect the exterior of your house for any small cracks or openings in the foundation or siding and seal them.
### Manage Your Lawn and Garden
Grasshoppers are attracted to lush greenery. Keeping your lawn mowed regularly can make it less appealing for them to lay eggs or hide. While a well-maintained lawn is great, overgrown areas can be havens for insects. [Learning how to mow your lawn effectively, like in a checkerboard pattern, can contribute to a tidier landscape.]
### Consider Natural Deterrents
Some strong-smelling plants are said to deter grasshoppers. Planting herbs like mint, rosemary, or basil near your home’s entryways might help.
## Troubleshooting Common Issues
* Grasshopper is very fast: This is normal. Be patient. If it’s on a hard surface, try to corner it against a wall or furniture before attempting to slide the card under it.
* Grasshopper jumps into the container lid: If this happens, try to quickly place the container lid back on the container opening to trap it.
* Grasshopper seems stressed or injured: If you accidentally injure the grasshopper, try to release it as soon as possible in a safe, sheltered outdoor spot. While you can’t undo the injury, providing a conducive environment gives it the best chance of recovery. [For more on insect health, you might research how to tell if a grasshopper is dying.]
## Conclusion
Finding a grasshopper in your house is a common occurrence, especially during warmer months. By following these simple, humane methods, you can effectively catch and release these jumping insects without causing them harm. Remember to stay calm, be prepared with your tools, and approach the task with gentleness. A clear container and a piece of cardstock are usually all you need for a successful capture. By taking a few preventative measures, you can also reduce the chances of future grasshopper encounters indoors. Enjoy your grasshopper-free home, and happy nature watching from a safe distance!
- Gentle Approach is Key: Always move slowly and quietly around the grasshopper to avoid startling it. Sudden movements can cause it to jump away erratically.
- Containment Tools: A clear container, like a glass jar or plastic bin, is ideal for trapping. Ensure it has a lid with air holes for the grasshopper’s safety.
- The Paper/Card Method: Use a thin piece of paper or cardstock to gently guide the grasshopper into your chosen container. This method offers good control.
- Netting for Reach: A butterfly net or even a makeshift net can be useful for catching grasshoppers in harder-to-reach areas or for those that are particularly skittish.
- Release with Care: Once captured, relocate the grasshopper to an outdoor environment where it can thrive, ideally away from your house.
- Prevention Tips: Seal cracks and check window screens to prevent future grasshopper invasions.