Building a home made corn planter is one of those projects that sounds simple until you're standing in the shop staring at a pile of angle iron and wondering how to get seeds to drop at the exact right interval. The good news is that plenty of people have built functional planters from scratch, and the core principles haven't changed much in decades. You just need to understand how the metering system works and be willing to spend time on calibration.
Our research shows that a basic single-row build can run you anywhere from $50 to $500 in materials, depending on whether you're sourcing scrap or buying new hardware. The real challenge isn't fabrication. It's getting consistent seed spacing and depth, which is what separates a planter that actually produces a decent stand from one that just makes a mess in the dirt.
Let's walk through what you need to know.
Quick Answer
A home made corn planter is a hand-built or shop-fabricated row planting device. It uses a seed meter, furrow opener, and drive mechanism to place corn seeds at consistent depth and spacing. Most builds cost under $500.
Success depends on careful calibration of the seed plate and drive system.
Image source: Pixabay / Coernl (Pixabay Content License)
The 7 Core Components Every DIY Corn Planter Needs
Before you cut a single piece of steel, you need to understand what goes into a working planter. Every functional build, whether it's a single-row push unit or a four-row ATV-mounted rig, relies on the same seven systems working together.
Here's what each one does and why it matters:
- Seed meter (plate or finger pickup), This is the heart of the planter. It picks up individual seeds from the hopper and drops them at regular intervals. Get this wrong and nothing else matters.
- Hopper (seed box), Holds your seed corn. Sounds simple, but the angle of the hopper walls and the feed opening size determine whether seeds flow or bridge.
- Seed tube, The path from the meter to the ground. It needs to be smooth and the right diameter so seeds don't bounce or hang up.
- Furrow opener, Cuts the trench in the soil. Shoe openers work in tilled ground. Disc openers handle residue better.
- Depth gauge wheel, Controls how deep the opener digs. Usually mounted right next to the opener.
- Closing wheels (press wheels), Pinch the furrow back over the seed. Proper tension matters for seed-to-soil contact.
- Drive system, Connects a ground wheel to the seed meter via chain and sprockets. This is what determines your seed spacing.
Skip any one of these and you'll fight inconsistency all season. The good news is that each component can be built from readily available materials. Steel tubing, standard sprockets, roller chain, and basic bearings are all you need for the mechanical side.
The Seed Meter — The Part That Makes or Breaks Your Build
If you take away one thing from this whole guide, let it be this: the seed meter is where most homemade builds succeed or fail. Everything else is just structure and alignment. The meter is what controls population and spacing, and it's the component that demands the most precision.
How Plate-Type Meters Work
The most common approach for DIY builds is a gravity-fed plate meter. A flat disc (the seed plate) rotates horizontally inside a housing. One side of the plate sits in the seed reservoir.
As the plate turns, seeds fall into holes or pockets on its surface. When the plate rotates those holes past a cutout in the housing, the seeds drop through the seed tube.
The key variables are:
- Hole size, Must match your kernel size. Too big and you get doubles or triples. Too small and seeds won't fill the holes, causing skips.
- Plate speed, Determined by your drive ratio from the ground wheel. Faster rotation means wider spacing (at a given ground speed).
- Number of holes, More holes means more seeds per revolution, which translates to higher population or tighter in-row spacing.
- Plate material, Aluminum is easy to drill and resists corrosion. HDPE (cutting board material) works and is quieter. Sheet metal is cheapest but wears faster.
Image source: Pixabay / Coernl (Pixabay Content License)
Sizing Your Seed Plate
Corn kernels vary by hybrid, so you need to match your plate to your seed. University extension guidelines from Iowa State and Purdue recommend testing your seed lot before committing to a plate. Here's a general reference:
| Kernel Size Category | Approximate Hole Diameter | Seeds per Pound (typical) |
|---|---|---|
| Small/Flat | 5/32" to 3/16" | 1,400 to 1,600 |
| Medium/Round | 3/16" to 7/32" | 1,200 to 1,400 |
| Large/Flat | 7/32" to 1/4" | 1,000 to 1,200 |
Drill a test plate with a few different hole sizes. Spin it by hand over a tray and see which size picks up one seed per hole most consistently. That's your plate.
Finger Pickup Meters
Some builders use finger pickup mechanisms, which use spring-loaded fingers to singulate seeds against a vacuum or mechanical force. These are more complex to fabricate but offer better singulation on irregular seed sizes. For most first-time builds, a well-made plate meter is simpler and more than adequate for small-plot work.
Hopper and Seed Tube — Getting Seeds from Storage to Soil
The hopper seems like the easiest part to get right, but it's where a surprising number of homemade planters run into trouble. The problem is seed flow. Corn kernels, especially treated seed with a powdery coating, don't always slide smoothly down a flat surface.
Hopper Design Tips
- Wall angle matters. The sides of your hopper need to slope at least 45 degrees, and 60 degrees is better. Shallow walls cause seeds to sit on the sides instead of feeding into the meter.
- Size it right. For a single-row push planter, a 2- to 3-gallon hopper gives you enough seed for a good-sized plot without making the rig too heavy. Multi-row builds need proportionally more capacity.
- Material options. Sheet metal formed into a funnel shape works well. Some builders use sections of PVC pipe with a plywood base. Repurposed plastic containers can work for very small builds, but they tend to crack in cold weather.
- Agitation helps. If your seeds are bridging (forming an arch over the feed opening and stopping flow), a small agitator driven off the meter shaft can keep things moving. It doesn't need to be complicated. A simple paddle wheel inside the hopper bottom does the job.
Seed Tube Routing
The tube from the meter to the furrow opener needs to be as short and straight as possible. Every bend or kink is a place where a seed can catch, bounce, or delay. Use 1.5" to 2" diameter PVC or flexible tubing.
Avoid corrugated hose if you can. It creates more surface area for seeds to hit and deflect off of.
Keep the tube angled forward slightly in the direction of travel. This lets gravity and your forward momentum work together to get the seed to the bottom of the furrow quickly. A vertical drop works in theory, but in practice it can cause the seed to bounce in soft soil.
Furrow Opener and Depth Control — Where Precision Happens
Your opener creates the home for the seed. If it's not cutting a clean, consistent furrow at the right depth, even a perfect meter won't save you. There are two main approaches for homemade builds, and each has trade-offs.
Shoe Openers
A shoe opener is essentially a wedge-shaped piece of steel that pushes through the soil. It's the simplest to fabricate. You can make one from a piece of mild steel plate, bent and sharpened to a point.
It works beautifully in loose, tilled soil.
The downsides: it doesn't handle crop residue well, and it can push soil around instead of cutting through it in firm or wet conditions. If you're planting into a prepared seedbed, a shoe opener is hard to beat for simplicity.
Disc Openers
A single disc opener uses a curved blade (often a repurposed circular saw blade or a disc blade from old farm equipment) that rolls through the soil and cuts a slit. It handles residue much better than a shoe opener and works in firmer ground.
The trade-off is that disc openers need more precise mounting geometry. The disc needs to be at the right angle to actually cut rather than just pushing soil. You also need a scraper inside the disc to keep it clean, or it'll start throwing soil and clogging.
Depth Control
Your depth gauge wheel is what keeps the opener at a consistent depth. For corn, university extension recommendations consistently point to 1.5" to 2.5" as the target planting depth. Shallower than 1" and you risk poor root development.
Deeper than 3" and emergence gets uneven.
Mount your gauge wheel adjacent to the opener, not behind it. It needs to ride on the undisturbed soil surface, right where the opener is cutting. An adjustable bolt or pin mechanism lets you change depth in quarter-inch increments.
This is one area where spending a few extra minutes on adjustability pays off enormously in the field.
Drive System — How Your Planter Knows How Fast to Drop
The drive system connects your ground wheel to the seed meter. It's what translates your forward movement into seed plate rotation. Get the ratio right and seeds land where they should.
Get it wrong and you're either over-planting or leaving gaps.
Understanding Drive Ratios
Your drive ratio is the relationship between how many times your ground wheel turns and how many times your seed plate turns. A 1:1 ratio means one wheel revolution equals one plate revolution. A 2:1 ratio means the plate turns twice for every wheel revolution.
The ratio you need depends on three things:
- Your target in-row seed spacing
- Your ground wheel circumference
- The number of holes in your seed plate
Here's the basic formula:
Seed spacing = (wheel circumference / drive ratio) / number of holes in plate
For example, if your ground wheel has a 66-inch circumference (about 21" diameter), your drive ratio is 1:1, and your plate has 20 holes, your theoretical seed spacing is 3.3 inches. That's tight for corn. You'd want to either reduce the number of holes or increase the drive ratio.
Chain and Sprocket Setup
Roller chain and standard sprockets are the go-to for DIY drive systems. They're cheap, available at any farm supply store, and handle the loads involved without issue.
- Use #40 or #41 chain for most builds. It's strong enough without being overkill.
- Mount your drive sprocket on the ground wheel axle. The driven sprocket goes on the meter shaft.
- Include a tensioner or idler sprocket. Chain slack is the number one cause of skipped seeds in homemade builds.
- Keep the chain path clean. Mud and debris will throw a chain off a sprocket faster than you'd expect.
Ground Wheel Traction
Your drive wheel needs solid contact with the ground. In loose or sandy soil, a smooth wheel can slip, which means the meter isn't turning at the right speed. Add some cleats or use a wheel with a lugged tread.
Some builders weld short pieces of angle iron around the wheel circumference for grip. Just make sure whatever you add doesn't throw off your circumference measurement, since that's what your spacing calculations depend on.
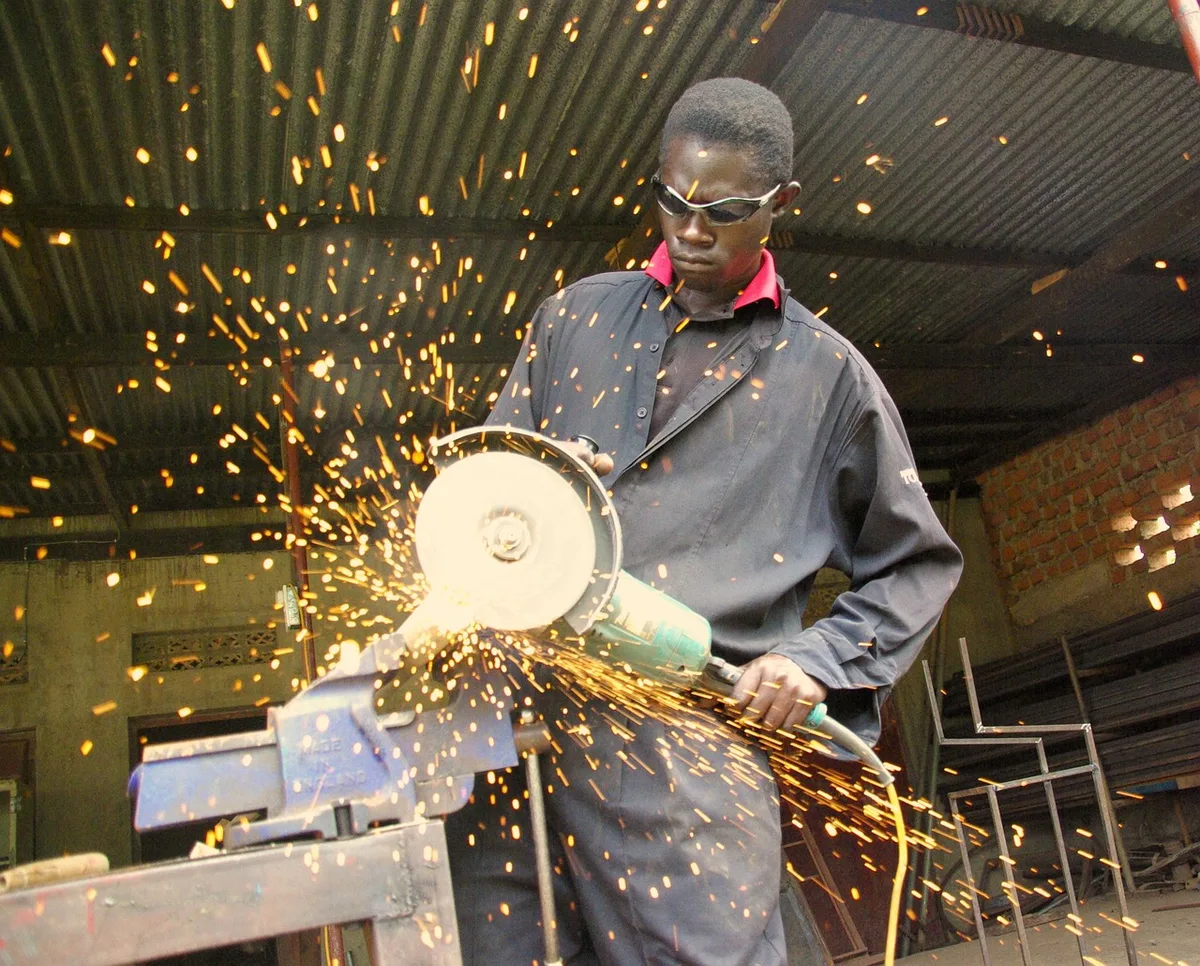
Image source: Pixabay / Odwarific (Pixabay Content License)
Frame, Hitch, and Row Assembly — Holding It All Together
Your frame is the skeleton that keeps every component aligned and rigid enough to maintain consistent opener depth. Flex in the frame means your depth gauge wheel loses contact with the ground surface, and your seed spacing goes out the square. Build it stout the first time.
Frame Material and Construction
Most builders use 2" x 2" x 1/4-inch angle iron or 2" x 2" square steel tubing. Angle iron is cheaper and easier to drill. Square tubing is stiffer for the same weight.
Either works fine for single-row push planters.
For multi-row builds, step up to 3" x 3" or even 4" x 4" tubing for the main cross members. Bolt your row units to the cross members rather than welding them permanently. That way you can adjust row spacing later without cutting and re-welding everything.
Hitch Options
- Push handles, Simple and cheap. Two pieces of pipe or angle iron extending back from the frame at shoulder height. Best for single-row units under 100 lbs.
- Three-point hitch, If you're mounting to a compact tractor, build a standard Category 1 three-point frame. Use 2" square tubing for the top link pin and 1-1/4" pins for the lower arms.
- Drawbar hitch, A single tow bar for ATV or small tractor. Keep it short enough to turn without the planter swinging wide.
Step-by-Step Build Overview — From Scrap Metal to Standing Corn
Phase 1: Design and Planning (Measure Twice, Cut Once)
Sketch your planter on paper before you buy anything. Mark your row spacing, wheel position, hopper location, and chain path. This is the time to catch interference problems, like the hopper hitting the drive wheel or the chain crossing the seed tube.
Calculate your target drive ratio using the formula from the drive system section. Order your sprockets and chain at this stage so you can build the mounting brackets to fit.
Phase 2: Frame Fabrication
Cut your main frame members to length. Drill mounting holes for the row unit, drive wheel axle, and hitch points. Bolt or weld the frame together.
If you're welding, tack everything first and check squareness before running full welds. A frame that's even slightly twisted will cause tracking problems in the field.
Phase 3: Installing the Seed Metering System
Mount the seed meter housing to the frame. Install the seed plate and verify it spins freely without rubbing. Attach the hopper and seed tube.
Run the drive chain from the ground wheel to the meter sprocket. Check tension and alignment.
Phase 4: Mounting Openers, Closing Wheels, and Drive
Bolt the furrow opener to the row unit mount. Set your depth gauge wheel at the midpoint of its adjustment range. Install closing wheels behind the opener.
Mount the drive wheel on its axle and verify the chain runs true between both sprockets.
Phase 5: Calibration — The Step Most People Skip
This is where you find out if your planter actually works. Jack up the ground wheel so it spins freely. Place a tarp or bucket under the seed tube.
Turn the wheel exactly 10 revolutions. Count the seeds that drop.
Multiply your seed count by the number of revolutions per foot of travel (based on your wheel circumference). Compare that to your target population. Adjust your drive ratio or swap seed plates until you're within 5% of your target.
It takes time. It's worth it.
Image source: Pixabay / Couleur (Pixabay Content License)
What a Real Build Costs (and How It Compares to Buying)
Material Cost Breakdown
| Component | Budget Build | Mid-Range Build |
|---|---|---|
| Steel frame material | $30 to $60 | $60 to $120 |
| Seed meter (plate and housing) | $15 to $40 | $40 to $100 |
| Chain, sprockets, bearings | $20 to $50 | $50 to $80 |
| Drive wheel | $10 to $30 | $30 to $60 |
| Opener and closing wheels | $15 to $40 | $40 to $80 |
| Hardware, fasteners, misc | $15 to $30 | $30 to $50 |
| Total | $105 to $250 | $250 to $490 |
Homemade vs. Commercial vs. Used — Honest Comparison
A new commercial walk-behind planter like an EarthWay runs $150 to $350. It's calibrated out of the box and works well for small gardens. A used John Deere 7000 or Allis-Chalmers planter can be found for $1,500 to $5,000, but it may need new discs, bearings, and seed tubes.
Your homemade build sits in the middle. It costs less than a used commercial unit and you can customize it to your exact row spacing. But it won't have seed monitors, hydraulic downforce, or the build quality of a factory unit.
For 1 to 20 acres, it's a solid choice. For 100 acres, buy something factory-built.
Common Mistakes That Kill Seed Spacing and Stand Count
- Skipping calibration. Guessing your drive ratio instead of measuring it. You'll be off by 20% or more.
- Using a chain without a tensioner. One bump in the field and your chain jumps a sprocket. Seeds stop dropping.
- Hopper walls too flat. Seeds sit on the sides instead of feeding the meter. You think you're out of seed but the hopper is half full.
- Mounting the depth wheel behind the opener. It rides in the furrow bottom, not the soil surface. Depth control becomes erratic.
- Ignoring seed treatment dust. Treated seed leaves a powder buildup in the plate holes. Clean your plate every few bags or your singulation drops off.
- Building the frame too light. Thin steel flexes under field conditions. Your opener depth wanders and your stand suffers.
Who Should Build One (and Who Should Just Buy)
A homemade corn planter makes sense if you have basic fabrication skills, a small plot (under 20 acres), and the time to calibrate properly. It's also a great choice if you need non-standard row spacing that commercial planters don't offer.
Skip the build if you're planting more than 20 acres, if you need precision population control for high-input hybrids, or if you don't have access to a welder and basic shop tools. In those cases, a used commercial planter will save you time and give you better results.
Maintenance, Troubleshooting, and Making It Last
After every planting session, empty your hopper completely. Shake out the seed tube and wipe down the seed plate. Corn seed treatment chemicals are corrosive, and leaving them in the metal components overnight accelerates rust.
At the end of the season, spray all metal surfaces with a light oil or fluid film. Check chain tension and tighten if needed. Inspect your seed plate for worn or enlarged holes.
A plate that was perfect last season may have worn enough to cause doubles this year.
If you're getting skips in the field, check these in order: chain tension, seed plate condition, hopper feed opening, and ground wheel traction. If you're getting doubles, check your plate hole size and your drive ratio. Most problems come down to one of these five things.
Frequently Asked Questions
How long does it take to build a homemade corn planter?
Expect 20 to 80 hours depending on complexity. A basic single-row push planter takes about 20 to 30 hours. A multi-row ATV-mounted unit can take 60 to 80 hours, especially if you're fabricating everything from scratch.
Can I use a homemade planter for soybeans or other crops?
Yes. Swap to a seed plate with smaller holes and adjust your drive ratio for the target population. Soybeans typically need smaller holes and tighter in-row spacing than corn.
The same frame and drive system works for sunflowers, dry beans, and other large-seeded crops.
What is the ideal planting speed for a push planter?
3 to 5 mph is the practical range for walking-speed planters. Faster than that and your ground wheel starts bouncing, which causes inconsistent metering. Slower is fine but you're sacrificing efficiency.
Do I need to paint or coat the frame?
You should. Bare steel rusts fast, especially with fertilizer and seed treatment chemicals. A coat of spray paint or powder coating extends the life of your frame by years.
At minimum, hit all exposed metal with a rust-inhibiting spray.
How do I know if my seed spacing is accurate?
Plant a short test row and carefully dig up the seeds along a measured distance. Count and measure. It's tedious but it's the only way to truly verify your calibration.
Don't rely on theory alone.