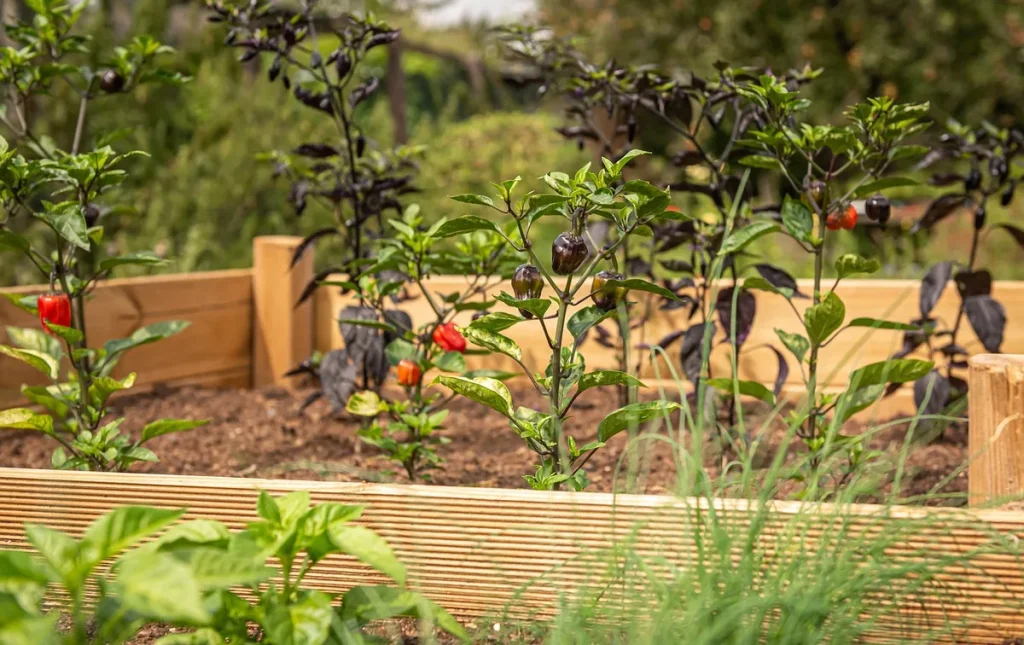
A castle block raised bed is one of the most durable, low-maintenance ways to grow vegetables, herbs, and flowers at home. Instead of wood that rots or metal that rusts, you're stacking interlocking concrete blocks into a structured wall, filling the center with soil, and planting right in. The result is a raised bed that can last 30 to 50 years with almost no upkeep.
The "castle" part comes from the crenellated top course, those notched blocks that give the bed a finished, architectural edge. Most castle blocks are designed for dry-stack retaining wall systems, meaning no mortar, no special tools, and no contractor needed. As of 2026, they're widely available through landscaping supply yards across North America, typically running $3 to $8 per block depending on your region.
Image source: Pixabay / AndreasGoellner (Pixabay Content License)
Quick Answer
A castle block raised bed is a garden bed built from interlocking concrete retaining wall blocks stacked without mortar. The blocks have a lip or flange that locks each course in place. The top course uses crenellated blocks that create a decorative castle-like edge.
A typical 4' x 8' bed requires 20 to 30 blocks and costs roughly $60 to $240 in blocks alone.
What Is a Castle Block Raised Bed, and Why Are Gardeners Switching to Them?
A castle block raised bed uses a specific type of concrete masonry unit designed for segmental retaining walls. Each block has an interlocking lip, usually on the back bottom edge, that catches the block below it. This lets you stack courses securely without any adhesive between them.
The crenellated top blocks set these apart from standard retaining wall systems. They have a notched profile along the top edge, giving the finished bed a clean, intentional look. It's a small detail, but it makes the bed feel like a designed landscape feature rather than leftover construction material.
Gardeners are gravitating toward this method for practical reasons. Wood raised beds, even cedar, typically last 7 to 15 years before rot sets in. Corrugated metal beds can rust at the soil line within 5 to 10 years.
Castle block beds are made from concrete rated at 3,000 to 5,000 PSI compressive strength. They handle freeze-thaw cycles, moisture, and soil pressure without degrading.
There's also the modularity factor. If you want to extend the bed, change its shape, or relocate it, you can disassemble the blocks and rebuild. Try doing that with a poured concrete planter.
How Castle Block Raised Beds Actually Work
The engineering behind these beds is straightforward. Each block weighs between 25 and 40 lbs, and gravity does most of the holding. The interlocking lip on each block sits behind the block below it, creating a mechanical lock that resists the outward pressure of the soil inside.
Here's how the pieces fit together:
- Straight-run blocks form the long sides of the bed. They're rectangular with the lip on one short end.
- Corner blocks have lips on two adjacent sides, letting you turn a 90-degree corner while maintaining the interlock.
- Crenellated cap blocks go on the top course. They have the notched castle profile and usually no lip.
- Hollow cores run through the center of most blocks. You fill these with gravel or sand to add weight and stability.
The whole system relies on a level base. If the first course isn't perfectly level, every course above it compounds that error. That's why base preparation is the single most important step in the entire build.
For beds under 16 inches tall (two courses), the weight of the blocks and the interlock are usually enough to handle soil pressure. Once you go to three courses or higher, or if you're building on a slope, you may need to pin the blocks together with rebar driven through the cores into the ground.
What You Need: Blocks, Tools, and Materials
Gather everything before you start. Running back to the supply yard mid-build wastes time.
Blocks and Materials
| Item | Quantity (for 4' x 8' bed) | Notes |
|---|---|---|
| Straight-run castle blocks | 18 to 24 | Depends on block length (12" or 16" typical) |
| Corner blocks | 4 | One per corner |
| Crenellated cap blocks | 18 to 24 | Same count as straight-run |
| Gravel (3/4" crushed) | 4 to 6 cubic feet | For base pad |
| Coarse sand | 1 to 2 cubic feet | For leveling layer |
| Landscape fabric | 1 roll | Lines the inside walls |
| Raised bed soil mix | 32 cubic feet | For a 4' x 8' x 12" bed |
| Rebar pins (optional) | 4 to 8 pieces, 12" long | For beds 2+ courses tall |
Tools
- Shovel and flat spade
- Wheelbarrow
- 4-foot level (or a 2-foot level and a long straight board)
- Rubber mallet
- Tape measure
- Stakes and string
- Tamper (hand or plate)
- Work gloves and safety glasses
You don't need a saw, drill, or any power tools for a basic build. If you need to cut a block, most landscaping supply yards will do it for you.
Step-by-Step Build Process
Here's the full build from empty yard to planted bed.
Step 1: Choose your location and mark the footprint. Pick a spot that gets at least 6 to 8 hours of direct sun for vegetables. Use stakes and string to mark the outside dimensions. A 4' x 8' rectangle is the most common size because you can reach the center from either side.
Step 2: Clear and excavate. Remove grass, weeds, and debris. Dig down about 6 inches. You need room for a 4-inch gravel base plus a sand leveling layer.
Step 3: Compact the soil subgrade. Use a hand tamper or plate compactor to firm up the exposed soil. Loose subgrade is the number one reason these beds settle unevenly.
Step 4: Spread and compact gravel. Pour 3/4" crushed gravel to a depth of 4 inches. Rake level and compact thoroughly.
Step 5: Add a sand leveling layer. Spread 1 to 2 inches of coarse sand. Screed flat using a straight board.
Step 6: Lay the first course. Place the first block at one corner. Check level in both directions. Continue around, lips facing inward.
Use the rubber mallet to tap blocks into position. Check level constantly.
Step 7: Stack subsequent courses. Stagger the vertical joints by offsetting each block by half its length. This staggered bond pattern adds structural strength.
Step 8: Fill hollow cores. Pour gravel or sand into each block's core as you build. This adds weight and prevents freeze-thaw damage.
Step 9: Install the crenellated cap course. These sit flat on the course below with no lip. Make sure they're level and aligned.
Step 10: Line the inside walls. Attach landscape fabric to keep soil from washing through the joints.
Step 11: Fill with soil and plant. A common mix is 60% topsoil, 30% compost, and 10% perlite. Water thoroughly before planting.
Base Preparation: The Step That Makes or Breaks It
If there's one section to read twice, it's this one. Spend 60 to 90 minutes on the base for a 4' x 8' bed. It's the best time investment you'll make.
Excavate to the right depth. For a single-course bed, dig out 6 inches. For two courses, go 8 inches. You want the first course sitting just at or slightly below ground level.
Compact the exposed soil. Don't skip this. Loose soil settles under the weight of gravel, blocks, and soil fill.
Add gravel in lifts. Spread 2 inches, compact it, then add the next 2 inches and compact again. This method gives a much firmer base than one thick layer.
Screed the sand leveling layer. Lay two parallel pipes on the gravel as rails, fill between with sand, then drag a straight board across the top.
Dry-fit the first course. Place all blocks without pressing down. Measure the diagonals to confirm the rectangle is square. Equal diagonals mean 90-degree corners.
Level each block individually. Check in both directions. Tap high spots down. Lift low spots and add sand underneath.
Check the entire course as a unit. Run your level across the full length of each side. Fix any deviation now.
Image source: Pixabay / Daria-Yakovleva (Pixabay Content License)
Stacking, Staggering, and Filling the Cores
Once the first course is level, stacking the rest is quick. Follow these rules.
Stagger the joints. On the second course, start with a half block so vertical joints don't line up. This distributes load and prevents a straight crack line.
Check level on every course. Soil and gravel shift slightly as you work. Place your level across each block as you go.
Fill cores as you build. Pour gravel or sand into each course's cores before moving to the next. Tamp it down to eliminate voids. In cold climates, unfilled cores collect water that expands when it freezes and cracks the block from the inside.
How tall should you go?
| Height | Courses | Best For | Notes |
|---|---|---|---|
| 4 to 6 in | 1 (cap only) | Herb borders | Minimal soil depth |
| 8 to 12 in | 1 course + cap | Lettuce, herbs | Most common build |
| 16 to 18 in | 2 courses + cap | Tomatoes, peppers | Good stability balance |
| 24 in | 3 courses + cap | Deep-rooted crops | Consider rebar pinning |
For beds two courses or taller, drive 12-inch rebar pins through aligned cores at each corner and every 4 feet along the sides. This pins the courses together and prevents bowing.

Image source: Pixabay / blickpixel (Pixabay Content License)
Castle Block vs. Timber vs. Metal Raised Beds
No single material is perfect for every situation. Here's how they compare.
Timber Beds
Cedar and redwood resist rot naturally. Pine is cheap. But even cedar beds last 7 to 15 years before the bottom course deteriorates.
Pressure-treated lumber lasts longer but raises concerns about chemical leaching into edible gardens.
Timber beds are lighter, easier to cut, and faster to assemble. A 4' x 8' cedar kit runs $80 to $200. Factor in replacement every decade, and the long-term cost adds up.
Corrugated Metal Beds
Galvanized steel beds have a modern look. Prefabricated kits bolt together in under an hour. The downside is corrosion.
Most metal beds show rust within 5 to 10 years at the soil line. Sharp cut edges can be a hazard during assembly.
Metal beds heat up in direct sun, which can stress some crops in hot climates. They're lightweight, good for portability but bad in windy areas.
Castle Block Beds
Concrete blocks win on durability. A well-built bed will outlast you. They're heavy, so they stay put in wind and resist soil pressure without bowing.
The crenellated top gives a finished look that timber and metal can't match without add-on trim.
The tradeoffs are weight, cost ($60 to $240 in blocks for a 4' x 8' bed), and permanence. You can move a castle block bed, but it's a two-person job.
| Factor | Castle Block | Timber | Corrugated Metal |
|---|---|---|---|
| Lifespan | 30 to 50+ years | 7 to 15 years | 5 to 10 years |
| Cost (4' x 8') | $60 to $240 (blocks) | $80 to $200 (kit) | $100 to $250 (kit) |
| Assembly | Moderate (heavy) | Easy | Easy |
| Maintenance | Almost none | Replace boards | Monitor rust |
| Aesthetic | Structured | Rustic | Modern |
| Portability | Low | Moderate | High |
Image source: Pixabay / AndreasGoellner (Pixabay Content License)
If you want a bed you'll never rebuild, castle block wins. If you're renting or might move soon, timber or metal kits make more sense.
Where Castle Block Beds Work Best
Ideal scenarios:
- Permanent backyard gardens. A one-time investment that pays off for decades.
- Sloped yards. The interlocking system handles terracing well. Build a stepped series of beds down a hillside.
- Accessible gardening. A two-course bed (16 to 18 inches) puts soil at a comfortable height for gardeners with back or knee issues.
- Formal landscapes. Clean lines and the crenellated top complement structured garden designs.
- Community gardens. Durability means these beds handle heavy use without constant repair.
Less ideal scenarios:
- Rental properties. The weight and effort of removal make these impractical for short-term setups.
- Rooftops and decks. A filled castle block bed is extremely heavy. Most structures aren't designed for that load.
- Tight budgets. If you need a bed under $100 total, timber or repurposed materials get you there faster.
- Frost-heave zones without proper base prep. In deep frost regions, an inadequate base will shift blocks over winter.
The Real Cost Breakdown
Here's the actual cost of a 4' x 8' castle block bed, single course plus cap, filled with soil.
| Component | Estimated Cost (USD, 2026) |
|---|---|
| Castle blocks (20 to 28 pieces) | $60 to $224 |
| Gravel base (4 to 6 cu ft) | $15 to $30 |
| Sand leveling layer | $5 to $10 |
| Landscape fabric | $10 to $20 |
| Raised bed soil mix (1.2 cu yd) | $40 to $80 |
| Rebar pins (optional) | $8 to $16 |
| Total | $138 to $380 |
The wide range depends on block pricing, which varies by region. Buying from a landscaping supply yard is almost always cheaper than a big-box store.
Over a 30-year timeline, the per-year cost of a castle block bed is lower than timber or metal, since you won't need to replace it.
Common Mistakes to Avoid
These errors are all avoidable.
Skipping the gravel base. Blocks on soil settle unevenly. Always use compacted gravel.
Not leveling the first course. A quarter-inch error on the first course becomes a full inch of lean by the third. Take the time.
Leaving cores unfilled. Hollow cores collect water. In freeze-thaw climates, that water expands and cracks blocks. Fill every core.
Using plastic instead of fabric. Plastic traps water behind walls and creates hydrostatic pressure that pushes blocks outward. Use woven landscape fabric.
Building too tall without reinforcement. A three-course bed holds a lot of soil. Pin with rebar and consider geotextile reinforcement behind the wall.
Ignoring drainage. If water pools inside, the soil becomes waterlogged. Make sure the bed slopes slightly away from structures.
Pro Tips for a Better Build
- Buy 10% extra blocks. Some may be damaged. You'll want spares for future extensions.
- Use a string line for long runs. Stretch a taut string along each side to keep block faces aligned.
- Backfill behind walls with gravel. This improves drainage and reduces lateral pressure on the blocks.
- Plant creeping thyme in the joints. It softens the look and helps prevent weeds.
- Seal the blocks for a darker finish. A concrete enhancer brings out the color. Apply after assembly.
- Call 811 before digging. Always mark underground utilities first. It's free and could save your life.
Maintenance and Long-Term Care
These beds need very little upkeep. But "low maintenance" doesn't mean "no maintenance."
Annual checklist:
- Check for shifted or settled blocks. Re-level by adjusting sand underneath.
- Pull weeds from joints between blocks. A flat-head screwdriver works well.
- Inspect landscape fabric. Replace if torn.
- Top off soil with 1 to 2 inches of compost each spring.
Drainage tips:
- Add a 2-inch gravel layer at the bed bottom if you're in a low spot.
- In heavy clay areas, consider a small French drain behind the walls.
- Don't step in the bed. Stay on the paths.
Winter care:
- Fill all cores before winter. This prevents freeze-thaw cracking.
- Don't pile snow against the walls. Added weight and moisture can push blocks outward.
- Replace any cracked blocks in spring. The dry-stack system makes this straightforward.
Safety and Permit Considerations
Height regulations. Many municipalities classify walls over 3 to 4 feet as retaining walls requiring a permit and engineering approval. Check your local building department before building taller than three courses.
Lifting safety. Each block weighs 25 to 40 lbs. Bend at the knees. Wear steel-toe boots.
Recruit a helper if you have back issues.
Underground utilities. Call 811 before any digging. Always.
Sharp edges. Freshly cut blocks can be sharp. Handle with gloves. File rough spots with a masonry rasp.
Children and pets. A single-course bed is low enough that falls are unlikely to cause injury. For taller beds near play areas, consider rounded-edge cap blocks if available.
Frequently Asked Questions
How many blocks do I need for a 4' x 8' bed?
Roughly 18 to 28 blocks for a single course plus cap, depending on block length. Buy 10% extra for cuts and future extensions.
Can I build on a slope?
Yes. The interlocking system works well for terracing. Start at the lowest point and work uphill.
For slopes steeper than 15 degrees, consider geogrid reinforcement.
Do I need mortar?
No. Castle blocks are designed for dry-stack construction. The interlocking lip and block weight hold everything in place.
Mortar makes the bed less flexible and more prone to cracking.
Will concrete blocks leach chemicals into soil?
Standard concrete blocks are inert once cured. They won't leach harmful chemicals at levels that affect plant growth or food safety.
How deep should the soil be?
Most vegetables need at least 10 to 12 inches. A single-course bed works for shallow crops. For tomatoes and root vegetables, go with a two-course bed (16 to 18 inches).
Can I paint or stain the blocks?
Yes. Concrete accepts masonry paint and stain well. Clean blocks thoroughly and let them dry 48 hours before applying.
Avoid coating interior surfaces that contact soil.
Final Verdict
If you own your home, want a raised bed that'll last a lifetime, and don't mind a Saturday of physical work, a castle block raised bed is hard to beat. The upfront cost is higher than timber or metal, but the near-zero maintenance and 30 to 50 year lifespan make it the most cost-effective option over time.
It's the right choice for permanent installations, sloped yards, accessible-height gardens, and formal landscapes. It's less ideal if you're renting, on a tight budget, or need something portable.
Prep the base carefully, level the first course, stagger the joints, fill the cores, and cap it off with those crenellated blocks. Do it right and you'll have a garden bed that looks better with age.