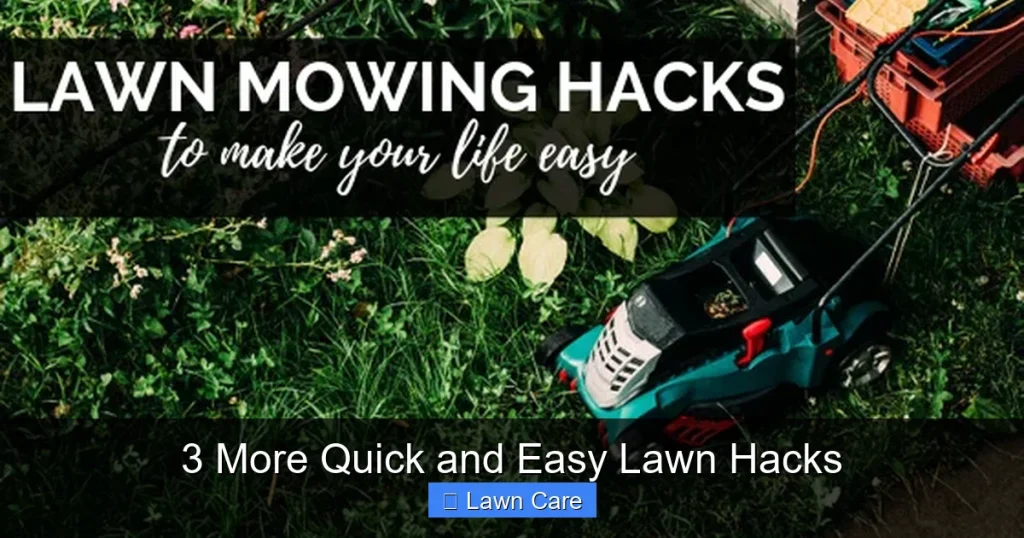
Tired of wrestling with a finicky lawn? We’ve got three more simple, quick, and easy lawn hacks to make your life easier and your grass greener. From DIY aerators to smart watering tricks, these tips are designed for minimal effort and maximum impact. Get ready to transform your yard with these clever, budget-friendly solutions.
Hello, fellow lawn enthusiasts! If you’re anything like me, you love a lush, green carpet of grass. But let’s be honest, achieving and maintaining that perfect lawn can sometimes feel like a full-time job. We’ve all been there, staring at brown patches or struggling with stubborn weeds. The good news is, you don’t need a degree in horticulture or a bottomless budget to make your lawn the envy of the neighborhood. We’ve already shared some fantastic tips, and today, we’re diving into *three more quick and easy lawn hacks* that will make your lawn care routine a breeze. These are the kind of tricks that save you time, money, and a whole lot of hassle.
So, grab your favorite beverage, settle in, and let’s discover some simple yet effective ways to give your lawn the TLC it deserves. These hacks are designed for real people with real lives, focusing on practical solutions that deliver noticeable results. Forget complicated jargon and expensive gadgets; we’re talking about smart, simple strategies that anyone can implement.
## Hack 1: The DIY Lawn Aerator – Punching Holes for Healthier Roots
One of the biggest secrets to a vibrant lawn is healthy soil. Over time, foot traffic, heavy equipment, and even just natural soil compaction can create a dense layer that prevents water, air, and nutrients from reaching your grass’s roots. This is where aeration comes in, and it’s a game-changer for lawn health. But buying or renting a professional aerator can be a hassle and an expense. What if I told you that you could make your own effective lawn aerator without breaking the bank?
### Why Aeration Matters
Before we get to the DIY part, let’s quickly touch on why aeration is so crucial. When your soil is compacted, it’s like trying to drink through a straw that’s been squashed flat. The roots can’t expand, they struggle to get water, and they become weaker. This makes your lawn more susceptible to drought, disease, and weed invasion. Aerating creates small holes, allowing these essential elements to penetrate deep into the soil. It’s like giving your lawn a chance to breathe and drink properly. If you’re curious about when and how to aerate, especially in colder climates, there are great resources like [cold climate lawn care when and how to aerate in frost prone areas](https://lawnhelpful.com/cold-climate-lawn-care-when-and-how-to-aerate-in-frost-prone-areas/).
### Building Your Budget-Friendly Aerator
This hack is surprisingly simple and uses materials you might already have around the house or can easily find at a hardware store. The goal is to create something that can effectively poke holes into your soil.
#### Materials You’ll Need:
* **A sturdy old shoe or boot:** Preferably one that’s comfortable to stand in and has decent ankle support. A work boot or a sturdy hiking boot is ideal.
* **Screws or bolts:** About 3-4 inches long. You’ll need about 8-12 of them, depending on how many holes you want per “step.”
* **Washers:** To fit your screws or bolts.
* **A drill and drill bits:** You’ll need one bit slightly smaller than your screws/bolts for pilot holes and one bit that matches the diameter of your screws/bolts for the actual holes.
* **A wrench or screwdriver:** To tighten the screws/bolts.
#### Step-by-Step Construction:
1. **Prepare the Shoe:** Clean out any dirt from your old shoe. Make sure it’s dry.
2. **Mark Your Holes:** Decide where you want the aeration spikes to be on the sole of the shoe. Aim for a pattern that will allow for good coverage. You want them to poke out at an angle that makes sense when you’re walking.
3. **Drill Pilot Holes:** Using a drill bit that’s slightly smaller than your screws/bolts, drill pilot holes at the marked spots on the sole of the shoe. Be careful not to drill all the way through the top of the shoe.
4. **Drill the Spike Holes:** Now, use a drill bit that matches the diameter of your screws/bolts. Drill through the sole where you made the pilot holes. You want these holes to go all the way through the sole.
5. **Insert Screws and Washers:** Place a washer onto each screw/bolt. Then, insert the screw/bolt through the sole from the inside of the shoe outwards. The threaded part of the screw/bolt should stick out from the bottom of the sole, acting as your aerator spikes.
6. **Secure Them:** Use a wrench or screwdriver to tighten the screws/bolts from the inside of the shoe. You want them to be snug and secure. The washers will help distribute the pressure and prevent the screws from pulling through the sole.
7. **Test It Out:** Once everything is secure, put on the shoe (maybe over your regular shoes for extra comfort and protection) and take a few steps on a patch of lawn. You should feel and see the spikes penetrating the soil.
#### How to Use Your DIY Aerator:
Simply walk around your lawn, taking steps and pressing down firmly. Aim for a pattern that covers the entire area. It might feel a bit like a workout, but it’s a great way to get some exercise while improving your lawn. This is especially effective for smaller to medium-sized lawns. For larger areas, you might consider [buying vs renting a lawn aerator](https://lawnhelpful.com/buying-vs-renting-a-lawn-aerator-which-is-more-cost-effective/) if this method becomes too time-consuming.
**Pro-Tip:** If you find the screws aren’t long enough, you can try using slightly longer ones, or even adding some small metal tubes or pipes to the ends of the screws for extra depth. Always ensure the spikes are not so long that they damage underground utilities or sprinkler systems.
## Hack 2: The “Water Less, Water Deeply” Strategy – Encouraging Drought-Proof Grass
Watering your lawn is essential, but *how* you water can make a huge difference. Many people fall into the trap of frequent, shallow watering. This might make the grass look green for a short while, but it encourages shallow root growth. When the weather gets hot and dry, these shallow-rooted lawns quickly turn brown and suffer. The secret to a truly resilient lawn is to train its roots to grow deep. And the best way to do that? Water less often, but water more deeply.
### The Shallow Watering Trap
Imagine a plant with roots that only reach an inch into the soil. When the surface dries out, the plant wilts. Now imagine a plant with roots that reach a foot down. It has access to moisture even when the surface is bone dry. This is exactly what happens with your lawn. Frequent, light watering keeps the moisture only in the top layer of soil, which is exactly where the roots want to stay. They don’t have to work to grow deeper because water is always readily available right there.
### The Deep Watering Solution
The “water less, water deeply” strategy is all about encouraging those roots to seek out moisture.
#### How to Implement It:
1. **Water Infrequently:** Instead of watering every day or every other day, aim to water only when your lawn truly needs it. How do you know? Look for signs of stress: the grass blades start to lose their springiness and look dull, or they may take on a bluish-gray tint. You can also use a screwdriver; if it easily pushes into the soil, it’s likely moist enough. If it’s hard to push in, it’s time to water.
2. **Water Deeply:** When you *do* water, make sure you’re watering long enough for the moisture to penetrate 4-6 inches into the soil. For most lawns, this means running your sprinklers for about 20-30 minutes per zone. The goal is to soak the soil thoroughly.
3. **Allow to Dry Out:** After a deep watering, allow the lawn to dry out before watering again. This encourages the roots to grow deeper in search of moisture. This cycle of deep watering and drying is what builds a strong, resilient root system.
#### Benefits of Deep Watering:
* **Drought Tolerance:** Your lawn will be much more capable of surviving dry spells.
* **Reduced Weed Growth:** Deep roots mean healthier, denser grass that can better outcompete weeds.
* **Improved Soil Health:** Deeper watering can help leach salts and other accumulated minerals from the soil.
* **Less Fungal Disease:** Allowing the grass to dry out between waterings can help prevent common fungal diseases.
**Seasonal Considerations:** Remember that watering needs change with the seasons. In cooler, wetter months, you’ll need to water less frequently, or perhaps not at all. Always adjust your schedule based on the weather. For example, in the fall, you might wonder, [should you water lawn in fall and winter?](https://lawnhelpful.com/should-you-water-lawn-in-fall-and-winter/). The answer often depends on your climate and grass type.
## Hack 3: The Kitchen Cabinet Weed Zapper – Vinegar and Dish Soap Power
Weeds. They’re the bane of every lawn owner’s existence. They pop up everywhere, stealing nutrients and water from your prized grass. While there are many commercial herbicides, they can be expensive, potentially harmful to your pets and family, and can damage the environment. But what if you could wage war on weeds using items you probably already have in your kitchen? This hack is all about a simple, effective, and eco-friendly weed killer.
### The Problem with Traditional Herbicides
Many store-bought weed killers work by poisoning the plant. While they can be effective, they often contain harsh chemicals. These can linger in the soil, harm beneficial insects, and can be dangerous if ingested by pets or children. Plus, they can sometimes damage your lawn grass if not applied perfectly.
### Your Natural Weed Solution
This DIY weed killer is a natural, non-selective herbicide. This means it will kill any plant it comes into contact with, so you need to be careful where you apply it. But for targeted weed removal, it’s fantastic.
#### What You’ll Need:
* **White Vinegar:** Use standard household white vinegar (5% acidity). The acetic acid in vinegar is what kills the weeds by dehydrating them and burning their leaves and stems.
* **Dish Soap:** A few drops of liquid dish soap. This acts as a surfactant, helping the vinegar stick to the weed’s leaves and penetrate its waxy coating.
* **A Spray Bottle:** A clean, empty spray bottle is ideal for application.
#### The Simple Recipe:
Mix one gallon of white vinegar with about a tablespoon of liquid dish soap. You can adjust the ratio slightly, but this is a good starting point. Pour the mixture into your spray bottle.
#### How to Use It:
* **Choose the Right Time:** Apply this mixture on a sunny, warm day. The sun helps to speed up the dehydration process, making the vinegar more effective. Avoid windy days, as you don’t want the spray to drift onto your desired plants.
* **Target Carefully:** Spray the mixture directly onto the weeds. Be precise. Try to spray only the weeds themselves, avoiding your lawn grass and any other plants you want to keep.
* **Repeat if Necessary:** For tougher weeds, you might need to apply the mixture a second time after a few days. The key is to repeatedly expose the weed to the vinegar until it dies completely.
#### Important Considerations:
* **Non-Selective:** As mentioned, this will kill any plant it touches. It’s great for cracks in sidewalks, driveways, or for spot-treating stubborn weeds in your lawn, but use it with caution.
* **Soil pH:** While generally safe, using a lot of vinegar can temporarily lower the soil’s pH. For most spot-treatment applications, this isn’t a significant concern.
* **Not a Root Killer:** This mixture is most effective on young weeds and annuals. It typically burns down the top growth but may not kill the roots of perennial weeds. For persistent perennial weeds, you might need to repeat applications or explore other methods.
This is a fantastic way to tackle weeds without resorting to harsh chemicals. It’s cheap, easy, and you can feel good about using it around your home. For more on preventing weeds, especially common ones like crabgrass, you might look into [prevent crabgrass preventer and lawn fertilizer](https://lawnhelpful.com/prevent-crabgrass-preventer-and-lawn-fertilizer/).
## Beyond the Hacks: Maintaining Momentum
These three quick and easy lawn hacks – the DIY aerator, the deep watering strategy, and the kitchen cabinet weed zapper – are just the beginning. They’re designed to be simple, effective, and budget-friendly. Remember that consistent, smart lawn care is key. Even with these hacks, you’ll still want to ensure your mower is in good shape. For example, a well-maintained carburetor is crucial for optimal engine performance. If your Briggs and Stratton mower is acting up, learning [how to clean carburetor on Briggs and Stratton lawn mower](https://lawnhelpful.com/how-to-clean-carburetor-on-briggs-and-stratton-lawn-mower/) can make a big difference.
### The Power of Mulching Mowing
Another often-overlooked hack is the power of your mulching mower. Instead of bagging grass clippings, let your mulching mower finely chop them and return them to the lawn. These clippings are rich in nitrogen and other essential nutrients, acting as a natural fertilizer. This not only reduces the need for chemical fertilizers but also helps retain moisture in the soil. It’s a simple act that provides significant benefits to your lawn’s health and your wallet.
### Keeping Edges Sharp and Clean
A well-defined lawn edge instantly makes your yard look tidier and more professional. While string trimmers and edgers are common, a simple hack for maintaining edges is using a flat-edged shovel or even an old spade. Keep a sharp edge on it, and you can easily cut clean lines along sidewalks and garden beds. It’s a surprisingly effective and low-tech way to maintain [lawn edges and borders](https://lawnhelpful.com/how-to-maintain-lawn-edges-and-borders/).
### Tracking Your Progress
Finally, don’t forget to track your progress! Understanding [what is the difference between lawn care and lawn maintenance](https://lawnhelpful.com/what-is-the-difference-between-lawn-care-and-lawn-maintenance/) and keeping an eye on how your lawn is responding to your efforts can be very rewarding. Use a simple journal or an app to note when you aerated, how you watered, and what steps you took to control weeds. This will help you refine your approach and identify what works best for your specific lawn.
### Conclusion: Simple Steps for a Stunning Lawn
Achieving a beautiful lawn doesn’t have to be complicated or expensive. By incorporating these three more quick and easy lawn hacks into your routine – the DIY aerator for healthier soil, the deep watering strategy for drought resistance, and the natural weed killer from your kitchen – you’re already on your way to a more vibrant, resilient, and beautiful yard. These are practical, actionable steps that make a real difference. Remember, small changes can lead to big results. So, get out there, try these hacks, and enjoy the satisfaction of a lawn that truly thrives! Your lawn will thank you for it.
- DIY Lawn Aerator: Create an effective lawn aerator at home using simple materials to improve soil health and water penetration.
- Smart Watering Schedule: Implement a deep and infrequent watering strategy to encourage stronger root growth and a more drought-tolerant lawn.
- Natural Weed Control: Utilize household items like vinegar and dish soap for a cost-effective and eco-friendly way to manage unwanted weeds.
- Edge Maintenance Made Easy: Maintain clean lawn edges with a simple, low-cost tool modification for a polished look.
- Mulching Mower Magic: Leverage your mulching mower to return valuable nutrients to the soil, reducing the need for fertilizers.
Quick Answers to Common Questions
What is the main benefit of using a DIY lawn aerator?
The main benefit is improving soil health by allowing better penetration of air, water, and nutrients to the grass roots, especially in compacted soil, without the cost of professional equipment.
How does the “water less, water deeply” strategy help a lawn?
This strategy encourages grass roots to grow deeper in search of moisture, making the lawn more drought-tolerant, resilient, and less susceptible to wilting during hot periods.
Is the vinegar and dish soap weed killer safe for pets?
While made from household items, it can still cause irritation if ingested. It’s best to keep pets away from the treated area until it has dried completely, and apply it carefully to avoid contact with your lawn grass.
Can I use the vinegar weed killer on my entire lawn?
No, this is a non-selective herbicide, meaning it will kill any plant it touches, including your lawn grass. It’s best used for spot-treating weeds in areas like sidewalk cracks or for very precise application onto individual weeds.
How often should I aerate my lawn using the DIY method?
You can aerate your lawn with the DIY method a few times a year, typically in the spring and fall, especially if you notice signs of soil compaction or if your lawn struggles to absorb water.
Frequently Asked Questions
How do I know if my lawn needs aerating?
Your lawn needs aerating if the soil is compacted, water pools on the surface after rain, or grass appears thin and unhealthy despite proper watering and fertilization. You can also test soil compaction by trying to push a screwdriver into the ground; if it’s difficult, aeration is likely needed.
What is the best time of day to water my lawn for maximum benefit?
The best time to water your lawn is early in the morning, generally between 4 AM and 10 AM. This allows the grass to absorb water before the heat of the day causes excessive evaporation and reduces the risk of fungal diseases that can thrive on prolonged wet foliage.
Will vinegar kill my grass if I’m not careful?
Yes, vinegar is a non-selective herbicide and will damage or kill grass it comes into contact with. It’s crucial to apply the vinegar solution very carefully and only directly to the weeds you wish to eliminate.
Are there any specific types of weeds that the vinegar solution works best on?
The vinegar and dish soap solution is most effective on young, annual weeds with softer foliage. It can burn down the top growth of perennial weeds, but they may regrow from their roots, often requiring repeat applications.
How deep should the spikes on my DIY aerator be?
The spikes should be long enough to penetrate the soil effectively, typically between 2 to 4 inches deep. This ensures you are aerating deep enough to loosen compacted soil and encourage deeper root growth. Ensure they aren’t excessively long to avoid hitting utilities.
Can I combine aeration with other lawn care tasks?
Yes, aeration is often combined with overseeding and top dressing. Aerating first opens up the soil, allowing new grass seed and topdressing material to reach the root zone more effectively for better germination and establishment.