To tighten the drive belt on your Craftsman riding lawn mower, start by safely lifting the mower, locate the belt tensioner, and adjust it to remove slack. If needed, replace the belt if it’s worn out or damaged. Regular maintenance ensures smooth operation and longer lifespan for your mower.
For tightening the drive belt on your Craftsman riding mower, you’ll need to lift the mower deck, locate the tensioner pulley, and adjust it to remove any slack from the belt. Replacing a worn or cracked belt will prevent slippage and improve performance. Keeping the belt tight and in good condition is key to ensuring your mower runs efficiently.
If you’re wondering how to tighten the drive belt on your Craftsman riding mower, don’t worry—it’s a straightforward task that keeps your lawn machine running smoothly. Over time, belts can loosen or wear out, causing poor traction or strange noises. By following a few simple steps, you can restore proper tension, extend the belt’s life, and avoid costly repairs. This guide will walk you through the process in a clear, easy-to-follow way so you can get back to mowing with confidence.

How to Tighten Drive Belt on Craftsman Riding Lawn Mower
Understanding the Drive Belt System
The drive belt is a critical part of your Craftsman riding lawn mower. Its main job is to transfer power from the engine to the blades and the wheels. If the belt is loose, it can cause poor mower performance or uneven cutting.
The drive belt is usually made from durable rubber with reinforced fibers. Over time, it can stretch or slip, making it necessary to tighten or replace it. Knowing how the system works helps you maintain your mower efficiently.
Signs That the Drive Belt Needs Tightening
Recognizing when your drive belt needs attention saves you from bigger problems. Look for these signs:
- The blades do not spin properly or stop unexpectedly.
- Your mower makes unusual squealing sounds during operation.
- There is visible slack or looseness in the belt.
- The mower moves slowly or struggles to move forward.
If you notice any of these issues, it’s time to check the belt tension.
Gathering Tools and Preparing Your Mower
Before starting the process, collect all necessary tools to make it smoother. You will need:
- Sockets and ratchets or wrenches
- Drive belt replacement or repair kit (if needed)
- Gloves for safety
- Owner’s manual for model-specific instructions
Ensure your mower is on a flat surface and the engine is turned off and cooled down. Disconnect the spark plug wire to prevent accidental starting.
Accessing the Drive Belt
Getting to the drive belt requires removing certain panels or covers. Follow these steps carefully:
- Locate the maintenance cover on the underside of the mower deck.
- Use the appropriate tools to remove the bolts or clips securing the cover.
- Set the cover aside and identify the belt’s path around pulleys and spindles.
Be gentle to avoid damaging clips or covers that can be integral to the machine’s safety features.
Inspecting the Drive Belt for Wear and Damage
Before tightening the belt, examine its condition closely. Check for:
- Cracks or fraying along the edges
- Glazing or shiny spots indicating slipping
- Broken or missing segments
A worn belt should be replaced rather than tightened further, which can cause more damage.
Adjusting the Drive Belt Tension
Proper tension is vital for optimal performance. Follow these steps:
- Locate the tensioner pulley, usually found near the belt’s midpoint.
- Loosen the bolt holding the tensioner pulley using the appropriate wrench.
- Gently move the pulley to add tension, pulling the belt tight but not overstretched.
- Check the belt’s tension by pressing down on it. There should be about half an inch of give.
- Retighten the bolt on the tensioner pulley securely.
This process may vary slightly based on your mower model, so always refer to the manual if available.
Verifying Correct Belt Tension
After adjusting, it’s important to test the tension:
- Reinstall the maintenance cover and tighten all bolts securely.
- Start the engine and engage the blades or drive system.
- Observe how the belt and pulleys operate. The belt should run smoothly without slipping or excessive noise.
If the belt slips or makes squealing sounds, recheck the tension and rebalance it accordingly.
Replacing the Drive Belt If Necessary
Sometimes, tightening isn’t enough, especially if the belt is damaged beyond repair. To replace it:
- Remove the old belt by releasing tension from the tensioner pulley.
- Compare the old belt with a new one, ensuring they are identical in size and type.
- Loop the new belt around the pulleys following the original path.
- Apply tension to the belt and secure the tensioner pulley.
- Double-check the alignment and tension before reassembling the cover.
Replacing the belt ensures your mower operates efficiently and prevents damage to other components.
Maintaining Proper Belt Tension for Long-Term Performance
Regular checks extend the lifespan of your drive belt. Schedule routine inspections every 20-25 hours of use or at the beginning of each mowing season. Adjust tension as needed to maintain optimal performance and prevent premature wear.
Tips for Preventing Belt Slippage and Wear
Keep your mower in top shape with these maintenance tips:
- Keep pulleys and belt paths clean from debris and grass clippings.
- Replace belts at the first signs of deterioration.
- Ensure pulleys are aligned and free of rust or damage.
- Use manufacturer-recommended belts for your specific mower model.
Proper maintenance helps avoid unnecessary tensioning or belt replacement.
Related Topics for Better Lawn Mower Care
Understanding other aspects of mower maintenance can improve performance:
Checking and Replacing mower blades
Dull blades require more power and can damage your grass. Sharpen or replace blades regularly for a clean cut.
Maintaining engine performance
A well-maintained engine contributes to belt longevity by providing consistent power and reducing strain.
Adjusting mower deck alignment
Proper deck level and alignment ensure even cutting and reduce belt stress.
Replacing pulleys and tensioners
Over time, pulleys and tensioners may wear out, affecting belt tension and operation. Replace them promptly to keep your mower functioning smoothly.
Summary of Key Steps to Tighten the Drive Belt
To quickly recap:
- Turn off the mower and disconnect the spark plug.
- Remove the deck cover to access the belt.
- Inspect the belt for damage. Replace if necessary.
- Loosen the tensioner pulley bolt.
- Adjust the pulley to tighten the belt, ensuring proper tension.
- Retighten the pulley bolt and reassemble the cover.
- Start the mower and verify smooth operation.
Following these steps ensures your Craftsman riding lawn mower runs efficiently and prolongs belt life.
Final Thoughts on Maintaining Your Lawn Mower
Consistent maintenance of the drive belt is essential for reliable mower performance. Regular inspections and timely adjustments prevent breakdowns and costly repairs. Always consult your mower’s manual for model-specific instructions to get the best results. Proper belt tension not only guarantees effective operation but also extends the lifespan of your entire mower system.
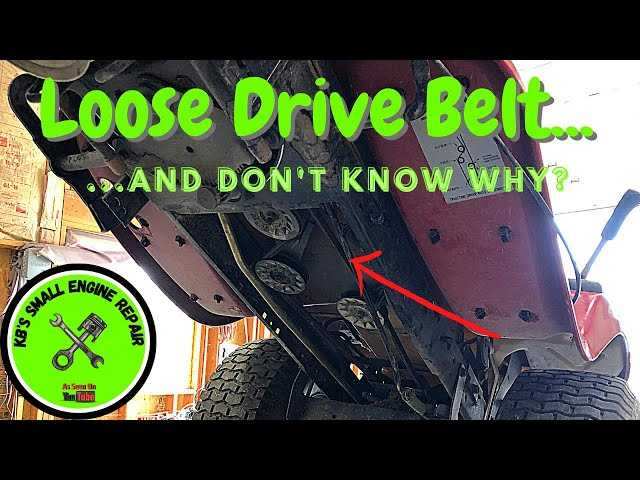
Quick fix for a loose drive belt. Sluggish or no drive power on Craftsman (YT4000) Lawn Tractors
Frequently Asked Questions
What tools do I need to tighten the drive belt on my Craftsman riding mower?
To tighten the drive belt, you’ll typically need a socket wrench, a ratchet, and possibly a belt tensioning tool. Some models may also require a screwdriver or pliers. Before beginning, ensure the mower is turned off, parked on a flat surface, and the spark plug is disconnected for safety.
How do I locate the belt tensioner on my Craftsman riding mower?
The belt tensioner is usually found near the pulley system that drives the blades and wheels. Refer to your mower’s manual for specific diagrams. Once located, you will see a tensioning arm or pulley that applies pressure to keep the belt tight, which you can adjust to improve tension.
What is the proper method to tighten the drive belt without damaging it?
To tighten the belt properly, loosen the mounting bolt or pulley bolt securing the tensioner. Then, manually adjust the tensioner or move the pulley until the belt has the correct tension—generally about 1/2 inch of slack. Avoid over-tightening, as it can cause premature belt wear and damage.
How can I check if the drive belt has the right tension after tightening?
After adjusting, press down on the belt at its midpoint between pulleys. The belt should deflect slightly, about 1/2 inch. If it feels too loose or too tight, readjust accordingly. Regularly inspecting belt tension ensures smooth mower operation and prolongs belt life.
Are there signs that indicate my drive belt needs tightening or replacing?
If your mower struggles to move, squeals during operation, or the belt slips off the pulleys, these are signs your belt may need tightening or replacing. Visible cracks or fraying on the belt also signal that the belt has worn out and should be replaced promptly.
Final Thoughts
To tighten the drive belt on a Craftsman riding lawn mower, first locate the belt and identify the tension pulley. Loosen the pulley bolt, then adjust the tensioner to tighten or loosen the belt as needed. Re-tighten the pulley bolt securely once the belt has the proper tension. Regularly checking and adjusting this belt ensures smooth mower operation and prevents unnecessary wear. In summary, knowing how to tighten drive belt on craftsman riding lawn mower helps maintain optimal performance and extends the mower’s lifespan.