To fix an automatic choke on your lawn mower quickly, start by checking for dirt or debris blocking the choke plate and inspecting the linkage for any disconnections or sticking parts. If needed, clean or replace faulty components to restore proper function. Regular maintenance and timely adjustments can keep your mower running smoothly and prevent choke issues from disrupting your lawn care routine.
If your lawn mower’s automatic choke isn’t working correctly, it can lead to hard starting, rough idling, or engine stalls. The fix involves inspecting the choke mechanism, cleaning or replacing dirty or stuck parts, and ensuring the linkage moves freely. Addressing these issues promptly can save you time and effort, and keep your mower operating at peak performance.
Ignoring automatic choke problems can cause unnecessary engine strain and poor cutting performance. When troubleshooting, start with simple checks like cleaning the choke plate, inspecting the linkage for wear or damage, and adjusting the tension if needed. With patience and a little mechanical know-how, you can get your lawn mower back to working efficiently without needing professional repairs. Proper maintenance of the choke system ensures your mower starts easily and runs smoothly every time.

How to Fix Automatic Choke on Lawn Mower
Understanding the Automatic Choke System
The automatic choke controls the air supply to the engine during startup to make starting easier. It automatically adjusts the air flow based on the engine’s temperature and needs. When functioning correctly, it ensures the engine receives the right mixture of air and fuel.
A malfunctioning choke can cause various issues such as difficulty starting, rough running, or stalling. Recognizing signs of choke problems is the first step toward fixing it. Common symptoms include prolonged engine start-up times, engine stalling shortly after starting, or the engine running too rich or too lean.
Common Causes of Automatic Choke Failure
Several issues can lead to automatic choke problems. Understanding these causes helps in diagnosing and fixing the problem effectively.
- Sticking Choke Plate: The choke plate can get stuck in the closed or partially closed position due to dirt, corrosion, or damage.
- Faulty Choke Spring: The spring that opens or closes the choke may lose tension or break.
- Damaged Choke Linkage: The linkage connecting the choke plate to the control arm might be bent, worn, or disconnected.
- Blocked or Dirty Carburetor: Dirt, debris, or varnish buildup can obstruct choke operation.
- Problems with the Choke Thermostat or Sensor: If these parts fail, the choke may not respond correctly to engine temperature.
Tools and Materials Needed for Fixing the Choke
Before starting repairs, gather the necessary tools and parts to make the process smoother.
- Screwdrivers: Both flathead and Phillips for removing panels and screws.
- Wrenches and Pliers: For loosening and tightening bolts and linkage parts.
- Carburetor Cleaner: To remove dirt and varnish buildup.
- Replacement Parts: Choke spring, linkage, or thermostat if needed.
- Lubricant Spray: To free sticky parts and prevent rusting.
Step-by-Step Guide to Fix the Automatic Choke
Follow these steps to troubleshoot and repair your lawn mower’s automatic choke system effectively.
1. Prepare the Mower
Ensure the mower is turned off and cooled down. Disconnect the spark plug wire for safety. Place the mower on a flat surface and gather your tools.
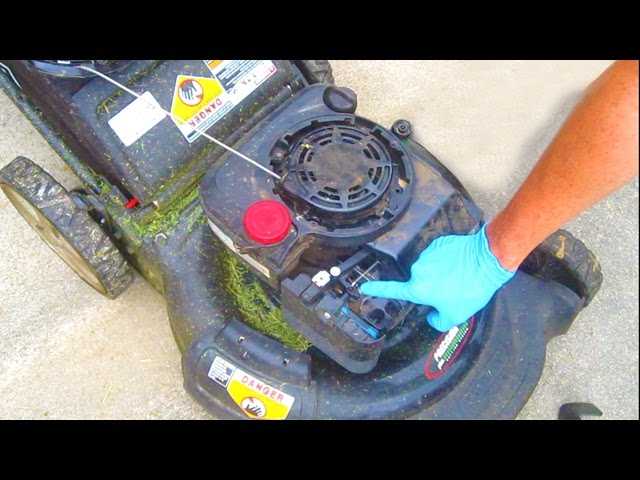
2. Locate the Choke Assembly
Identify the choke components on your mower’s carburetor. Usually, it is a small plate or flap connected via linkage to the throttle or control arm.
3. Inspect the Choke Plate and Linkage
Check for signs of sticking, bending, or damage. Ensure the choke plate moves freely when you manually move the linkage.
4. Clean the Carburetor
Remove the carburetor if necessary. Use carburetor cleaner to spray inside and remove dirt or varnish buildup. Use a brush to scrub stubborn deposits carefully.
5. Check the Choke Spring
Test the spring’s tension by gently pulling on it. Replace if it’s broken or loses tension.
6. Lubricate Moving Parts
Apply a small amount of lubricant to the choke linkage and moving parts to ensure smooth operation.
7. Adjust the Linkage
Make sure the linkage is properly connected and not bent or worn. Adjust it so that the choke opens fully when the engine warms up and closes when cold.
8. Replace Damaged Parts
If you find a broken spring, damaged choke plate, or faulty thermostat, replace the parts with new ones matching your mower’s model.
9. Reassemble and Test
Put the carburetor back together. Reconnect the spark plug wire. Start the mower and observe how the choke operates during startup and warm-up.
Tips for Maintaining the Automatic Choke System
Regular maintenance can prevent many choke problems. Here are useful tips:
- Clean the Carburetor Regularly: Prevent dirt and varnish buildup by cleaning it at least once per season.
- Inspect the Linkage: Check for wear or damage and lubricate regularly to keep parts moving smoothly.
- Replace Worn Parts Promptly: Springs, linkage, or thermostat components should be replaced if they show signs of damage.
- Use Fresh Fuel: Old or contaminated fuel can cause varnish buildup and clog the carburetor.
Additional Troubleshooting Tips
If your mower still has issues after repairs, consider these points:
- Check the fuel mixture: Ensure you’re using the correct fuel-to-oil ratio if applicable.
- Inspect the air filter: A dirty air filter restricts airflow and affects choke operation.
- Review the engine’s temperature sensor or thermostat: Faulty sensors can cause the choke to malfunction.
When to Seek Professional Help
If you’re unsure or uncomfortable performing repairs, consult a professional mower technician. Complex carburetor or choke system problems may require specialized tools and expertise.
Summary of Key Points
Fixing the automatic choke involves inspecting, cleaning, and replacing faulty parts. Proper maintenance ensures smooth choke operation and reliable mower start-up. Regular checks and timely repairs can prevent larger engine issues and extend your mower’s lifespan.
By following these detailed steps and tips, you can troubleshoot and fix most automatic choke problems confidently. Maintaining a clean and well-adjusted choke system will keep your lawn mower running smoothly season after season.
Common Reason for Honda Lawn Mower NO START | GCV160 Engine Auto Choke Repair
Frequently Asked Questions
What are common signs indicating the automatic choke needs adjustment or repair?
If your lawn mower engine struggles to start, stalls soon after starting, or runs rough at startup, these could signal issues with the automatic choke. Additionally, if you notice the choke plate stuck in the closed position or inconsistent engine performance during engine warm-up, it’s a sign that the choke may require attention. Keeping an eye on engine behavior helps you identify when maintenance is necessary.
How can I check if the choke plate is functioning properly?
To verify the choke plate’s operation, turn on the mower and observe the choke mechanism as the engine warms up. The choke plate should initially be in the closed position to help start the engine and then gradually open as the engine reaches operating temperature. If the plate remains stuck closed or open, it indicates a problem. Manually inspecting the linkage and moving the choke lever can help identify if the plate moves freely or needs adjustment.
What steps should I take to repair a malfunctioning automatic choke linkage?
Begin by disconnecting the spark plug for safety. Inspect the linkage for any dirt, corrosion, or damage that may prevent movement. Clean the linkage using a brush and apply a light lubricant to ensure smooth operation. If the linkage is bent or broken, replace it with a compatible part. Reassemble the components carefully and test the choke operation to confirm proper function before using the mower again.
How do I replace a faulty choke heater or thermal coil?
Identify the location of the choke heater or thermal coil, often situated near the carburetor. Remove any covers or panels to access it. Disconnect the wiring carefully and remove the faulty heater or coil. Install the new part by reversing the removal steps, ensuring all connections are secure. After replacing, start the mower and observe the choke’s movement to ensure it opens and closes correctly during engine warm-up.
What routine maintenance can prevent issues with the automatic choke?
Regularly clean the carburetor and choke area to prevent dirt and debris buildup. Lubricate moving parts like linkages and pivots periodically to maintain smooth operation. Check for corrosion or damage on parts involved in the choke mechanism and replace any worn components promptly. Performing these maintenance steps helps the choke function reliably and extends the mower’s service life.
Final Thoughts
Pour réparer le starter automatique de votre tondeuse, commencez par vérifier le câble et le mécanisme pour détecter tout signe de blocage ou d’usure. Nettoyez la buse d’enrichissement et ajustez le réglage si nécessaire pour assurer une réponse rapide. Si le problème persiste, examinez le flotteur et la bobine pour déceler tout dysfonctionnement.
En résumé, pour fixer le problème de l’automatic choke on lawn mower, inspectez et nettoyez les composants clés, puis ajustez si besoin. Suivez ces étapes pour assurer un bon fonctionnement du système.