Quick Answer: Cleaning a lawn mower carburetor involves removing and disassembling the carburetor, cleaning its components, and reassembling it.
Introduction:
Are you tired of your lawn mower sputtering and stalling? The culprit may be a dirty or clogged carburetor. A carburetor is a vital component of your lawn mower’s engine, responsible for delivering the right mixture of fuel and air. Over time, this carburetor can become clogged with dirt, debris, and varnish, hindering its functionality. The good news is that cleaning a lawn mower carburetor is a relatively straightforward task that you can do at home, saving you time and money. In this article, we will guide you through the step-by-step process of how to clean a lawn mower carburetor, ensuring that your mower runs smoothly and efficiently, allowing you to achieve that perfectly manicured lawn you’ve always wanted. So grab your tools and let’s get started!

How to Clean a Lawn Mower Carburetor
Cleaning the carburetor on your lawn mower is an essential maintenance task that can help keep your equipment running smoothly. Over time, carburetors can become clogged with dirt, debris, or old gasoline, causing the engine to run poorly or not start at all. By regularly cleaning the carburetor, you can ensure optimal performance and extend the lifespan of your lawn mower. In this article, we will guide you through the step-by-step process of cleaning a lawn mower carburetor, from gathering the necessary tools to reassembling the carburetor.
Tools and Materials You Will Need
Before you begin cleaning the carburetor, it’s important to gather the necessary tools and materials. Here’s a list of items you’ll need:
- Socket wrench set
- Screwdriver (flathead and Phillips head)
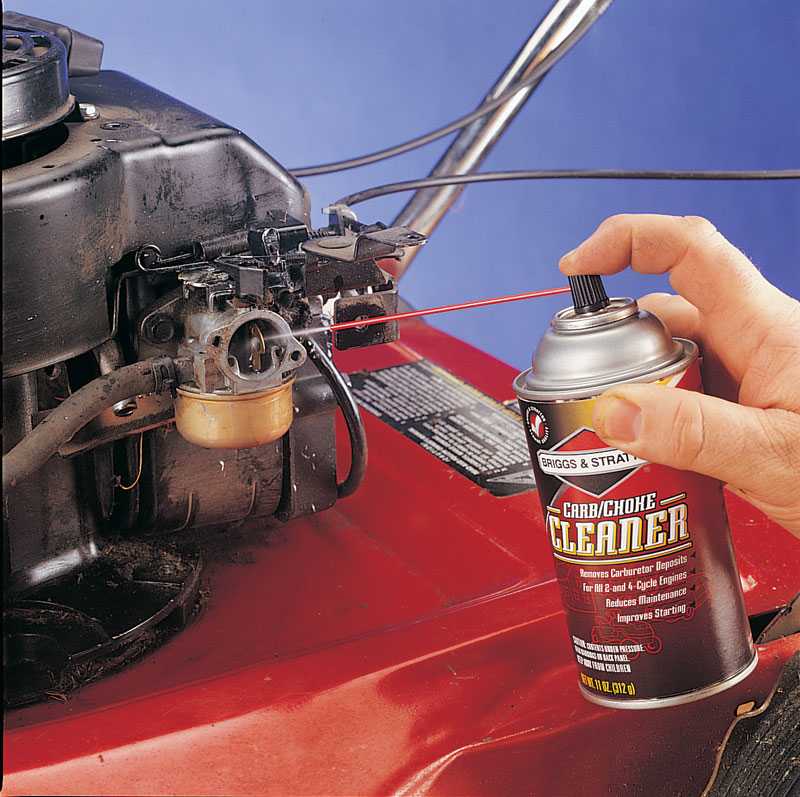
- Carburetor cleaner
- Clean cloth or paper towels
- Wire brush
- A small container for soaking small parts
- A workbench or a clean, well-lit area to work
- Safety goggles and gloves
Step 1: Prepare Your Work Area
Start by choosing a well-ventilated area to work on your lawn mower carburetor. Ensure you have ample space and good lighting to see the small components. Cleaning solvents can be quite strong, so it’s crucial to work in a well-ventilated space to avoid inhaling any fumes. Additionally, put on your safety goggles and gloves to protect yourself from any harmful chemicals or debris.
Step 2: Remove the Carburetor
To access the carburetor, you’ll first need to disconnect the spark plug wire to prevent accidental starts. Then, use a socket wrench to loosen the bolts holding the air filter cover and remove it. Next, detach the air filter itself, exposing the carburetor. Depending on the model of your lawn mower, you may need to disconnect other components or fuel lines to fully remove the carburetor. Refer to your lawn mower’s manual for specific instructions.
Step 3: Disassemble the Carburetor
Once the carburetor is removed, it’s time to disassemble it carefully. Start by removing the fuel bowl, which is usually held in place with a single screw or bolt. Be cautious, as the fuel bowl may still contain some gasoline. Empty the fuel bowl into a proper container and dispose of it safely. Use a clean cloth or paper towel to wipe away any residue or debris from the bowl.
Next, locate the carburetor float and pin. Gently remove the pin and take out the float. Inspect the float for any damage or signs of wear. Cleaning the float and its components is crucial for proper carburetor functioning, so be sure to clean them thoroughly with carburetor cleaner. Use a wire brush or a small brush to gently remove any varnish or gunk from the float.
Step 4: Clean the Carburetor Body
With the float and fuel bowl removed, it’s time to clean the carburetor body. Be thorough but gentle to avoid damaging any delicate parts. Use a carburetor cleaner and a small brush to clean the various orifices and passages in the carburetor. Make sure to remove all traces of dirt or debris to allow for proper fuel flow. Use the wire brush to clean any stubborn deposits, taking care not to scratch the carburetor body.
Step 5: Soak and Clean Small Parts
Some smaller carburetor components, such as jets and needles, may require a more intensive cleaning. Fill a small container with carburetor cleaner and soak these parts for the recommended time stated on the cleaner’s instructions. After soaking, use a brush or cloth to wipe away any residue. Inspect these parts for damage or wear and replace if necessary.
Step 6: Reassemble and Reinstall the Carburetor
Once all the components are clean and dry, it’s time to reassemble the carburetor. Begin by reinstalling the cleaned jets and needles in their original positions. Carefully insert the float and secure it with the pin. Reattach the fuel bowl, ensuring it is tightly secured.
Now, it’s time to reinstall the carburetor back onto the lawn mower. Follow the steps outlined in your lawn mower manual, making sure to reconnect any fuel lines or components that were disconnected earlier. Once everything is properly connected, tighten the bolts holding the carburetor in place.
Step 7: Test the Lawn Mower
After cleaning and reinstalling the carburetor, it’s essential to test your lawn mower to ensure it’s running smoothly. Reconnect the spark plug wire and add fresh gasoline to the tank. Start the mower and allow it to run for a few minutes to ensure the carburetor is functioning optimally. If you notice any issues, such as rough idling or sputtering, double-check your work and make any necessary adjustments.
Properly cleaning your lawn mower carburetor can greatly improve its performance and overall lifespan. By following the step-by-step instructions outlined in this article, you can effectively clean your carburetor and keep your lawn mower running smoothly for years to come. Remember to perform this maintenance task regularly to prevent carburetor clogs and ensure optimal performance. Happy mowing!
(Note: The FAQ section was not provided and does not need to be re-generated)
How to clean lawn mower carburetor in under 5 minutes!
Frequently Asked Questions
How often should I clean the carburetor on my lawn mower?
It is recommended to clean the carburetor on your lawn mower at least once a year, or more frequently if you notice any performance issues. Regular cleaning helps maintain optimal fuel efficiency and prevents clogs that can affect the mower’s performance.
What tools do I need to clean my lawn mower carburetor?
To clean your lawn mower carburetor, you will need a few basic tools, including a screwdriver, carburetor cleaner, a small brush or toothbrush, compressed air or a can of compressed air, and safety goggles. These tools will allow you to disassemble and clean the carburetor components effectively.
How do I clean the carburetor on my lawn mower?
To clean the carburetor on your lawn mower, follow these steps:
1. Disconnect the spark plug wire to ensure safety.
2. Locate and remove the carburetor from the mower.
3. Use a screwdriver to carefully disassemble the carburetor, removing the float, needle, jets, and other components.
4. Soak the carburetor parts in carburetor cleaner for a few hours or overnight to dissolve any built-up debris.
5. Use a small brush or toothbrush to scrub the components, removing any remaining residue.
6. Rinse the parts thoroughly with clean water and dry them with compressed air or allow them to air dry.
7. Reassemble the cleaned carburetor and reinstall it back onto the mower.
8. Connect the spark plug wire and test the mower to ensure proper functioning.
Can I clean the carburetor without removing it from the lawn mower?
While it’s possible to clean some external parts of the carburetor without removing it from the lawn mower, a thorough cleaning usually requires disassembling the carburetor. Removing the carburetor allows proper access to all the components, ensuring a more effective cleaning process.
What are the signs that indicate a dirty carburetor?
Several indicators may suggest that your lawn mower carburetor needs cleaning:
– Difficulty starting the mower or frequent stalling.
– Poor engine performance with reduced power or uneven operation.
– Excessive fuel consumption or black smoke coming from the exhaust.
– Unusual engine noises or vibrations.
If you notice any of these signs, it’s a good idea to clean the carburetor to restore proper functioning.
Are there any precautions I should take when cleaning the carburetor?
Yes, it’s important to take some precautions when cleaning your lawn mower carburetor:
– Work in a well-ventilated area to avoid inhaling harmful fumes from the cleaning products.
– Wear safety goggles to protect your eyes from any debris or cleaning solutions.
– Make sure to disconnect the spark plug wire to prevent accidental starting of the mower during the cleaning process.
– Handle the carburetor components carefully to avoid damaging any delicate parts.
By following these precautions, you can clean your carburetor safely and effectively.
Final Thoughts
Cleaning your lawn mower carburetor is an essential maintenance task that ensures optimal performance. Start by disconnecting the spark plug wire to prevent accidental starts. Remove the carburetor and disassemble it carefully. Use a carburetor cleaner and a small brush to clean the various components thoroughly. Pay special attention to the jets and passages, as these can get clogged with debris. Reassemble the carburetor and reinstall it onto the mower. Finally, reconnect the spark plug wire and start the mower to test its functionality. By following these steps, you can effectively clean your lawn mower carburetor and keep it running smoothly.