Want a carpet-like Bermuda lawn? Achieving thicker, greener Bermuda grass is totally doable with the right care. It boils down to consistent watering, proper mowing, balanced fertilization, and addressing any issues like weeds or thatch. Follow these steps for your best Bermuda lawn yet!
Are you dreaming of a lawn that looks like a plush, green carpet? If you have Bermuda grass, you’re in luck! Bermuda grass is a warm-season turf that, when cared for properly, can become incredibly dense and vibrantly green. It’s known for its resilience and its ability to spread, making it a popular choice for many homeowners. But sometimes, despite our best efforts, our Bermuda lawns can look a bit thin or lack that deep green hue we desire.
Don’t get discouraged! Making your Bermuda grass thicker and greener is achievable with a consistent and informed approach. It’s not about one magic trick, but rather a combination of practices that work together to support healthy growth. Think of it like tending to a garden; each element plays a role in the overall health and beauty of your lawn. This guide will walk you through everything you need to know to transform your Bermuda grass into the envy of the neighborhood.
We’ll cover the essentials, from how to water and mow your grass correctly to the best ways to fertilize and tackle common lawn problems. By understanding the unique needs of Bermuda grass, you can unlock its full potential for thickness and vibrant color. Let’s get started on creating that beautiful, healthy lawn you’ve always wanted.
Key Takeaways
- Proper Watering is Crucial: Bermuda grass thrives on deep, infrequent watering. Water deeply when the grass shows signs of stress (like a bluish-grey tint or footprints remaining visible).
- Mowing at the Right Height Matters: Bermuda grass prefers being cut short. Adjust your mower to the lowest setting your mower can safely handle, but avoid scalping. Regular mowing encourages thicker growth.
- Fertilize for Lushness: Feed your Bermuda grass with nitrogen-rich fertilizer during its active growing season (late spring through summer). Aim for a balanced approach to avoid over-fertilizing.
- Aeration and Dethatching are Key: Periodically aerating and dethatching your lawn allows water, nutrients, and air to reach the root zone, promoting thicker, healthier growth.
- Weed and Pest Control: Address any weed or pest problems promptly. Healthy, dense Bermuda grass is more resistant to invaders, but intervention is sometimes necessary.
- Soil Health is Fundamental: Ensure your soil has good drainage and the right pH. Healthy soil provides the foundation for a vigorous Bermuda lawn.
Quick Answers to Common Questions
What is the best time of year to fertilize Bermuda grass?
The best time to fertilize Bermuda grass is during its active growing season, which typically runs from late spring through early fall. You should apply fertilizer after the grass has fully greened up in spring and continue with applications every 4 to 6 weeks throughout the summer, with a final feeding in early fall.
How often should I water my Bermuda grass?
Water your Bermuda grass deeply and infrequently. Aim for about 1 to 1.5 inches of water per week, applied in a single watering session. Water when the grass shows signs of stress, such as a bluish-grey tint or visible footprints.
Can I mow my Bermuda grass too short?
Yes, you can mow your Bermuda grass too short, which is known as scalping. Scalping can damage the grass, expose the soil, and make it susceptible to weeds and stress. Aim for a mowing height of 0.5 to 1.5 inches for most common Bermuda varieties.
What causes bare patches in Bermuda grass?
Bare patches in Bermuda grass can be caused by several factors, including insect damage (like grubs), fungal diseases, pet urine, physical injury, or poor soil conditions. Identifying the cause is the first step to effectively repairing the area.
How do I make my Bermuda grass greener if it looks a bit yellow?
If your Bermuda grass looks yellow, it might need more nitrogen or iron. Ensure you are fertilizing regularly with a nitrogen-rich fertilizer during its growing season. An iron supplement can also help boost green color. Make sure watering and mowing practices are also optimal.
📑 Table of Contents
Understanding Bermuda Grass Needs
Before we dive into the “how-to,” it’s helpful to understand what makes Bermuda grass tick. As a warm-season grass, it loves the heat and thrives during the warmer months of the year, typically from late spring through early fall. During this active growing season, it’s when you’ll see the most growth and when it’s most receptive to treatments that encourage thickness and color. In cooler months, Bermuda grass goes dormant, turning brown. This is normal and not a sign of a problem, but it’s during its active phase that we focus on its health and appearance.
Bermuda grass has a unique growth habit. It spreads through both above-ground stolons and below-ground rhizomes, which is how it forms that dense, carpet-like texture. Encouraging this spreading behavior is key to achieving thickness. Factors like sunlight, water, nutrients, and proper mowing techniques all influence how well these spreading mechanisms work.
Sunlight Requirements
Bermuda grass absolutely loves sunshine. It needs at least 6 to 8 hours of direct sunlight per day to thrive. If your lawn is in a shady area, Bermuda grass might struggle to grow thickly and achieve that deep green color. In such cases, you might consider shade-tolerant grass alternatives or look for ways to reduce shade if possible. For most Bermuda lawns, maximizing sunlight is a given, but it’s worth noting that dense trees or structures can impact its vigor.
Soil Type and pH
Bermuda grass prefers well-draining soil. Heavy clay soils that retain too much water can lead to root rot and other issues. Sandy soils drain well but might require more frequent watering and fertilization. The ideal soil pH for Bermuda grass is slightly acidic to neutral, generally between 6.0 and 7.0. You can get a soil test done to determine your soil’s pH and nutrient levels. Based on the results, you can amend the soil with lime to raise the pH or sulfur to lower it, if necessary. Good soil health is the foundation for a truly robust Bermuda lawn.
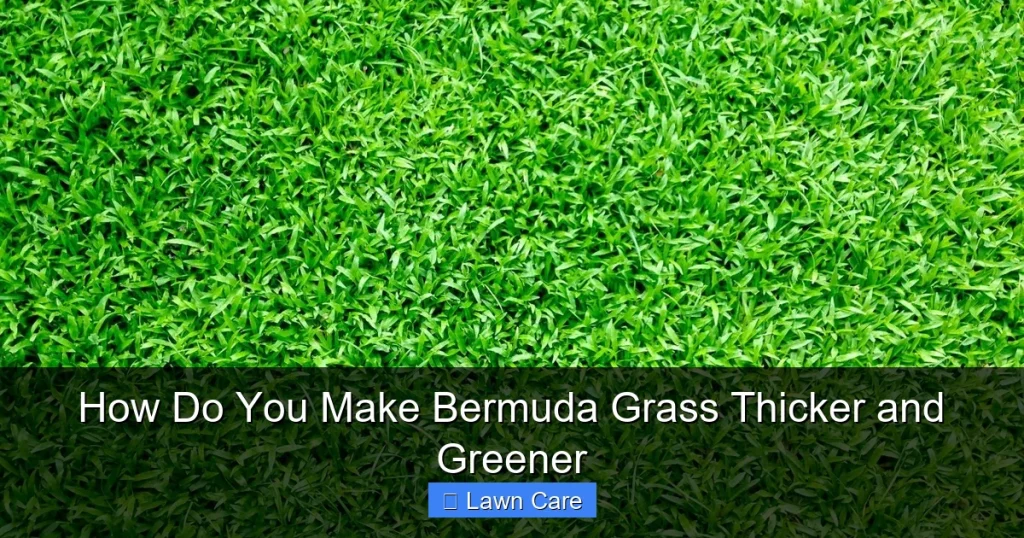
Mastering the Art of Watering

Visual guide about How Do You Make Bermuda Grass Thicker and Greener
Image source: lawnandpetal.com
Water is life for any plant, and for Bermuda grass, it’s a critical component in achieving that lush, green look. However, how you water is just as important as how much. Overwatering can be just as detrimental as underwatering, leading to shallow roots and increased susceptibility to diseases.
Deep and Infrequent Watering
The golden rule for watering Bermuda grass is to water deeply and infrequently. This encourages the roots to grow deeper into the soil in search of moisture. Deep watering means applying enough water to moisten the soil several inches down. For most established Bermuda lawns, this translates to about 1 to 1.5 inches of water per week, applied in a single watering session.
How can you tell when it’s time to water? Look for signs of drought stress. These include:
- A dull, bluish-grey tint to the grass blades.
- Footprints that remain visible on the lawn long after you’ve walked on it.
- The grass blades starting to curl or fold.
When you see these signs, it’s time for a good, long soak.
Best Time to Water
The best time to water your Bermuda grass is in the early morning, ideally between 4 a.m. and 10 a.m. Watering during this window allows the grass to absorb the water before the heat of the day causes excessive evaporation. It also gives the grass blades time to dry out before nightfall, which helps prevent fungal diseases. Avoid watering in the late evening, as standing water on the grass overnight can create a breeding ground for fungi.
Watering Established vs. New Lawns
New lawns, whether from seed or sod, will require more frequent watering initially to help them establish. For newly seeded lawns, you’ll need to keep the top inch of soil consistently moist. This might mean light watering several times a day for the first few weeks. Once the grass starts to germinate and grow, you can gradually transition to deeper, less frequent watering. For newly laid sod, water thoroughly immediately after installation, and then water daily for the first week or two, gradually reducing the frequency as the sod roots into the soil. Always check the moisture level a few inches down to gauge needs. For more detailed guidance on watering, especially during hot months, refer to articles like how often should you water Bermuda grass in summer.
The Importance of Proper Mowing
Visual guide about How Do You Make Bermuda Grass Thicker and Greener
Image source: wikihow.com
Mowing is a fundamental practice for maintaining a healthy lawn, and for Bermuda grass, it’s particularly important for encouraging thickness and that desirable carpet-like appearance. Because Bermuda grass spreads aggressively, regular mowing actually stimulates this growth. However, mowing too high or too low can cause problems.
Mowing Height for Bermuda Grass
Bermuda grass thrives when mowed at a low height. This is one of the key differences between it and some other turfgrasses. The ideal mowing height for most common Bermuda varieties is between 0.5 to 1.5 inches. For ultra-dwarf varieties, you can even go lower, down to 0.25 inches, but this requires more frequent mowing and precision.
Mowing at a lower height encourages the grass to produce more tillers (new shoots) and allows the stolons and rhizomes to spread more effectively, leading to a thicker turf. It also helps to shade out weeds that might try to establish in thinner areas.
Mowing Frequency
Because you’re mowing at a low height, you’ll need to mow more frequently than you might with other grasses. A good rule of thumb is to follow the “one-third rule”: never remove more than one-third of the grass blade in a single mowing. For Bermuda grass, this often means mowing every 3 to 5 days during its active growing season. As mentioned in articles about how often should you cut Bermuda grass, consistency is key.
Sharp Blades and Mulching Clippings
Always use a sharp mower blade. Dull blades tear the grass, leaving ragged edges that can turn brown and make your lawn look unhealthy. Sharpen your blades at least once or twice during the growing season.
When mowing, it’s generally best to mulch the clippings back into the lawn. These clippings are full of nutrients and organic matter that will feed your grass and improve soil health. They decompose quickly and won’t contribute to thatch buildup if you’re mowing regularly.
Fertilizing for a Greener, Thicker Lawn
Visual guide about How Do You Make Bermuda Grass Thicker and Greener
Image source: wikihow.com
Fertilization is your secret weapon for boosting the color and density of your Bermuda grass. During its active growing season, Bermuda grass is a heavy feeder, meaning it utilizes a lot of nutrients to fuel its rapid growth and spreading. Providing the right nutrients at the right time is crucial.
Choosing the Right Fertilizer
For Bermuda grass, you’ll want a fertilizer that is relatively high in nitrogen (N). Nitrogen is the nutrient responsible for green, leafy growth. Look for fertilizers with an N-P-K ratio where the first number (Nitrogen) is higher than the other two (Phosphorus and Potassium). For example, a 20-5-10 or 16-4-8 fertilizer would be suitable.
It’s also beneficial to use a slow-release nitrogen fertilizer. This type of fertilizer provides a steady supply of nutrients over a longer period, reducing the risk of burning the grass and avoiding the sudden surge of growth that can lead to more frequent mowing.
When and How to Fertilize
The Bermuda grass growing season typically starts when soil temperatures consistently reach 65°F (18°C) and lasts until the first frost. This is generally from late spring through early fall.
* **Spring Application:** Apply your first dose of fertilizer after the grass has fully greened up and is actively growing. This is usually in late May or early June.
* **Summer Applications:** Continue to fertilize every 4 to 6 weeks throughout the summer, using a balanced fertilizer or one with a slightly higher nitrogen content.
* **Late Summer/Early Fall Application:** Apply a final, lighter feeding in late August or early September to help the grass recover from summer stress and prepare for dormancy.
Always follow the application rates recommended on the fertilizer packaging. Water your lawn thoroughly after fertilizing to help the nutrients move into the soil and to prevent the fertilizer from burning the grass.
Understanding Nitrogen Needs
A common recommendation for Bermuda grass is to apply about 1 pound of actual nitrogen per 1,000 square feet of lawn per growing month. This means if you’re using a fertilizer that is 20% nitrogen, you would need 5 pounds of that fertilizer to deliver 1 pound of nitrogen to 1,000 square feet (5 lbs x 0.20 = 1 lb). Over-fertilizing can lead to weak, overly-lush growth that is more susceptible to disease and pests. It can also cause brown patches if applied too heavily or unevenly.
Essential Lawn Maintenance Practices
Beyond watering, mowing, and fertilizing, several other maintenance practices are vital for a thick, green Bermuda lawn. These tasks address underlying issues that can hinder growth and appearance.
Aeration
Aeration involves creating small holes in the soil to relieve compaction. Compacted soil prevents water, air, and nutrients from reaching the grass roots effectively. This is especially important for Bermuda grass, which grows best with good air circulation to its root system.
* **When to Aerate:** The best time to aerate Bermuda grass is during its active growing season, typically from late spring through summer. This allows the grass to recover quickly from the process.
* **How to Aerate:** You can rent a core aerator, which pulls out plugs of soil. Aim to aerate every 1 to 2 years, or more frequently if your soil is heavily compacted. After aerating, you can overseed or apply fertilizer, as the holes will help the nutrients penetrate the soil. Check out how do you aerate Bermuda grass for more details.
Dethatching
Thatch is a layer of dead and living organic matter that builds up between the grass blades and the soil surface. A thin layer of thatch can be beneficial, but when it becomes too thick (more than half an inch), it can block water, air, and sunlight from reaching the soil and roots.
* **When to Dethatch:** Dethatch your Bermuda grass when it’s actively growing, usually in late spring or early summer.
* **How to Dethatch:** You can use a power rake or a dethatching blade on a mower. For severe thatch, a power rake is more effective. Follow up with watering and possibly fertilizing to help the lawn recover. You can learn more about do you dethatch Bermuda grass to understand its necessity.
Weed and Pest Control
A thick, healthy lawn is the best defense against weeds and pests. However, sometimes intervention is needed.
* **Weeds:** Identify the types of weeds you have. For broadleaf weeds, use a selective herbicide that targets broadleaf plants but won’t harm your Bermuda grass. Grassy weeds, like crabgrass, can be more challenging and might require specific pre-emergent or post-emergent treatments. Knowing how to kill crabgrass in Bermuda grass is a common concern for many homeowners.
* **Pests:** Common pests include grubs, armyworms, and chinch bugs. Inspect your lawn regularly for signs of damage. If you find an infestation, use an appropriate insecticide. Always read and follow label instructions carefully.
Addressing Bare Spots and Enhancing Color
Even with the best care, bare patches can sometimes appear, and achieving that vibrant green can be a process. Fortunately, there are ways to address these issues and further enhance your lawn’s appearance.
Fixing Bare Patches
Bare spots in Bermuda grass can be caused by several factors, including disease, insect damage, pet urine, or physical injury.
* **Identify the Cause:** First, determine why the patch is there. If it’s due to grubs, treat the grub problem. If it’s pet urine, try to redirect pets or rinse the area immediately with water.
* **Repairing the Patch:** For small bare spots, you can reseed or use sod. For seeding, prepare the soil by loosening it and ensuring good seed-to-soil contact. Keep the area consistently moist until the grass is established. If you’re using sod, cut pieces to fit the bare area and water thoroughly. You can find helpful tips on how do you fix bare patches in Bermuda grass.
Enhancing Green Color
While proper fertilization is the primary way to achieve green color, there are a couple of other things to consider.
* **Iron Supplementation:** Sometimes, your Bermuda grass might need a little extra boost of iron to deepen its green color. Iron supplements, often available as liquid sprays or granular forms, can provide this. Be careful not to overapply, as too much iron can stain concrete surfaces.
* **Proper Hydration and Mowing:** As we’ve discussed, ensuring your grass is adequately watered and mowed at the correct height are foundational for a healthy, green appearance. A stressed or improperly mowed lawn will never look its best, regardless of fertilization.
Conclusion
Transforming your Bermuda grass into a thicker, greener spectacle is a rewarding endeavor. It requires understanding the grass’s needs and implementing a consistent care regimen. From deep, infrequent watering and mowing at the right height to providing balanced nutrition and performing essential maintenance like aeration and dethatching, each step contributes to a healthier, more vibrant lawn.
Remember that Bermuda grass is a warm-season grass that thrives in heat and sunshine. Patience and consistency are your best allies. Don’t be discouraged by occasional setbacks; they are part of the lawn care journey. By applying the principles outlined in this guide, you’ll be well on your way to achieving that dream lawn that is both dense and beautifully green. Enjoy the process and the stunning results!
Frequently Asked Questions
When should I aerate my Bermuda grass lawn?
The ideal time to aerate Bermuda grass is during its peak growing season, typically late spring through summer. This allows the turf to recover quickly from the aeration process and encourages better nutrient and water uptake.
What is thatch, and why is it bad for my Bermuda grass?
Thatch is a layer of dead and living organic matter that accumulates at the base of grass blades. A thick thatch layer (over half an inch) can prevent water, air, and nutrients from reaching the soil and roots, hindering healthy growth and potentially promoting disease.
How can I prevent weeds in my Bermuda grass lawn?
The best way to prevent weeds is to maintain a thick, healthy Bermuda grass lawn through proper mowing, watering, and fertilization. For persistent weed issues, consider using pre-emergent herbicides in early spring before weeds germinate or post-emergent herbicides to spot-treat existing weeds.
Is it okay to leave grass clippings on my Bermuda lawn?
Yes, it is generally beneficial to leave grass clippings on your Bermuda lawn, especially if you are mowing regularly. The clippings decompose and return valuable nutrients to the soil, acting as a natural fertilizer.
My Bermuda grass is not spreading as much as I’d like. What can I do?
Ensure your Bermuda grass is receiving adequate sunlight, water, and nutrients. Mowing at the correct low height also encourages spreading. Aerating compacted soil can also help the rhizomes and stolons spread more effectively.
What should I do if I see signs of pests on my Bermuda grass?
Inspect your lawn regularly for signs of common pests like grubs or chinch bugs. If an infestation is confirmed, use an appropriate insecticide. Always follow the product’s label instructions carefully and consider integrated pest management strategies.