When your plants start wilting or stunted growth shows up in the garden bed, "do worms eat roots" is probably one of the first things running through your mind. It's a fair question. You've got worms in your soil or compost bin, and something is clearly wrong with the roots down below.
But the answer is not as straightforward as a simple yes or no.
The truth is that the organisms most gardeners call "worms" fall into very different categories, and their feeding habits couldn't be more different. Beneficial earthworms and composting worms (like red wigglers, Eisenia fetida) are detritivores, meaning they feed on decaying organic matter, not living plant roots. The culprits behind true root damage are usually root-knot nematodes (Meloidogyne species), vine weevil larvae (Otiorhynchus sulcatus), or root maggets, all of which require entirely different management approaches.
Understanding which organism you're actually dealing with saves you time, protects healthy soil biology, and keeps your plants thriving. As of 2026, university extension programs across the U.S. and U.K. continue to emphasize accurate pest identification as the single most important step before any treatment. Let's break down exactly who's who and what's really happening below the soil surface.
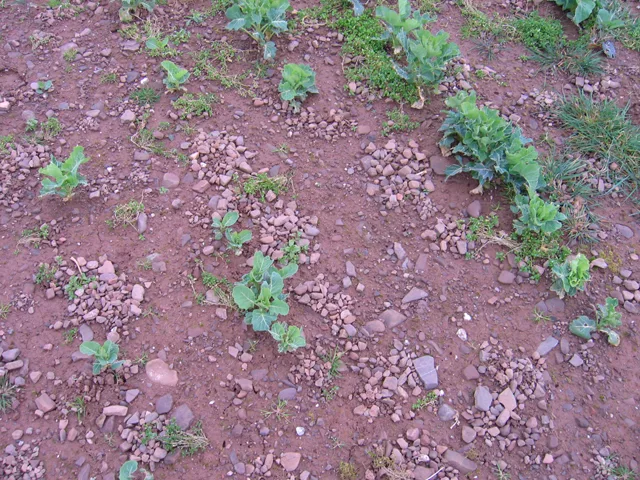
Image source: Wikimedia Commons / Rodney Burton (CC BY-SA)
Quick Answer
No, earthworms do not eat live plant roots. Earthworms and composting worms are detritivores. They consume decomposing leaves, microorganisms, and organic debris in the soil. True root damage comes from other organisms, such as root-knot nematodes, vine weevil larvae, or root maggots.
These pests are often confused with earthworms. Correctly identifying the organism you're dealing with matters before you take any action in the garden.
Earthworms vs. Root-Damaging Pests: Knowing the Difference
This is where most of the confusion starts. Gardeners see soft, squishy organisms in the soil and lump them all together. Earthworms, nematodes, and insect larvae look similar to the untrained eye, but their biology and behavior are worlds apart.
Earthworms are segmented, visible to the naked eye, and usually reddish-brown. Common species include the common earthworm (Lumbricus terrestris) and the red wiggler (Eisenia fetida) used in vermicomposting. They process dying leaves, decomposed plant material, and the microorganisms living in organic matter.
They don't have mouthparts designed to chew into healthy roots, and they have no nutritional incentive to do so. A healthy soil ecosystem with adequate leaf litter and compost gives them plenty to eat without bothering your plants.
Root-knot nematodes are microscopic roundworms. You cannot see them without magnification, though you can see their damage. They pierce root cells with a needle-like structure called a stylet and inject chemicals that cause characteristic swellings, known as galls, on roots.
If your plant pulls up with knotted, lumpy roots, nematodes are almost certainly the problem, not earthworms.
Vine weevil larvae are creamy-white, C-shaped grubs about half an inch long. They feed on roots of container plants, strawberries, rhododendrons, and many ornamentals. Unlike earthworms, these larvae physically consume root tissue, and heavy infestations kill plants outright.
Root maggots are the larval stage of various fly species (like the cabbage root fly). They tunnel through roots of brassicas and other crops. Again, no relation to earthworms.
The key takeaway: if you're wondering whether worms eat roots in your garden, first confirm you're actually looking at earthworms and not one of these destructive pests.
How Earthworms Actually Feed
Earthworms are soil engineers, and their feeding process centers almost entirely on dead and decaying organic matter. When an earthworm moves through soil, it ingests a mixture of soil particles, decomposing leaves, fungal hyphae, and bacteria. This material passes through its digestive tract and comes out as nutrient-rich castings, which are essentially concentrated plant fertilizer.
Research summarized by the USDA Natural Resources Conservation Service confirms that earthworm activity improves soil structure, increases water infiltration, and cycles nutrients in ways that directly benefit plant root development. They process roughly their own body weight in organic material each day under favorable conditions (soil moisture between 60% and 80%, temperature between 55°F and 77°F).
They do not seek out healthy roots. A study published in Applied Soil Biology found that earthworm feeding preference strongly favors partially decomposed material over living tissue. The mouth apparatus of Lumbricus terrestris is a simple muscular pharynx with no cutting or rasping structures capable of penetrating intact root epidermis.
The one scenario where earthworms might be found near damaged roots is after the damage has already been done by something else. Decaying root tissue attracts them because it's decomposing organic matter. Their presence at a damaged root site is a response to the problem, not the cause.
If you're running a vermicomposting bin and your red wigglers seem to migrate toward plant roots placed in the bin, they're feeding on the decaying outer layers, not the living tissue. This is normal and not something to worry about.
For a deeper look at root development and how different species establish underground, this guide on how deep Bermuda grass roots grow goes into the kind of root architecture that healthy soil biology supports.
What Root-Knot Nematodes Really Do
If earthworms are the good guys, root-knot nematodes are the silent destroyers. These microscopic parasites are among the most economically damaging pests in agriculture and home gardens worldwide.
Here's how they work. The second-stage juvenile nematode, which is invisible to the naked eye, migrates through soil moisture films until it locates a suitable root. It then penetrates the root tip with its stylet and migrates inward to the vascular tissue.
Once established, it manipulates plant cells into forming specialized "giant cells" that serve as nutrient sinks. The surrounding root tissue swalls into the characteristic galls or knots.
These galls disrupt the plant's ability to take up water and nutrients. Above ground, you'll see wilting, yellowing, stunted growth, and reduced yields. In severe cases, the root system becomes so compromised that the plant collapses entirely.
Warm soils, typically above 64°F, accelerate nematode life cycles, and in southern states or greenhouse environments, multiple generations can complete within a single growing season.
Root-knot nematodes have a broad host range, affecting over 2,000 plant species, including tomatoes, peppers, carrots, okra, and many ornamental plants. They're especially problematic in sandy soils where moisture films allow easy movement between root systems.
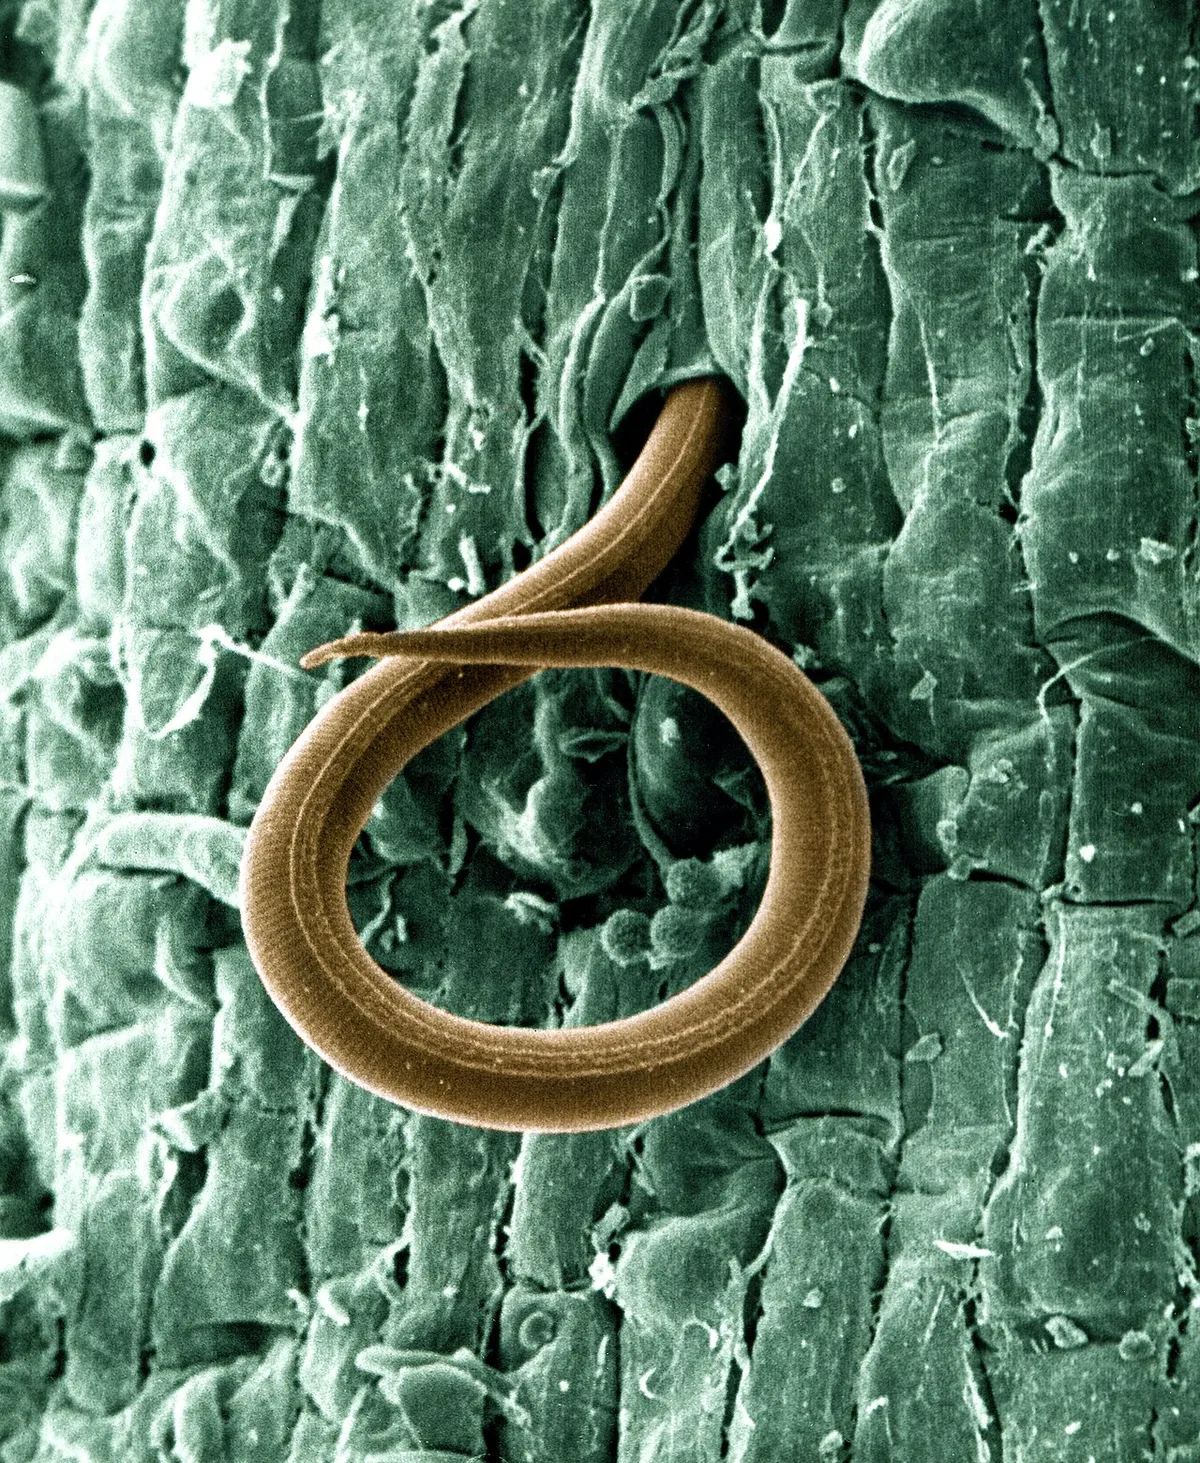
Image source: Wikimedia Commons / Photo by William Wergin and Richard Sayre. Colorized by Stephen Ausmus. U.S. Department of Agriculture (CC BY)
If you suspect nematode damage, pull up an affected plant carefully and examine the roots. Galls are typically round swellings ranging from pinhead to marble size, and they won't rub off (unlike nitrogen-fixing nodules on legumes, which detach easily). A soil sample sent to your local university extension soil lab can confirm nematode species and populations through laboratory analysis.
Crop rotation with non-host plants, soil solarization, and biological controls like Paecilomyces lilacinus fungus are recommended management strategies. Chemical nematicides exist but are increasingly restricted and generally not suitable for organic systems.
Vine Weevil Larvae and Other True Root Feeders
Vine weevil larvae deserve their own mention because they're one of the most common root-destroying "worm-like" organisms gardeners encounter, especially in container plantings. The adult vine weevil is a flightless, black beetle with a distinctive snout. It feeds on leaf edges at night, creating characteristic notches.
But the real damage happens below ground.
Females lay hundreds of eggs in soil around host plants during summer. The larvae hatch and immediately begin feeding on roots. By late winter and early spring, mature larvae are consuming entire root systems of container plants, since the limited soil volume offers no escape for the plant.
Infested potted plants often suddenly wilt and fall over because there's essentially nothing left below the soil line holding them up.
Distinguishing vine weevil larvae from earthworms is straightforward once you know what to look for. Larvae are C-shaped, creamy white with a tan or brown head capsule, and have no visible segmentation like earthworms. They're typically found in clusters near or on roots.
Root maggots work differently. Flies lay eggs at the base of host plants, and the tiny maggots bore directly into roots. Crops like cabbage, radish, onion, and turnip are common targets.
Damage appears as tunneling inside roots, often accompanied by secondary rot fungi and bacteria entering through the feeding wounds.
Cutworms are another group sometimes confused with root pests. They're moth larvae that chew through stems at ground level rather than feeding on roots directly, but the result (toppled plants) gets attributed to root damage.
If you're dealing with root maggots, floating row covers during the egg-laying period and crop rotation are effective non-chemical controls. For vine weevils, beneficial nematode applications (Heterorhabditis bacteriophora) in late summer target larvae in the soil without harming earthworms.
Signs Your Plant Roots Are Under Attack
Identifying which organism is damaging your roots takes a bit of detective work. The symptoms above ground can be misleading, since wilting, yellowing, and stunted growth show up across many conditions, from drought stress to disease to nutrient deficiency. What matters most is what you find below the surface.
Root Damage Patterns That Point to Pests
Root-knot nematodes produce distinct galls on roots. These swellings are firm, round to irregular in shape, and vary from barely visible to over half an inch across. Severely infected roots become knotted, stubby, and function poorly.
Cutting open a gall under magnification reveals the tiny female nematodes embedded inside.
Vine weevil larvae leave behind chewed, shredded roots. Often the entire root mass is stripped away in containers. You'll find the C-shaped larvae in the remaining soil, typically between half an inch and three-quarters of an inch long.
Root maggots create tunnels inside fleshy roots. If you slice open an affected carrot or turnip, you'll see brown, rotting channels where the maggots have burrowed. Secondary infections like soft rot bacteria often follow, producing a foul smell.
General environmental stress (overwatering, compaction, nutrient deficiency) can also affect roots, but these conditions don't produce the specific physical evidence of galls, tunnels, or larvae. Overwatered roots turn brown, mushy, and slough off. Compacted soils produce short, stunted root systems without any feeding damage.
Working through this checklist methodically, rather than jumping to conclusions, separates successful gardeners from frustrated ones. If you're also dealing with disease in your turf alongside these root concerns, this resource on identifying fungus in Bermuda grass covers similar diagnostic logic above ground.
Symptoms That Look Like Worm Damage but Aren't
Several conditions mimic the above-ground symptoms of root pest damage, and misdiagnosing them leads to wasted effort and potentially harming beneficial organisms unnecessarily.
Overwatering is probably the most common mimic. Roots deprived of oxygen begin to die back, the plant wilts despite wet soil, and the overall appearance looks exactly like root damage from pests. The fix is drainage correction, not pest treatment.
Root rot fungi such as Phytophthora and Pythium cause genuine root destruction but are caused by pathogens, not worms or insects. Infected roots appear dark, soft, and water-soaked. Laboratory testing is often needed to confirm the specific pathogen.
Nutrient deficiency can cause yellowing and poor growth without any root damage at all. A soil pH test and nutrient panel, available through extension services, will reveal whether pH imbalance or specific deficiencies (nitrogen, iron, manganese) are the actual cause.
Gopher and mole activity physically destroys root systems and creates tunnels that dry out roots. These are separate issues from soil-dwelling invertebrates and require different management strategies, such as physical barriers or trapping.
The pattern to remember: true worm and insect root damage has visible physical evidence on or near the roots. Environmental and disease problems affect root tissue uniformly without the specific damage signatures pests leave behind.
Frequently Asked Questions
Do earthworms harm plant roots?
Earthworms don't eat or damage living plant roots. They consume decomposing organic matter and actually improve root growth by aerating soil and producing nutrient-rich castings. If you find earthworms near damaged roots, they're responding to the decay, not causing it.
How can I tell if I have root-knot nematodes?
Pull up an affected plant and examine the roots. Root-knot nematodes produce firm, knotted swellings (galls) on roots that won't rub off. For confirmation, send a soil and root sample to your local university extension lab for nematode analysis.
Are red wigglers in my compost bin eating plant roots?
No. Red wigglers (Eisenia fetida) fed in a proper vermicomposting bin eat decomposing kitchen scraps and organic waste. They have no interest in living plant roots.
If they're trying to leave the bin, poor bin conditions (too wet, too acidic, not enough food) are the usual reason.
What kills vine weevil larvae without harming earthworms?
Beneficial nematodes (Heterorhabditis bacteriophora) applied to soil in late summer target vine weevil larvae specifically. They don't affect earthworms. You can purchase them from biological control suppliers and apply them with a watering can.
Can root damage from pests be reversed?
Minor root damage can be managed by improving overall plant health and reducing pest pressure. Severely damaged root systems, especially those attacked by vine weevil larvae or heavy nematode infestations, often cannot sustain the plant, and removal with soil replacement is the most practical option.
When Compost Bin Worms Seem Like the Problem
If you're running a vermicomposting system and your worms are acting restless, it's tempting to blame them for root damage elsewhere in the garden. But composting worms don't leave a well-maintained bin to attack plant roots. They simply don't behave that way.
Red wigglers and European nightcrawlers stay where the food is. A properly managed bin offers everything they need: consistent moisture, steady organic input, and stable temperatures between 55°F and 77°F. When worms cluster at the walls or try to escape, the bin environment has shifted against them.
Why Worms Leave the Bin (It's Not Your Plants)
The most common reason worms try to flee is excess moisture. A waterlogged bin drives out oxygen, and worms will literally suffocate. Squeeze a handful of bedding.
If water streams out, it's too wet. Adding dry shredded cardboard or newspaper and turning the bedding usually fixes this within a day or two.
Acidity is another trigger. Overfeeding citrus, onions, or large amounts of acidic fruit scraps drops the pH below their comfort zone. Worms prefer a pH between 6.0 and 7.0.
A light dusting of agricultural lime or crushed eggshells buffers the acidity effectively.
Overfeeding itself causes problems. Uneaten food scraps ferment, heat up, and create anaerobic pockets. Feed smaller amounts and bury scraps in different spots each time.
If you see moldy, rotting food the worms haven't touched, cut back.
Temperature extremes send worms looking for the exit. Bins above 85°F or below 45°F stress the population. In hot climates, move the bin to a shaded area or garage.
In cold winters, insulating with straw bales or moving indoors keeps things stable.
Conditions That Keep Composting Worms Happy
A well-run bin has a earthy smell, moist but not soggy bedding, and worms actively processing food scraps throughout the layers. The bedding material (shredded newspaper, cardboard, coconut coir, or aged leaves) should feel like a wrung-out sponge.
Feed them a balanced mix. Fruit and vegetable scraps, coffee grounds, and crushed eggshells are staples. Avoid meat, dairy, oily foods, and pet waste.
These attract pests and create odors.
Harvest castings every three to four months. A crowded bin slows reproduction and processing. If you're expanding your garden beds with this finished vermicompost, you'll notice the difference in root development.
Healthy soil biology starts with inputs like these, and understanding how different grass species establish root systems helps you appreciate what good soil structure does underground.
How to Figure Out What's Really Eating Your Roots
Diagnosing root problems is a process of elimination. You need to look at the organism, the damage pattern, and the conditions together. Skipping steps leads to wrong conclusions and wasted treatments.
Step 1: Identify the Organism
Grab a trowel and dig carefully around the base of an affected plant. Look for anything living in the soil near the roots. Earthworms are segmented, reddish, and move when exposed to light.
Vine weevil larvae are C-shaped, creamy white, and curl up when disturbed. Root maggots are smaller, legless, and pale.
If you don't see anything obvious but the roots look damaged, nematodes are likely. They're microscopic. You'll need a soil sample sent to a lab for confirmation.
Most university extension services offer nematode assays for a small fee, and results typically come back within two weeks.
Step 2: Check Your Soil and Bin Conditions
Test soil moisture by pushing a finger two inches into the soil. If it's soggy, overwatering or poor drainage is the primary issue, not pests. If the soil is bone dry, roots may be desiccated from underwatering.
Check pH with a simple home test kit. Most garden plants prefer slightly acidic to neutral soil (pH 6.0 to 7.0). Extreme pH levels lock out nutrients and stress roots, making them vulnerable to secondary problems.
For compost bin operators, check bin moisture, pH, and food supply. If conditions are off, fix those first before worrying about worms migrating to garden beds.
Step 3: Match the Damage to the Culprit
Galls on roots point to nematodes. Chewed, shredded roots with C-shaped grubs nearby mean vine weevils. Tunnels inside fleshy roots indicate root maggots.
Uniform browning and mushiness without visible pests suggests root rot from overwatering or fungal infection.
Document what you find. Take photos of the roots, the organisms, and the surrounding soil. This makes it easier to get accurate advice from extension agents or local garden centers if you need a second opinion.
What to Do Based on What You Find
Your treatment depends entirely on the diagnosis. Applying the wrong fix wastes time and can make things worse.
If It's Earthworms: Leave Them Alone
Earthworms are working for you. Their castings contain five times more nitrogen, seven times more phosphorus, and eleven times more potassium than surrounding soil, according to research published in Soil Biology and Biochemistry. They improve drainage, break up compacted layers, and cycle organic matter into plant-available forms.
If you find earthworms near damaged roots, address the actual cause of the root damage. The worms are there to clean up the mess, not create it.
If It's Nematodes: Soil Testing and Treatment Options
Confirm the species through a lab assay first. Different Meloidogyne species have different host ranges, and management strategies vary.
For light infestations, crop rotation with non-host plants (marigolds, certain grasses) reduces populations over two to three seasons. Soil solarization, covering moist soil with clear plastic for four to six weeks during the hottest part of summer, heats the top several inches enough to kill nematodes.
Biological controls like Paecilomyces lilacinus and Bacillus firmus show promise in research trials. These organisms parasitize nematode eggs and reduce reproduction rates.
For severe infestations in vegetable gardens, removing and replacing the top 12 inches of soil in raised beds is sometimes the most practical option, especially in small plots.
If It's Vine Weevil Larvae or Root Maggots: Targeted Control
Apply beneficial nematodes (Heterorhabditis bacteriophora) to soil in late summer when vine weevil larvae are small and vulnerable. Water the soil first, apply the nematodes in the evening, and keep the soil moist for a week after application.
For root maggots, floating row covers during the adult fly egg-laying period prevent infestations entirely. Crop rotation breaks the life cycle. Avoid planting susceptible crops in the same spot two years running.
Diatomaceous earth around plant bases offers some protection against crawling larvae, though it loses effectiveness when wet. Reapply after rain.
Common Mistakes Gardeners Make When Diagnosing Root Problems
The biggest mistake is treating every soil organism as a pest. Broad-spectrum pesticides and even some organic treatments kill beneficial earthworms along with actual pests. Once earthworm populations crash, soil structure degrades, drainage suffers, and plants struggle more than before.
Another common error is treating symptoms without confirming the cause. Applying nematode control when the real problem is overwatering does nothing except cost money and disrupt soil biology.
Ignoring soil conditions is a close third. Compacted, waterlogged, or nutrient-poor soil stresses roots regardless of pest presence. Fix the environment first, then reassess.
Finally, many gardeners skip the lab test. Visual identification works for large organisms like vine weevil larvae, but nematode damage looks similar to several other conditions. A $15 to $30 soil assay saves seasons of guesswork.
If you're managing turf alongside garden beds, similar diagnostic principles apply. Knowing what's happening below the surface, whether in a lawn or a vegetable patch, prevents unnecessary treatments and keeps the soil ecosystem functioning.
How to Protect Your Plants Without Harming Beneficial Worms
Keeping earthworms safe while managing actual pests comes down to targeted, selective treatments. Broad-spectrum approaches cause collateral damage to soil biology that takes years to rebuild.
Use physical barriers first. Floating row covers block egg-laying flies. Copper tape around containers deters vine weevil adults.
These methods don't touch earthworms at all.
When biological controls are needed, choose species-specific options. Heterorhabditis bacteriophora nematodes attack vine weevil larvae but leave earthworms unharmed. Paecilomyces lilacinus targets nematode eggs without disrupting beneficial soil organisms.
Maintain organic matter levels. A steady supply of compost, leaf mulch, or cover crop residue feeds earthworms and keeps their populations robust. Healthy soil biology creates natural suppression of many pest species through competition and predation.
Avoid over-tilling. Aggressive cultivation severs earthworm burrows and can kill worms directly. No-till or minimal-till approaches preserve the underground infrastructure earthworms build over time.
The Bottom Line: Should You Worry About Worms Eating Roots?
No. Earthworms and composting worms are not eating your plant roots. They're decomposers that process dead organic matter and improve the soil your roots depend on.
If your plants are struggling, look for the real culprits. Root-knot nematodes, vine weevil larvae, root maggots, overwatering, fungal disease, and nutrient deficiencies are the usual suspects. Each one has distinct symptoms and requires a specific response.
The best thing you can do for your garden is learn to tell these organisms apart. Dig, look, and when in doubt, send a soil sample to your local extension lab. Accurate diagnosis saves you from unnecessary treatments and keeps the beneficial biology in your soil working for you instead of against you.